Task 01: Create a Microsoft Fabric-enabled workspace
-
Open a new browser tab and go to https://app.powerbi.com/
You may see a message alerting you that you have been assigned a Microsoft Fabric (Free) license. Select OK to dismiss the message.
-
On the You’ve selected Microsoft Fabric free page, select Continue if prompted. If necessary, enter any random 10 digits or use
5551234567and select Get Started twice. -
On the Power BI Home page, in the left navigation pane, select Workspaces and then select + New workspace.
-
In the Name box, enter a unique name for your workspace (e.g., ContosoSales). After Azure verifies that the name is available,select Advanced.
-
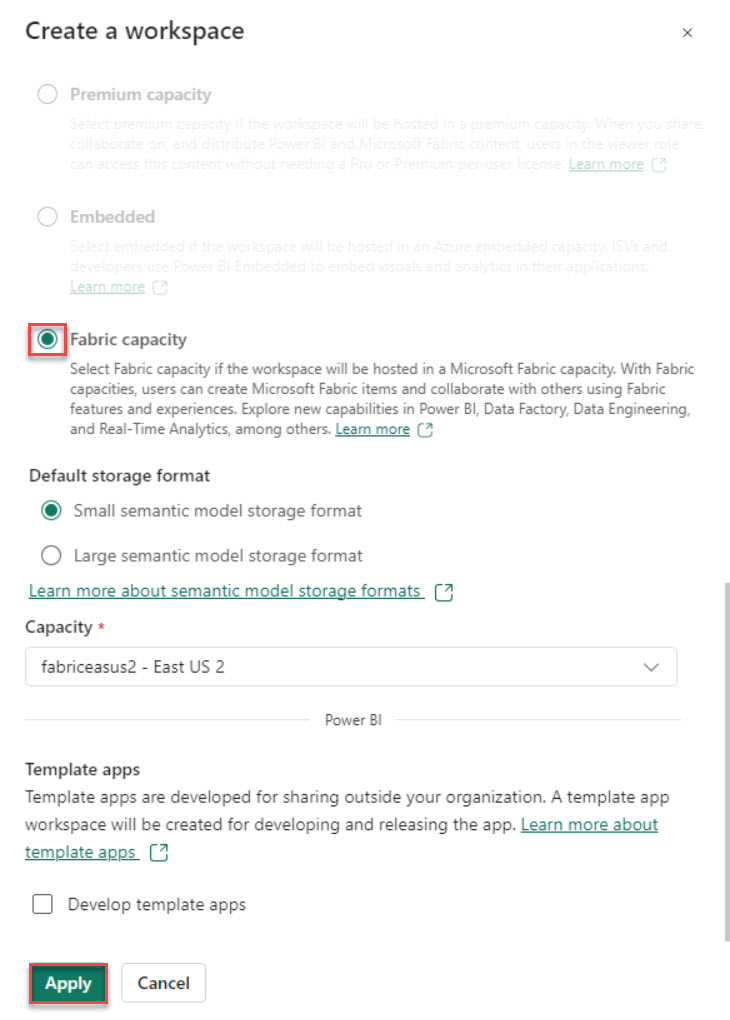
In the License mode section, verify that Fabric capacity is selected and then select Apply.

-
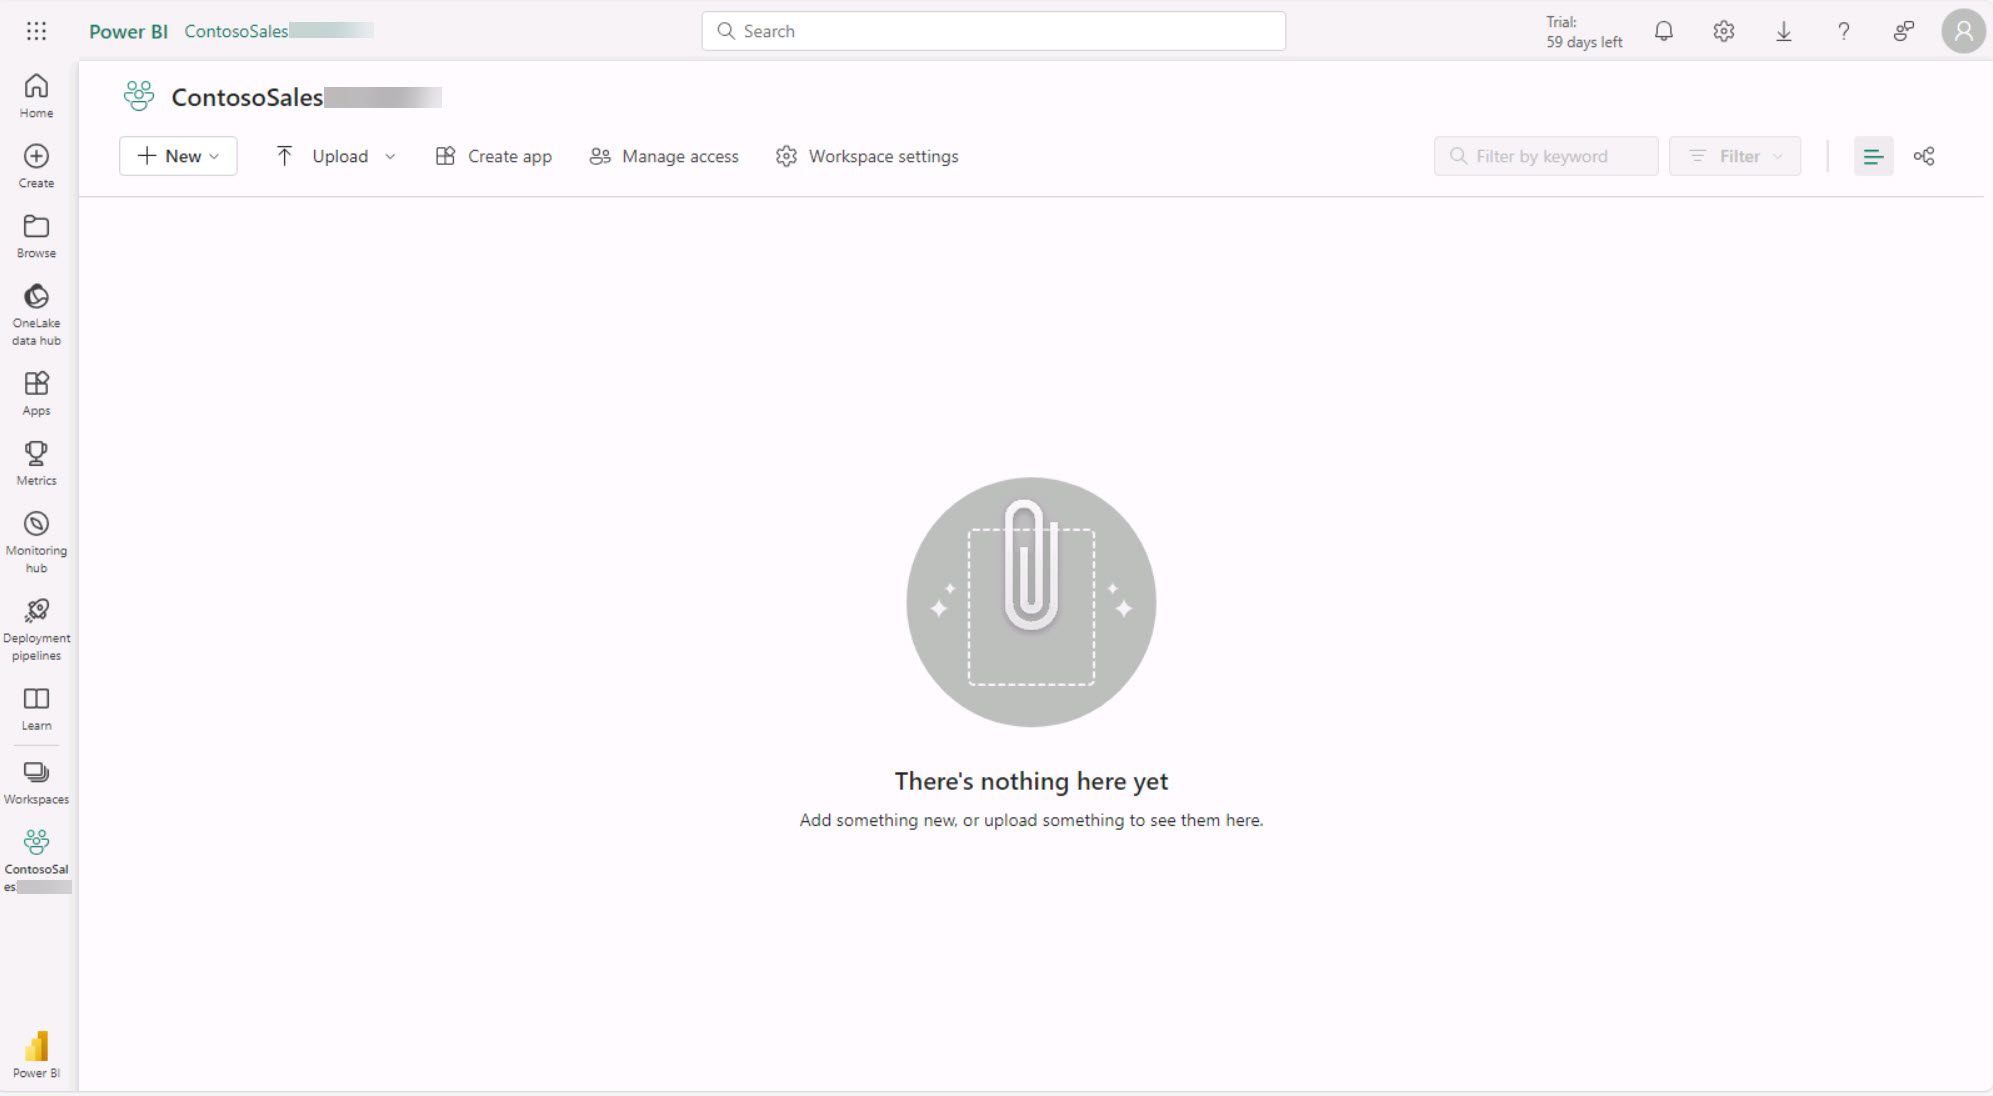
On the Power BI [Your Workspace Name] page, select Workspaces and verify that the workspace you created is listed.

If your workspace was not created, repeat the steps in this task to create the workspace.
-
Select the workspace you just created to access it.