AirSim provides a Python-based event camera simulator, aimed at performance and ability to run in real-time along with the sim.
Event cameras#
An event camera is a special vision sensor that measures changes in logarithmic brightness and only reports 'events'. Each event is a set of four values that gets generated every time the absolute change in the logarithmic brightness exceeds a certain threshold. An event contains the timestamp of the measurement, pixel location (x and y coordinates) and the polarity: which is either +1/-1 based on whether the logarithmic brightness has increased or decreased. Most event cameras have a temporal resolution of the order of microseconds, making them significantly faster than RGB sensors, and also demonstrate a high dynamic range and low motion blur. More details about event cameras can be found in this tutorial from RPG-UZH
AirSim event simulator#
The AirSim event simulator uses two consecutive RGB images (converted to grayscale), and computes "past events" that would have occurred during the transition based on the change in log luminance between the images. These events are reported as a stream of bytes, following this format:
<x> <y> <timestamp> <pol>
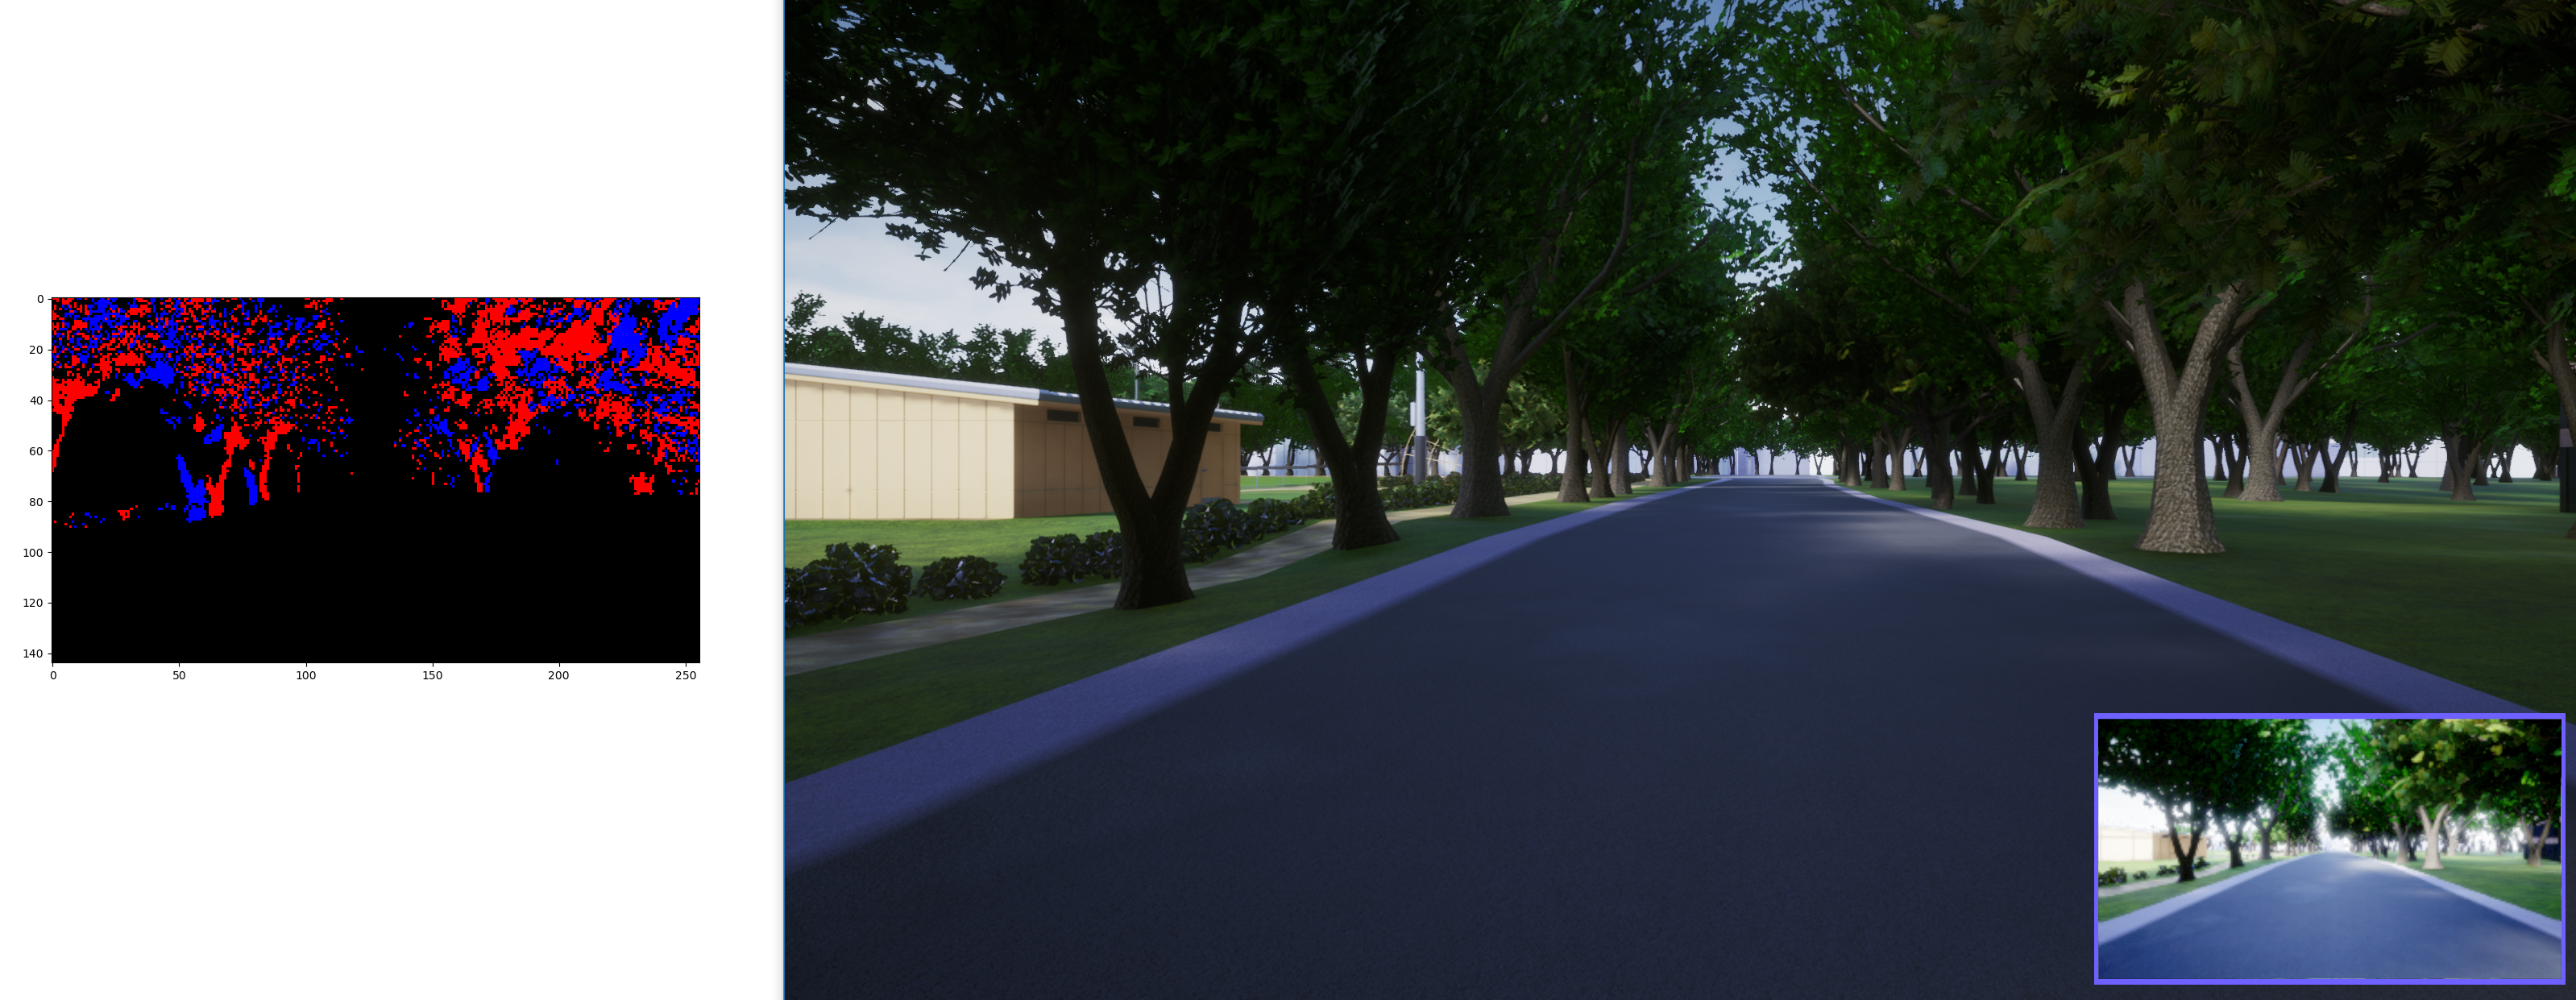
x and y are the pixel locations of the event firing, timestamp is the global timestamp in microseconds and pol is either +1/-1 depending on whether the brightness increased or decreased. Along with this bytestream, an accumulation of events over a 2D frame is also constructed, known as an 'event image' that visualizes +1 events as red and -1 as blue pixels. An example event image is shown below:
Usage#
An example script to run the event simulator alongside AirSim is located at https://github.com/microsoft/AirSim/blob/main/PythonClient/eventcamera_sim/test_event_sim.py. The following optional command-line arguments can be passed to this script.
args.width, args.height (float): Simulated event camera resolution
args.save (bool): Whether or not to save the event data to a file, args.debug (bool): Whether or not to display the simulated events as an image
The implementation of the actual event simulation, written in Python and numba, is at https://github.com/microsoft/AirSim/blob/main/PythonClient/eventcamera_sim/event_simulator.py. The event simulator is initialized as follows, with the arguments controlling the resolution of the camera.
from event_simulator import *
ev_sim = EventSimulator(W, H)
The actual computation of the events is triggered through an image_callback function, which is executed every time a new RGB image is obtained. The first time this function is called, due to the lack of a 'previous' image, it acts as an initialization of the event sim.
event_img, events = ev_sim.image_callback(img, ts_delta)convert_event_img_rgb. events is a numpy array of events, each of format <x> <y> <timestamp> <pol>.
Through this function, the event sim computes the difference between the past and the current image, and computes a stream of events which is then returned as a numpy array. This can then be appended to a file.
There are quite a few parameters that can be tuned to achieve a level of visual fidelity/performance of the event simulation. The main factors to tune are the following:
- The resolution of the camera.
- The log luminance threshold
TOLthat determines whether or not a detected change counts as an event.
Note: There is also currently a max limit on the number of events generated per pair of images, which can also be tuned.
Algorithm#
The working of the event simulator loosely follows this set of operations:
1. Take the difference between the log intensities of the current and previous frames.
2. Iterating over all pixels, calculate the polarity for each each pixel based on a threshold of change in log intensity.
3. Determine the number of events to be fired per pixel, based on extent of intensity change over the threshold. Let \(N_{max}\) be the maximum number of events that can occur at a single pixel, then the total number of firings to be simulated at pixel location \(u\) would be \(N_e(u) = min(N_{max}, \frac{\Delta L(u)}{TOL})\).
4. Determine the timestamps for each interpolated event by interpolating between the amount of time that has elapsed between the captures of the previous and current images.
\(t = t_{prev} + \frac{\Delta T}{N_e(u)}\)
5. Generate the output bytestream by simulating events at every pixel and sort by timestamp.