Task 03: Build a topic that confirms cancellation, collects issue details, saves the record, and returns a confirmation ID
Introduction
Zava’s COE must show that agents can move from analysis to action while maintaining control over user experience and data handling. Refund submission is a practical example of an enterprise workflow: confirm intent, capture structured inputs, write the record to a system of record, and provide an auditable confirmation identifier.
Description
In this task, you’ll build the refund-submission topic and connect it to refund-initiator for a clean workflow handoff. You’ll implement an adaptive card to collect structured inputs, then use an Agent Flow to generate a confirmation ID and write the refund request to an Excel table stored in SharePoint. The topic returns the confirmation number to the user in a consistent, business-ready message.
Success criteria
- A topic named refund-submission exists and is configured as a redirect topic that can be invoked from refund-initiator.
- The confirmation question correctly injects order values from the shared global context variable (order ID and order date).
Key steps
01: Create the topic
-
On the command bar for the agent, select Topics.

-
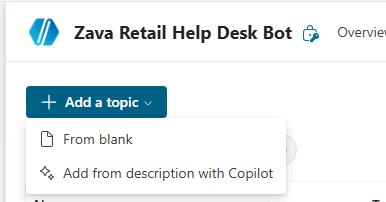
On the Topics page, on the command bar, select Add a topic and then select From blank.
-
Change the name from Untitled to
refund-submissionand then press the Enter key to save the change.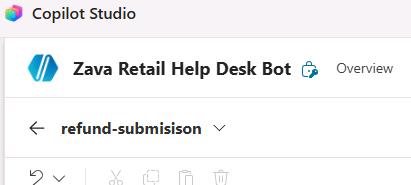
-
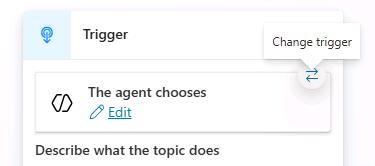
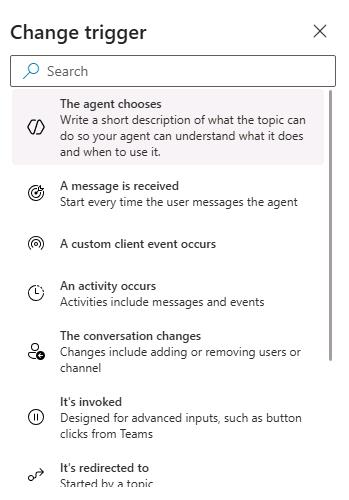
In the Trigger node, hover the mouse cursor over the text The agent chooses and then select Change trigger.
-
In the Change trigger dialog, select It’s redirect to.
-
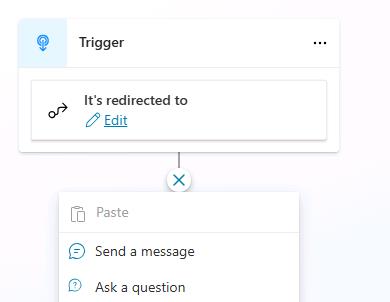
Below the Trigger node, select Add node (the + sign) and add an Ask a question node.
-
In the Enter a message field, enter the following text:
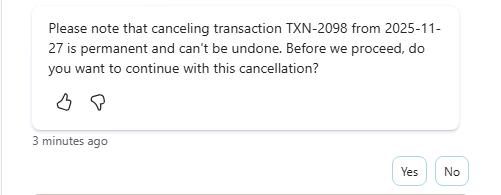
Please note that canceling transaction [order_id] from [order_date] is permanent and can't be undone. Before you proceed, do you want to continue with this cancellation? -
Highlight and delete [order_id] from the text.
-
Select Insert Power fx expression.
-
In the fx field, enter
Global.redRefundGlobalShareContext.order_id. -
Highlight and delete [order_date] from the text.
-
Select Insert Power fx expression.
-
In the fx field, enter
Global.redRefundGlobalShareContext.order_date.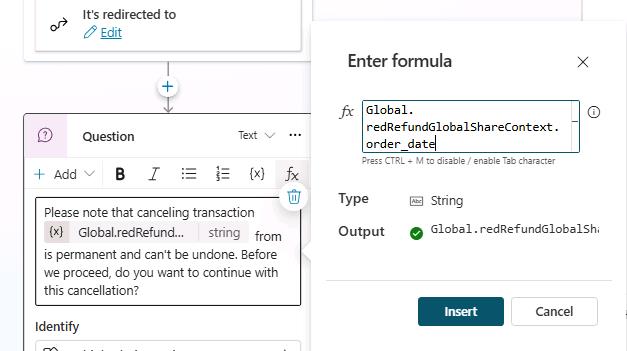
-
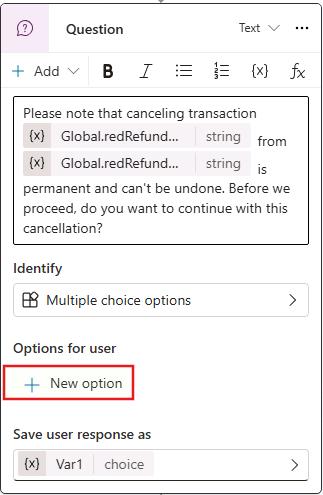
In the Option for user section, select New option.
-
In the Enter option field, enter
Yesand then press the Enter key. -
Repeat Steps 14-15 to create a
Nooption.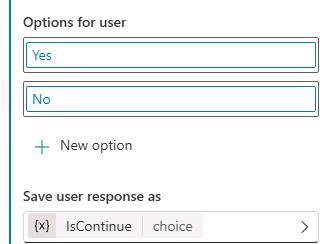
-
In the Save user response as field, select Var1.
-
In the Variable properties pane, in the Variable name field, enter
IsContinue.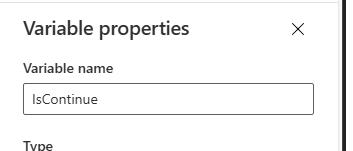
-
Close the Variable properties pane.
02: Configure the Yes option
When the customer selects Yes, the agent should proceed with the refund or cancellation process.
-
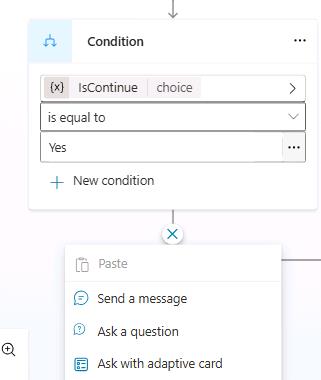
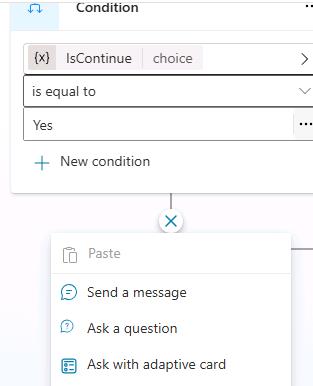
On the topic canvas, move down to the Condition nodes. Below the Yes node, select Add node (the + sign).
-
Select Ask with adaptive card.
-
In the Adaptive Card node, select the ellipses ((…)) and then select Properties.
-
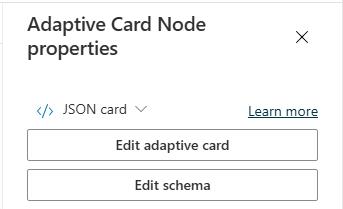
In the Adaptive Card Node properties pane, select Edit adaptive card.
-
In the Card payload editor pane, delete the existing code. Then, paste the following code into that pane:
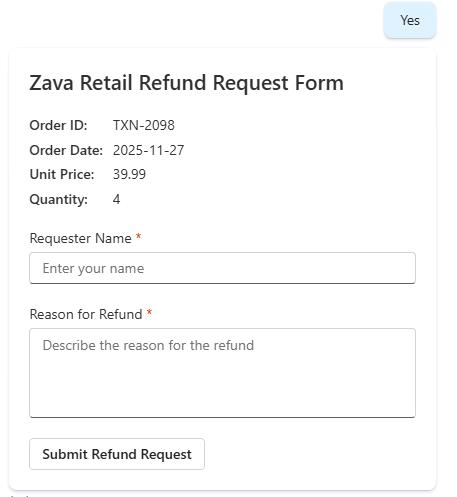
{ "$schema": "http://adaptivecards.io/schemas/adaptive-card.json", "type": "AdaptiveCard", "version": "1.6", "body": [ { "type": "TextBlock", "text": "Zava Retail Refund Request Form", "weight": "Bolder", "size": "Large", "wrap": true }, { "type": "FactSet", "facts": [ { "title": "Order ID:", "value": "${Topic.OrderId}" }, { "title": "Order Date:", "value": "${Topic.OrderDate}" }, { "title": "Unit Price:", "value": "${Topic.UnitPrice}" }, { "title": "Quantity:", "value": "${Topic.Quantity}" } ] }, { "type": "Input.Text", "id": "Requester", "label": "Requester Name", "placeholder": "Enter your name", "isRequired": true, "errorMessage": "Requester name is required." }, { "type": "Input.Text", "id": "Reason", "label": "Reason for Refund", "placeholder": "Describe the reason for the refund", "isMultiline": true, "isRequired": true, "errorMessage": "Refund reason is required." } ], "actions": [ { "type": "Action.Submit", "title": "Submit Refund Request" } ] } -
Select Save and then select Close.

-
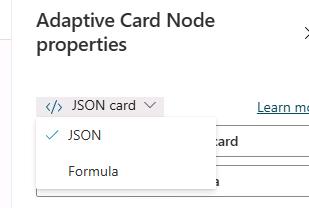
In the Adaptive Card Node properties pane, select JSON card and then select Formula.
-
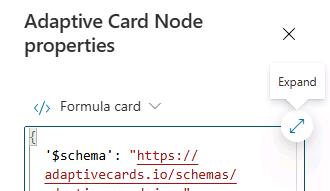
In the Formula field select Expand.
-
Place your cursor in the Formula field and then press the Ctrl F key combination.
-
In the Find field, search for
type: "FactSet" -
Locate the following values in the code and then replace them with the values shown below:
Value to replace New value ”${Topic.OrderId}” Global.redRefundGlobalShareContext.order_id”${Topic.OrderDate}” Global.redRefundGlobalShareContext.order_date”${Topic.UnitPrice}” Global.redRefundGlobalShareContext.unit_price”${Topic.Quantity}” Global.redRefundGlobalShareContext.quantity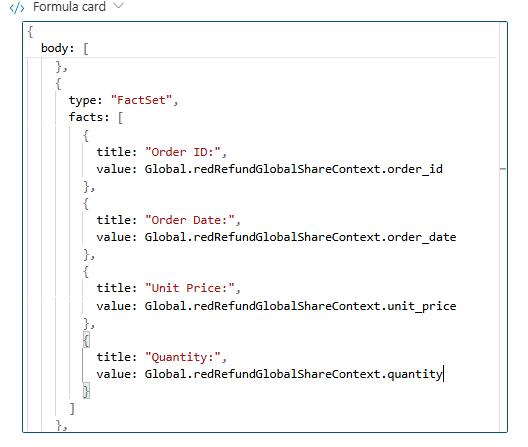
-
Select Save.
03: Configure the No option
When the customer selects No, the agent should stop the refund process and exit or redirect to the appropriate next step.
-
Under the Condition node where its set to No add a Send a message node.
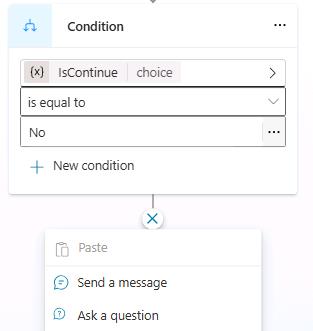
-
Select the text area, then type:
Great news - your order [order_id] from [date] will remain active. If you have any additional questions, feel free to ask. -
Highlight [order_id] from the text, delete it then select Insert Power(Fx) expression. Enter the following expression and then select Insert:
Global.redRefundGlobalShareContext.order_id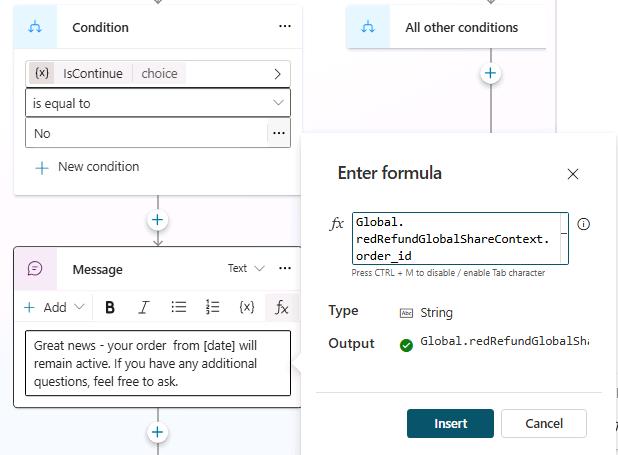
-
Highlight [order_date] from the text, select Insert Power(FX) expression, then press Insert to replace it with:
Global.redRefundGlobalShareContext.order_date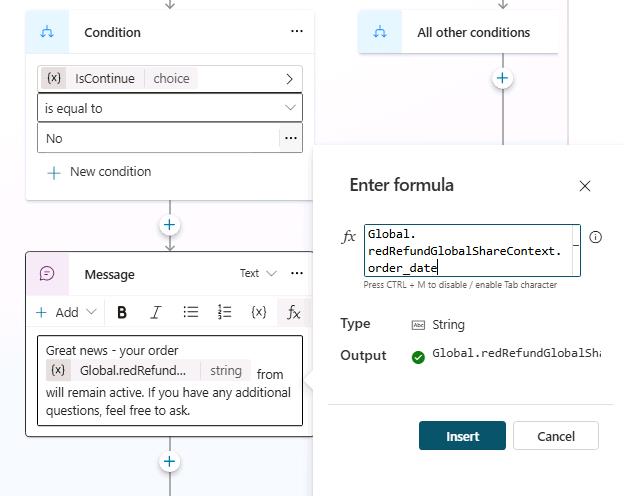
-
Below the Message node that you just created, select Add node, select Topic management, and then End conversation.
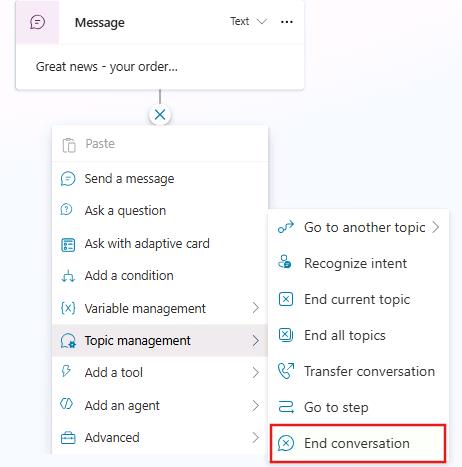
-
Select Save.
04: Define triggering behavior
It’s time to define how one topic will trigger another, ensuring the handoff follows the business context of each request.
-
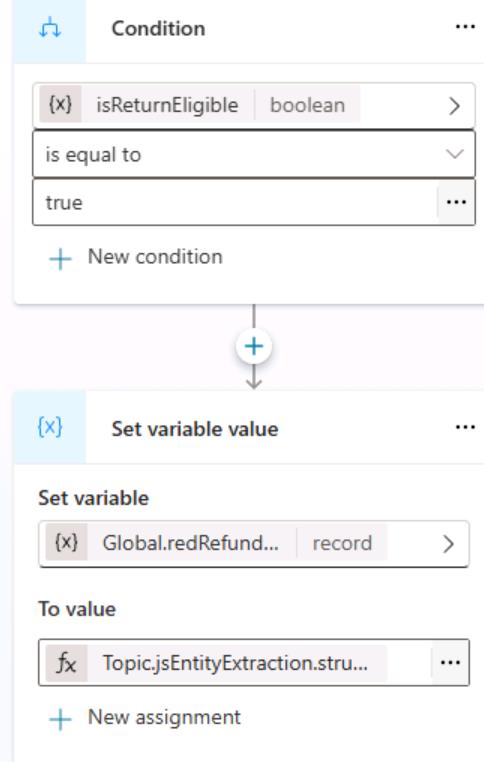
Open the refund-initiator topic. Locate the Set variable value node for the True condition.
-
Below Set variable value node, select Add node.
-
Select Topic management, and then Go to another topic. Search for and select
refund-submission.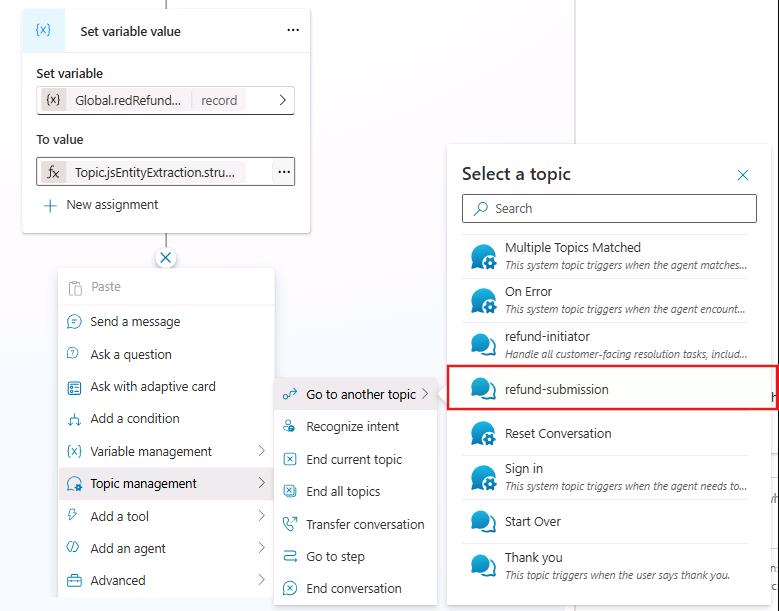
-
Select Save.
-
Start a new test session and submit the following prompt:
How can I request a refund for order TXN-2098, which I no longer need?The agent redirects you from the refund‑initiator topic to the refund‑submission topic to continue the refund process, then waits for your confirmation before proceeding.
-
Select Yes and observe how the adaptive card displays certain variable values in read‑only mode, while allowing the end user to enter the complaint details.
-
Now let us test the No condition option, first select Start a new session then prompt:
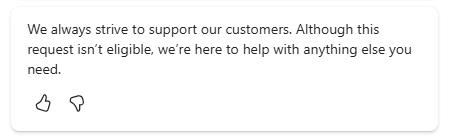
How can I request a refund for order TXN‑2008, which I no longer need?Notice how the agent clearly rejects the request while still offering support for anything else the customer may need.
04: Create an AgentFlow
-
Open the refund-submission topic.
-
Move down to locate the Adaptive Card node.
-
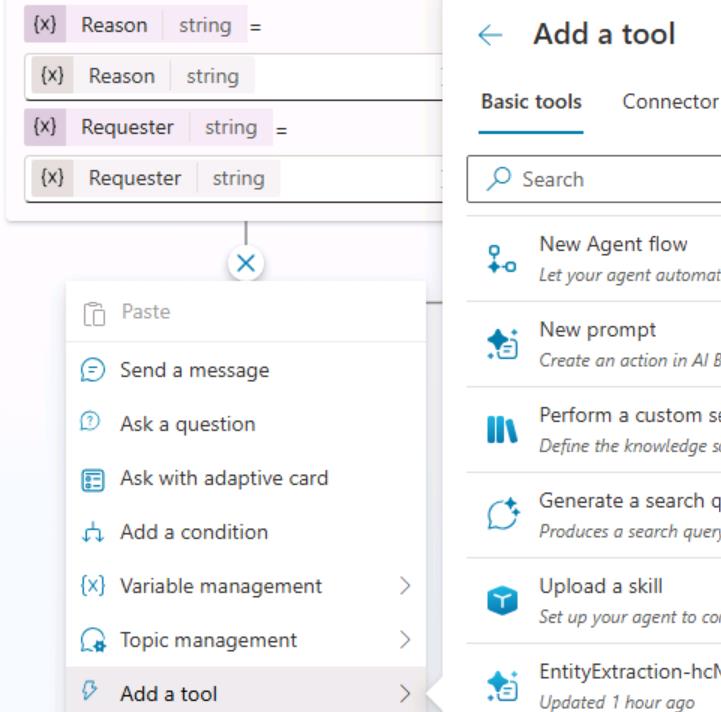
Below the node, select Add node, select Add a tool, and then select New Agent flow.
-
Select When an agent calls the flow and then select + Add an input.
-
In the left field, select Text, enter
OrderId.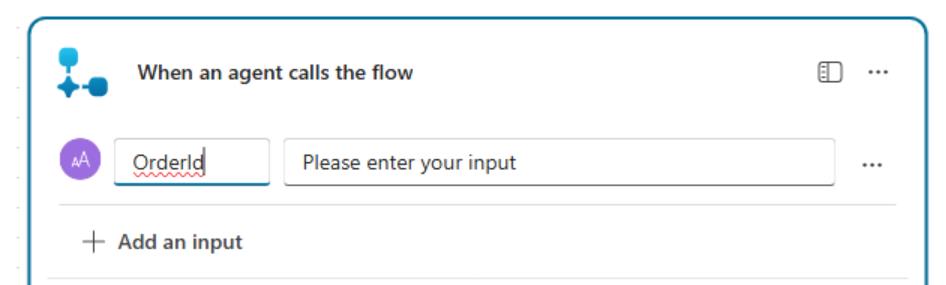
-
Repeat Steps 3-5 to add these additional inputs:
Value Data type OrderDateDate UnitPriceNumber QuantityNumber RequesterText ReasonText 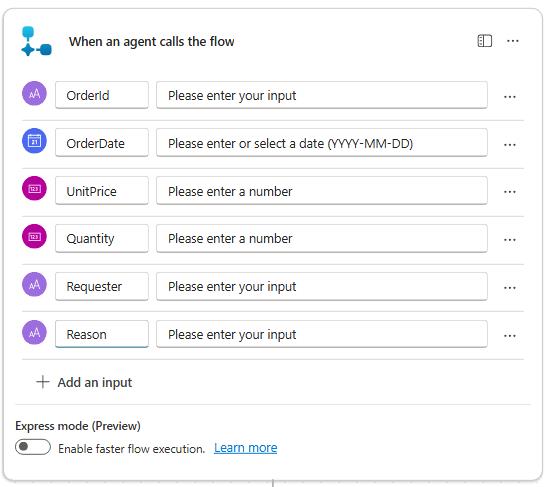
-
Below the When an agent calls the flow node, select Add an action (+).
-
Search for and select
Initialize variable.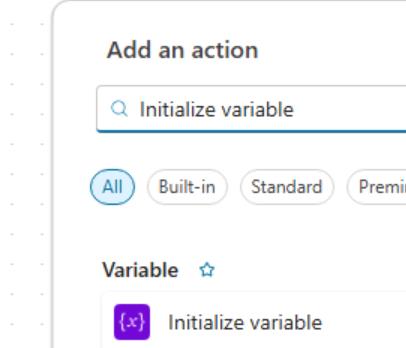
-
At the top right of the action, select the ellipses and then select Rename.
-
Rename it to
Generate Unique Request ID.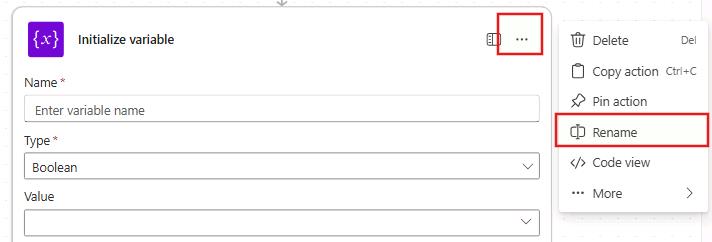
-
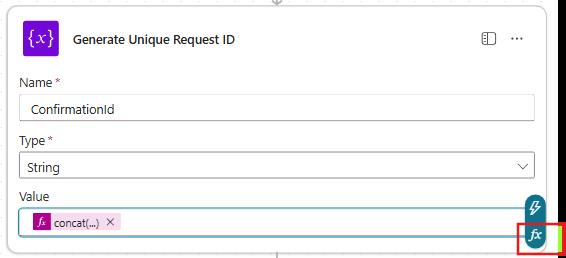
Configure the node by using the following information:
column 1 column 2 Name ConfirmationIdType String -
In the Value field, select fx then enter:
concat('req-', formatDateTime(utcNow(), 'MMddyyHHmmss'))Then, select Add.
-
Add a new
Initialize variableaction below the Generate Unique Request ID action. Rename the action toCompose - Submission Timestamp. -
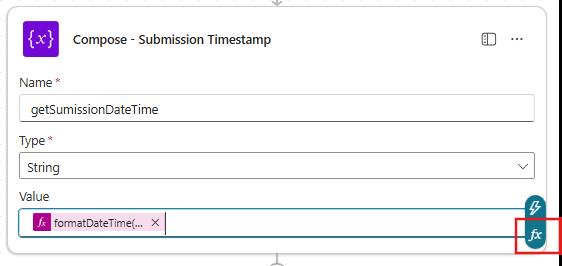
Configure the action by using the following information:
column 1 column 2 Name getSumissionDateTimeType String -
In the Value field, select fx then enter:
formatDateTime(utcNow(), 'yyyy-MM-dd HH:mm:ss')Then, select Add.
-
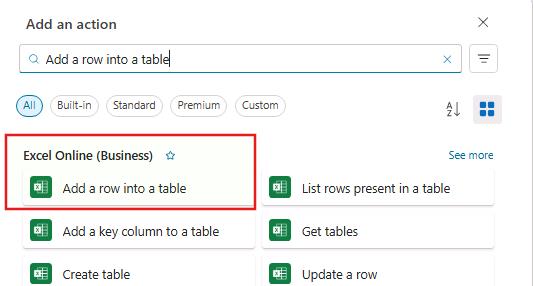
Below the Compose - Submission Timestamp action, add an
Add a row into a tableexcel action.Be sure to select the Excel Online (Business) option.
-
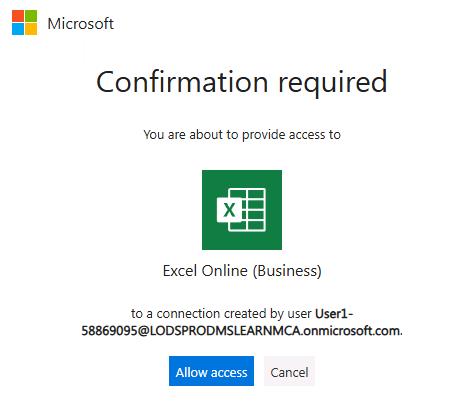
Select Sign in. If prompted, sign in by using the following credentials:
Item Value Username @lab.CloudPortalCredential(User1).UsernameTemporary Access Pass (TAP) token @lab.CloudPortalCredential(User1).AccessToken -
Select Allow access.
-
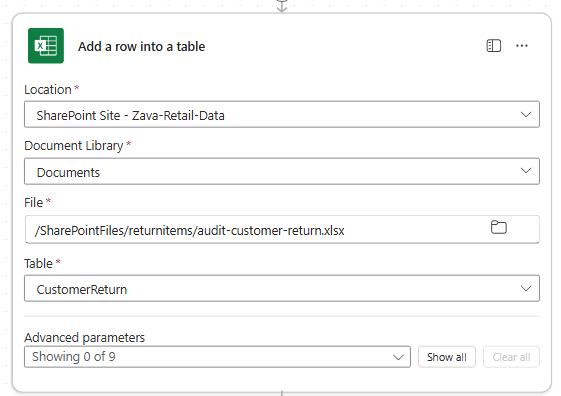
Enter the following details:
- Location:
SharePoint Site - Zava Retail Data - Document Library:
Documents - File:
/SharePointFiles/returnitems/audit-customer-return.xlsx - Table:
CustomerReturn
- Location:
-
In the Advanced parameters section, select Show all.
-
Delete DateTime Format: by selecting X and configure these columns by using the following information:
Item Value ConfirmationId ConfirmationIdOrderId OrderIdOrderDate OrderDateUnitPrice UnitPriceQuantity QuantityRequestDate getSumissionDateTimeRequester RequesterReason Reason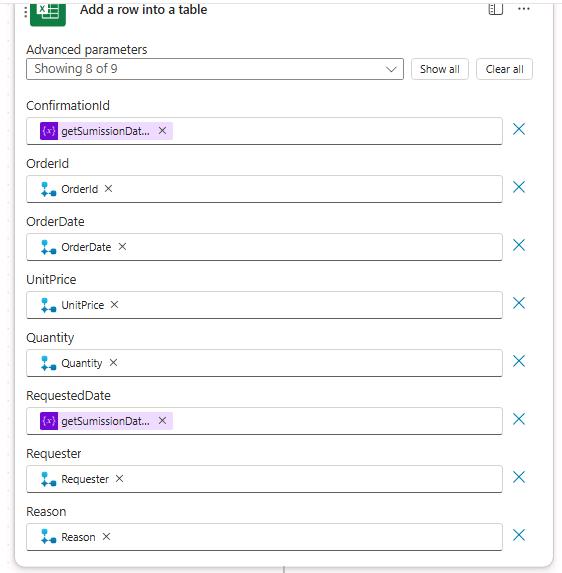
-
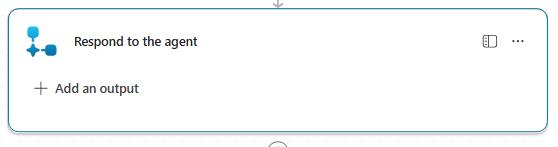
Select the Respond to the agent then select + Add an output.
-
Select Text then name it
ConfirmationNumberthen set value to ConfirmationId.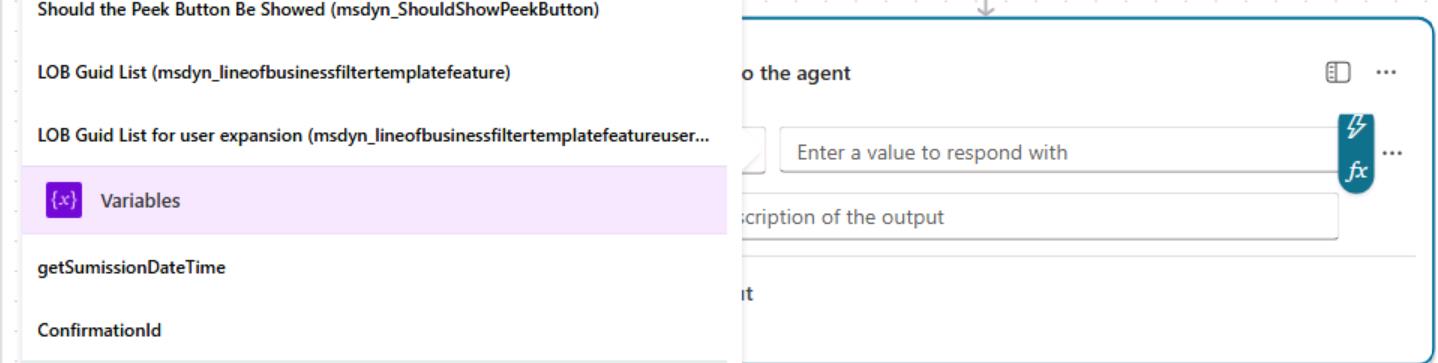
-
Select Save draft.
-
Change the name from agentflow to
Customer Return Request Processorand then select Publish.
05:
-
Open the Zava Retail Help Desk Bot. Select Topics and then select refund-submission.
-
Refresh the page. Locate the Adaptive Card node.
-
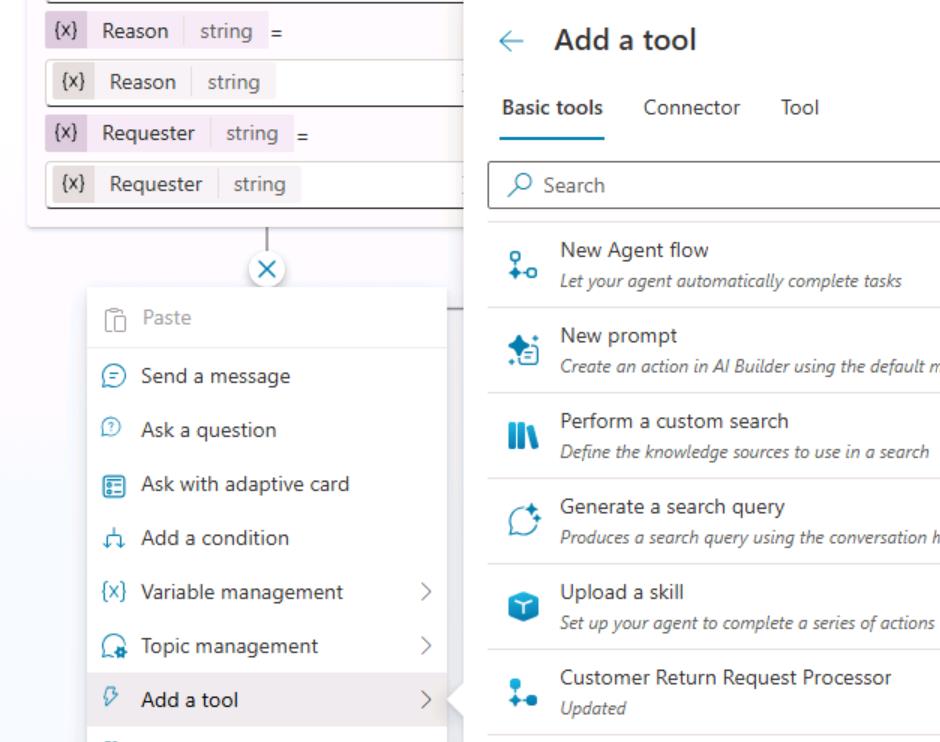
Below the node, select Add node. Select Add a tool and then select Customer Return Request Processor.
-
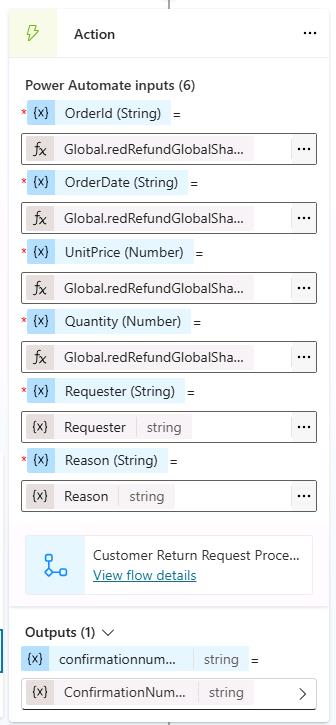
Configure the Action node using the information provided. In the Enter or select a value field, select the ellipsis (…), choose Formula, and enter the corresponding expression for each item.:
Field Formula OrderId Global.redRefundGlobalShareContext.order_idOrderDate Global.redRefundGlobalShareContext.order_dateUnitPrice Global.redRefundGlobalShareContext.unit_priceQuantity Global.redRefundGlobalShareContext.quantity- For the Requester variable, select Requester.
- For the Reason variable, select Reason.
-
Add a Send a Message node below the Action node you just configured.
-
Enter the following text in the message field:
We're sorry to hear that you need to cancel your order. Your cancellation has been successfully processed, and your confirmation number is [insert confirmation number]. If you have any other questions or need further assistance, please don't hesitate to contact us-we're here to help. -
Highlight and delete [insert confirmation number],leave the cursor on the same place then select {x} then select
ConfirmationNumber.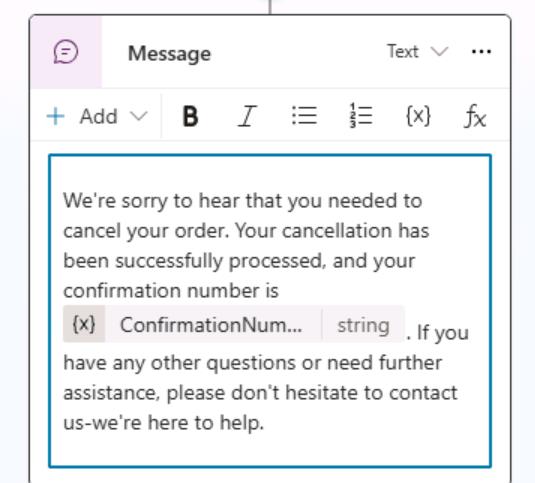
-
Select Save.
-
Start a new test session and submit the following prompt:
How can I request a refund for order TXN-2098, which I no longer need? -
Select Yes and follow the instructions. Enter the following information when prompted:
- Requester Name:
Alex Rivera - Reason for Refund:
Received the wrong item. Order included a different product than what was purchased.
- Requester Name:
-
Select Submit Refund Request, and then select Allow to save the request details to the Excel table.
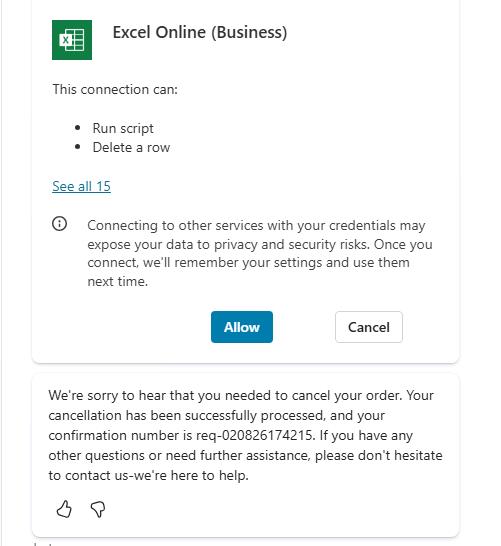
-
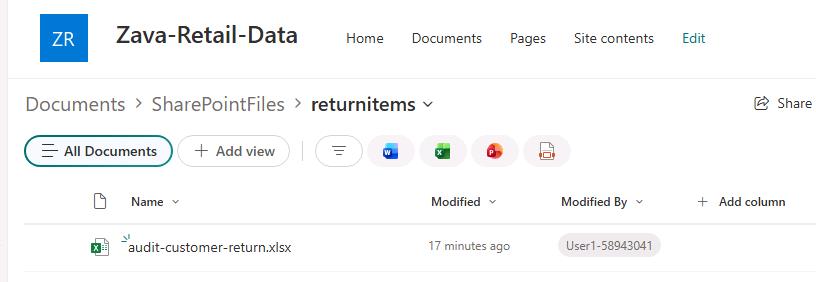
Verify that the record was inserted successfully by opening a new browser tab and entering the following URL:
https://lodsprodmslearnmca.sharepoint.com/sites/Zava-Retail-Data@lab.LabInstance.Id/Shared%20Documents/SharePointFiles/returnitems/ -
If prompted, sign in by using the following credentials:
Item Value Username @lab.CloudPortalCredential(User1).UsernameTemporary Access Pass (TAP) token @lab.CloudPortalCredential(User1).AccessToken -
Select
audit-customer-return.xlsxto access the refund detail record.