
TIP
🔥 Download the FREE Azure Developer Guide eBook here (opens new window).
💡 Learn more : Automate Azure Load Testing with GitHub Actions (opens new window).
📺 Watch the video : How to test application performance with Azure Load Testing (opens new window).
# How to test application performance with Azure Load Testing
# Application performance testing
When you build an application, you want it to be fast. Users should perceive it as fast and performant, even when many users are using it. And your application should continue to work without errors when it is under load. It can be difficult to know how your application behaves when it is used by many concurrent users. Azure Load Testing (opens new window) can help by putting your application under load and analyzing how it performs.
In this post, we'll test the performance of an existing web application with Azure Load Testing (opens new window).
# Prerequisites
If you want to follow along, you'll need the following:
- An Azure subscription (If you don't have an Azure subscription, create a free account (opens new window) before you begin)
- An existing application running in Azure. For instance, a web application running in an App Service Web App (opens new window)
# Test and analyze the performance of a web application
We'll start by creating an Azure Load Testing resource from the Azure portal.
- Go to the Azure portal (opens new window)
- Click the Create a resource button (the plus-sign in the top left corner)
- Search for Load Testing, select the "Azure Load Testing" result and click Create
- Select a Resource Group
- Fill in a Name
- Select a Location
- Click Review + create and then Create
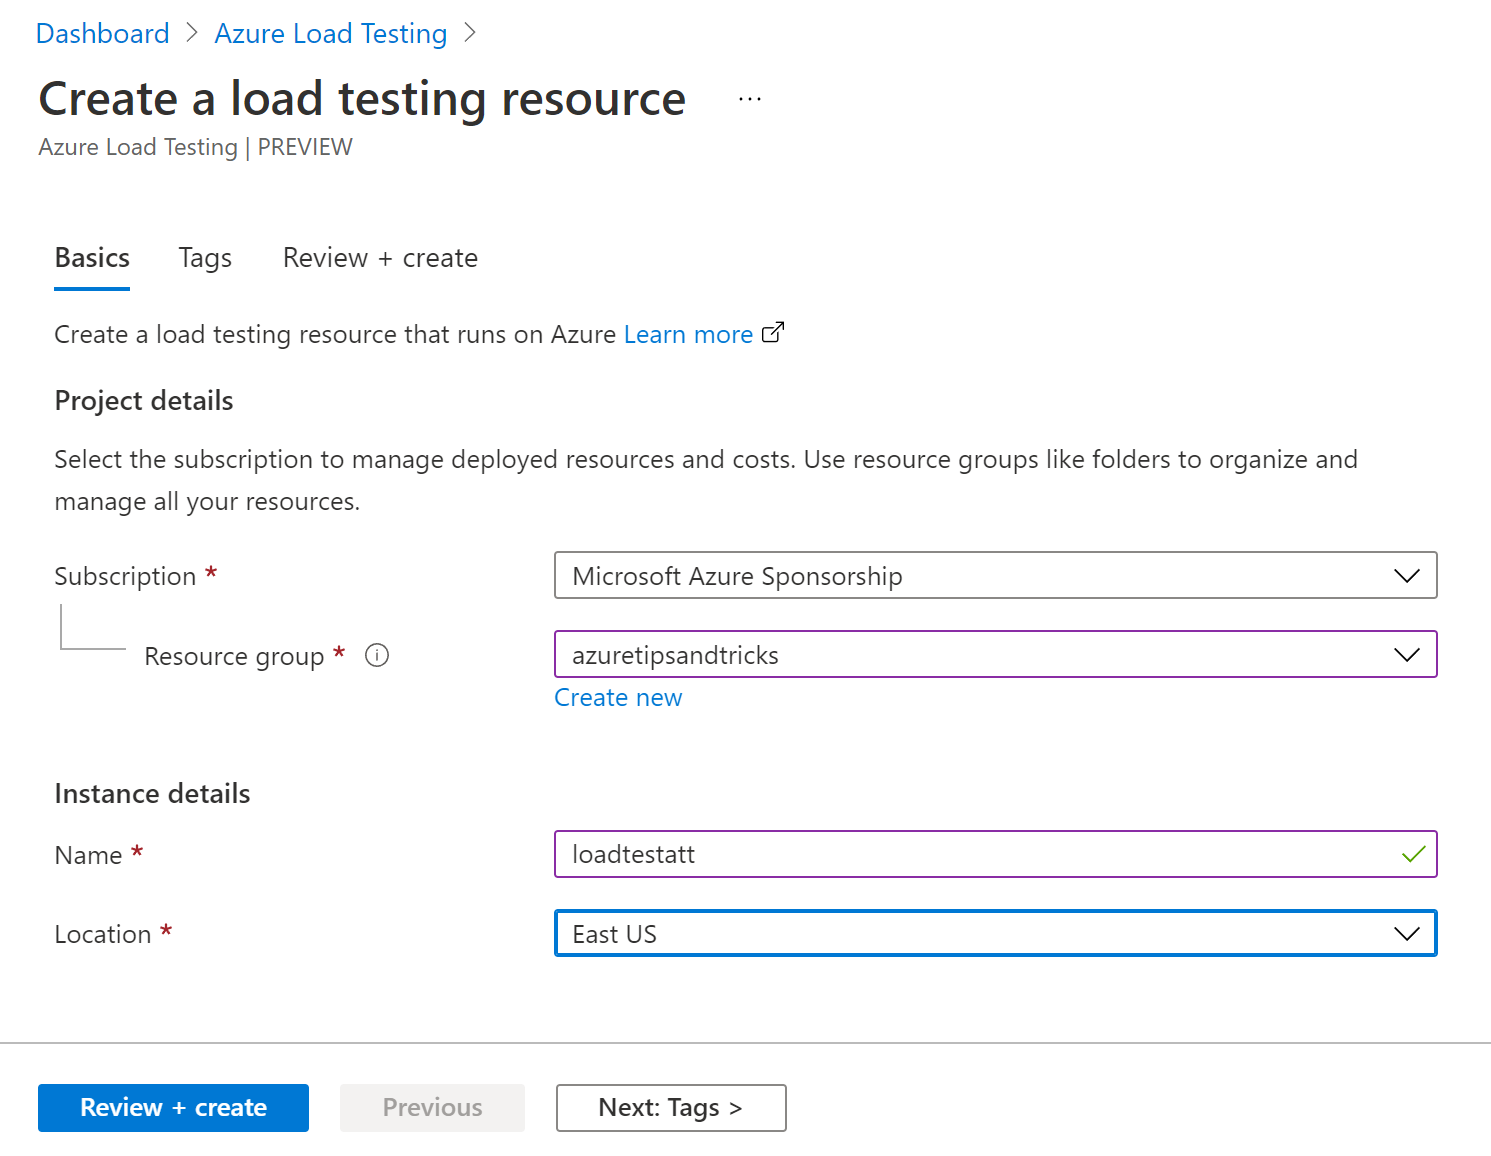
(Create an Azure Load Testing resource)
Before we can create a test, we need to create an Apache JMeter script. This is a scripts that tells Azure Load Testing what to test and how to do it. JMeter scripts have the .jmx extension and look like the code here:
<?xml version="1.0" encoding="UTF-8"?>
<jmeterTestPlan version="1.2" properties="5.0" jmeter="5.4.1">
  <hashTree>
    <TestPlan guiclass="TestPlanGui" testclass="TestPlan" testname="Test Plan" enabled="true">
      <stringProp name="TestPlan.comments"></stringProp>
      <boolProp name="TestPlan.functional_mode">false</boolProp>
      <boolProp name="TestPlan.tearDown_on_shutdown">true</boolProp>
      <boolProp name="TestPlan.serialize_threadgroups">false</boolProp>
      <elementProp name="TestPlan.user_defined_variables" elementType="Arguments" guiclass="ArgumentsPanel" testclass="Arguments" testname="User Defined Variables" enabled="true">
        <collectionProp name="Arguments.arguments"/>
      </elementProp>
      <stringProp name="TestPlan.user_define_classpath"></stringProp>
    </TestPlan>
    <hashTree>
      <kg.apc.jmeter.threads.UltimateThreadGroup guiclass="kg.apc.jmeter.threads.UltimateThreadGroupGui" testclass="kg.apc.jmeter.threads.UltimateThreadGroup" testname="jp@gc - Ultimate Thread Group" enabled="true">
        <collectionProp name="ultimatethreadgroupdata">
          <collectionProp name="1400604752">
            <stringProp name="1567">5</stringProp>
            <stringProp name="0">0</stringProp>
            <stringProp name="48873">30</stringProp>
            <stringProp name="49710">60</stringProp>
            <stringProp name="10">10</stringProp>
          </collectionProp>
        </collectionProp>
        <elementProp name="ThreadGroup.main_controller" elementType="LoopController" guiclass="LoopControlPanel" testclass="LoopController" testname="Loop Controller" enabled="true">
          <boolProp name="LoopController.continue_forever">false</boolProp>
          <intProp name="LoopController.loops">-1</intProp>
        </elementProp>
        <stringProp name="ThreadGroup.on_sample_error">continue</stringProp>
      </kg.apc.jmeter.threads.UltimateThreadGroup>
      <hashTree>
        <HTTPSamplerProxy guiclass="HttpTestSampleGui" testclass="HTTPSamplerProxy" testname="homepage" enabled="true">
          <elementProp name="HTTPsampler.Arguments" elementType="Arguments" guiclass="HTTPArgumentsPanel" testclass="Arguments" testname="User Defined Variables" enabled="true">
            <collectionProp name="Arguments.arguments"/>
          </elementProp>
          <stringProp name="HTTPSampler.domain">your-endpoint-url</stringProp>
          <stringProp name="HTTPSampler.port"></stringProp>
          <stringProp name="HTTPSampler.protocol">https</stringProp>
          <stringProp name="HTTPSampler.contentEncoding"></stringProp>
          <stringProp name="HTTPSampler.path"></stringProp>
          <stringProp name="HTTPSampler.method">GET</stringProp>
          <boolProp name="HTTPSampler.follow_redirects">true</boolProp>
          <boolProp name="HTTPSampler.auto_redirects">false</boolProp>
          <boolProp name="HTTPSampler.use_keepalive">true</boolProp>
          <boolProp name="HTTPSampler.DO_MULTIPART_POST">false</boolProp>
          <stringProp name="HTTPSampler.embedded_url_re"></stringProp>
          <stringProp name="HTTPSampler.implementation">HttpClient4</stringProp>
          <stringProp name="HTTPSampler.connect_timeout">60000</stringProp>
          <stringProp name="HTTPSampler.response_timeout">60000</stringProp>
        </HTTPSamplerProxy>
        <hashTree/>
      </hashTree>
    </hashTree>
  </hashTree>
</jmeterTestPlan>
2
3
4
5
6
7
8
9
10
11
12
13
14
15
16
17
18
19
20
21
22
23
24
25
26
27
28
29
30
31
32
33
34
35
36
37
38
39
40
41
42
43
44
45
46
47
48
49
50
51
52
53
54
55
This JMeter script simulates a load test of five virtual users simultaneously accessing a web endpoint. It takes less than two minutes to complete. All you need to do to make this script work for you is to replace the string your-endpoint-url with the endpoint of the web application that you want to test, like microsoft.github.io/AzureTipsAndTricks.
Now that we have an Apache JMeter script, we can create a test in the Azure Load Testing resource.
- Navigate to the Azure Load Testing resource in the Azure portal
- Select the Tests menu
- Click on Create new test
- In the Basics tab, enter a Test name
- Click Next: Test plan
- Select the JMeter script that you created and click Upload
- Click Next: Parameters
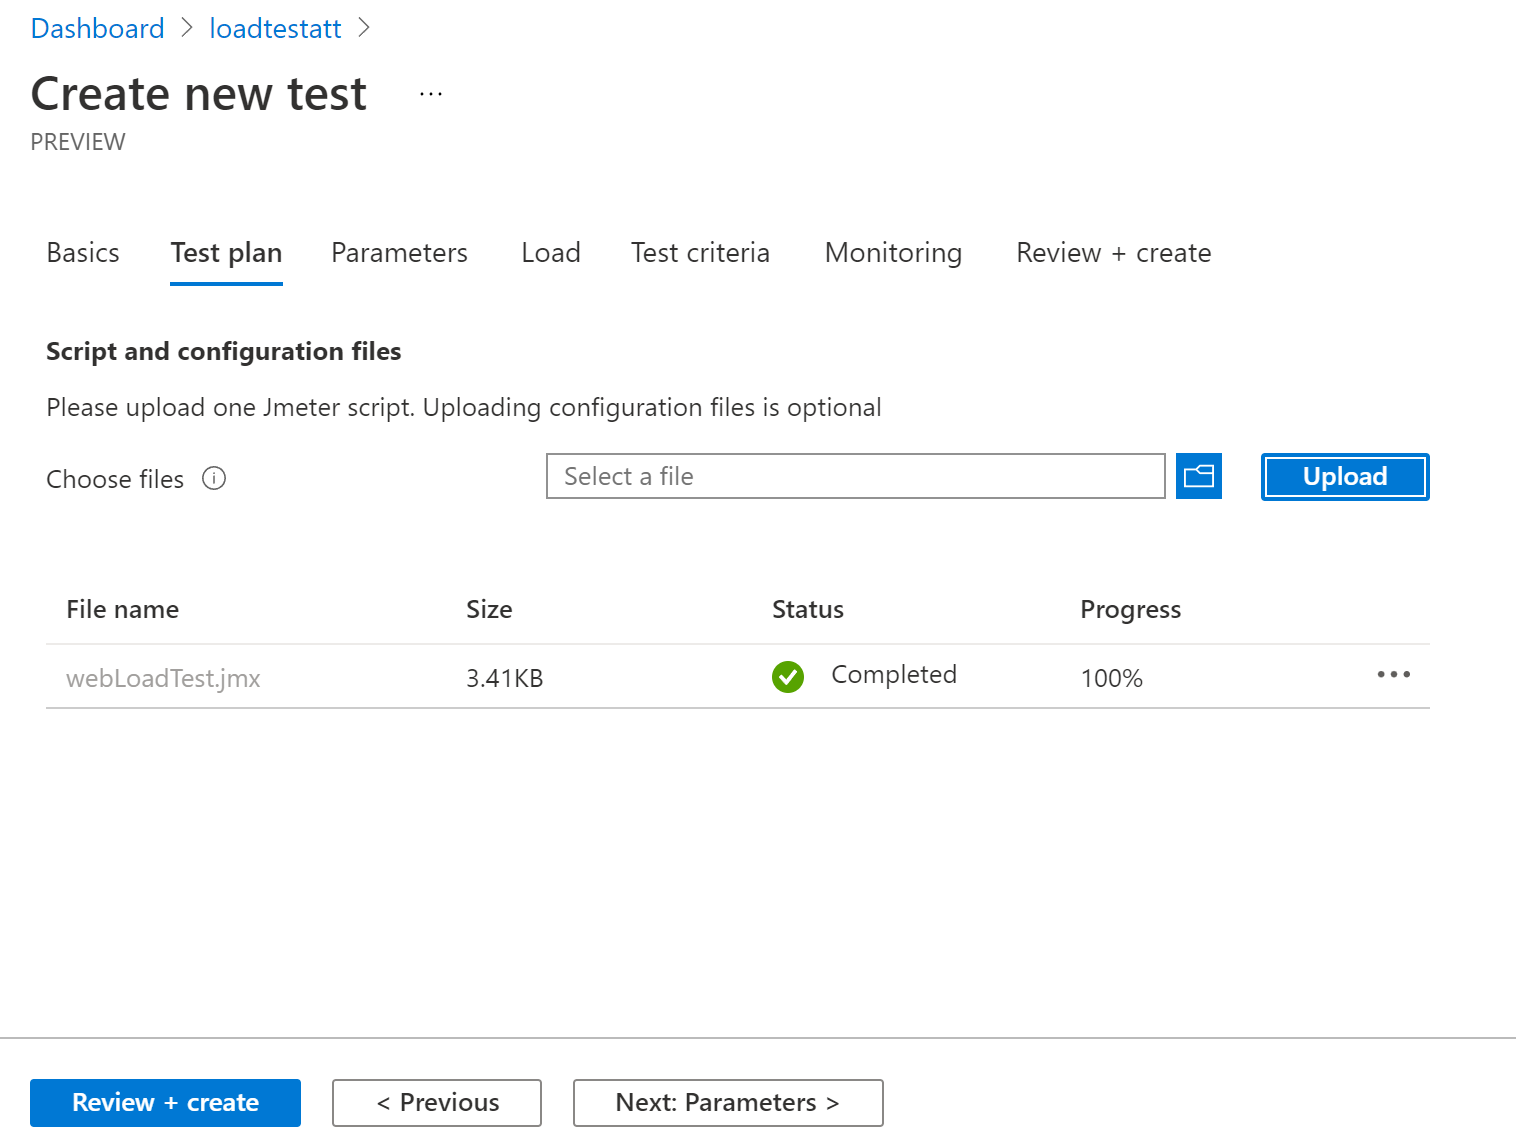
(Upload an Apache JMeter script)
- You can enter environment variables and secrets that can be used by the JMeter script. Let's leave this blank and click Next: Load
- We only need one test engine instance to run the test. You can scale this up to increase the threads that will be executed. Click Next: Test criteria
- Here we can create failure criteria that state when the test fails. Let's create one
- For Metric, select Error
- The Aggregate function should be Percentage
- Select Greater than for Condition
- Enter 50 for Threshold. This tells the test that it fails if more than 50 percent of requests fail
- Click Next: Monitoring
- Here, we can indicate Azure services to be monitored during the test. The application that we are testing runs in an Azure App Service Web App, so let's select that
- Click Next: Review + create and then Create to create the test. It will run automatically when it is created
When the test is done, it will show the results in the overview. This includes the load, response time, error percentage and throughput. You can see more details for the Azure services that were monitored by clicking on Additional insights.
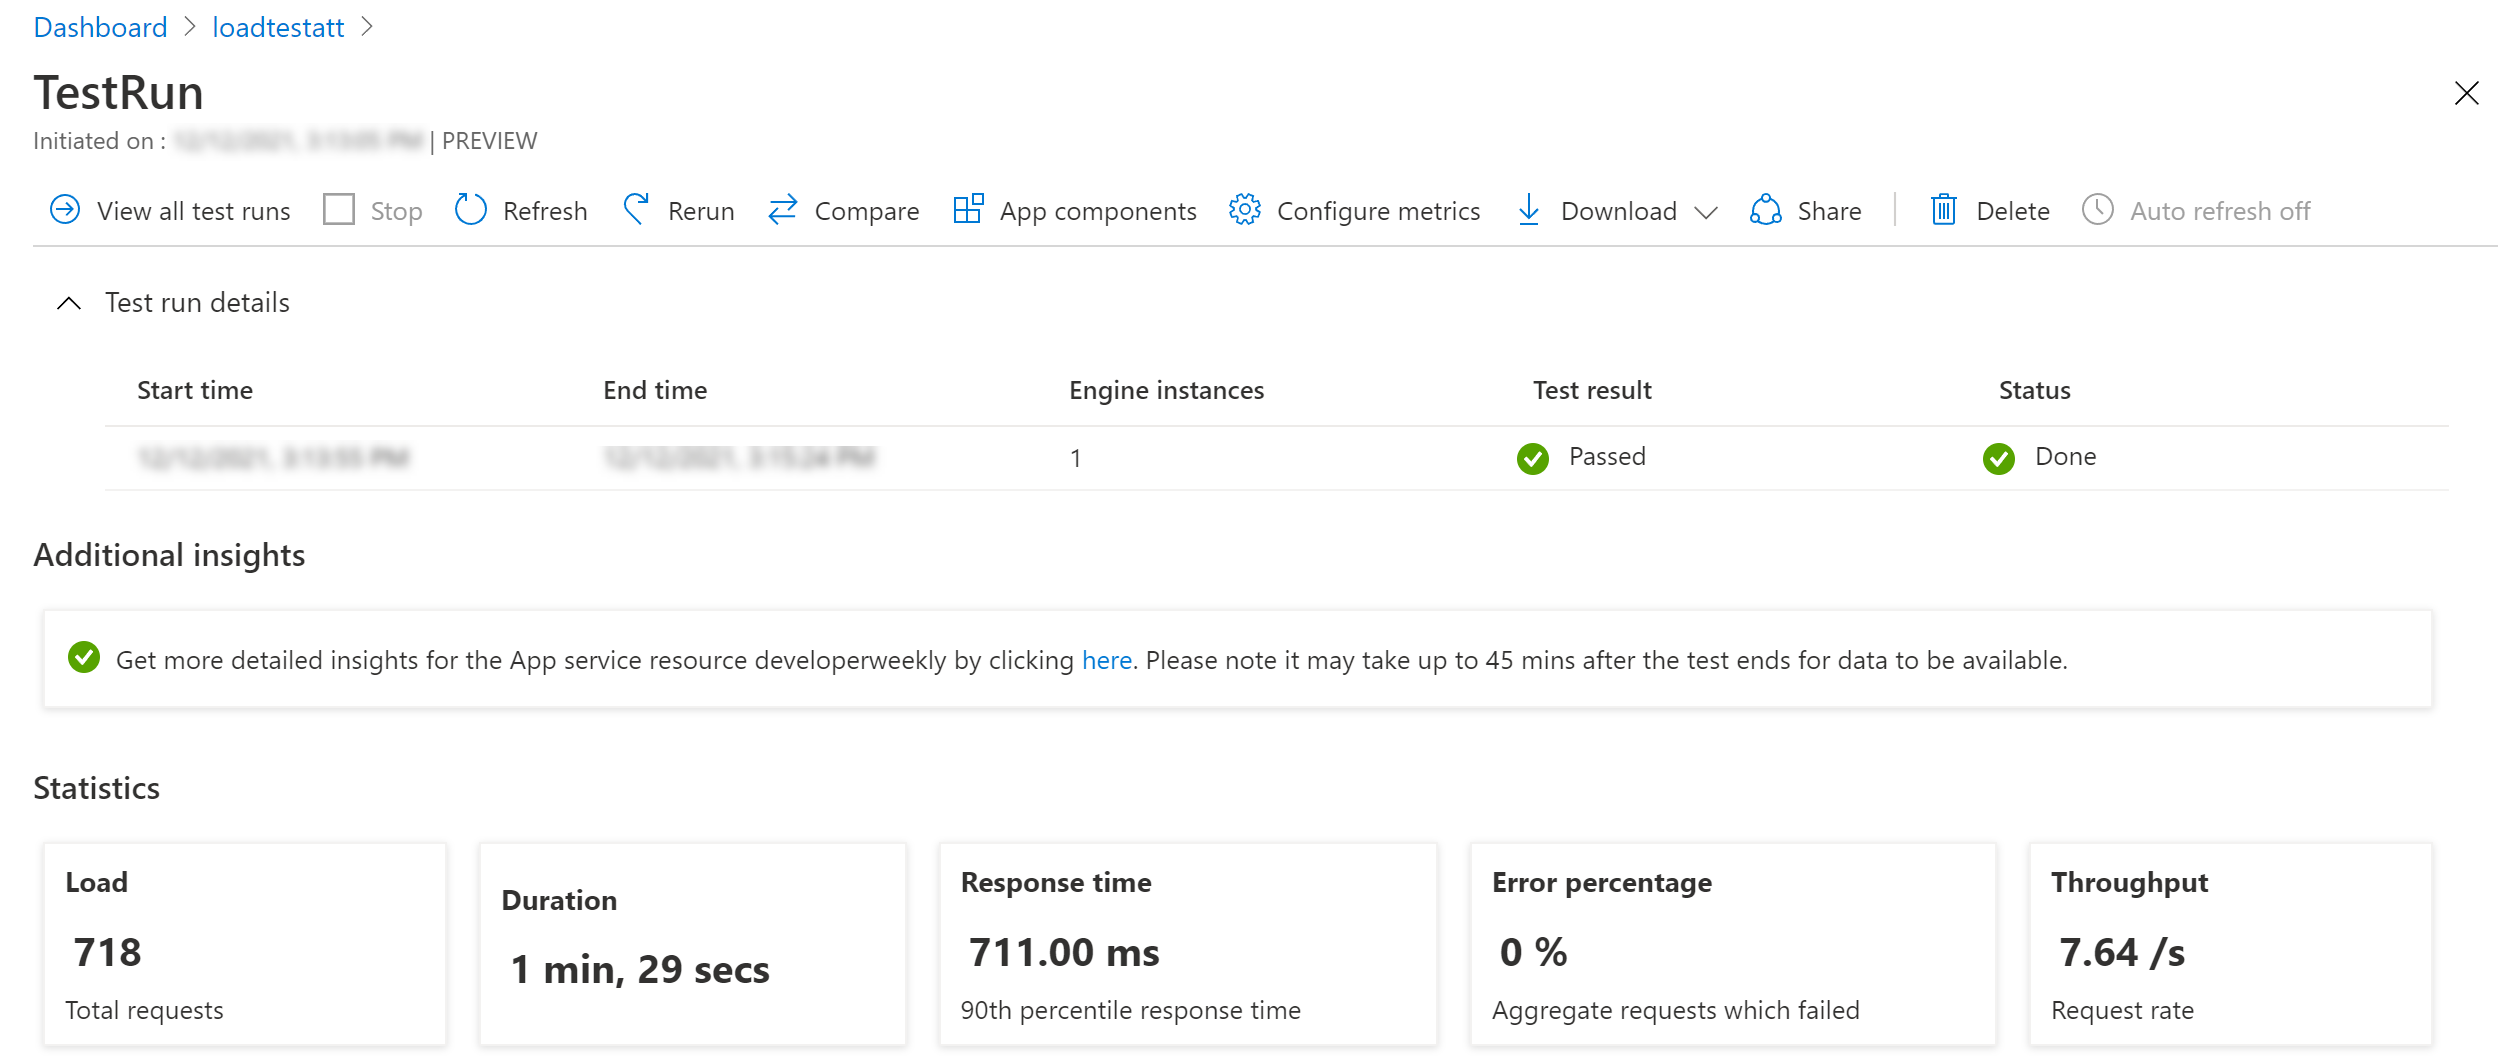
(The results of the load test)
# Conclusion
Azure Load Testing (opens new window) helps you to test the responsiveness and resilience of your application when it is under load. You can integrate it into your DevOps pipeline (opens new window) to identify performance regressions, and you can monitor and analyze the Azure services (opens new window) that are under load. Go and check it out!