Task 04: Add AI-assisted productivity features
Key tasks
01: Use AI hub to auto-summarize case descriptions
-
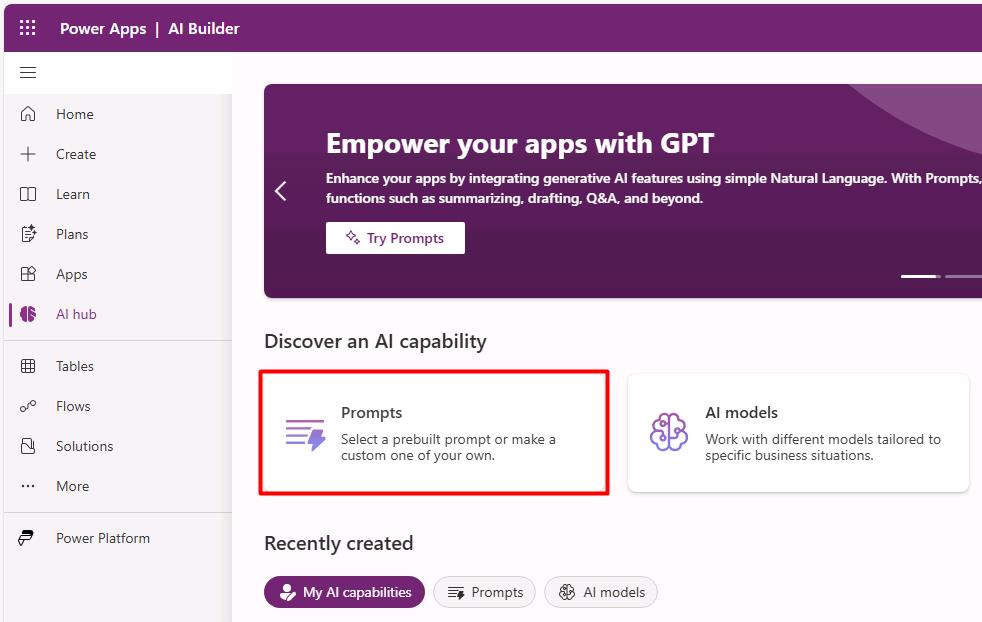
In the leftmost pane, select AI hub.
-
Select the Prompts tile.
-
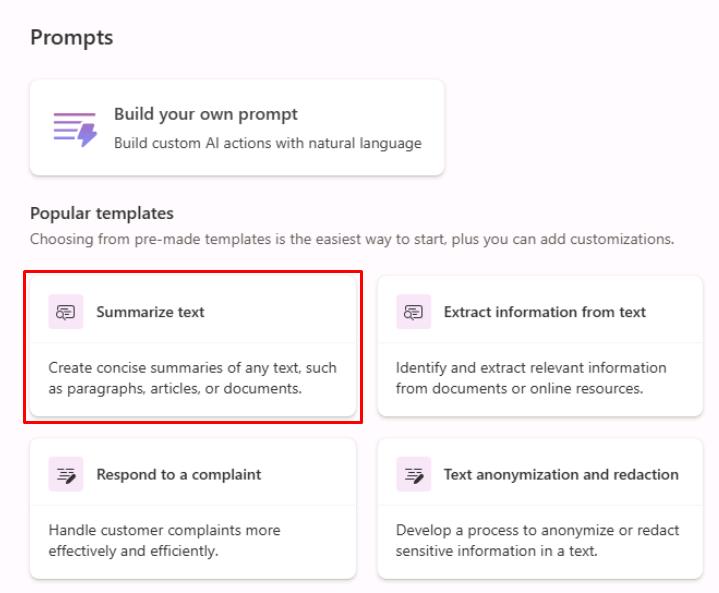
Select the Summarize text tile.
-
In the dialog:
-
Replace the text in the top box to set the prompt name to:
Case Summary Generator -
In the leftmost Instructions pane, enter the following:
You are a customer service assistant. Summarize the following case description in 2 sentences focusing on the issue and expected outcome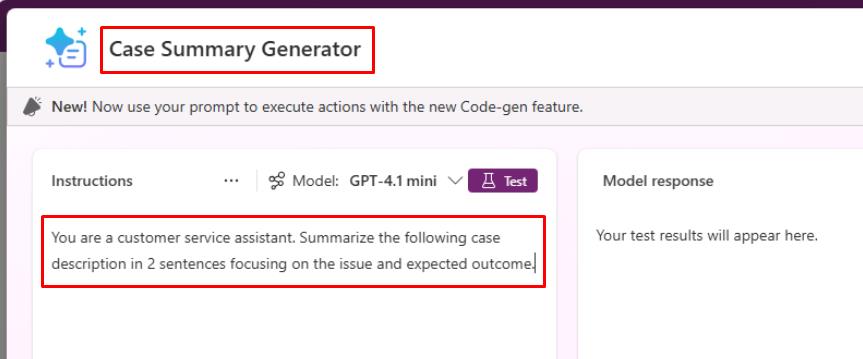
-
In the lower-right corner of the dialog, select Save.
-
Once saved, close the dialog.
-
-
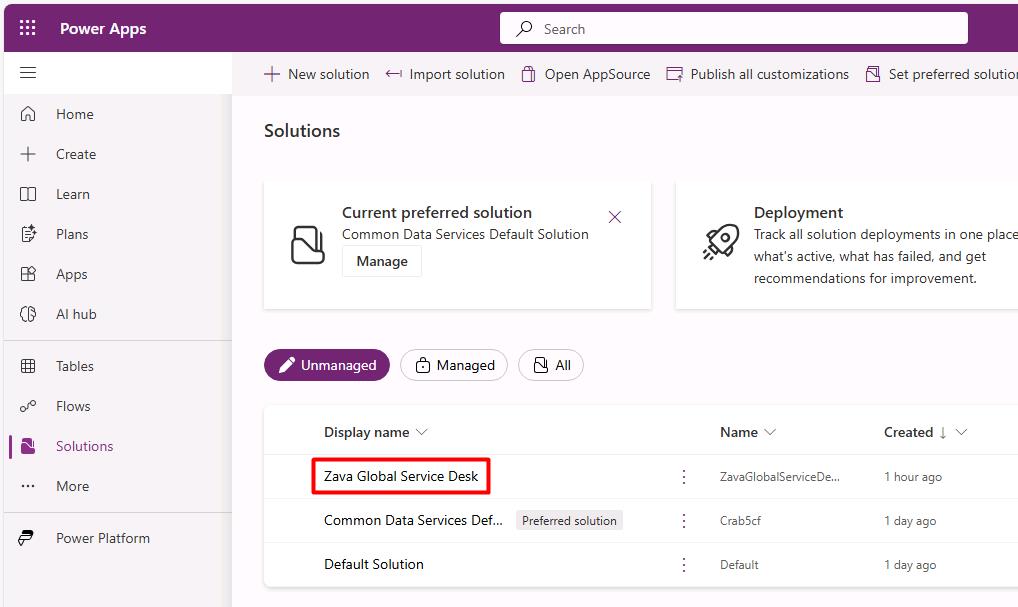
In the leftmost pane, select Solutions.
-
Select Zava Global Service Desk.
-
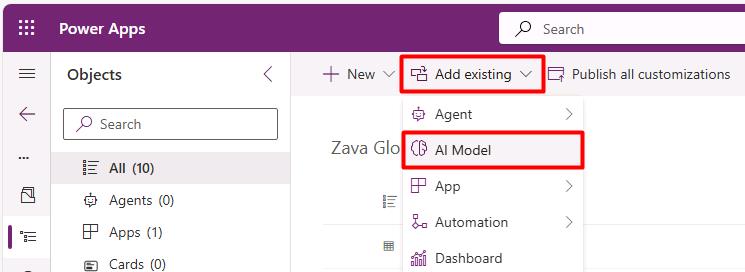
On the top bar, select Add existing > AI Model.
-
In the flyout pane, select the Case Summary Generator you created, then select Add at the bottom of the pane.
-
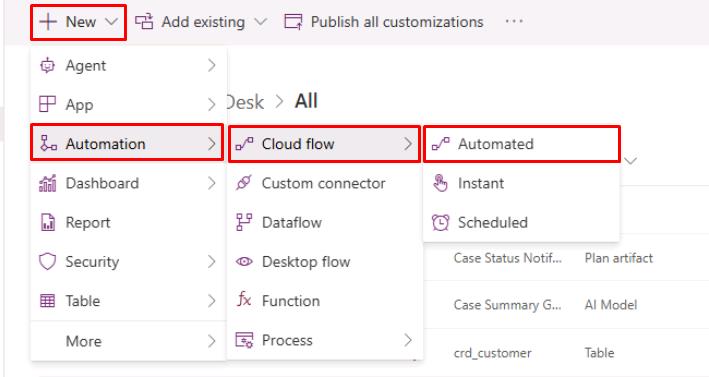
On the top bar, select New > Automation > Cloud flow > Automated.
-
In the dialog:
-
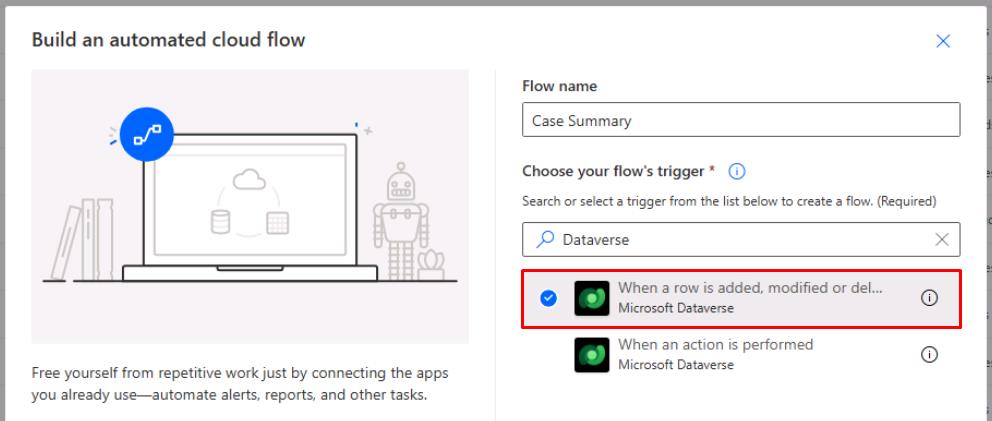
For Flow name, enter
Case Summary. -
In the search box for Choose your flow’s trigger, enter
Dataverse. -
Select When a row is added, modified, or deleted.
-
Select Create.
This will open the flow configuration page.
-
-
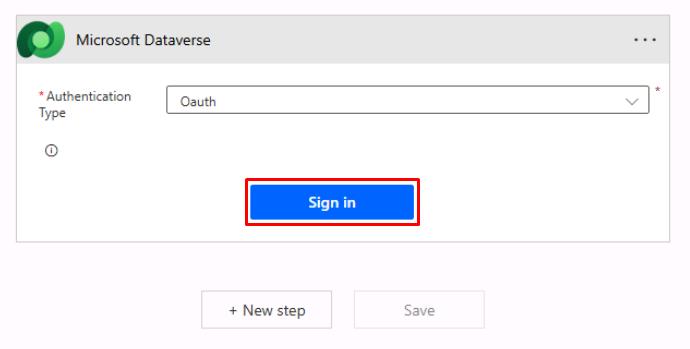
In the Microsoft Dataverse tile, select Sign in.
-
In the dialog, select your lab user account.
-
Enter the following details in the Dataverse section:
Item Value Change type AddedTable name CasesScope Organization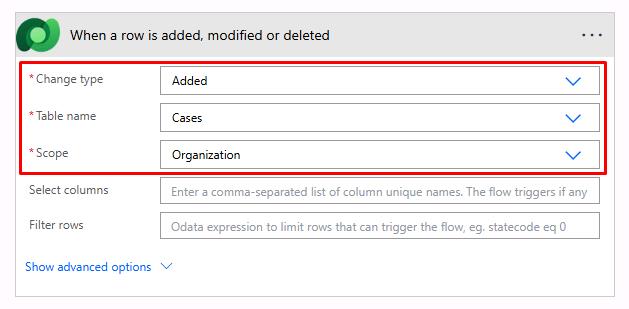
-
Below the tile, select New step.
-
In the search box, enter and select
Run a prompt(AI Builder).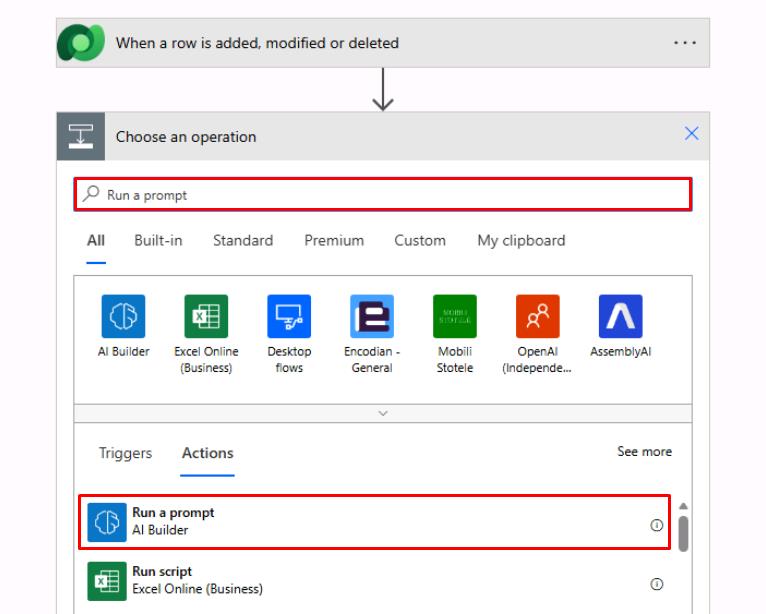
-
In the Prompt dropdown menu, select
Case Summary Generator.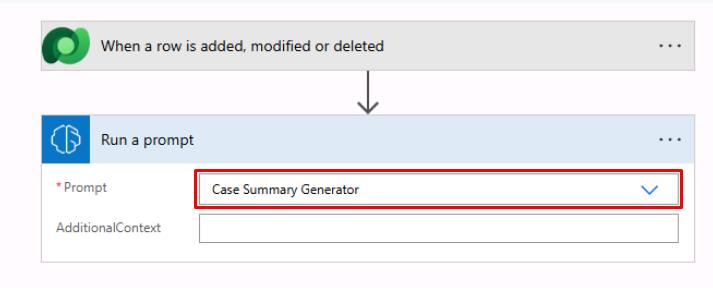
-
Below the Run a prompt step, select New step.
-
In the search box, enter
Dataverse Update a row, then select Update a row.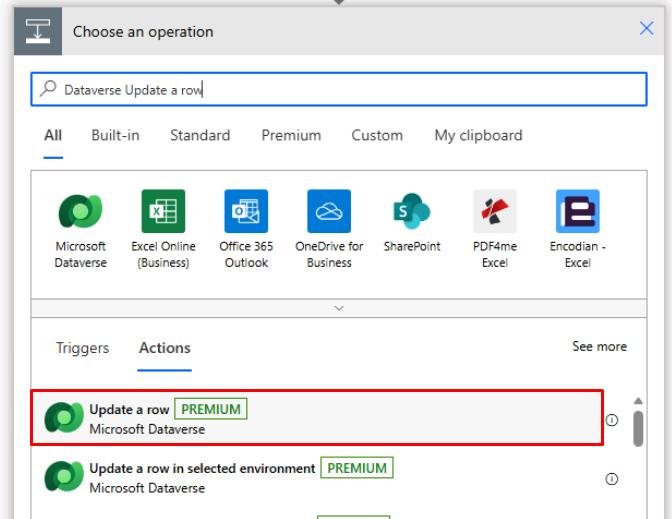
-
Enter the following details:
-
For Table name, select
Cases. -
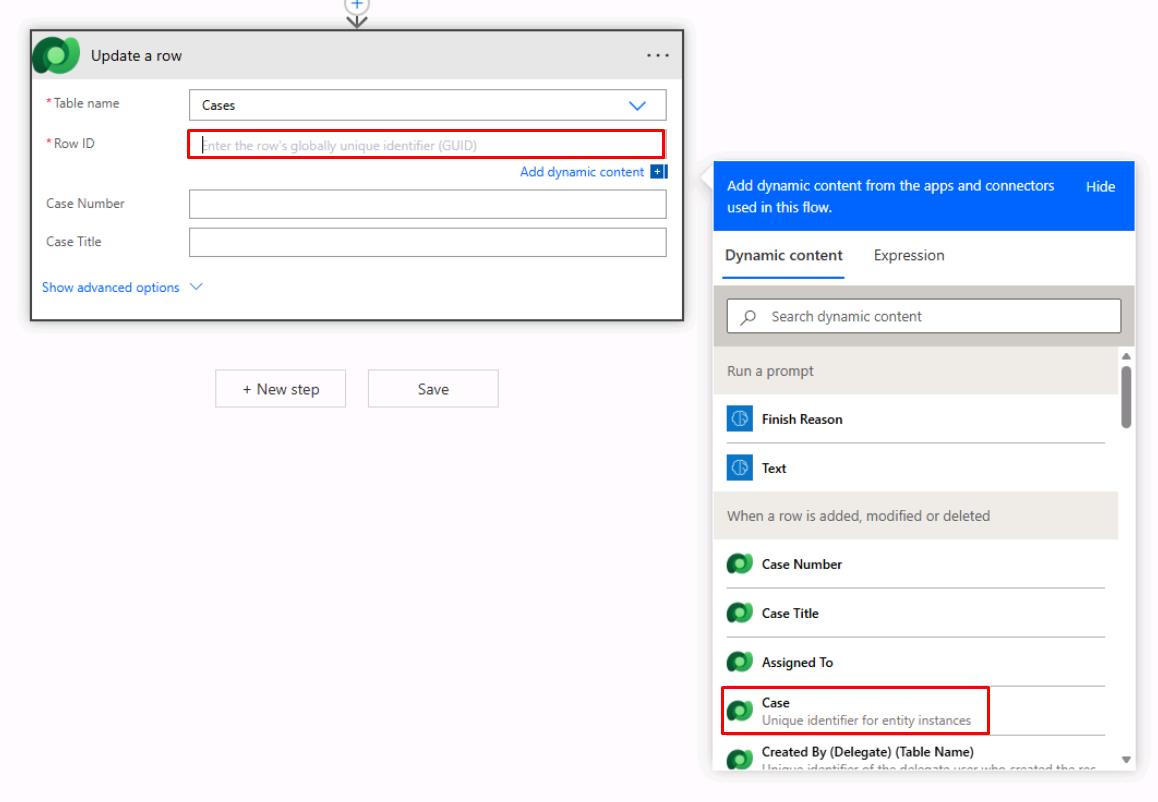
Select the Row ID box.
-
In the flyout pane, select Case (Unique identifier for entity instances).
-
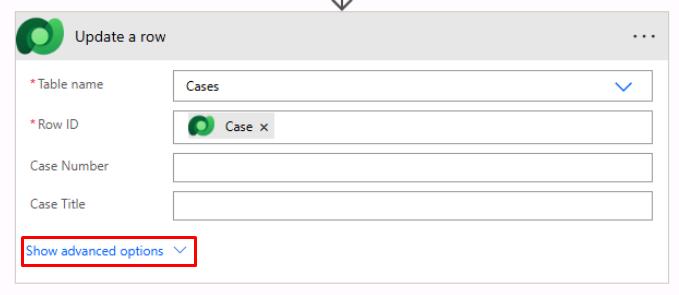
Select Show advanced options.
-
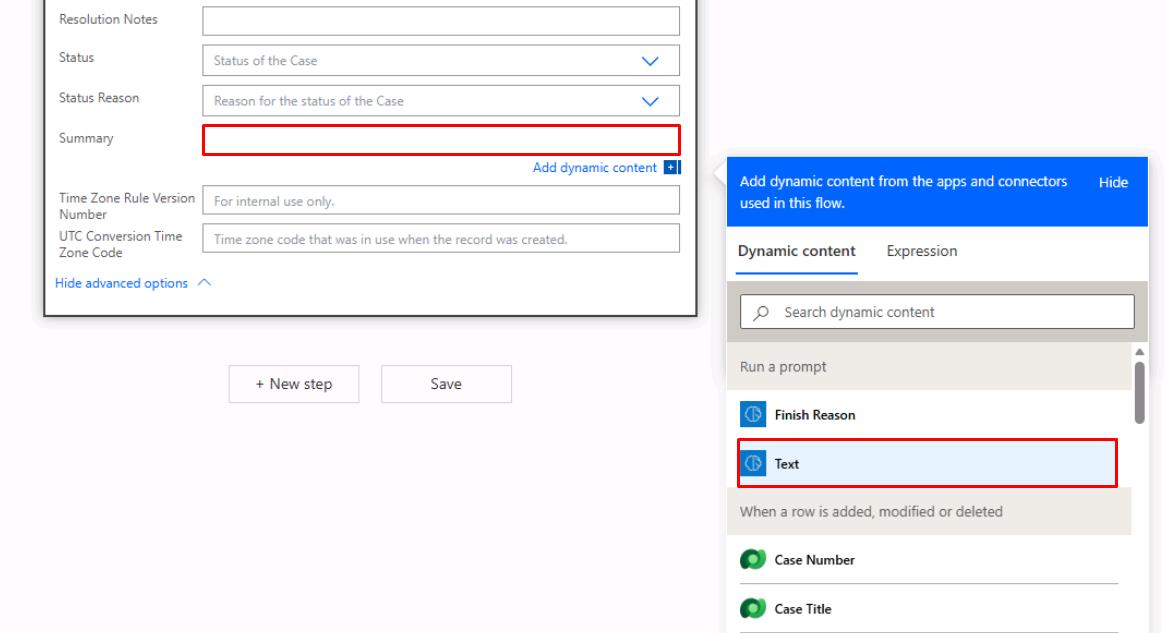
Move to the bottom of the tile, then select the Summary box.
-
In the flyout pane, under the Run a prompt section, select Text.
-
-
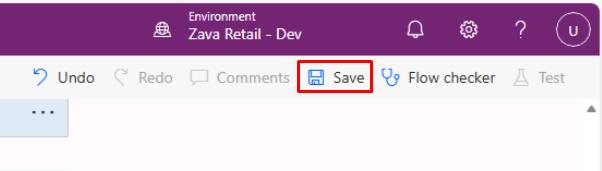
Near the upper-right corner of the page, select Save.
-
Once saved, in the upper-left corner of the page, select the <- icon.
02: Add a generative page for self-service insights
-
In your solution, select the name of your Model-Driven App.
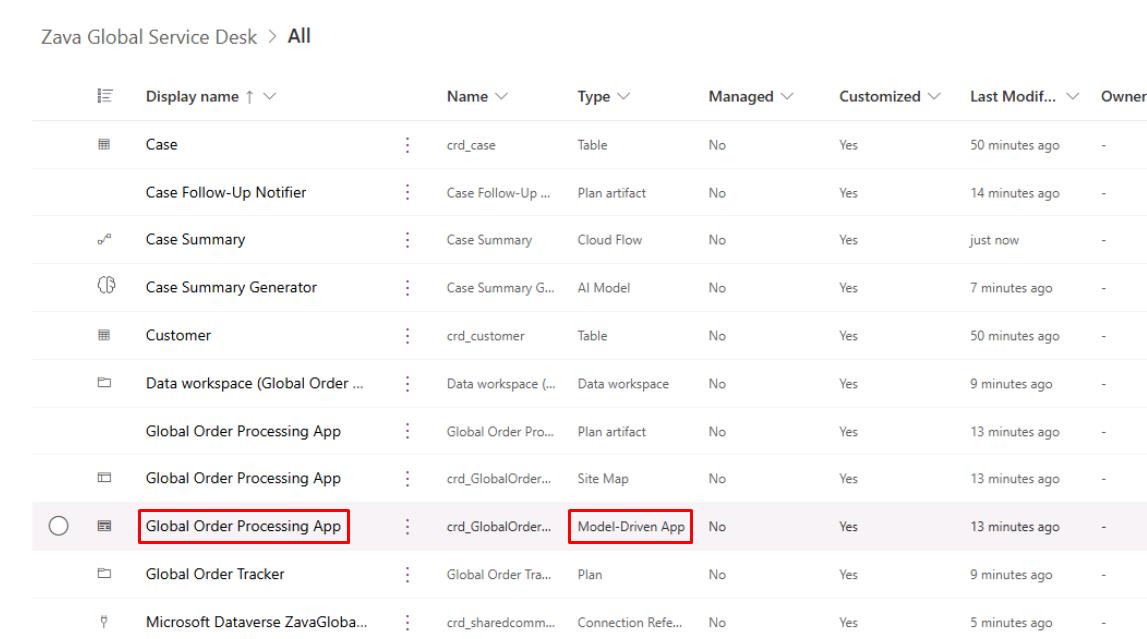
Your generated app name will differ.
-
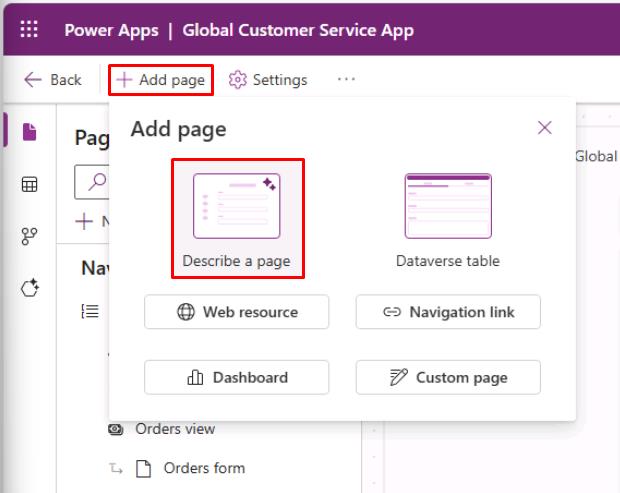
Near the upper-left corner of the page, select Add page, then select Describe a page.
-
In the prompt box, enter:
Data source: Use 'Cases' and 'Orders' tables. Allow customer service leads to ask natural language questions like: "Show me high-priority cases in APAC created this week", or "Which customers have more than three open cases?" -
Select Enter to send.
-
Once the page is generated, test by entering a prompt in the page:
List open high priority cases by region.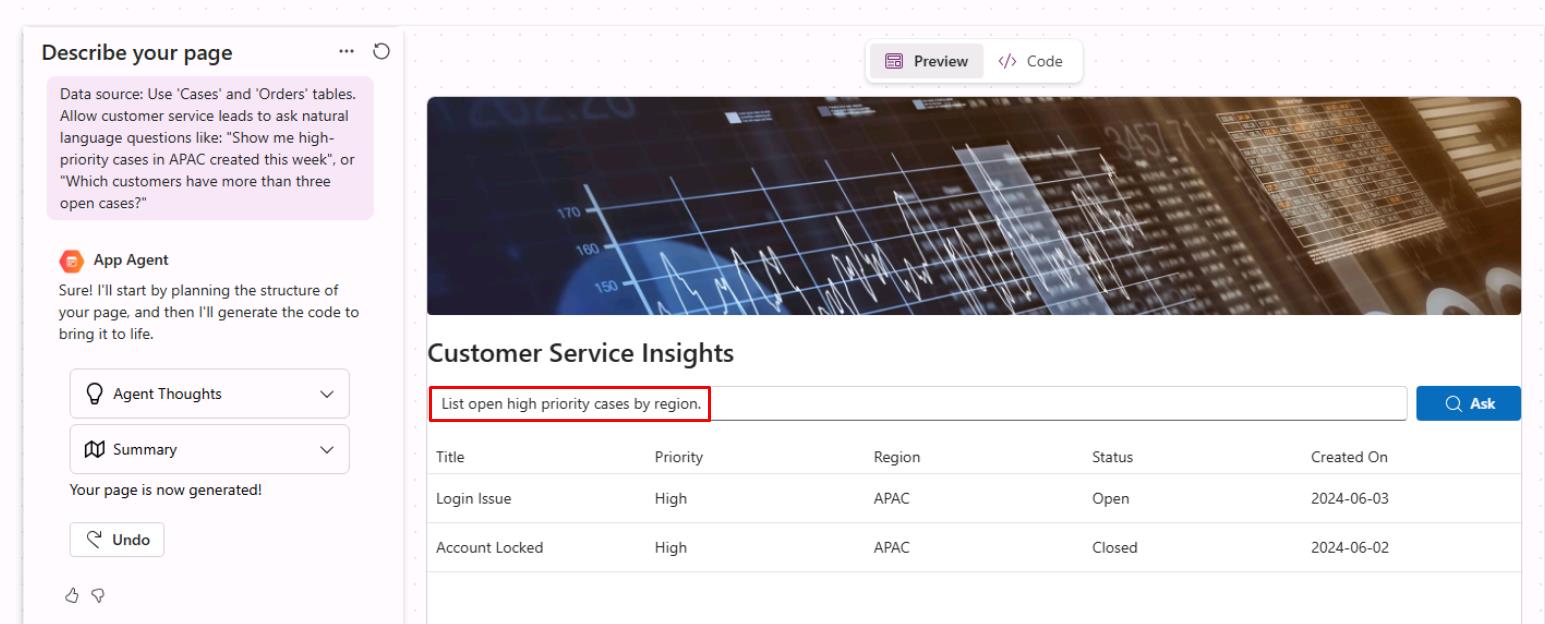
Your page will look different but should provide the option to prompt.
If you see no results or option to prompt, proceed to the next steps.
While you can prompt further in the left pane’s page description, don’t spend too much time on this task.
-
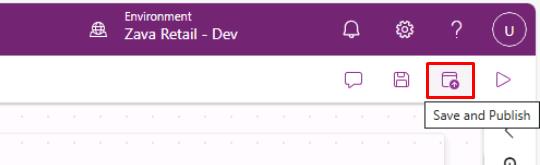
Near the upper-right corner of the page, select the Save and Publish icon.
-
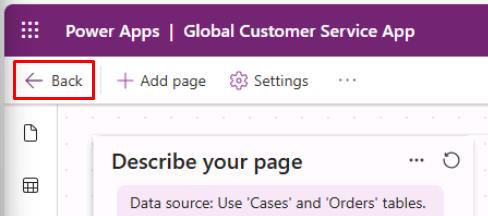
Once saved after the page refreshes, in the upper-left corner of the page, select Back.
03: Configure an agent for case triage
-
On the top bar of the solution, select New > Agent > Agent.
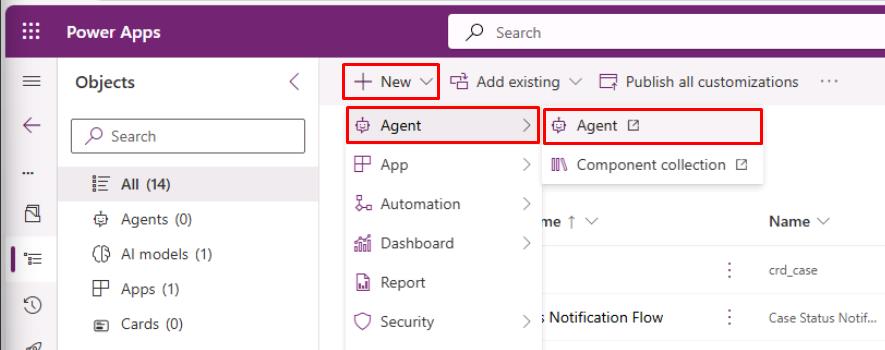
This will open Copilot Studio.
-
In the dialog, select Get Started, then select Skip.
-
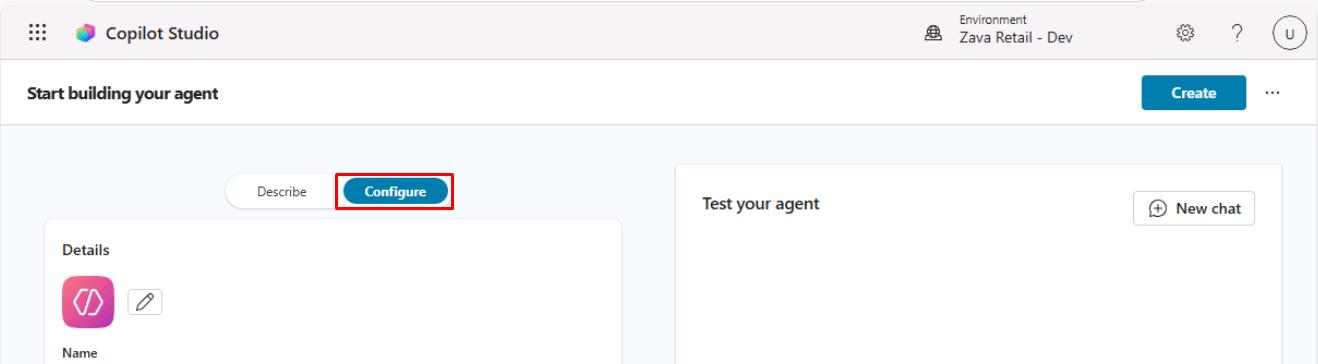
At the top of the left pane, select the Configure tab:
-
Enter the following details:
Item Value Name Zava Case Triage AgentDescription Helps customer service agents triage and update cases by summarizing issues, suggesting priorities, and drafting responses. -
In the Instructions section, enter the following:
Select Copy in the following block, then paste with Ctrl+V.
 You are a customer service triage assistant for a global retailer. When agents ask about a case, identify the customer, related order, and suggest:
 - Likely priority
 - Recommended next action (refund, replacement, escalate to billing)

 Example user prompts:
 - Summarize case CASE-90003 and suggest an appropriate priority.
 - List all open high-priority cases for customers in APAC.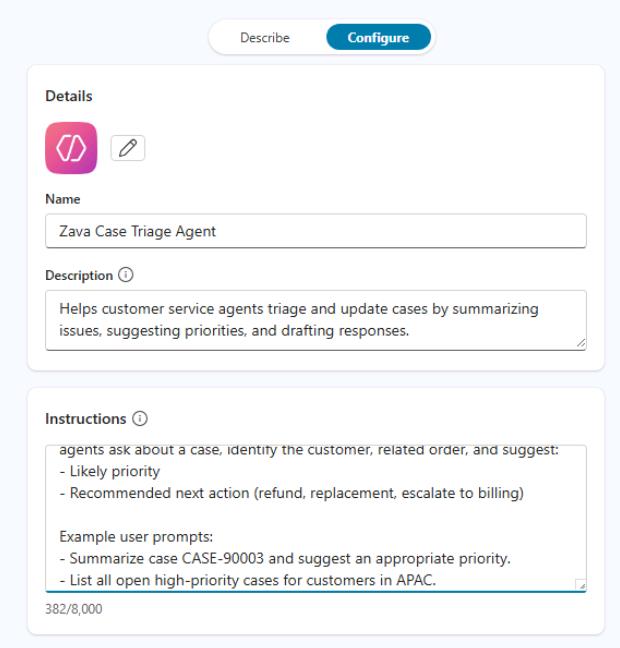
-
In the upper-right corner of the page, select Create.
This will create the agent and take you directly to its page in Copilot Studio.
-
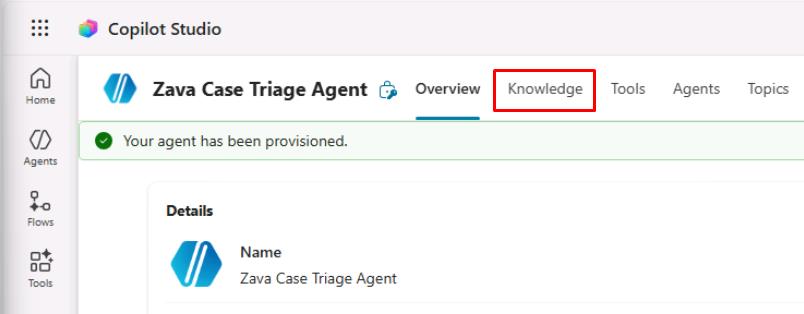
On the top bar, select the Knowledge tab.
-
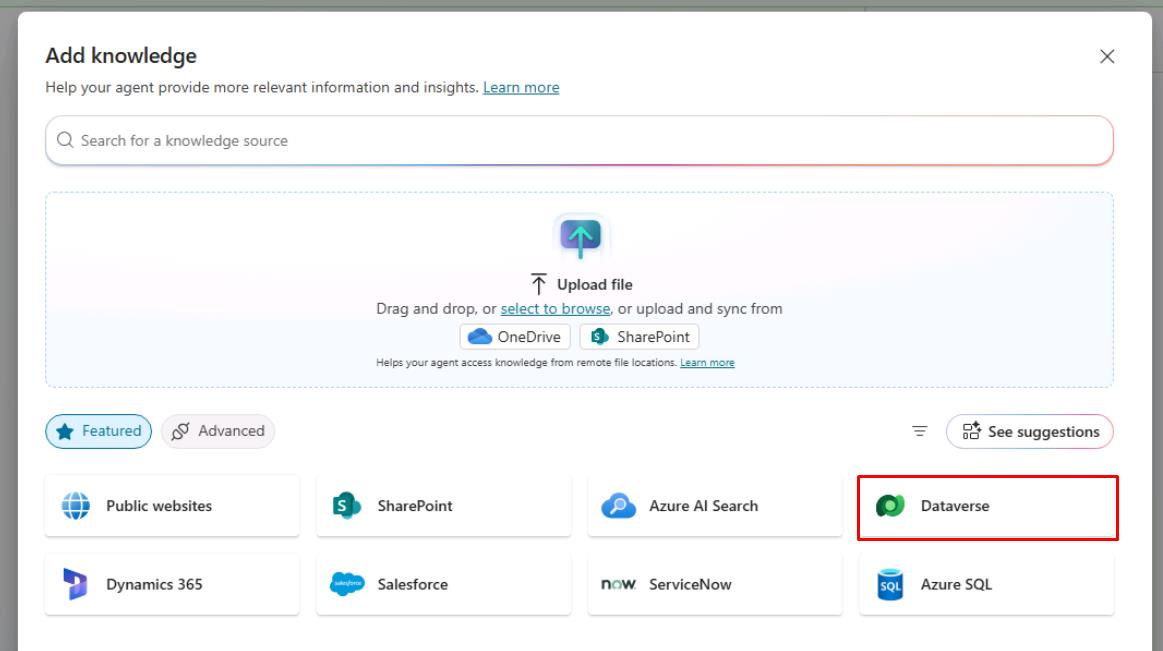
Select Add knowledge.
-
In the dialog:
-
Select Dataverse.
-
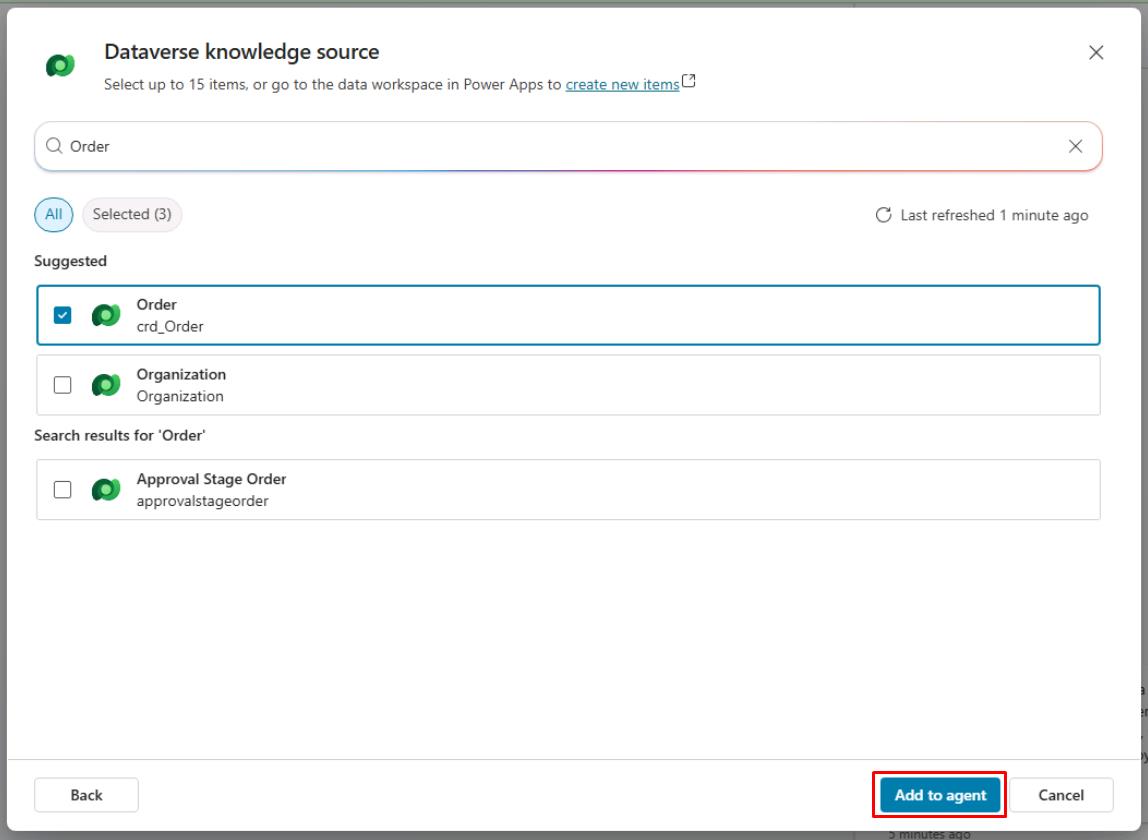
Search for and select the following tables:
- []
Case - []
Customer - []
Order
- []
-
In the lower-right corner of the dialog, select Add to agent.
-
-
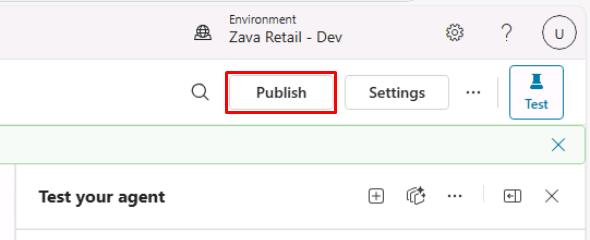
Near the upper-right corner of the page, select Publish.
-
In the dialog, select Publish.
You don’t need to wait for this to finish. Proceed to the next task.
-
Close the Copilot Studio tab.