Task 01: Configure solution-aware pipelines
Key tasks
01: Configure Power Platform environments (OPTIONAL)
In this task, you’ll run a script to recreate the Power Platform environments and import the solution. These steps are a repeat of everything accomplished in Day 1’s first exercises for setting up their environment, since the live lab was split up. YOU DO NOT NEED TO PERFORM THIS if you are following the steps on your own in one go.
-
Sign in to the virtual machine with the following credentials (* ONLY if performing the steps in the live environment):
Item Value Username @lab.VirtualMachine(Win11-Pro-Base).Username Password +++@lab.VirtualMachine(Win11-Pro-Base).Password+++ -
On the VM’s taskbar, open Windows PowerShell ISE.
-
In PowerShell ISE, select File > New.
-
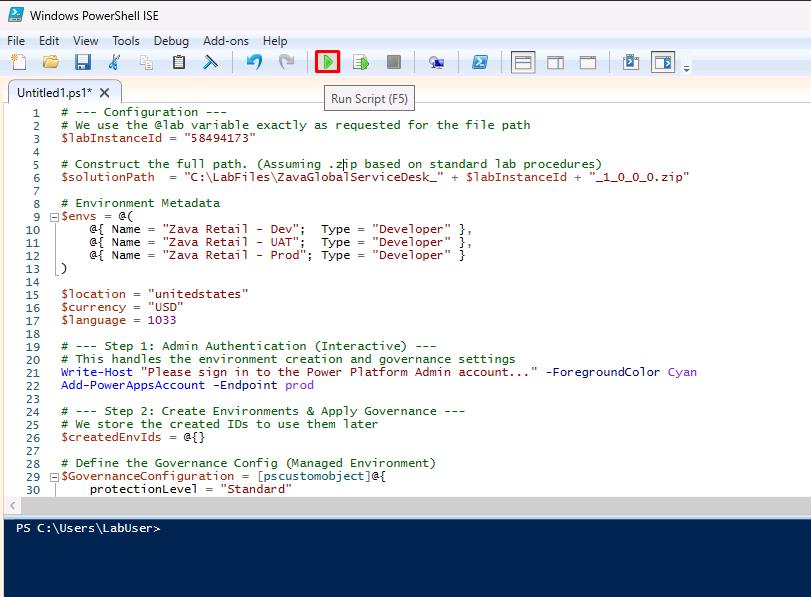
In the top pane, enter the following:
Select Copy in the following block, then paste with Ctrl+V.
# --- Configuration --- # We use the @lab variable exactly as requested for the file path $labInstanceId = "@lab.LabInstance.Id" # Construct the full path. (Assuming .zip based on standard lab procedures) $solutionPath = "C:\LabFiles\ZavaGlobalServiceDesk_" + $labInstanceId + "_1_0_0_0.zip" # Environment Metadata $envs = @( @{ Name = "Zava Retail - Dev"; Type = "Developer" }, @{ Name = "Zava Retail - UAT"; Type = "Developer" }, @{ Name = "Zava Retail - Prod"; Type = "Developer" } ) $location = "unitedstates" $currency = "USD" $language = 1033 # --- Step 1: Admin Authentication (Interactive) --- # This handles the environment creation and governance settings Write-Host "Please sign in to the Power Platform Admin account..." -ForegroundColor Cyan Add-PowerAppsAccount -Endpoint prod # --- Step 2: Create Environments & Apply Governance --- # We store the created IDs to use them later $createdEnvIds = @{} # Define the Governance Config (Managed Environment) $GovernanceConfiguration = [pscustomobject]@{ protectionLevel = "Standard" settings = [pscustomobject]@{ extendedSettings = @{} } } foreach ($envDef in $envs) { Write-Host "--------------------------------------------------" Write-Host "Processing: $($envDef.Name)" -ForegroundColor Cyan # A. Create Environment Write-Host "Creating environment ($($envDef.Type))..." $newEnv = New-AdminPowerAppEnvironment ` -DisplayName $envDef.Name ` -LocationName $location ` -EnvironmentSku $envDef.Type ` -ProvisionDatabase ` -CurrencyName $currency ` -LanguageName $language ` -WaitUntilFinished $true $envId = $newEnv.EnvironmentName $createdEnvIds[$envDef.Name] = $envId Write-Host "Created Environment ID: $envId" -ForegroundColor Green # B. Set as Managed Environment # We use a small retry loop because the environment needs a moment to be 'ready' for governance settings Write-Host "Enabling Managed Environment settings..." $retry = 0 $success = $false do { try { Set-AdminPowerAppEnvironmentGovernanceConfiguration ` -EnvironmentName $envId ` -UpdatedGovernanceConfiguration $GovernanceConfiguration ` -ErrorAction Stop Write-Host "Managed Environment enabled." -ForegroundColor Green $success = $true } catch { $retry++ if ($retry -lt 5) { Write-Host "Waiting for provisioning to settle (Attempt $retry/5)..." -ForegroundColor Yellow Start-Sleep -s 15 } else { Write-Error "Failed to set Managed Environment after 5 attempts." } } } while (-not $success -and $retry -lt 5) } # --- Step 3: Import Solution into DEV Only (Interactive) --- $devName = "Zava Retail - Dev" $devEnvId = $createdEnvIds[$devName] if ($devEnvId) { Write-Host "--------------------------------------------------" Write-Host "Preparing Solution Import for: $devName ($devEnvId)" -ForegroundColor Cyan # A. Get and Clean URL $targetEnv = Get-AdminPowerAppEnvironment -EnvironmentName $devEnvId # Logic to find the correct URL property if ($targetEnv.EnvironmentUrl) { $rawUrl = $targetEnv.EnvironmentUrl } elseif ($targetEnv.InstanceApiUrl) { $rawUrl = $targetEnv.InstanceApiUrl } else { $rawUrl = $targetEnv.Internal.properties.linkedEnvironmentMetadata.instanceApiUrl } # Clean the URL (.api.crm -> .crm) $cleanUrl = $rawUrl -replace "\.api\.crm", ".crm" Write-Host "Target URL: $cleanUrl" -ForegroundColor Cyan # B. Connect to Dataverse (Interactive) # We use AuthType=Office365 for interactive user login Write-Host "Connecting to Dataverse..." $connStr = "AuthType=Office365;Url=$cleanUrl;RequireNewInstance=True" try { $conn = Get-CrmConnection -ConnectionString $connStr -ErrorAction Stop } catch { Write-Error "Connection Failed: $_" break } # C. Import & Publish if ($conn.IsReady) { Write-Host "Connected. Importing: $solutionPath" try { # Import $importJob = Import-CrmSolution ` -conn $conn ` -SolutionFilePath $solutionPath ` -OverwriteUnmanagedCustomizations $true ` -Verbose Write-Host "SUCCESS: Solution imported." -ForegroundColor Green # Publish Write-Host "Publishing customizations..." Publish-CrmAllCustomization -conn $conn -Verbose Write-Host "SUCCESS: All customizations published." -ForegroundColor Green } catch { Write-Error "IMPORT FAILED: $_" } } } else { Write-Error "Could not find the Dev environment ID. Skipping import." } -
On the top bar, select Run Script (
 ).
).
-
In the dialog, sign in with your lab credentials.
-
Wait until the script completes in the bottom pane.
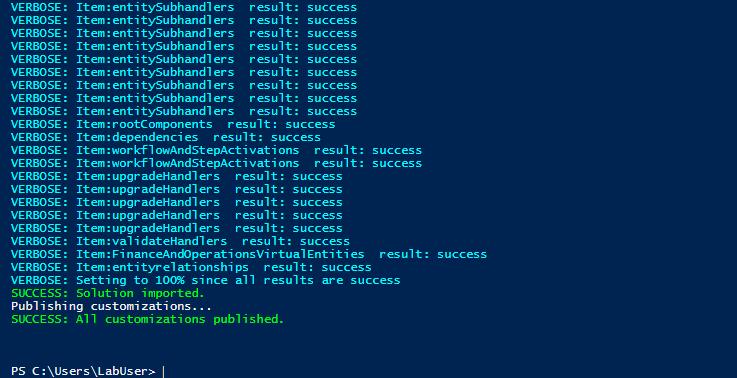
This will take a few minutes.
-
Close the PowerShell ISE window without saving.
02: Setup pipelines
-
Open Edge, then go to Power Apps home page.
-
Sign in with your lab credentials.
-
In the dialog, select Get started.
-
Near the upper-right corner of the page, select Environment, then select Zava Retail - Dev.
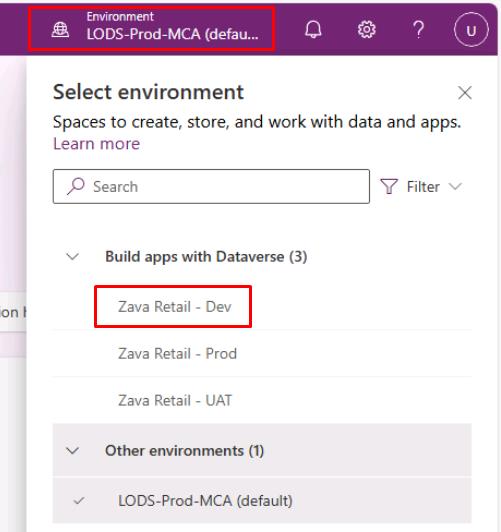

Depending on screen resolution, you may need to select the globe icon to open the Select environment pane.
-
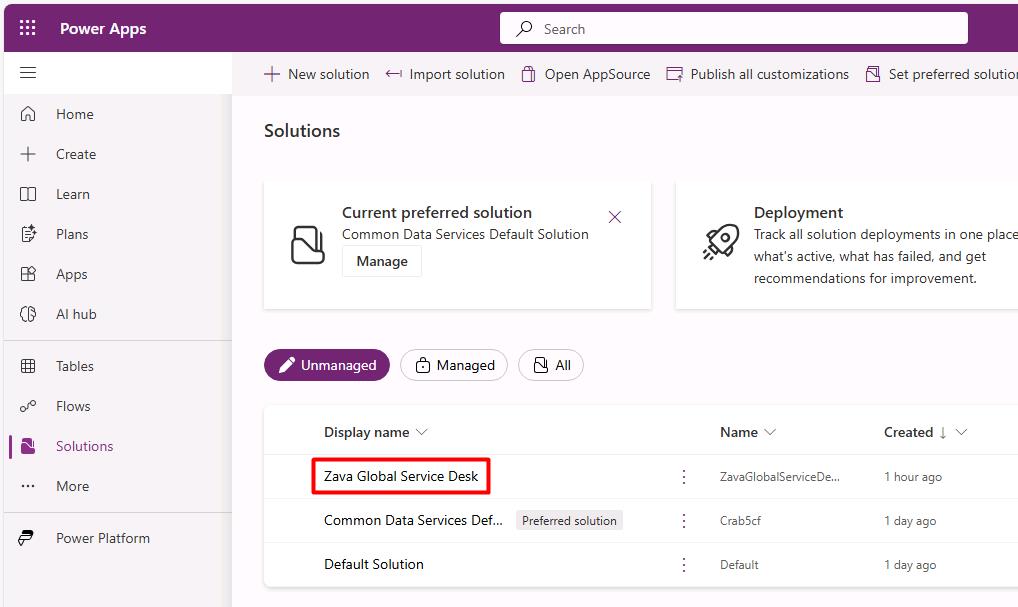
In the leftmost pane, select Solutions.
-
Select Zava Global Service Desk.
-
In the leftmost pane, select the Pipelines (
 ) icon.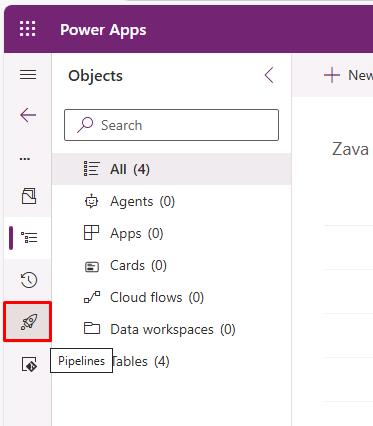
-
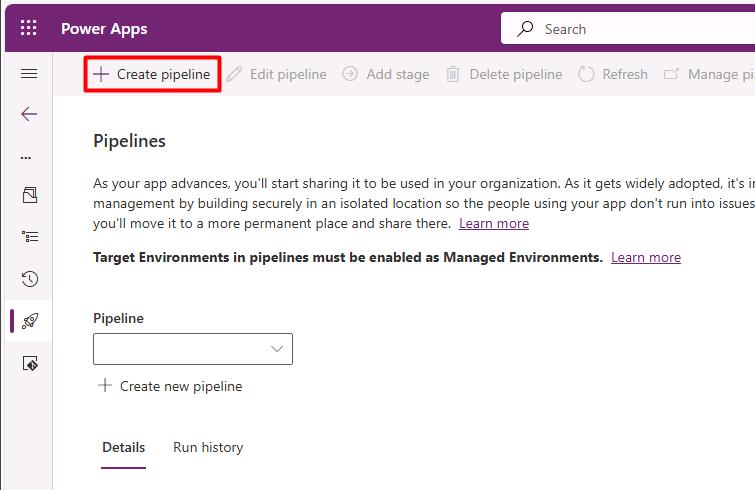
On the top bar, select Create pipeline.
-
In the flyout pane:
-
Enter the following values:
Item Value Name Zava Retail - ALM PipelineTarget environment Zava Retail - UAT 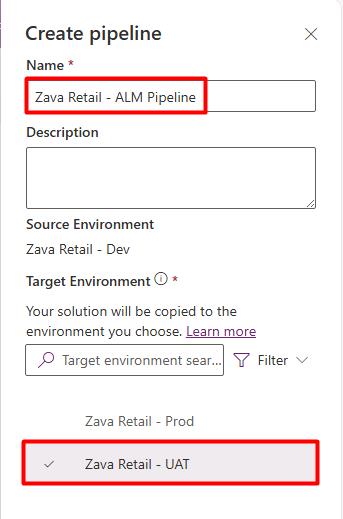
-
At the bottom of the pane, select Save.
-
-
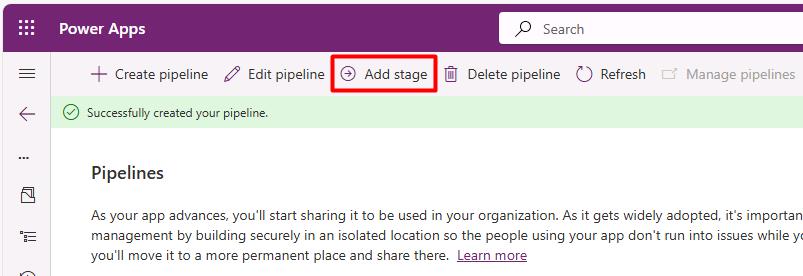
On the top bar, select Add stage.
-
In the flyout pane:
-
Enter the following values:
Item Value Name Zava Retail - ProdTarget environment Zava Retail - Prod 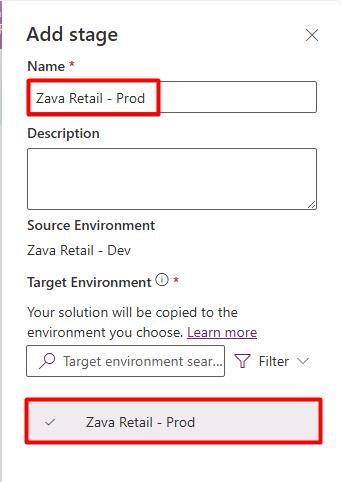
-
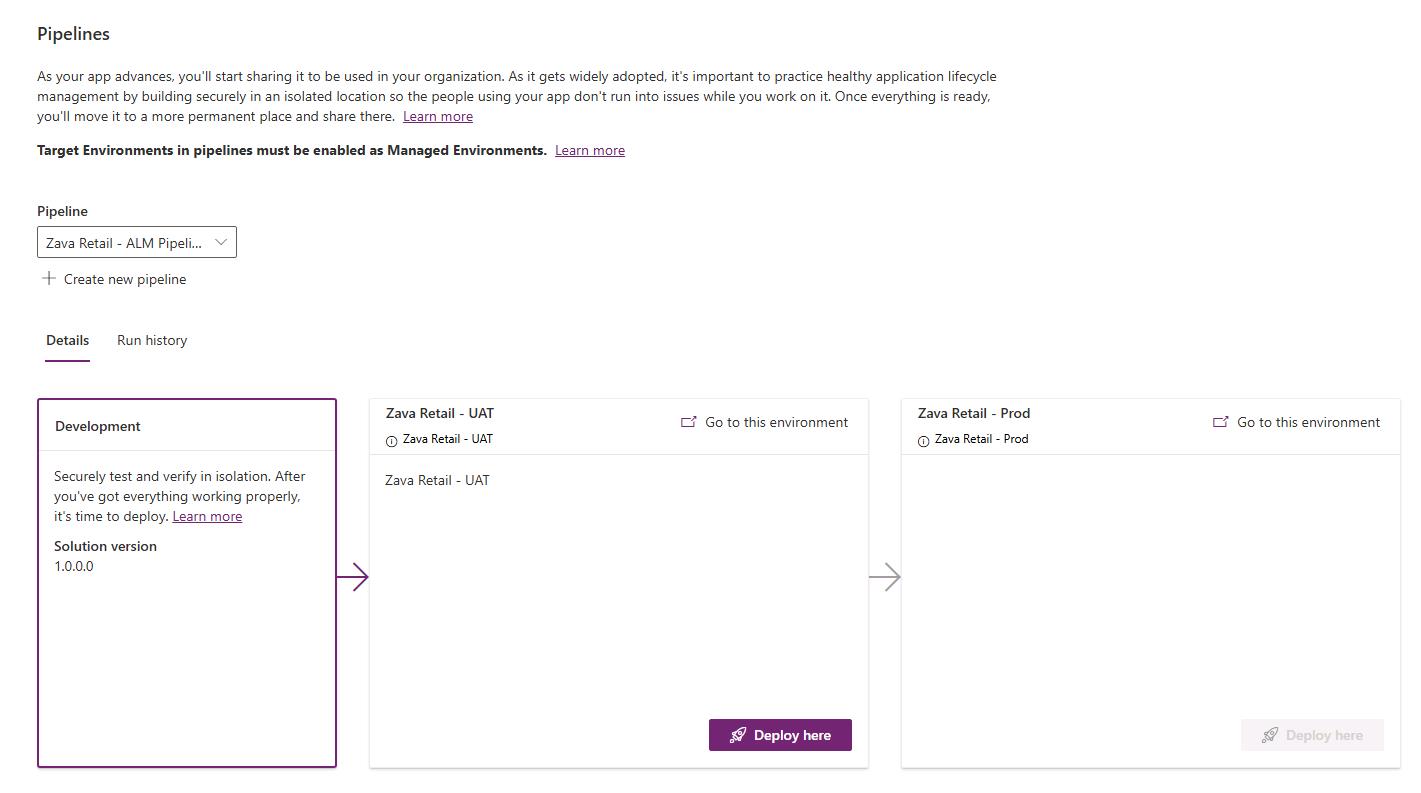
At the bottom of the pane, select Save.
-
03: Deploy using platform host pipelines
-
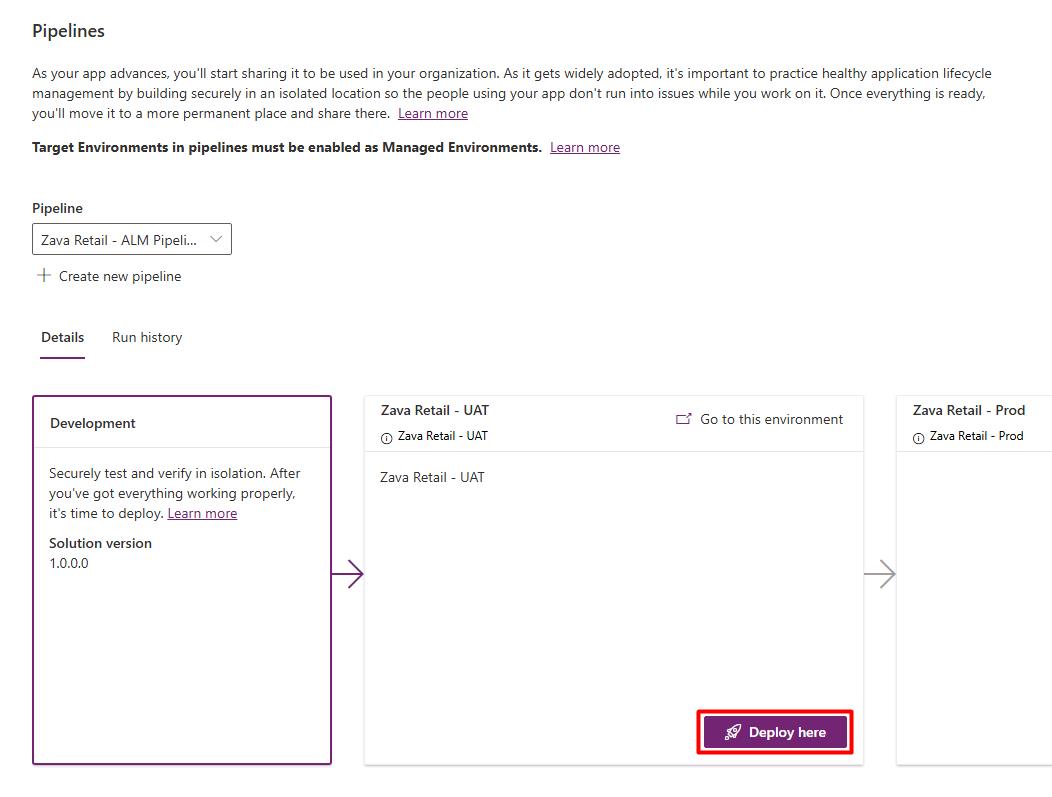
On the Zava Retail – UAT stage, select Deploy here to initiate the solution deployment to UAT.
-
In the flyout pane:
If it appears, you can ignore the EnvironmentNotFound error.
-
Under Deployment schedule, keep the default of Now.
Selecting Later will allow you to set a time and date for the scheduled deployment.
-
At the bottom of the pane, select Next.
Validation may take a couple minutes.
-
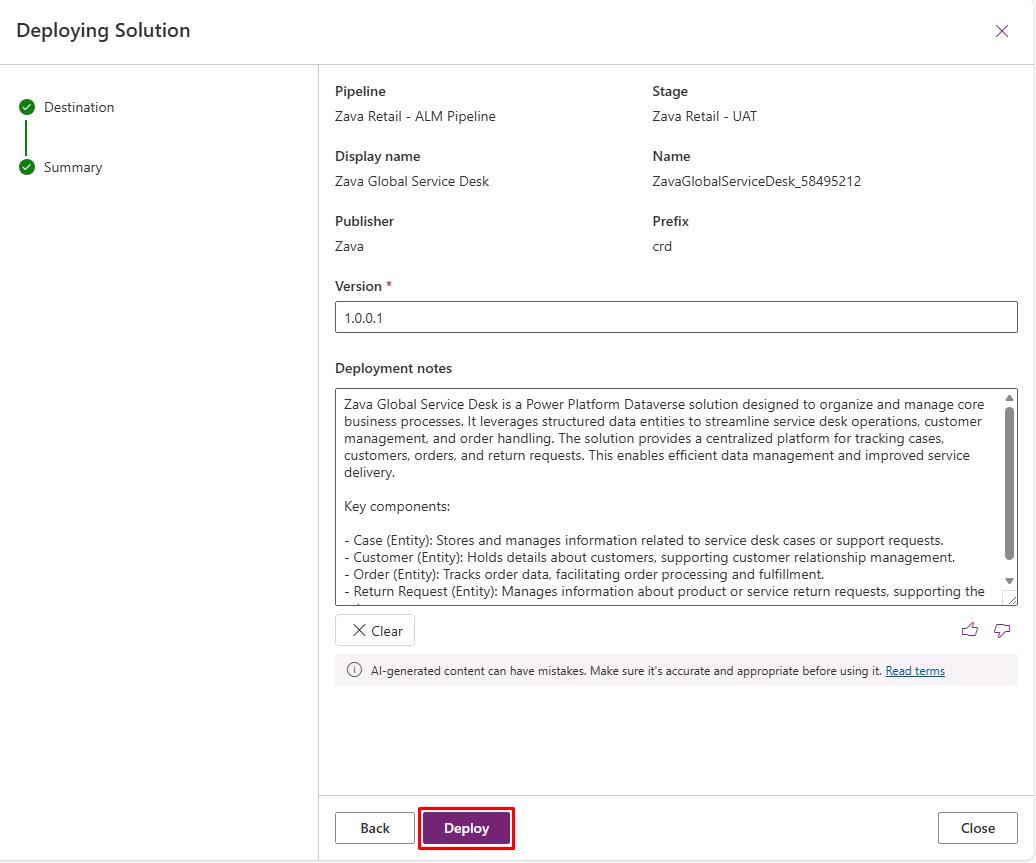
On the Summary step, observe the AI-generated Deployment notes, which contains a summary of the solution’s capabilities.
-
At the bottom of the pane, select Deploy.
-
-
Wait until deployment completes.
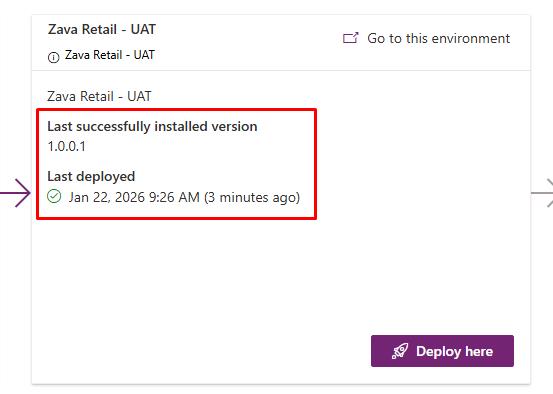
This may take 5-10 minutes.
-
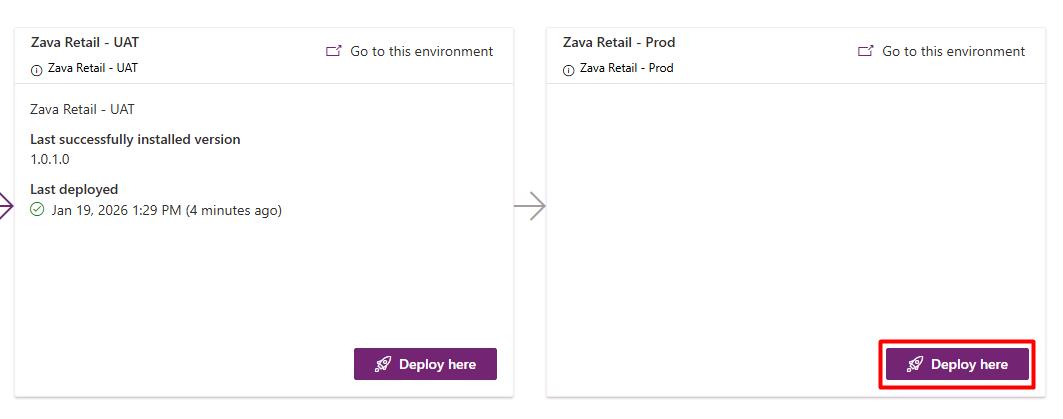
On the Zava Retail - Prod stage, select Deploy here.
-
In the flyout pane:
-
At the bottom of the pane, select Next.
-
Select Deploy.
Proceed to the next task. You don’t need to wait for this to complete.
-
Platform host pipelines are not shareable, nor can they be extended to support approvals or delegations. You can look into custom host pipelines for these options.