TIP
🔥 The FREE Azure Developer Guide eBook is available here (opens new window).
💡 Learn more : Create your first automated workflow with Azure Logic Apps (opens new window).
📺 Watch the video : How to use inline JavaScript code snippets in Azure Logic Apps (opens new window).
# Add and run JavaScript code snippets by using inline code in Azure Logic Apps
# Run JavaScript code in Azure logic Apps
Azure Logic Apps (opens new window) are great. You can use them to create a process of multiple steps. Logic Apps can be triggered on a timer, or by an external event, like when a new email comes in. The process that you create with Logic Apps consists out of calls to connectors and data evaluations by conditions. There are a lot of built-in connectors (opens new window), like the OneDrive and Office365 connector and you can also use your own API, Function App or Logic App as a connector.
And now, you can also run inline code as part of the process in a Logic App. You can create a JavaScript code snippet and run it, just like any other step. In this article, we'll take a look at the inline code capability of Azure Logic Apps.
# Prerequisites
If you want to follow along, you'll need the following:
- An Azure subscription (If you don't have an Azure subscription, create a free account (opens new window) before you begin)
- An integration account (opens new window) that we need to link to our Logic App
- A OneDrive (opens new window) account. We will use this in our Logic App process
# Create the Azure Logic App
Let's start by creating the Azure Logic App and connecting the integration account to it. We'll do that in the Azure portal.
- Go to the Azure portal (opens new window)
- Click the Create a resource button (the plus-sign in the top left corner)
- Search for Logic App and click on the result to start creating one
- Fill in a Name for the Logic App
- Select an Azure subscription
- Select or create a Resource group
- Select the Location
- Click Create
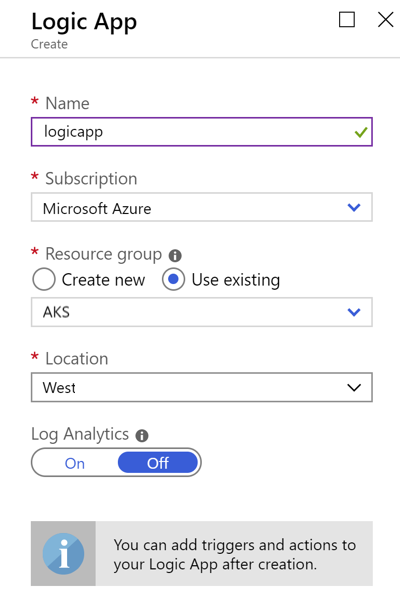
(Creating the Azure Logic App in the Azure portal).
In the inline code that we are going to write, we will use values from other tasks in the Logic App. We can do that by calling the workflowContext object in the inline code. To be able to access that, we need to couple an integration account (opens new window) to the Logic App. Let's do that:
- Navigate to the Logic App in the Azure portal
- Click on the Workflow settings menu-item
- In the Workflow settings blade, under Integration account, select your integration account
- Click Save
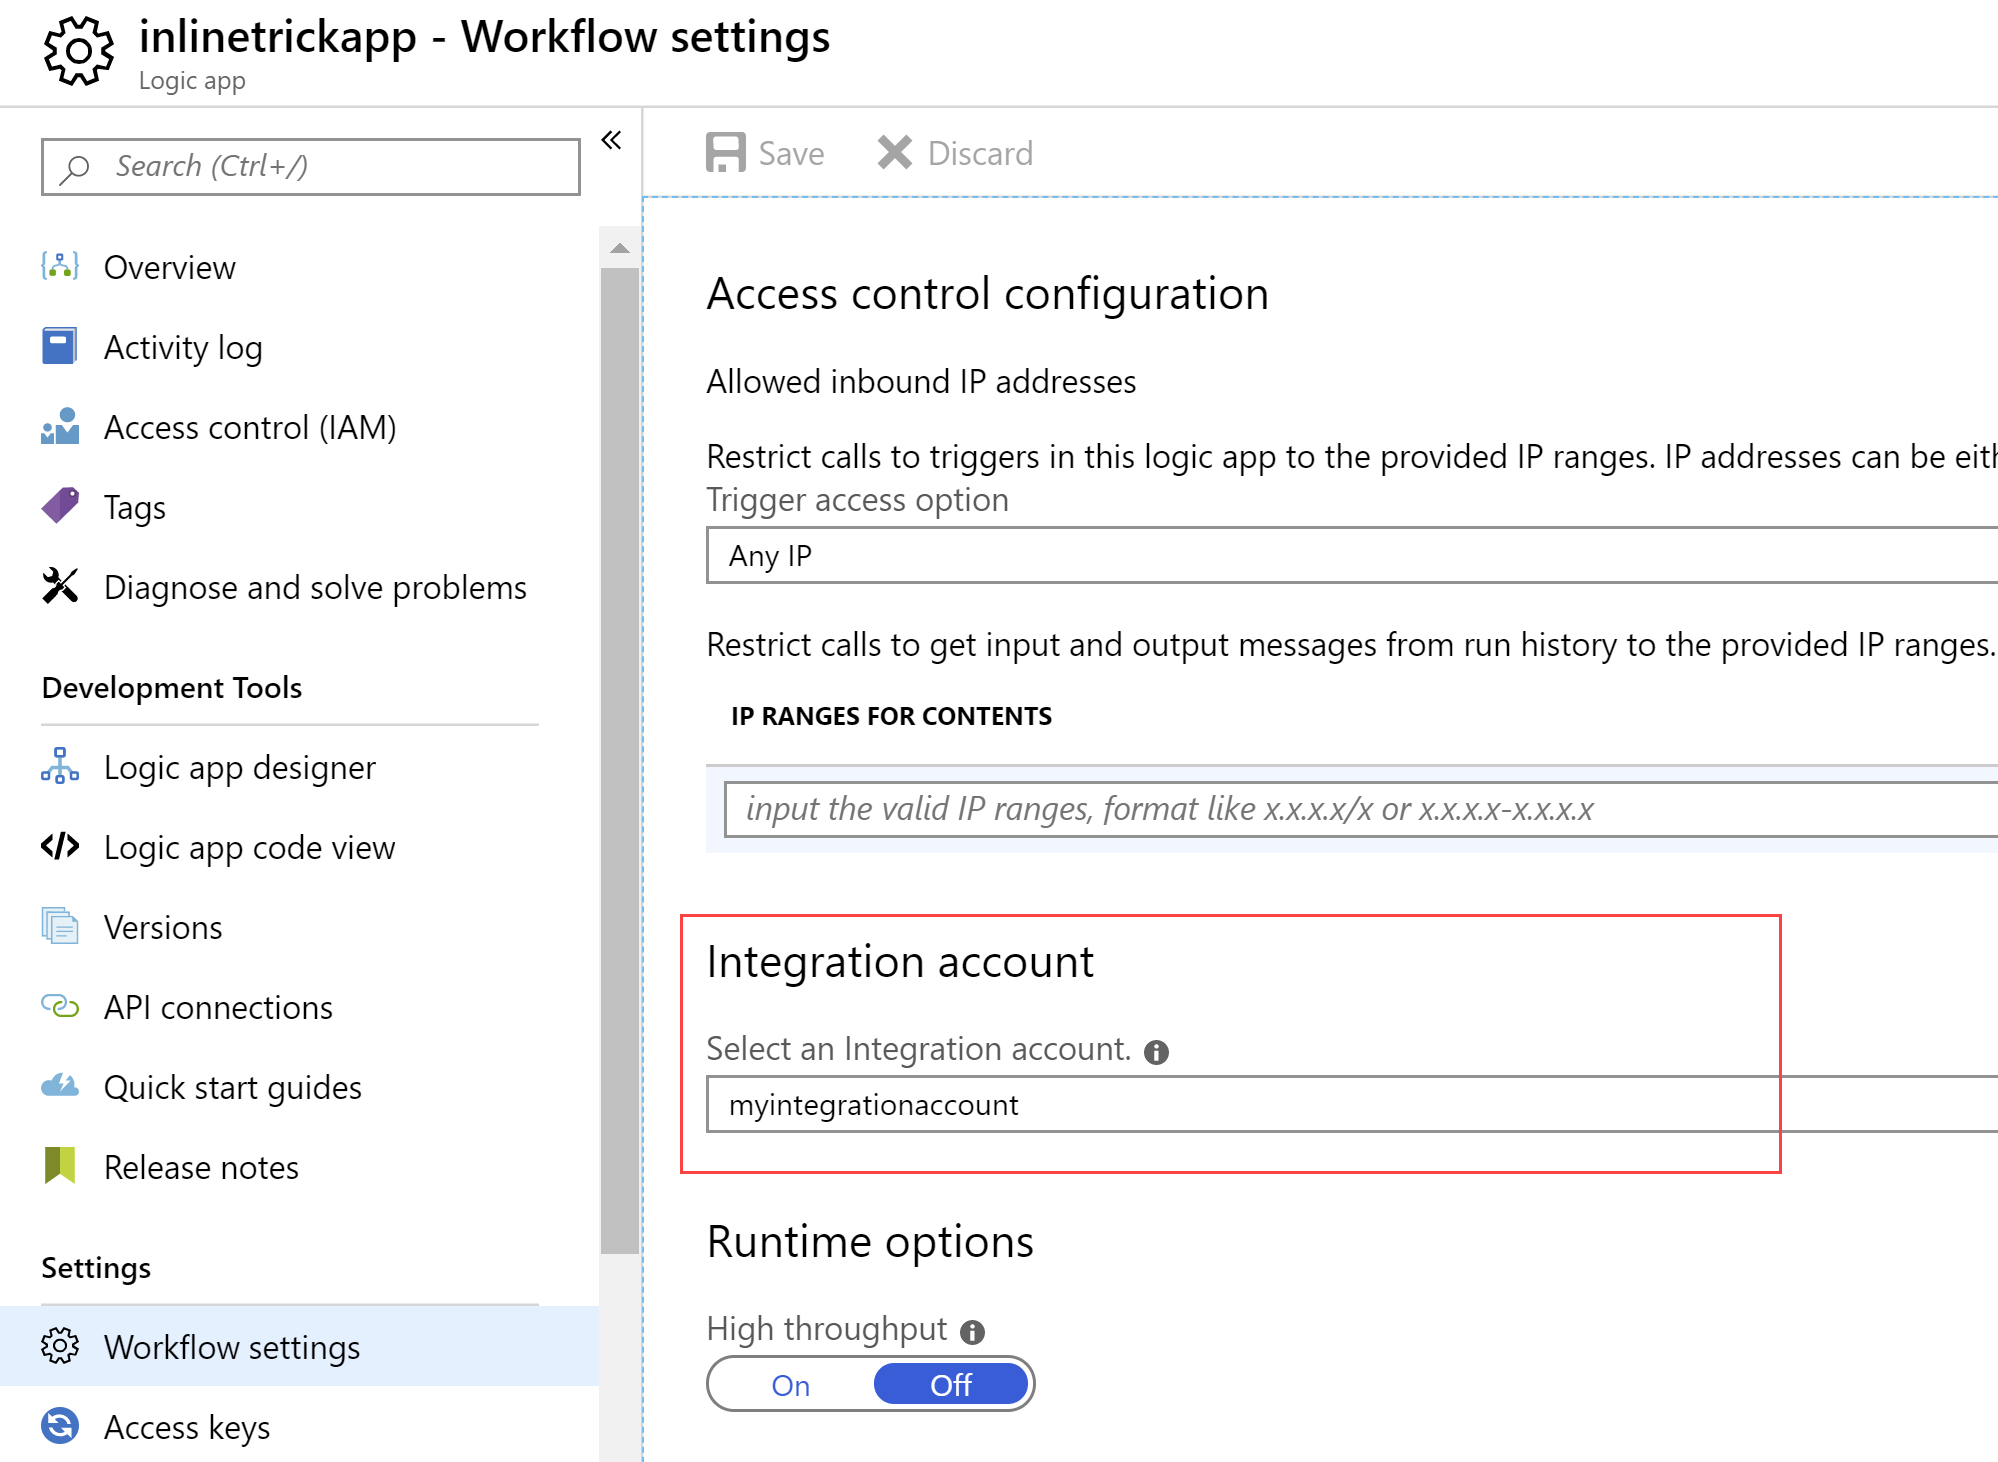
(Couple Integration Account to Logic App)
That's it! We can now create the Logic App process.
# Creating the Logic App process
We will create a simple process that uses inline code. The process will start when I upload a new file in a OneDrive folder and then it will manipulate the text in the file using inline code. Let's set it up.
First, create a new text file and save it on your local machine. With the inline code, we will search through the text in the file and replace the word Portal with portal (with a lower case p). Put the following text in the file:
The Azure Portal is great.

Sometimes, Azure Portal is written with a capital P, which is wrong.
2
3
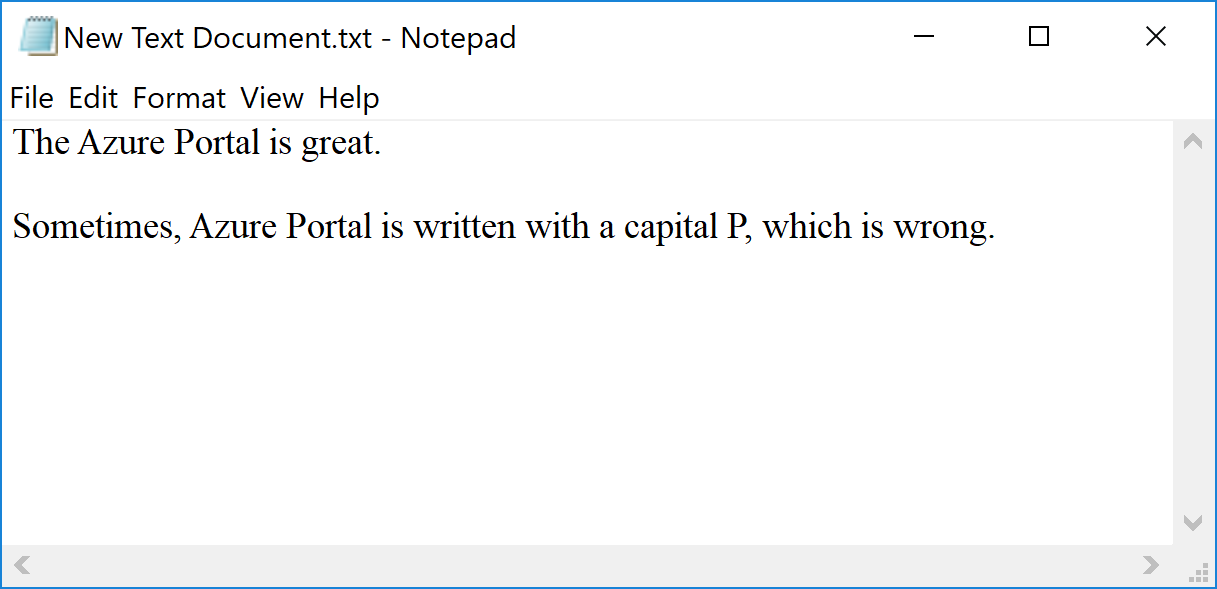
(The original text file)
Next, we'll create the Logic App process:
- Navigate to the Logic App in the Azure portal
- Click on the Logic app designer menu-item to start designing the process a. You might see the Logic App templates when you open the Logic App in the Azure portal. In that case, choose the template Blank Logic App
Next, we'll create the trigger for the logic app. This will start the Logic App and run the process. Search for OneDrive and choose the When a file is created trigger.
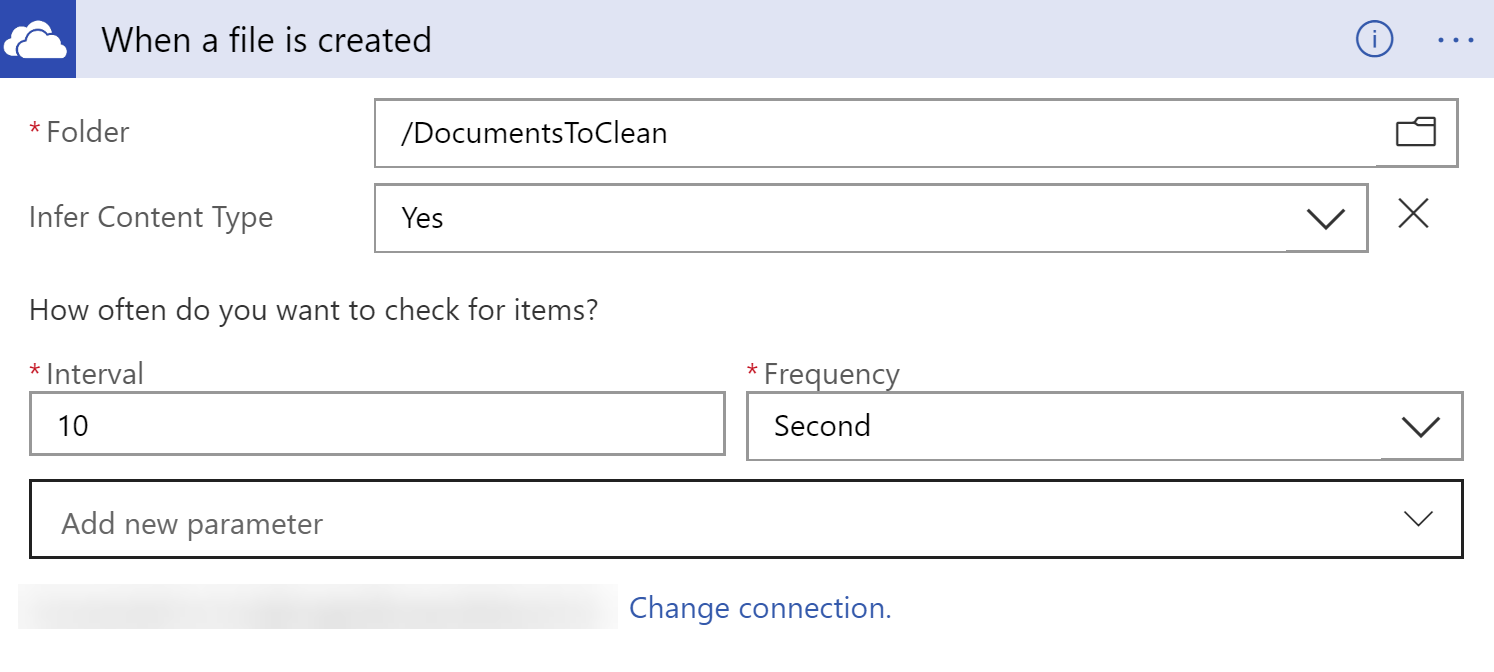
(When a file is created OneDrive trigger)
You will be asked to sign in to OneDrive and give Logic Apps permissions to your OneDrive. Once you have done that, fill in the fields of the trigger:
- Select a Folder to monitor. This is a folder in your OneDrive that we'll use to put a new file in. Choose any folder in your OneDrive
- Change the Interval to 10 seconds. This makes the Logic App check for new files in the Folder every 10 seconds
Next, we'll create the inline code.
- Click the New Step button to create a new step in the process
- Search for Inline Code and select the Inline Code (JavaScript) action
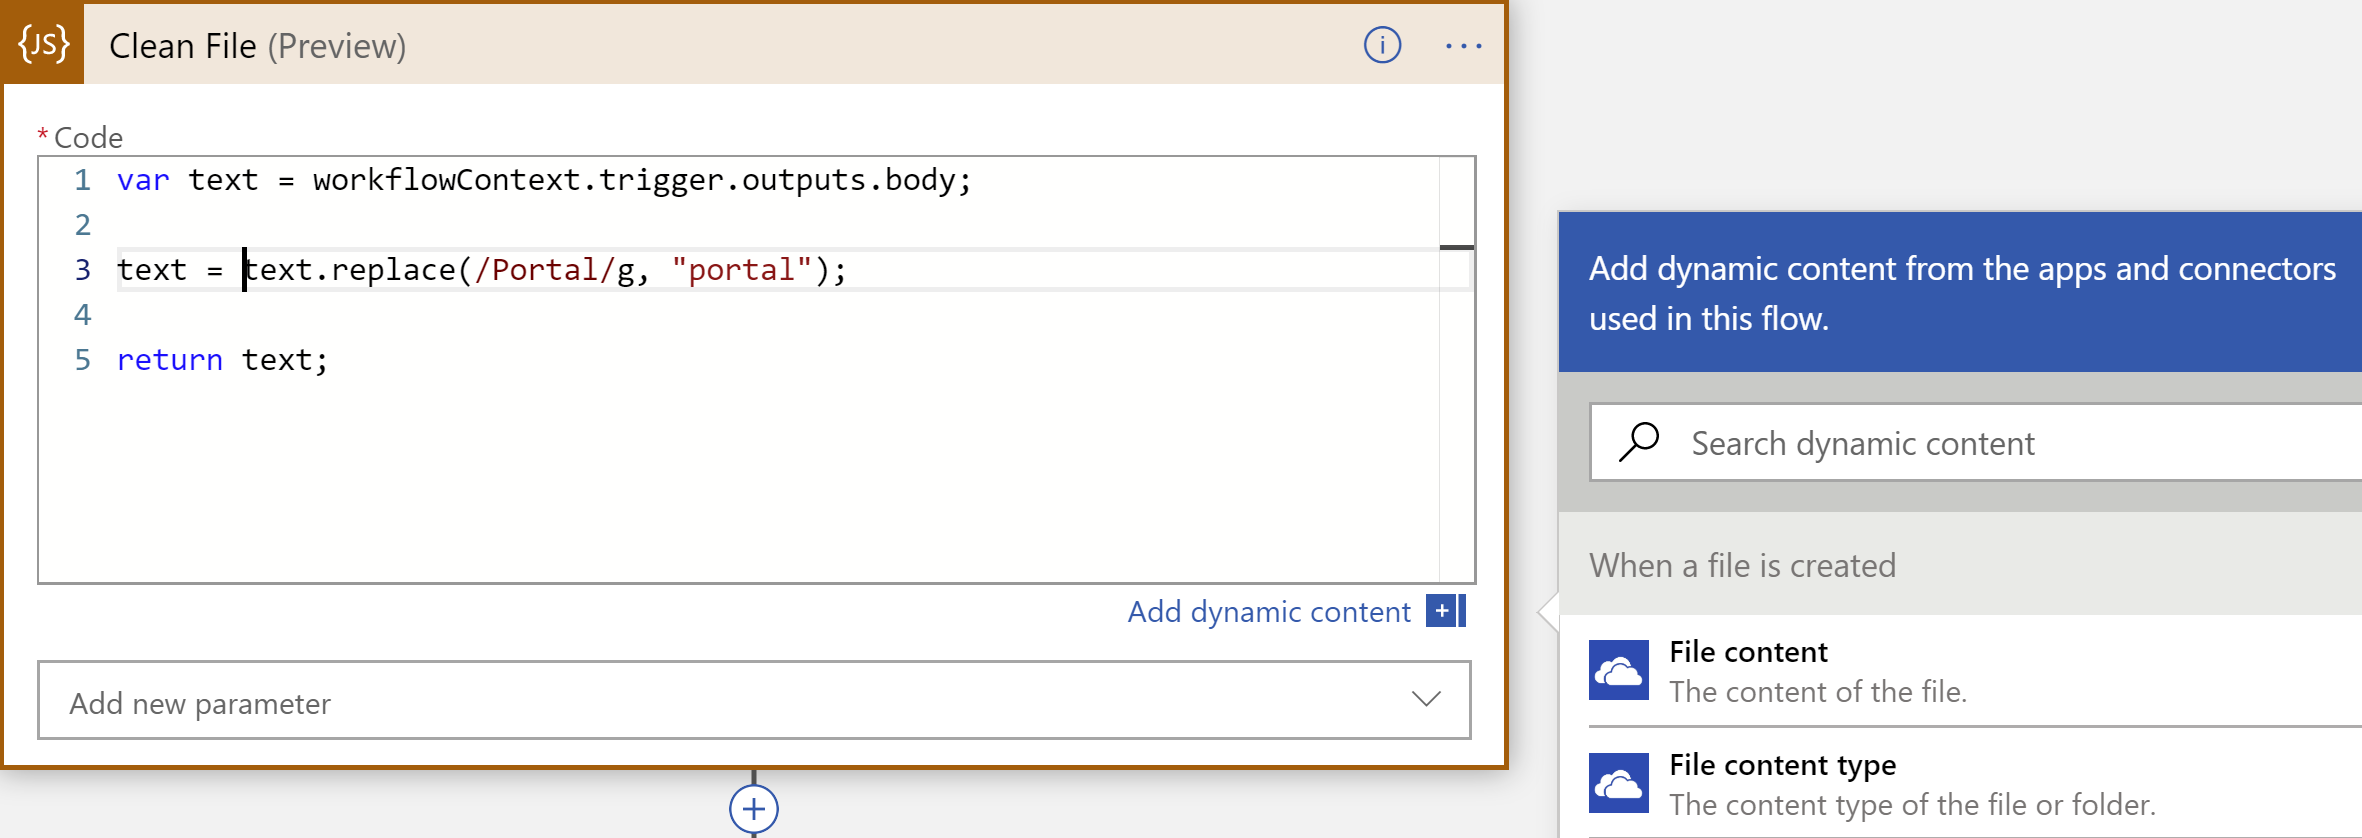
(Inline Code action)
Let's configure the inline code action:
- First, click the ... in the top-right corner of the action and click Rename
- Rename the action to Clean File
- In the Code textbox, type the following JavaScript code:
var text = workflowContext.trigger.outputs.body;

text = text.replace(/Portal/g, "portal");

return text;
2
3
4
5
The inline code uses the text from the trigger step and replaces the word Portal (with a capital P), with the word portal (with a lower case p). The /Portal/g syntax means that the code searches for all instances of 'Portal'. The g indicates that it needs to search globally, throughout the text. When you click in the Code textbox, you'll see that you can use all the values from the previous step.
Now, we need to create the final step:
- Click the New Step button
- Search for OneDrive and select the Update File action. This updates a file in OneDrive with new values

(OneDrive Update File action)
Let's configure the Update File action:
- For File, click in the text box and select the File Identifier value from the OneDrive trigger step
- For File Content, click in the text box and select the Result from the inline code step
a. Sometimes, you can't select the result value from the dynamic content picker. In that case, you can also put the following as the File Content value:This represents the result from the Clean File action, which is the name of the inline action
@body('Clean_File')1
That's it! Now click Save to save the Logic App Process.
# Test the Logic App
Now that the process is complete, we can test the Logic App.
- In the Logic App Designer, click Run a. The Logic App will now wait to be triggered
- Put the text file that we created earlier in the OneDrive folder that the trigger action is monitoring
- After a while, the Logic App will be triggered and you'll see the results, like in the image below:
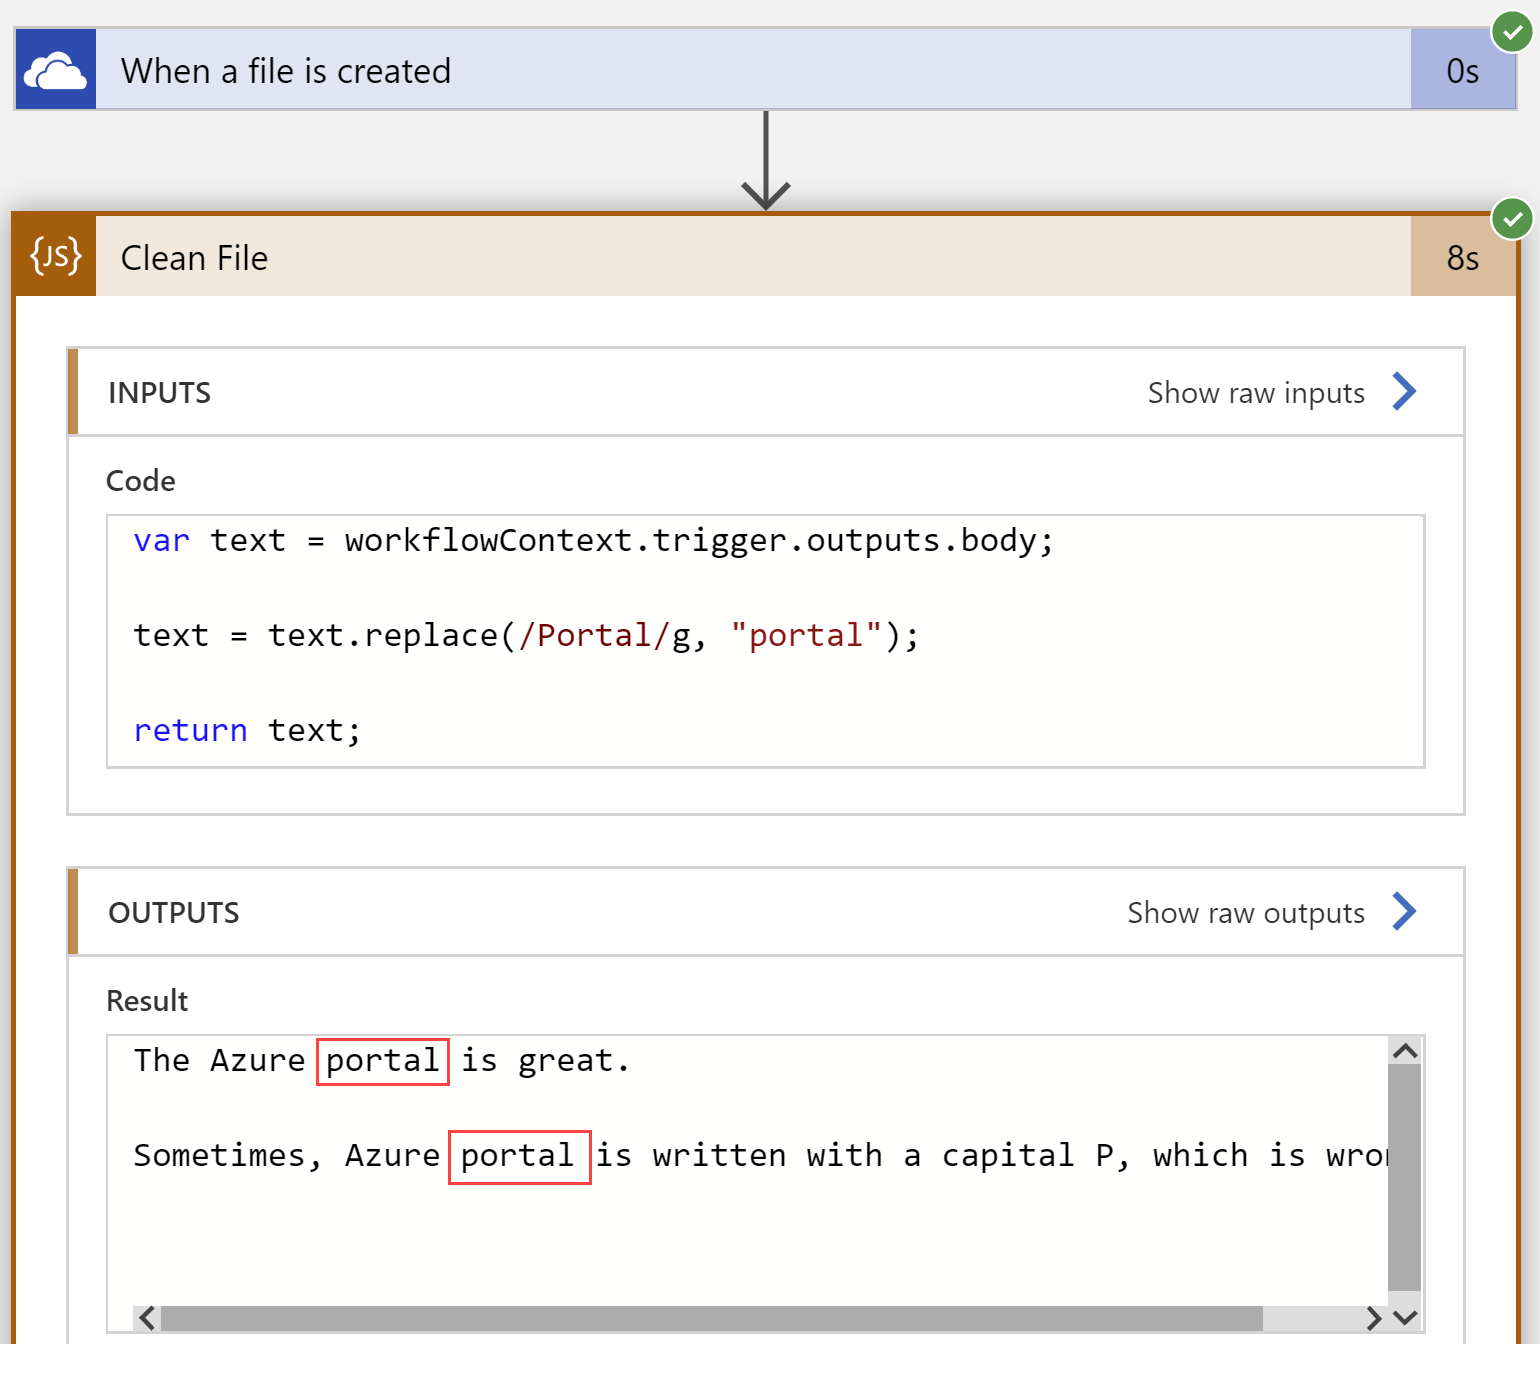
(The result of the Logic App run)
And if you now open the text file in OneDrive, you'll see that the content has changed.
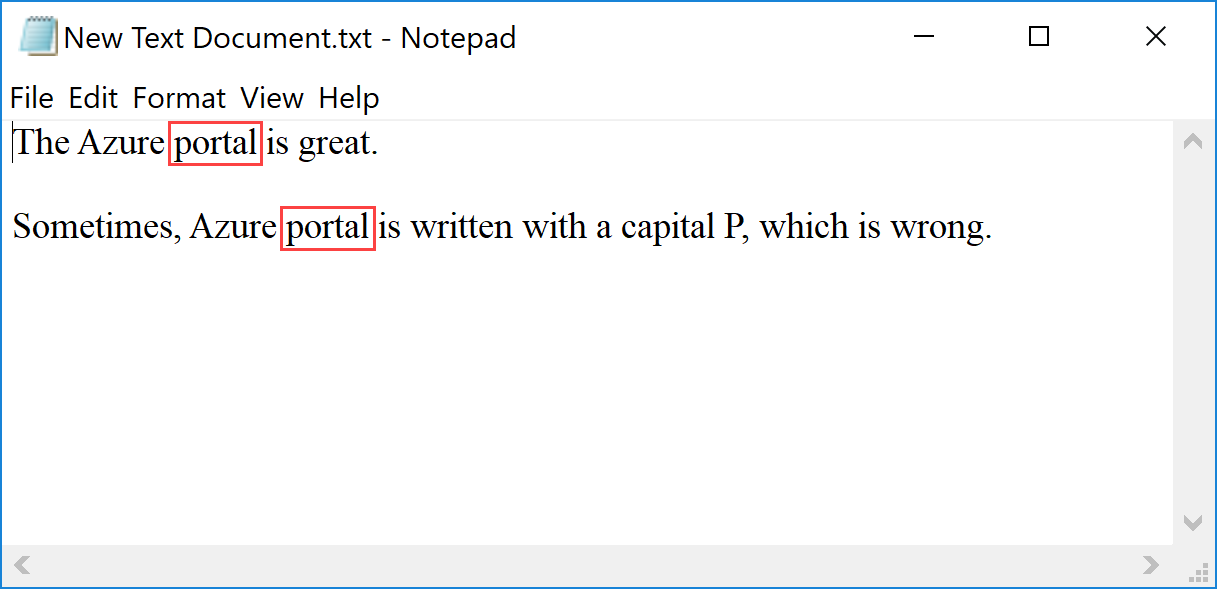
(Updated text file)
# Conclusion
Logic Apps are really powerful and easy to use. The ability to use inline code in a Logic App process, creates endless possibilities. With inline code, you can enhance the process in any way you like. You can build custom conditions and data manipulations and whatever else you need. You can learn more by checking out the reference to the inline code action (opens new window). Go and check it out!
