TIP
🔥 Checkout the Azure Developer page at azure.com/developer (opens new window).
💡 Learn more : New Azure Logic App features in the VS Code extension (opens new window).
📺 Watch the video : How to use the VS Code Logic Apps extension to create stateless workflows (opens new window).
# How to use the VS Code Logic Apps extension to create stateless workflows
# Orchestrate workflows with Azure Logic Apps
Azure Logic Apps (opens new window) provide the central integration solution for your applications and services. Logic Apps enable you to create workflow orchestrations that are triggered by events like a timer or a new message on a queue and can call various APIs (opens new window) in sequence or in parallel to accomplish tasks. Logic Apps run your workflows serverless, without managing infrastructure.
Azure Logic Apps can pass information from one step to subsequent steps. For instance, if one step in a Logic App receives JSON data from an API, you can use that data in a next step to create a file with. This "dynamic content" is retained by Azure Logic Apps. In stateful (opens new window) Logic Apps, this data is retained in external storage, which makes it easy to re-run the workflow and restart it if it is interrupted by downtime. You can also create a stateless Logic App. A stateless app retains its dynamic content only in memory, which makes it faster and less expensive to run, although it won't be able to restart its workflow after an interruption.
In this post, we'll create and run a stateless Azure Logic App, locally, with VS Code.
# Prerequisites
If you want to follow along, you'll need the following:
- An Azure subscription (If you don't have an Azure subscription, create a free account (opens new window) before you begin)
- Azure Storage Emulator 5.10 (opens new window)
- To run the emulator, you need to have a local SQL DB installation, such as the free SQL Server 2019 Express Edition (opens new window)
- Before you open the Logic App Designer in VS Code, run the Azure Storage Emulator
- The latest version of VS Code (opens new window)
- The VS Code Azure Account extension (opens new window)
- The VS Code C# for Visual Studio Code extension (opens new window)
- Azure Functions Core Tools (opens new window) (v3 or higher)
- .NET Core SDK 3.1 (opens new window)
- An Azure Storage Account with a Storage Queue. Learn how to create one in this quickstart (opens new window)
# Create a stateless Logic App workflow with VS Code
Let's create a new Azure Logic App from VS Code.
- Open VS Code
- Go to the Extensions menu
- To create stateless Logic Apps, we need the newest Azure Logic Apps Extension. Search for Logic Apps and install the newest Logic Apps extension (opens new window)

(Newest Azure Logic Apps extension for VS Code)
- When the extension is installed, select the Azure menu in VS Code
- You'll see a section for Logic Apps. Sign into Azure if it asks you to
- In the Logic Apps section, click Create New Project
- Select a folder to store the new Logic App project in
- Select Stateless workflow
- Type in a name for the workflow and press Enter
- Choose to open the project in the current window to open the Logic App project

(Azure Logic Apps in VS Code)
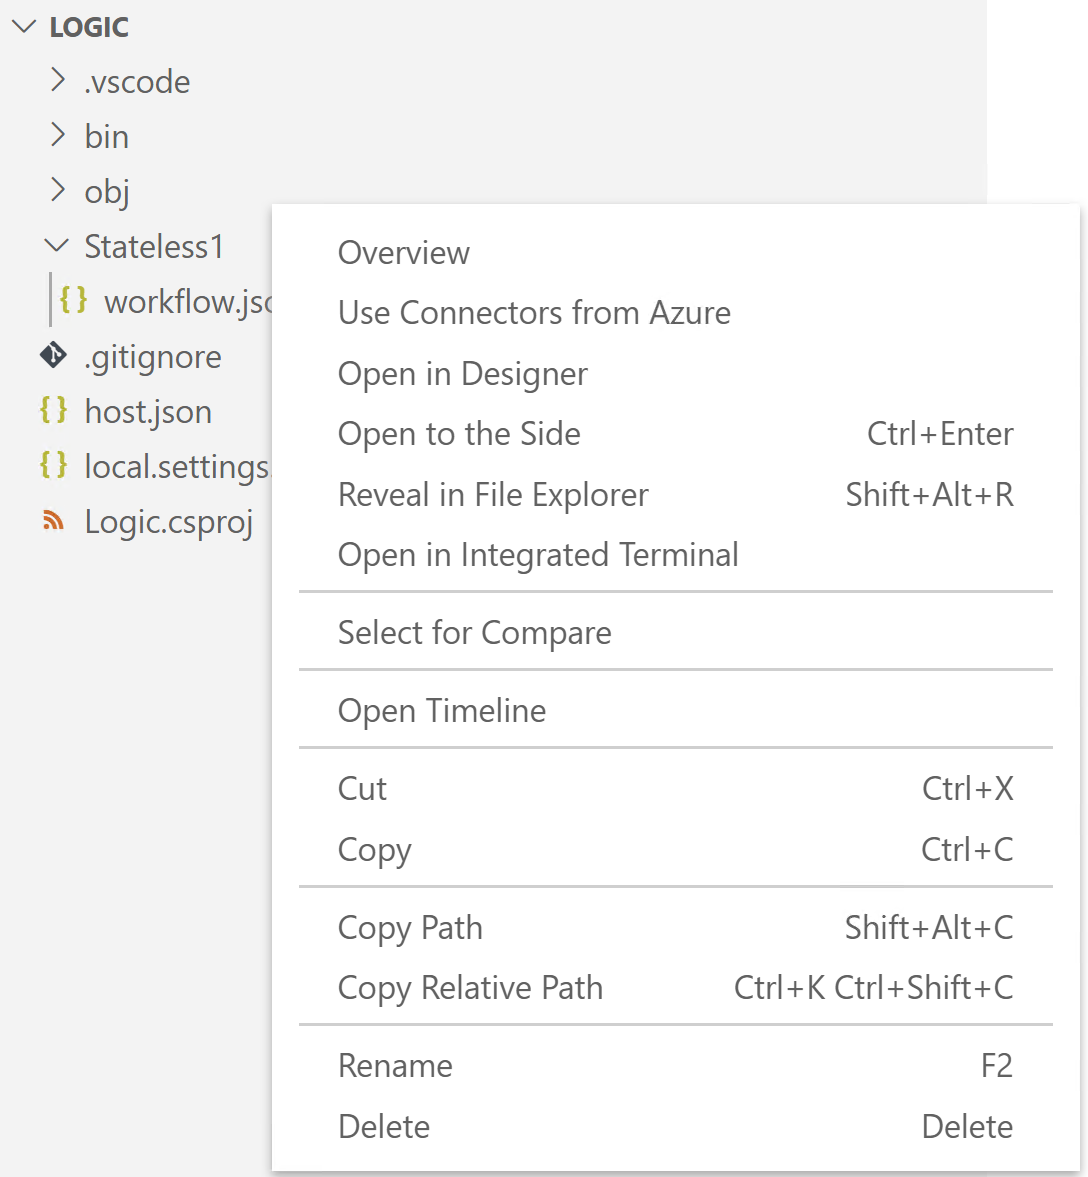
- In the Logic App code, you'll see a file called workflow.json. Right-click on the file and select Open in Designer
- When asked, choose Use connectors from Azure
- Also, select a Resource Group in Azure to store new resources in
- In the workflow designer, select the trigger "When a HTTP request is received". This will trigger the workflow when a HTTP request is received on a certain URL
- Next, click on New step
- In the Add and action tab on the right, select the Azure tab
- Search for "queue" and select Azure Queues
- Next, select the action "Put a message on a queue"
- Now we need to create a connection to Azure Storage. Select the Azure Storage account that contains the queue that you want to use
- In the next screen, select the name of the Azure Storage Queue that you want to send a message to
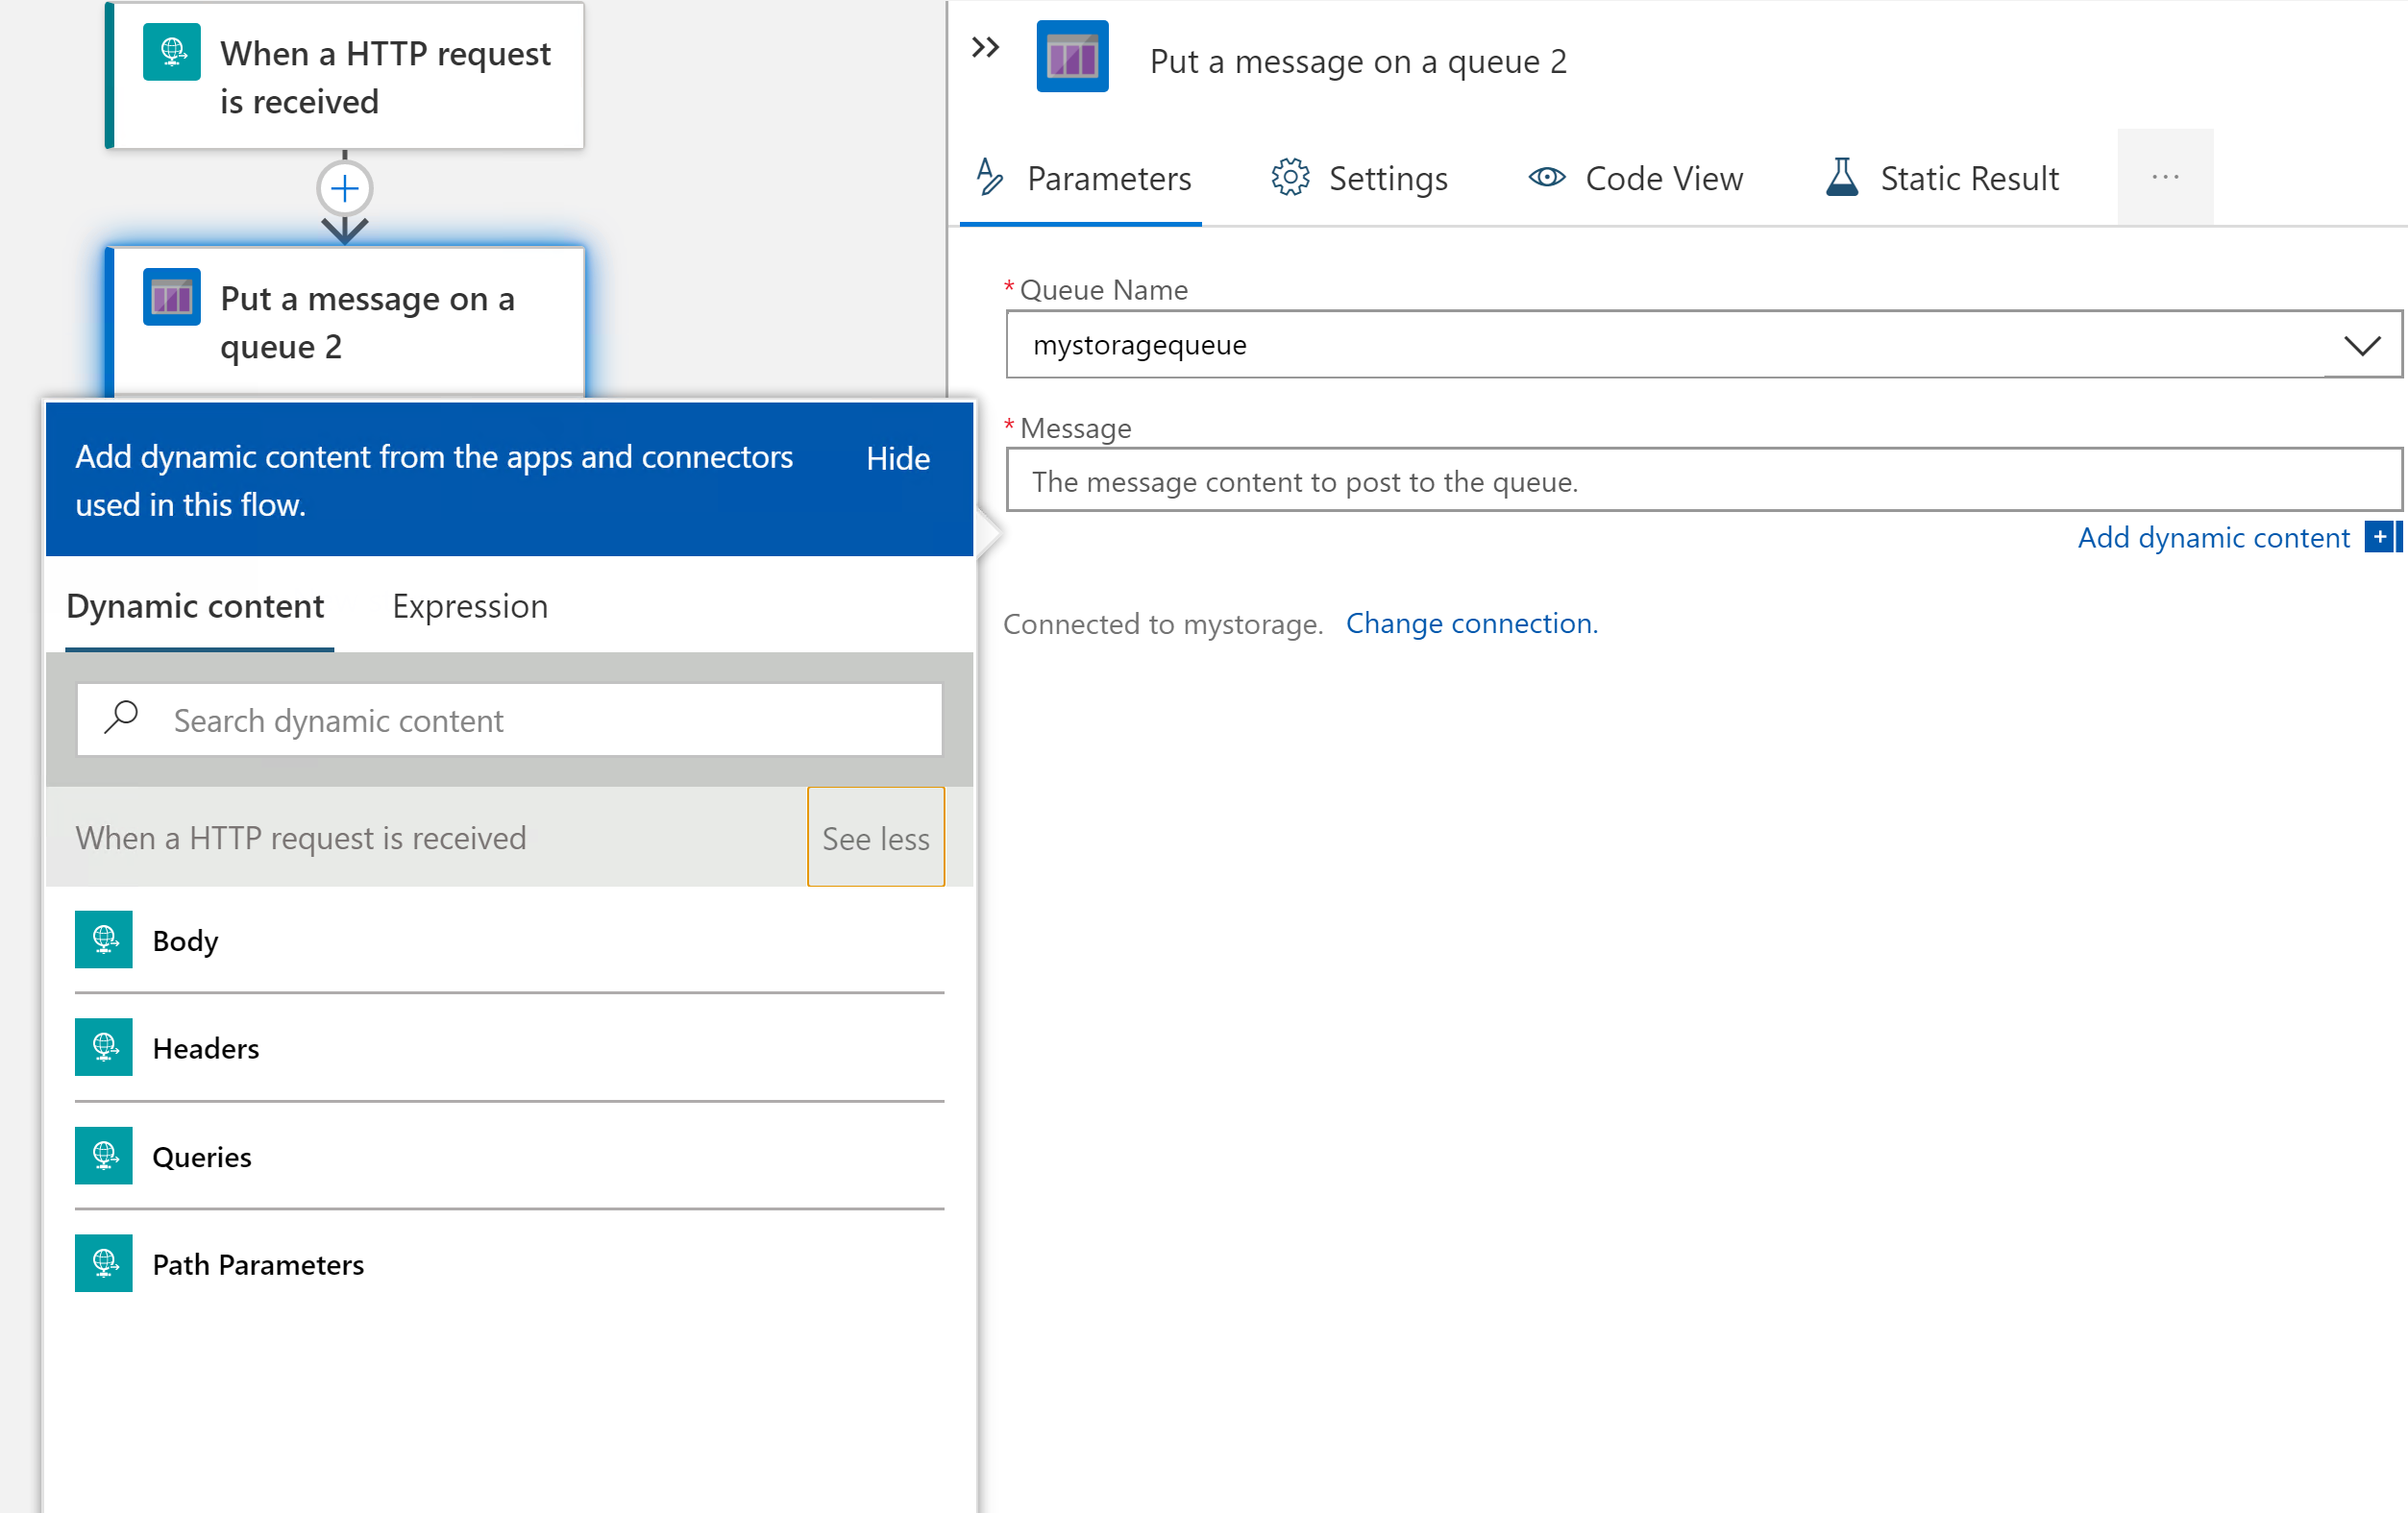
- Select the Message input box. This makes the dynamic content window appear. Click on See more in the dynamic content window to see all the data fields that you can use from the previous step. Select Queries, to fill the message with whatever is in the querystring of the request that triggers the workflow

(Dynamic content window)
- That's it! Click Save to save the workflow. You'll see that saving creates a connections.json file which contains the connection information for Azure Storage
- Let's test the workflow by pressing F5 in VS Code. This will start the workflow on the local Azure Functions Runtime and will expose an HTTP endpoint for it that we can call to trigger it
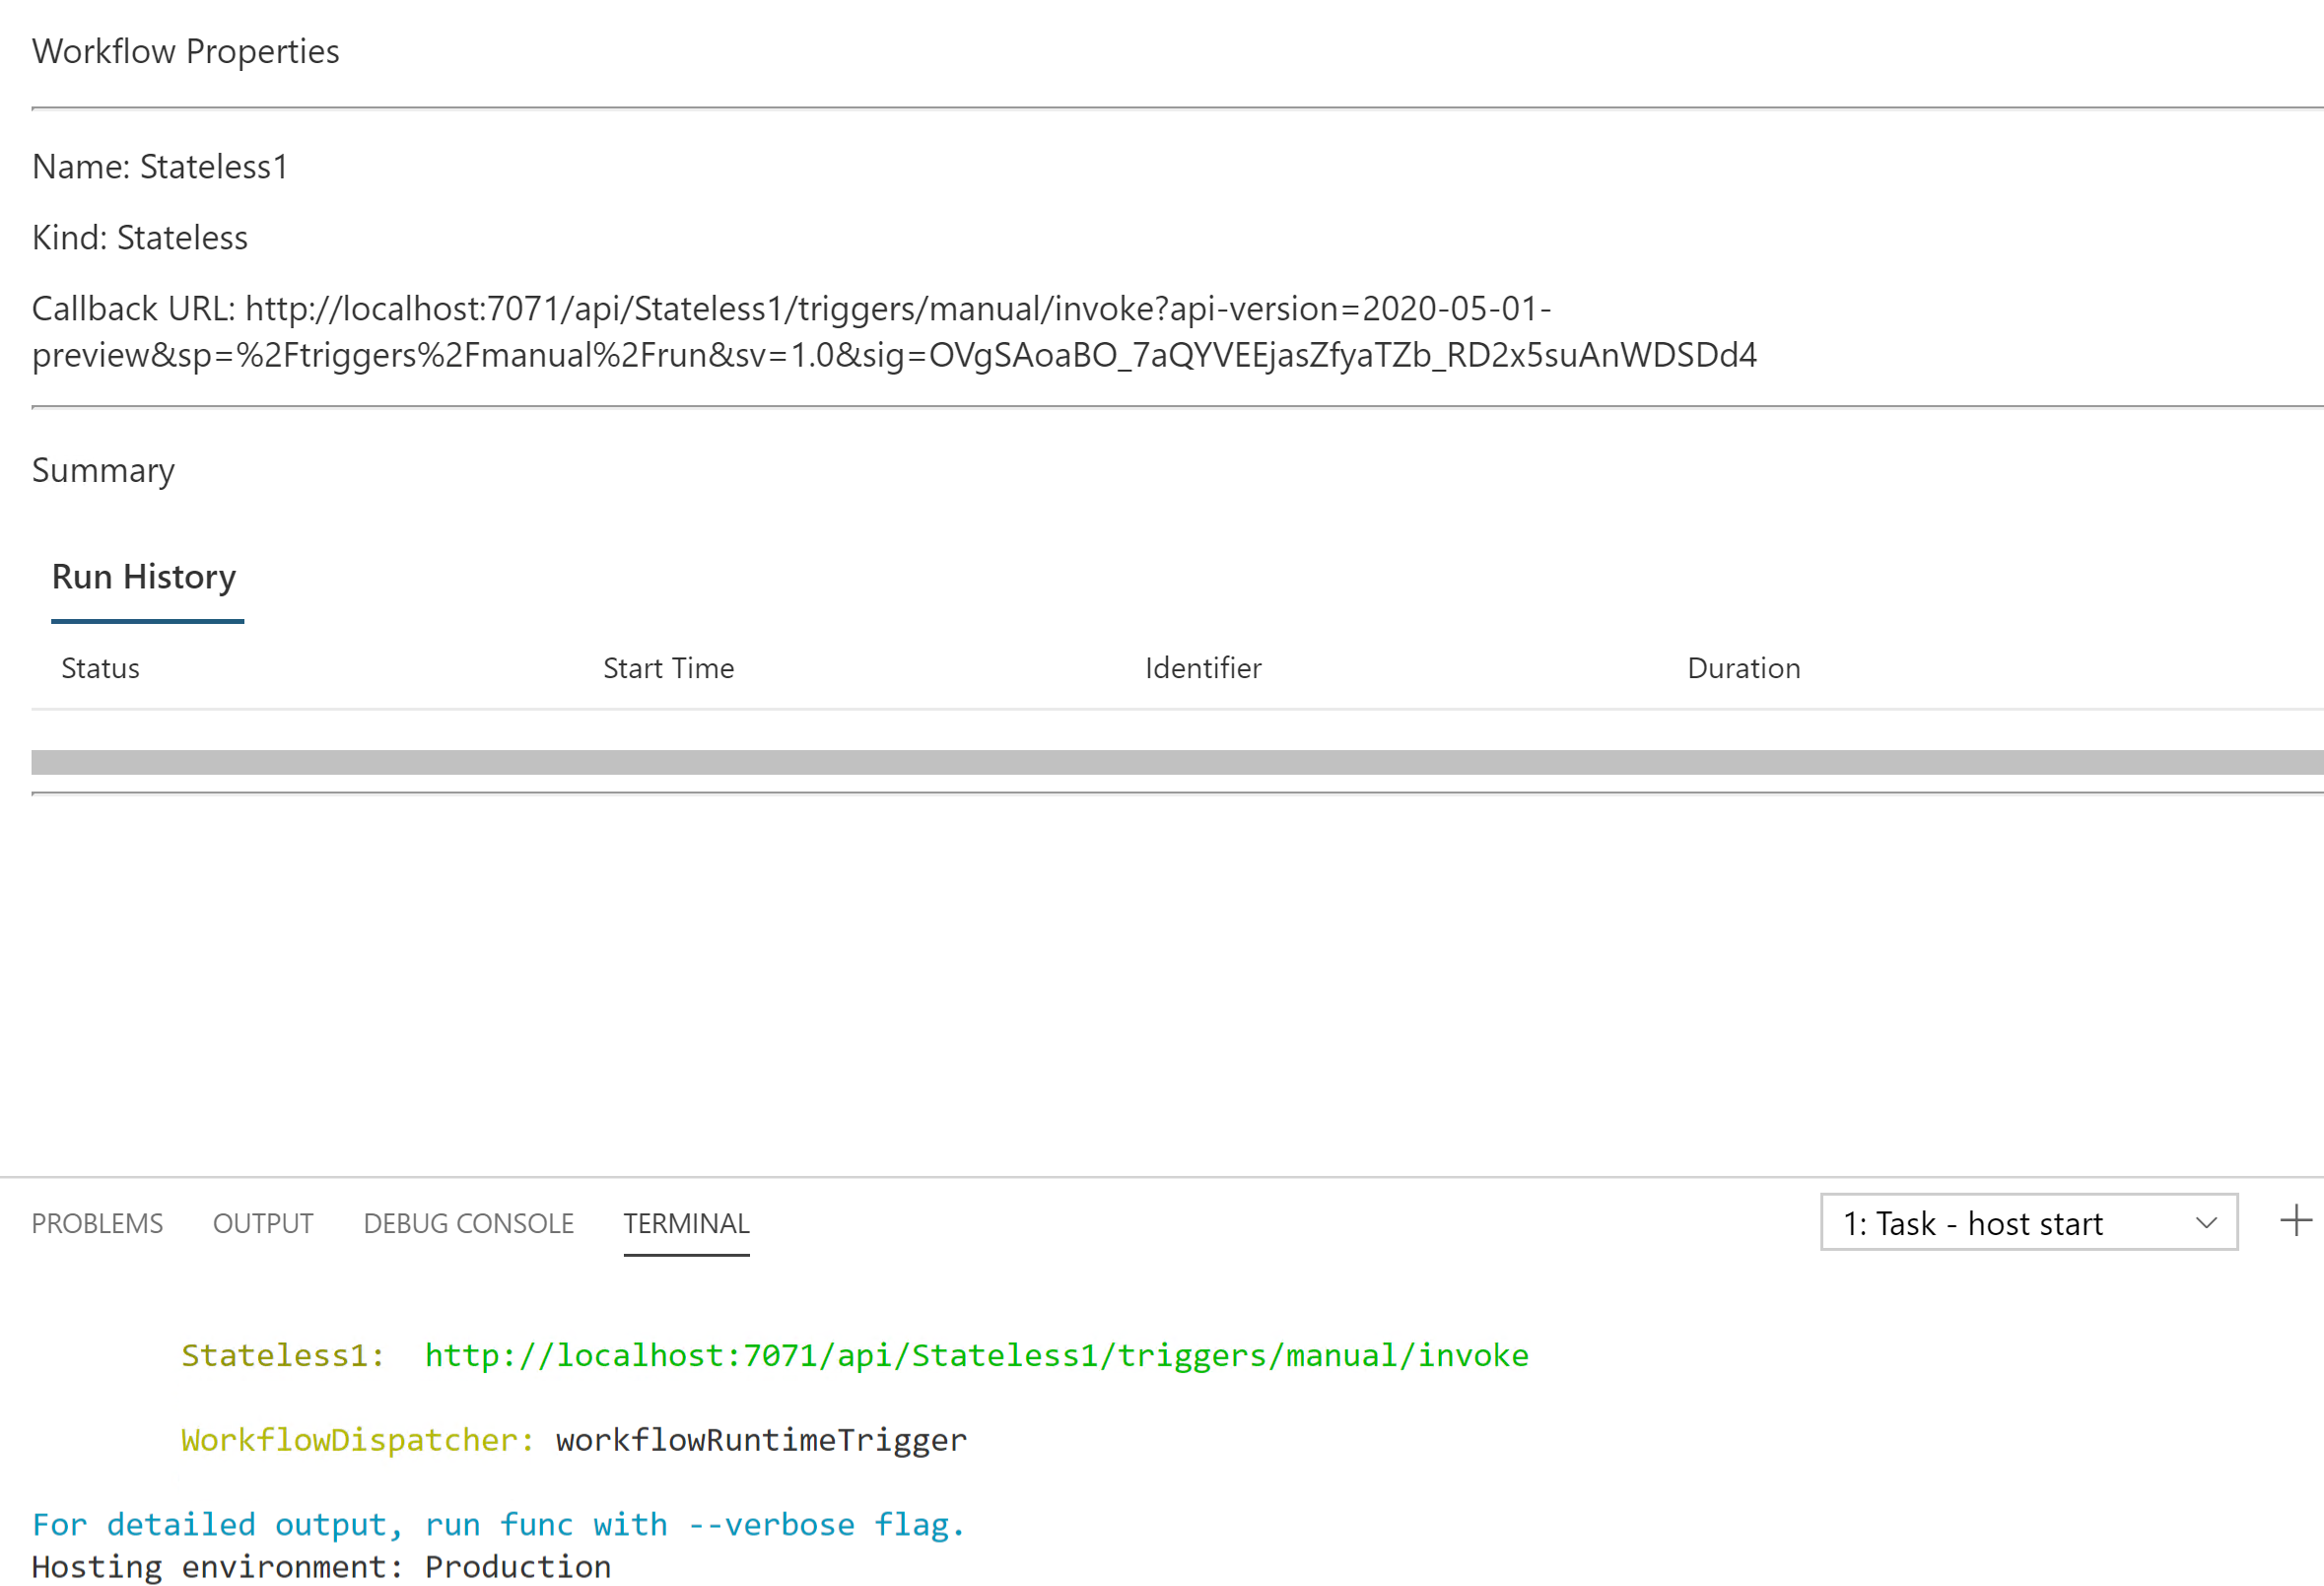
- When the workflow is running, right-click on the workflow.json file and select Overview. This will show the trigger URL to call. Copy the complete URL

(Overview tab with HTTP trigger URL)
- Open a browser and paste in the URL and append it with &thistextwillbequeued
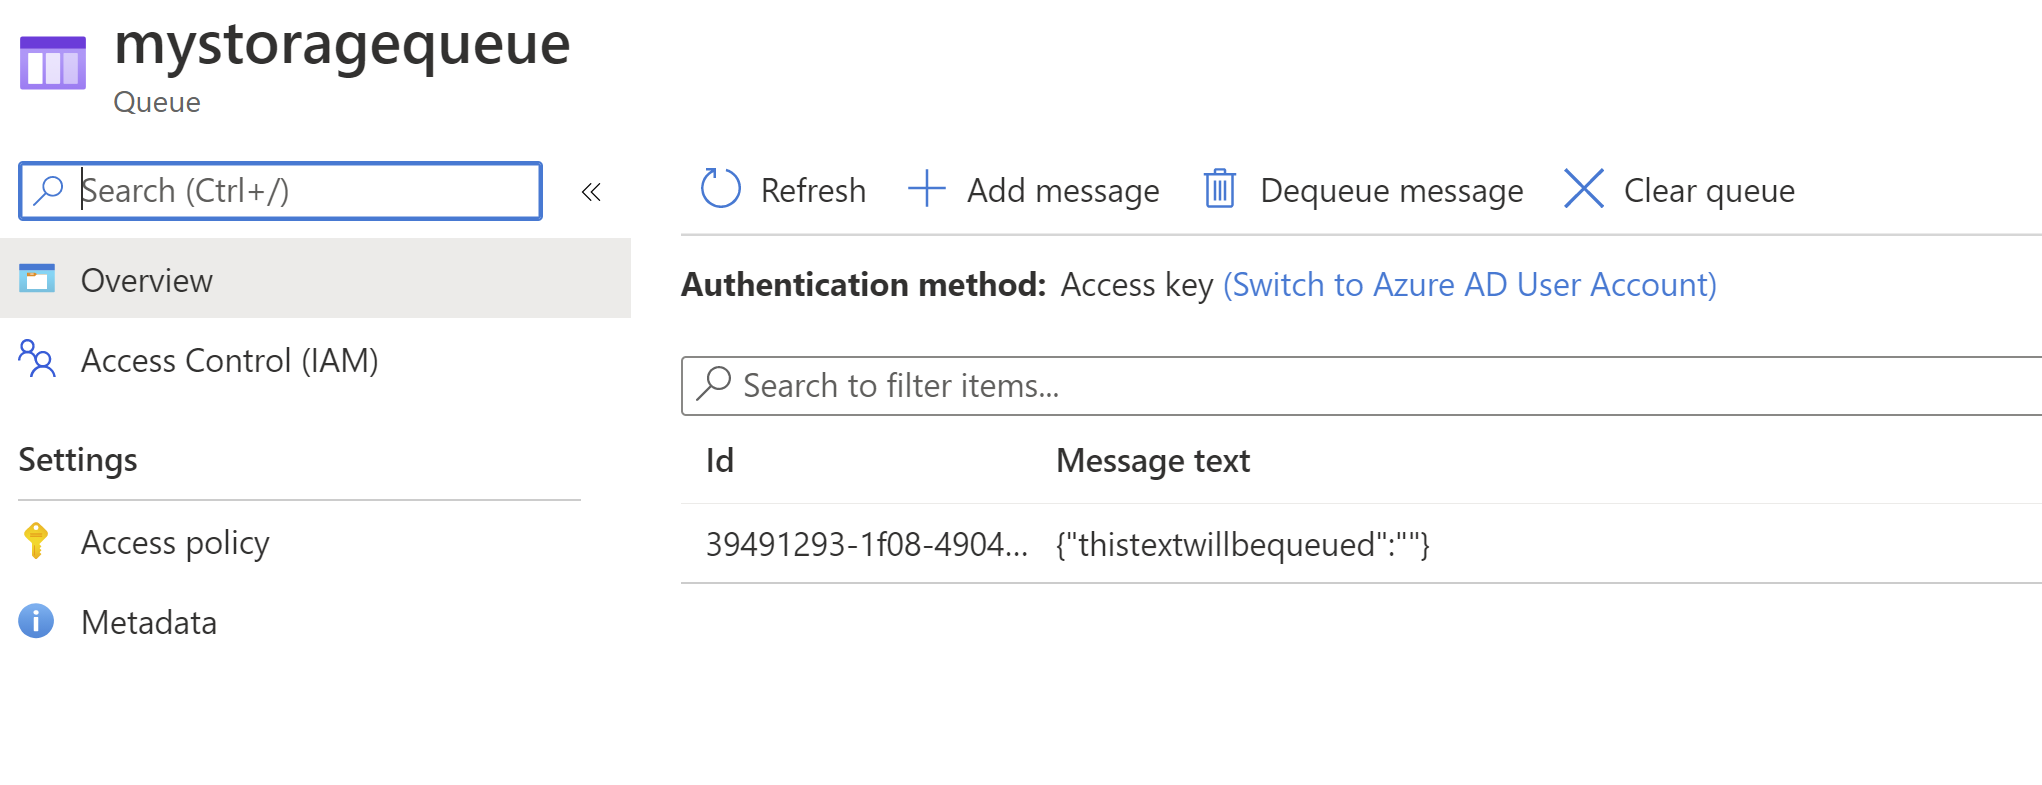
- Check the Azure Storage Queue. This should have a new message in it with the text thistextwillbequeued, which is what we appended as a querystring to the HTTP request that triggered the workflow

(Message in Azure Storage Queue)
# Conclusion
Azure Logic Apps (opens new window) is great for easily creating comprehensive workflows. It is made even easier with the VS Code extension for Azure Logic Apps (opens new window) and is made faster and less expensive by using stateless workflows (opens new window). Go and check it out!
