Task 03: Call your Power Automate cloud flow from Copilot Studio
Introduction
To enhance Contoso’s customer interactions, the agent needs to integrate seamlessly with automated processes. By connecting conversational topics to Power Automate cloud flows, the agent will dynamically fetch and provide customers with relevant information in real-time.
Description
In this task, you’ll integrate your previously created Power Automate cloud flow with the conversational topic in Microsoft Copilot Studio. You’ll configure the flow invocation and pass collected customer inputs to automate the process of information retrieval.
Success criteria
- You’ve linked your conversational topic to the Power Automate cloud flow.
- You’ve correctly configured topic variables to pass inputs to the flow.
- You’ve verified through testing that the integration works correctly.
Key tasks
01: Call your Power Automate cloud flow from Copilot Studio
Expand this section to view the solution
-
In the new Action node, under Power Automate inputs, select the ellipsis (…) next to Enter or select a value, then select the TicketNumber variable.
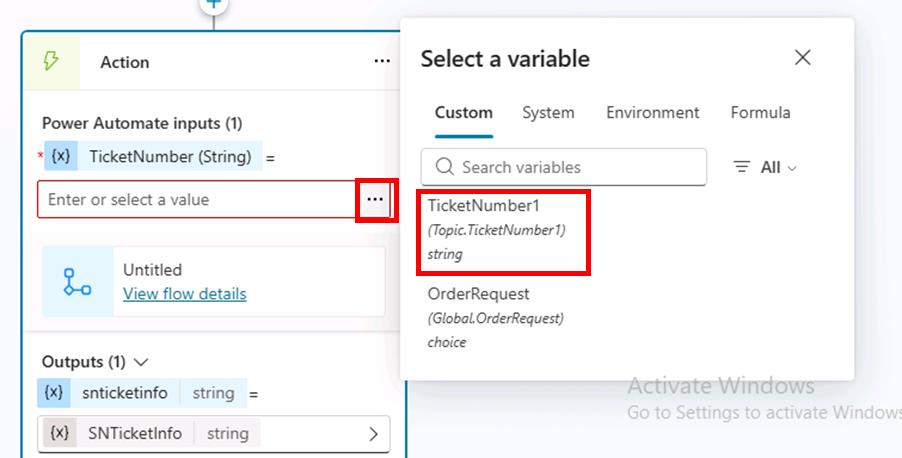
This is now connected to the Power Automate flow, and outputs the result from Power Automate into the SNTicketInfo variable.
Pro tips:
- If latency is expected from your integration, go the action’s properties and add a latency message , for example:
I'm getting these details for you. Hold on... - Consider using HTTP requests and connectors directly in Microsoft Copilot Studio to avoid the added latency of invoking and running a cloud flow in Power Automate.
- If latency is expected from your integration, go the action’s properties and add a latency message , for example:
-
As ServiceNow will return the full details of the incident in a JSON format, you need to parse it so that Copilot Studio fully understands its content based on its schema.
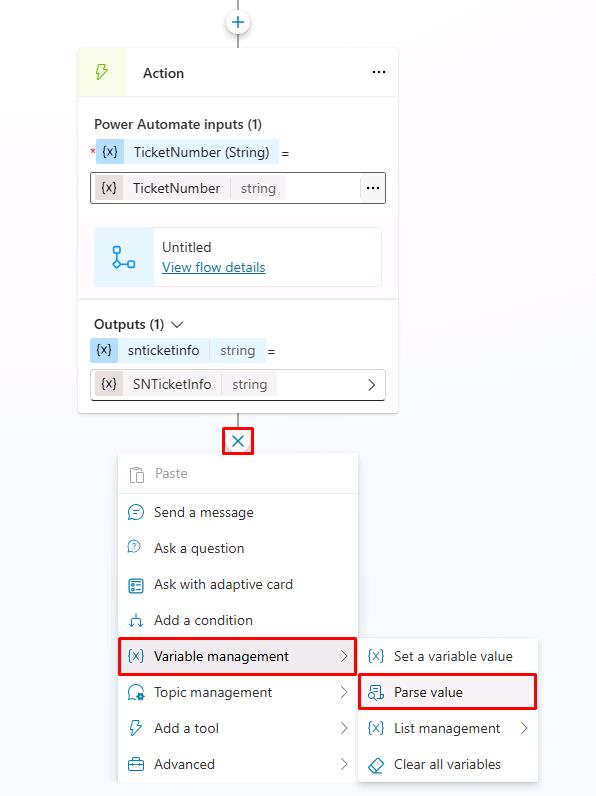
Under the Action node, select the + button, select Variable Management, then select Parse value.
To parse the JSON you can use the Rest API Explorer in ServiceNow to get the structure of the body, or get the schema from a sample payload. For the exercise, we’re providing sample ServiceNow data.
-
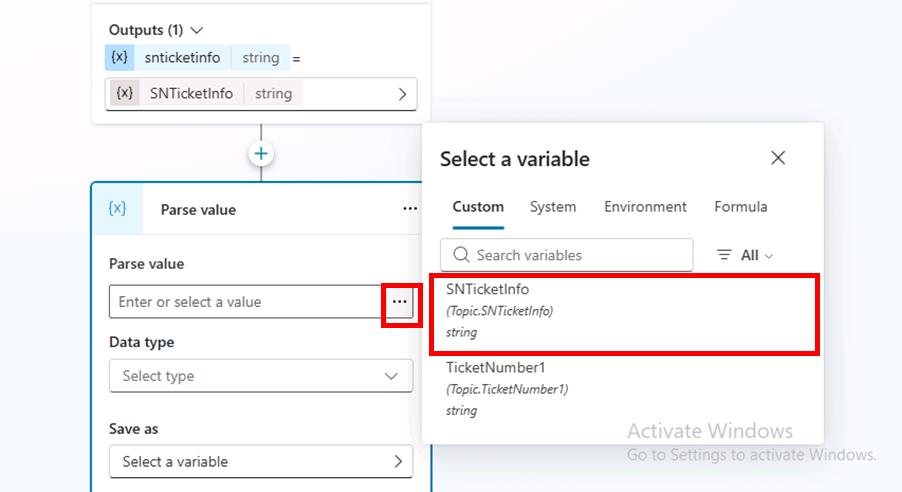
Under Parse value, select the ellipsis (…), then select the SNTicketInfo variable.
-
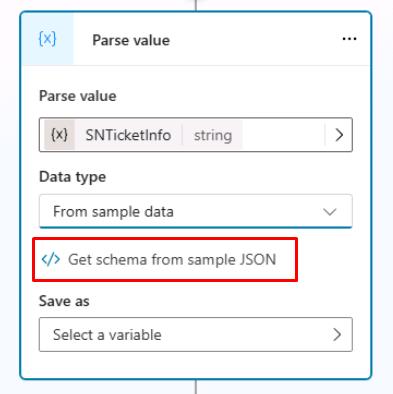
For Data type, select From sample data from the dropdown menu.
-
Select Get schema from sample JSON.
-
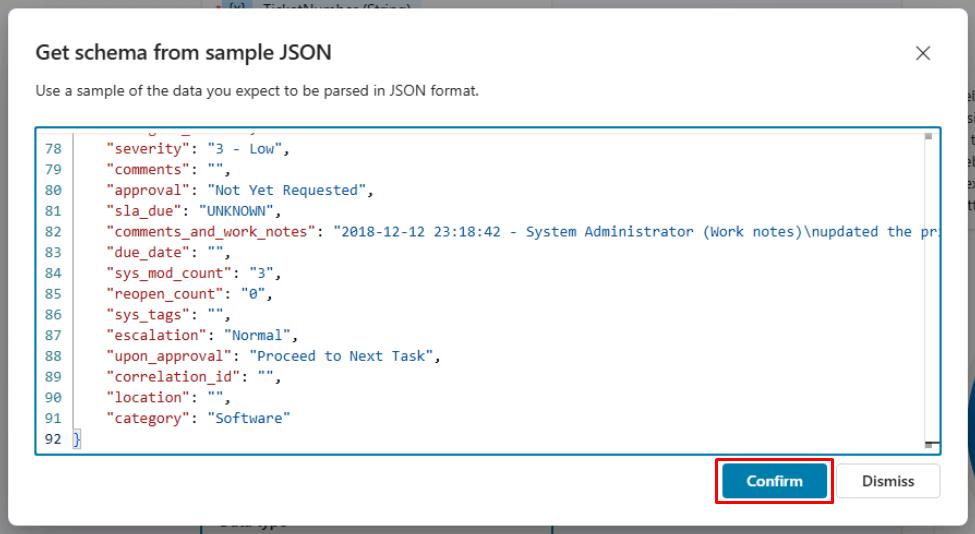
Paste the schema below.
Use the Copy option on the following code block and paste it with Ctrl+V, rather than use Type.
{ "parent": "", "made_sla": "true", "caused_by": "", "watch_list": "", "upon_reject": "Cancel all future Tasks", "sys_updated_on": "2018-12-12 23:18:55", "child_incidents": "0", "hold_reason": "", "origin_table": "", "task_effective_number": "INC0009005", "approval_history": "", "number": "INC0009005", "resolved_by": "", "sys_updated_by": "admin", "opened_by": "System Administrator", "user_input": "", "sys_created_on": "2018-08-31 21:35:45", "sys_domain": "global", "state": "New", "route_reason": "", "sys_created_by": "admin", "knowledge": "false", "order": "", "calendar_stc": "", "closed_at": "", "cmdb_ci": "", "delivery_plan": "", "contract": "", "impact": "1 - High", "active": "true", "work_notes_list": "", "business_service": "", "business_impact": "", "priority": "1 - Critical", "sys_domain_path": "/", "rfc": "", "time_worked": "", "expected_start": "", "opened_at": "2018-08-31 21:35:21", "business_duration": "", "group_list": "", "work_end": "", "caller_id": "David Miller", "reopened_time": "", "resolved_at": "", "approval_set": "", "subcategory": "Email", "work_notes": "2018-12-12 23:18:42 - System Administrator (Work notes)\nupdated the priority to high based on the criticality of the Incident.\n\n", "universal_request": "", "short_description": "Email server is down.", "correlation_display": "", "delivery_task": "", "work_start": "", "assignment_group": "", "additional_assignee_list": "", "business_stc": "", "cause": "", "description": "Unable to send or receive emails.", "origin_id": "", "calendar_duration": "", "close_notes": "", "notify": "Do Not Notify", "service_offering": "", "sys_class_name": "Incident", "closed_by": "", "follow_up": "", "parent_incident": "", "sys_id": "ed92e8d173d023002728660c4cf6a7bc", "reopened_by": "", "incident_state": "New", "urgency": "1 - High", "problem_id": "", "company": "", "reassignment_count": "0", "activity_due": "2018-12-13 01:18:55", "assigned_to": "", "severity": "3 - Low", "comments": "", "approval": "Not Yet Requested", "sla_due": "UNKNOWN", "comments_and_work_notes": "2018-12-12 23:18:42 - System Administrator (Work notes)\nupdated the priority to high based on the criticality of the Incident.\n\n", "due_date": "", "sys_mod_count": "3", "reopen_count": "0", "sys_tags": "", "escalation": "Normal", "upon_approval": "Proceed to Next Task", "correlation_id": "", "location": "", "category": "Software" } -
Select Confirm.
-
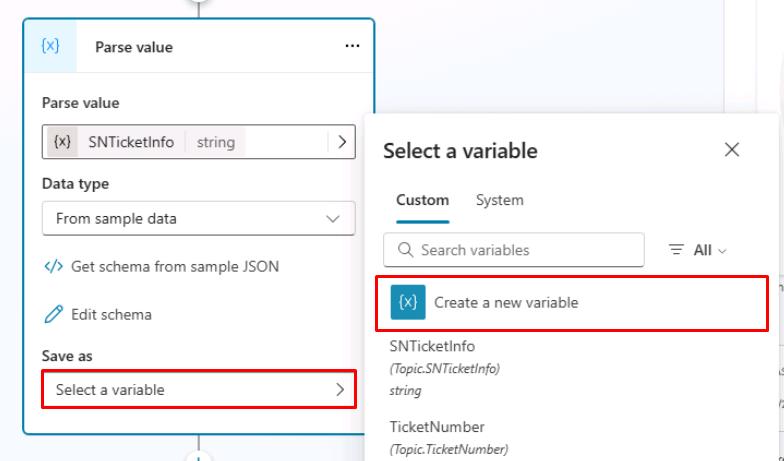
Still in the Parse value node, under Save as, select Select a variable, then select Create a new variable.
-
Select the new Var1 variable, then for Variable name enter
SNTicketInfoParsed.The variable type will automatically be set based on its schema (record).
-
Under the Parse value node, add a new Message node, then enter the following message:
The status of ticket {Topic.TicketNumber} ({Topic.SNTicketInfoParsed.short_description}) is {Topic.SNTicketInfoParsed.state}.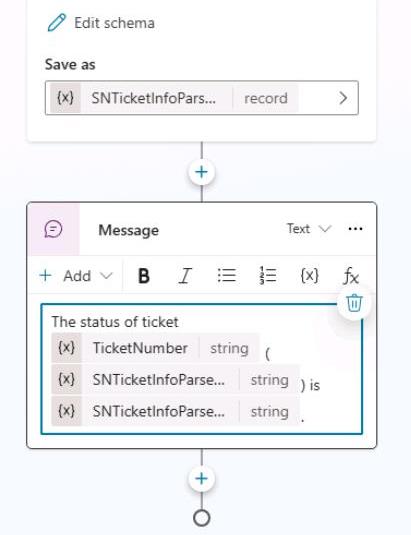
You can bold key information either with the command bar or by surrounding the text with **.
Copilot Studio and some channels support Markdown for simple formatting.
You can look above at the sample JSON to see what data would be returned in what value.
-
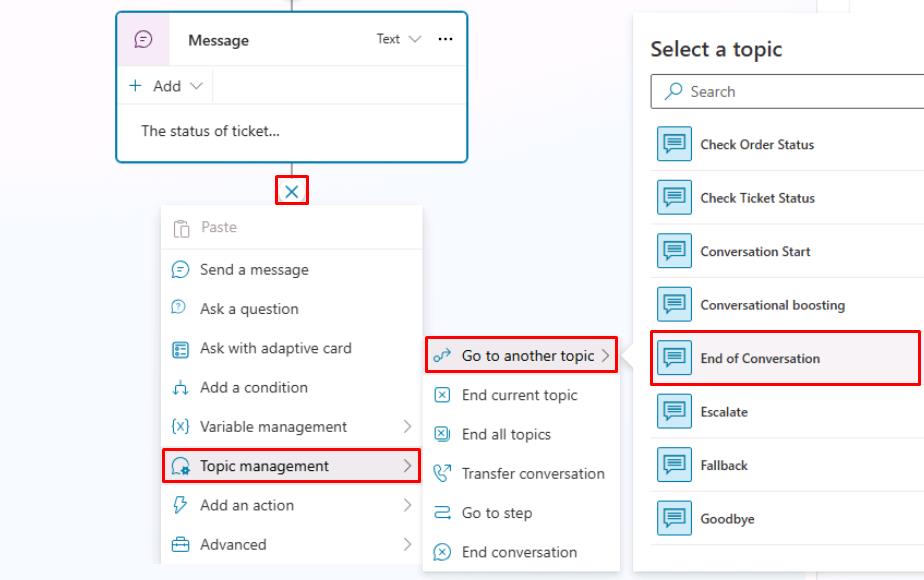
Under the Message node, select the + button, select Topic management, select Go to another topic, then select End of Conversation.
-
Select Save in the upper-right part of the canvas to save the topic.
-
Select the refresh icon in the upper-right corner of the Test your agent pane to start a new conversation.
-
Test it out by entering the following prompt:
What is the status of my ticket INC0007001?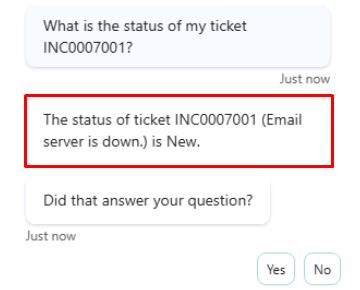
You’ve successfully created a Power Automate cloud flow, and a new topic in Copilot Studio that used the flow to provide real-time data from an external service to the user!