Task 12: Use Power Fx across Microsoft Copilot Studio
Introduction
Extending the Contoso agent’s functionality beyond standard conversational logic requires deeper integration. To do this, you’ll need to apply Power Fx expressions across Microsoft Copilot Studio and customize customer interactions for Contoso.
Description
You’ll incorporate Power Fx expressions throughout Copilot Studio, enhancing the agent’s capability to handle complex scenarios and interactions comprehensively.
Success criteria
- You’ve implemented Power Fx expressions effectively in various conversational topics.
- You’ve verified agent behavior aligns with intended advanced logic during interactions.
Key tasks
Power Fx is available in Microsoft Copilot Studio. With Power Fx, you can add functions, in the same way authors currently do in canvas apps from Microsoft Power Apps or Dataverse, within the Microsoft Copilot Studio authoring canvas. You can use Power Fx in Message and Question nodes when you’re using the Set a variable value node, and in other areas such as Conditions, Actions, Question behavior configurations, and Adaptive Cards.
This feature gives you greater control over the data that’s displayed to customers and users within the conversational interface. Additionally, it allows you to perform common operations in the runtime of Microsoft Copilot Studio.
The following task goes through a basic scenario of using Power Fx within a variable and then displaying the value to the user.
01: Use Power Fx to modify how the date is displayed
-
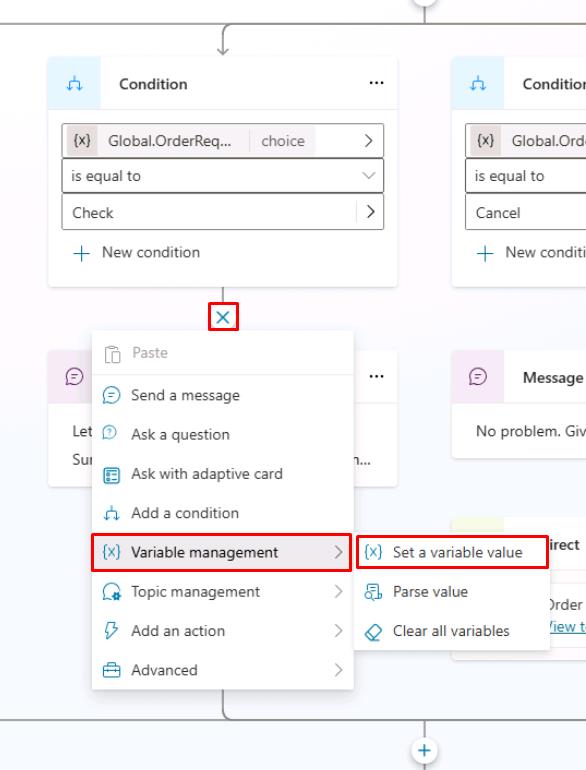
Under the Condition node for Check, select the + button, select Variable management, then select Set a variable value.
-
Select the entry under Set variable, then select Create a new variable.
-
Select the Var1 variable, then set the Variable name to
OrderDeliveryDate. -
Under To Value, select the ellipsis (…), select the Formula tab, and enter the following function.
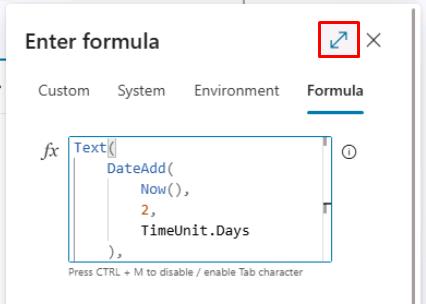
 Text(
     DateAdd(
         Now(),
         2,
         TimeUnit.Days
     ),
     DateTimeFormat.LongDate
 )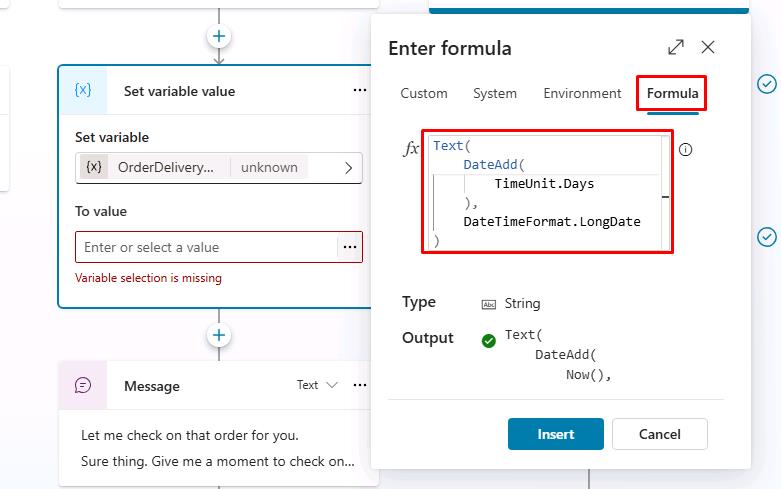
You can select the expand icon in the upper-right corner of the Enter formula pane to enlarge the area.
-
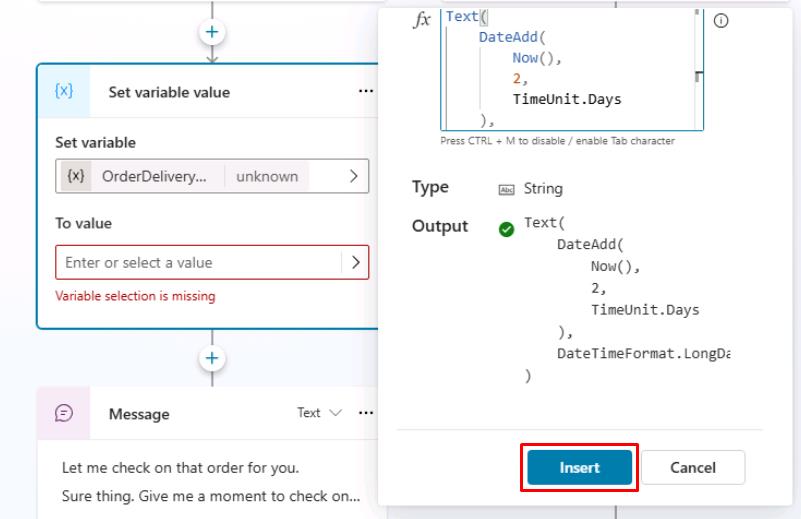
Move through the Enter formula pane and select Insert at the bottom, or in the lower-right part of the expanded view.
This function takes today’s date and time (for example, 5/31/2035 8:00 AM), adds two days to it, and then formats it in a long date format (for example, Saturday, June 2, 2035) . This approach is important if you want to display simple date formats that are user-friendly, or if you want to store the date as a string in text format.
-
Add a Message node to the bottom of the Check branch, under the existing Message node.
-
Add a message using the new variables you configured:
Your order {Topic.OrderNumber} should be delivered by {Topic.OrderDeliveryDate}.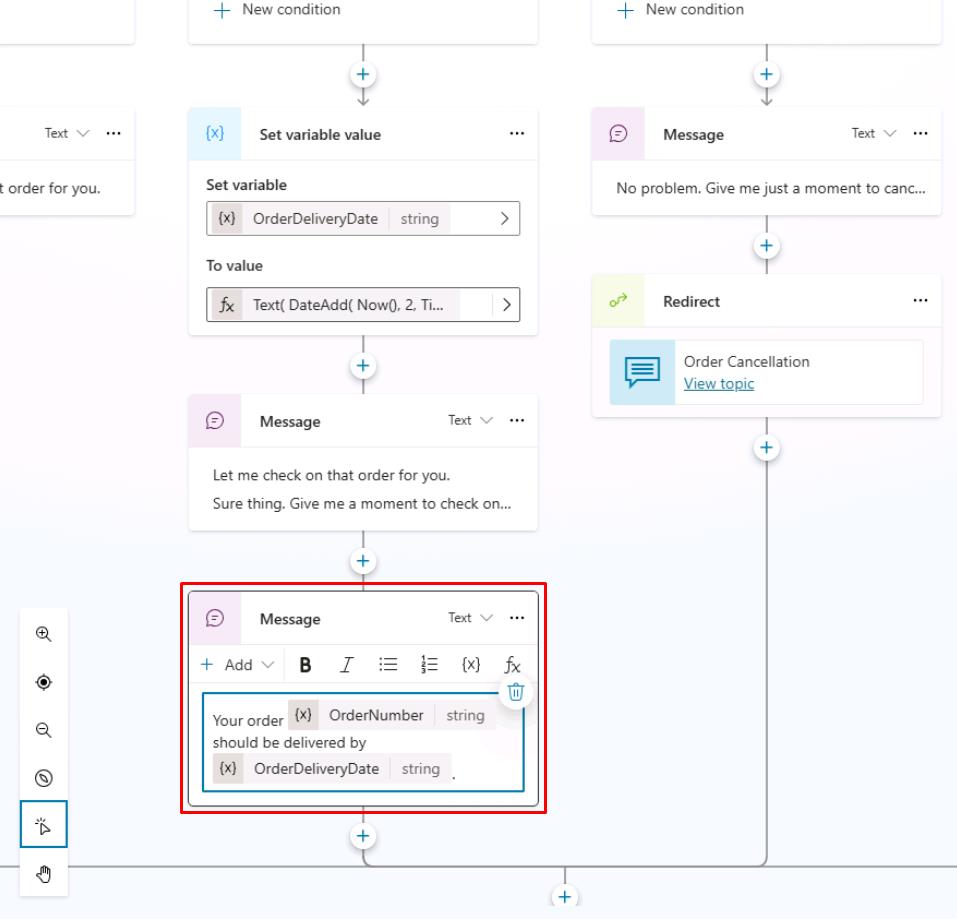
-
Select Save in the upper-right part of the canvas to save the topic.
-
Select the refresh icon in the upper-right corner of the Test your agent pane to start a new conversation.
-
Trigger the topic with a relevant prompt:
Hi, could you check the status of my order ORD-001342?
</details>
Summary
Congratulations, you’ve successfully worked through all the tasks on the central authoring features in Microsoft Copilot Studio unified authoring. In this exercise you:
- Defined and used custom entities and slot‑filling to capture user intent automatically.
- Stored customer data in topic and global variables for later use.
- Added conditions to branch conversations based on variable values.
- Practised using the Test your agent pane to trace variable values and dialog flow.