Task 06: Use variables in conditions
Introduction
To provide tailored responses based on customer input, Contoso’s agent must utilize conditions based on stored data. In this task, you’ll configure conversation conditions using variables to dynamically guide the conversation according to specific scenarios.
Description
In this task, you’ll set conditions in conversational topics based on variable values, directing the conversation flow appropriately depending on user inputs or previously collected information.
Success criteria
- You’ve created conditional logic based on variable values.
- You’ve tested and confirmed correct conversational branching based on variables.
Learning resources
For more information on conditions, see Authoring using conditions.
Key tasks
01: Use variables in conditions
Expand this section to view the solution
-
Under the Message node, select the + button, then select Add a condition.
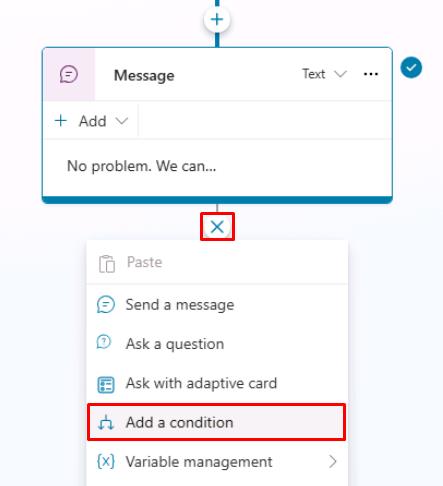
Two new nodes will appear. One is your Condition and the other is an exception for All other conditions.
-
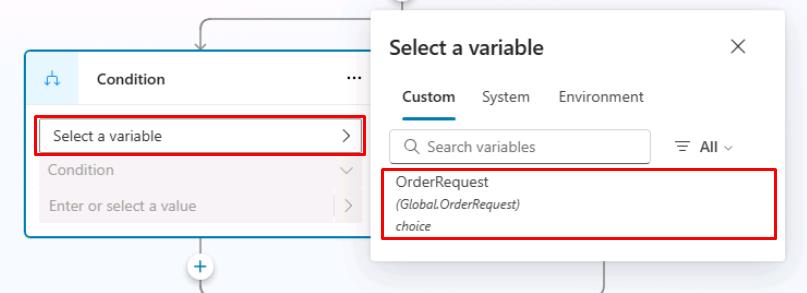
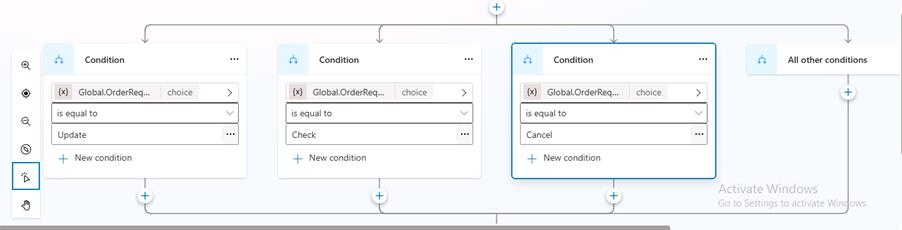
In the Condition node, select Select a variable, then select your OrderRequest global variable.
-
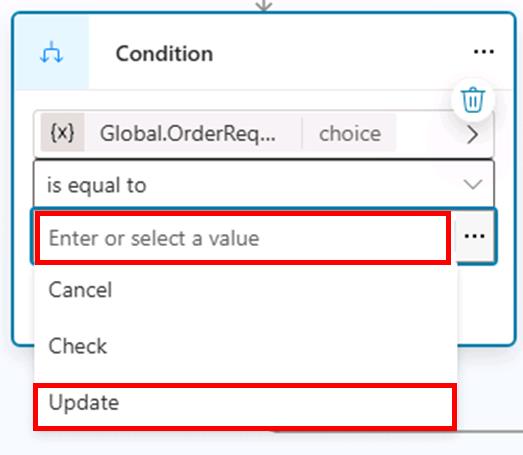
Keep the condition operator as is equal to.
-
Select the text box for Enter or select a value, then select Update.
-
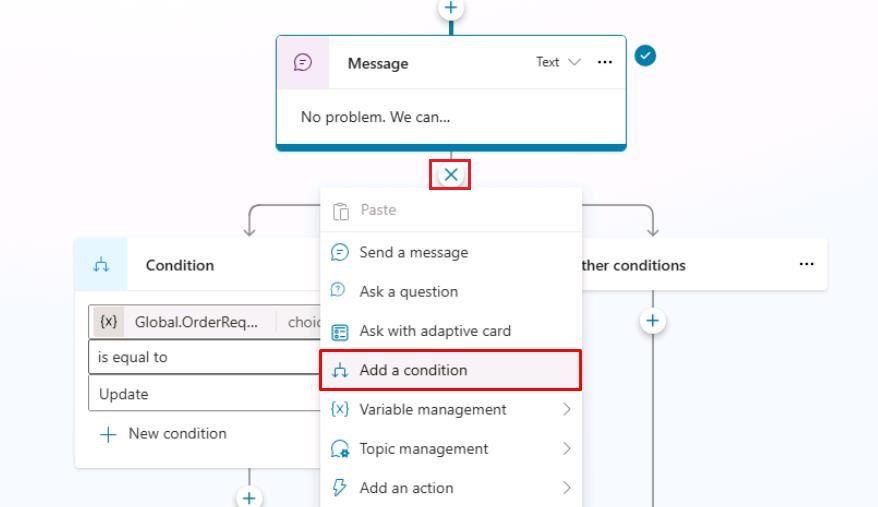
Select the + button between the Message node and the branching Condition nodes, then select Add a condition to add another branch.
-
In the new Condition node, repeat steps 2 and 3, then set the value to Check.
-
Repeat the same steps to add a Condition node for Cancel.
-
Under each Condition node, select the + button, then select Send a message to add a Message node.
-
Set different messages depending on the condition:
One moment while I update that order.Let me check on that order for you.No problem. Give me just a moment to cancel that order.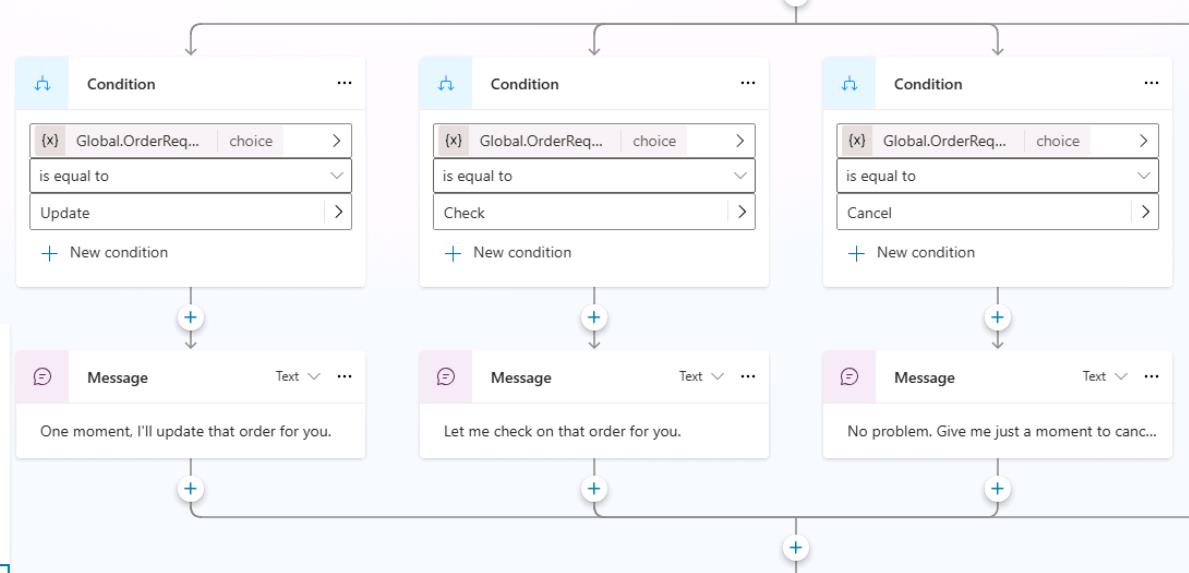
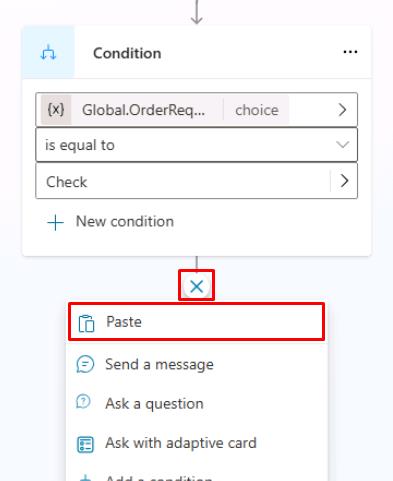
Do things faster by selecting a node and copying it using the upper-left productivity tools menu. Once copied, the node is available to be pasted, using the same tools menu or when using the + button to add a new node.

-
Select Save in the upper-right part of the canvas to save the topic.
-
Select the refresh icon in the upper-right corner of the Test your agent pane to start a new conversation.
-
Explore the different trigger phrases and conditions that lead the user to view different message outcomes.
Conditions are foundational tools that help you create tailored experiences based on what the user has selected or answered in previous questions. You can nest conditions within other conditions for more complex logic.
Congratulations, you’ve now completed the basics of using conditions and using variables as parameters within them.