Quick start#
This guide will walk you through the first steps of the prompt flow code-first experience.
Prerequisite - To make the most of this tutorial, you’ll need:
Python programming knowledge
Learning Objectives - Upon completing this tutorial, you should know how to:
Setup your python environment to run prompt flow
Create a flow using a prompt and python function
Test the flow using your favorite experience: CLI, SDK or UI.
Installation#
Install promptflow package to start.
pip install promptflow
Learn more about installation.
Create your first flow#
Model a LLM call with a prompty#
Create a Prompty file to help you trigger one LLM call.
---
name: Minimal Chat
model:
  api: chat
  configuration:
    type: azure_openai
    azure_deployment: gpt-35-turbo
  parameters:
    temperature: 0.2
    max_tokens: 1024
inputs:
  question:
    type: string
sample:
  question: "What is Prompt flow?"
---

system:
You are a helpful assistant.

user:
{{question}}
Prompty is a markdown file. The front matter structured in YAML, encapsulates a series of metadata fields pivotal for defining the model’s configuration and the inputs for the prompty. After this front matter is the prompt template, articulated in the Jinja format.
See more details in Develop a prompty.
Create a flow#
Create a python function which is the entry of a flow.
import os

from dotenv import load_dotenv
from pathlib import Path
from promptflow.tracing import trace
from promptflow.core import Prompty

BASE_DIR = Path(__file__).absolute().parent

@trace
def chat(question: str = "What's the capital of France?") -> str:
    """Flow entry function."""

    if "OPENAI_API_KEY" not in os.environ and "AZURE_OPENAI_API_KEY" not in os.environ:
        # load environment variables from .env file
        load_dotenv()

    prompty = Prompty.load(source=BASE_DIR / "chat.prompty")
    # trigger a llm call with the prompty obj
    output = prompty(question=question)
    return output
Flow can be a python function or class or a yaml file describing a DAG which encapsulates your LLM application logic. Learn more on the flow concept and how to Develop a flow.
See the full example of this python file in: Minimal Chat.
Test the flow#
Test the flow with your favorite experience: CLI, SDK or UI.
pf is the CLI command you get when you install the promptflow package. Learn more about features of the pf CLI in the reference doc.
pf flow test --flow flow:chat --inputs question="What's the capital of France?"
You will get some output like the following in your terminal.
Prompt flow service has started...
You can view the trace detail from the following URL:
http://127.0.0.1:51330/v1.0/ui/traces/?#collection=chat-minimal&uiTraceId=0x49382bbe30664f747348a8ae9dc8b954

The capital of France is Paris
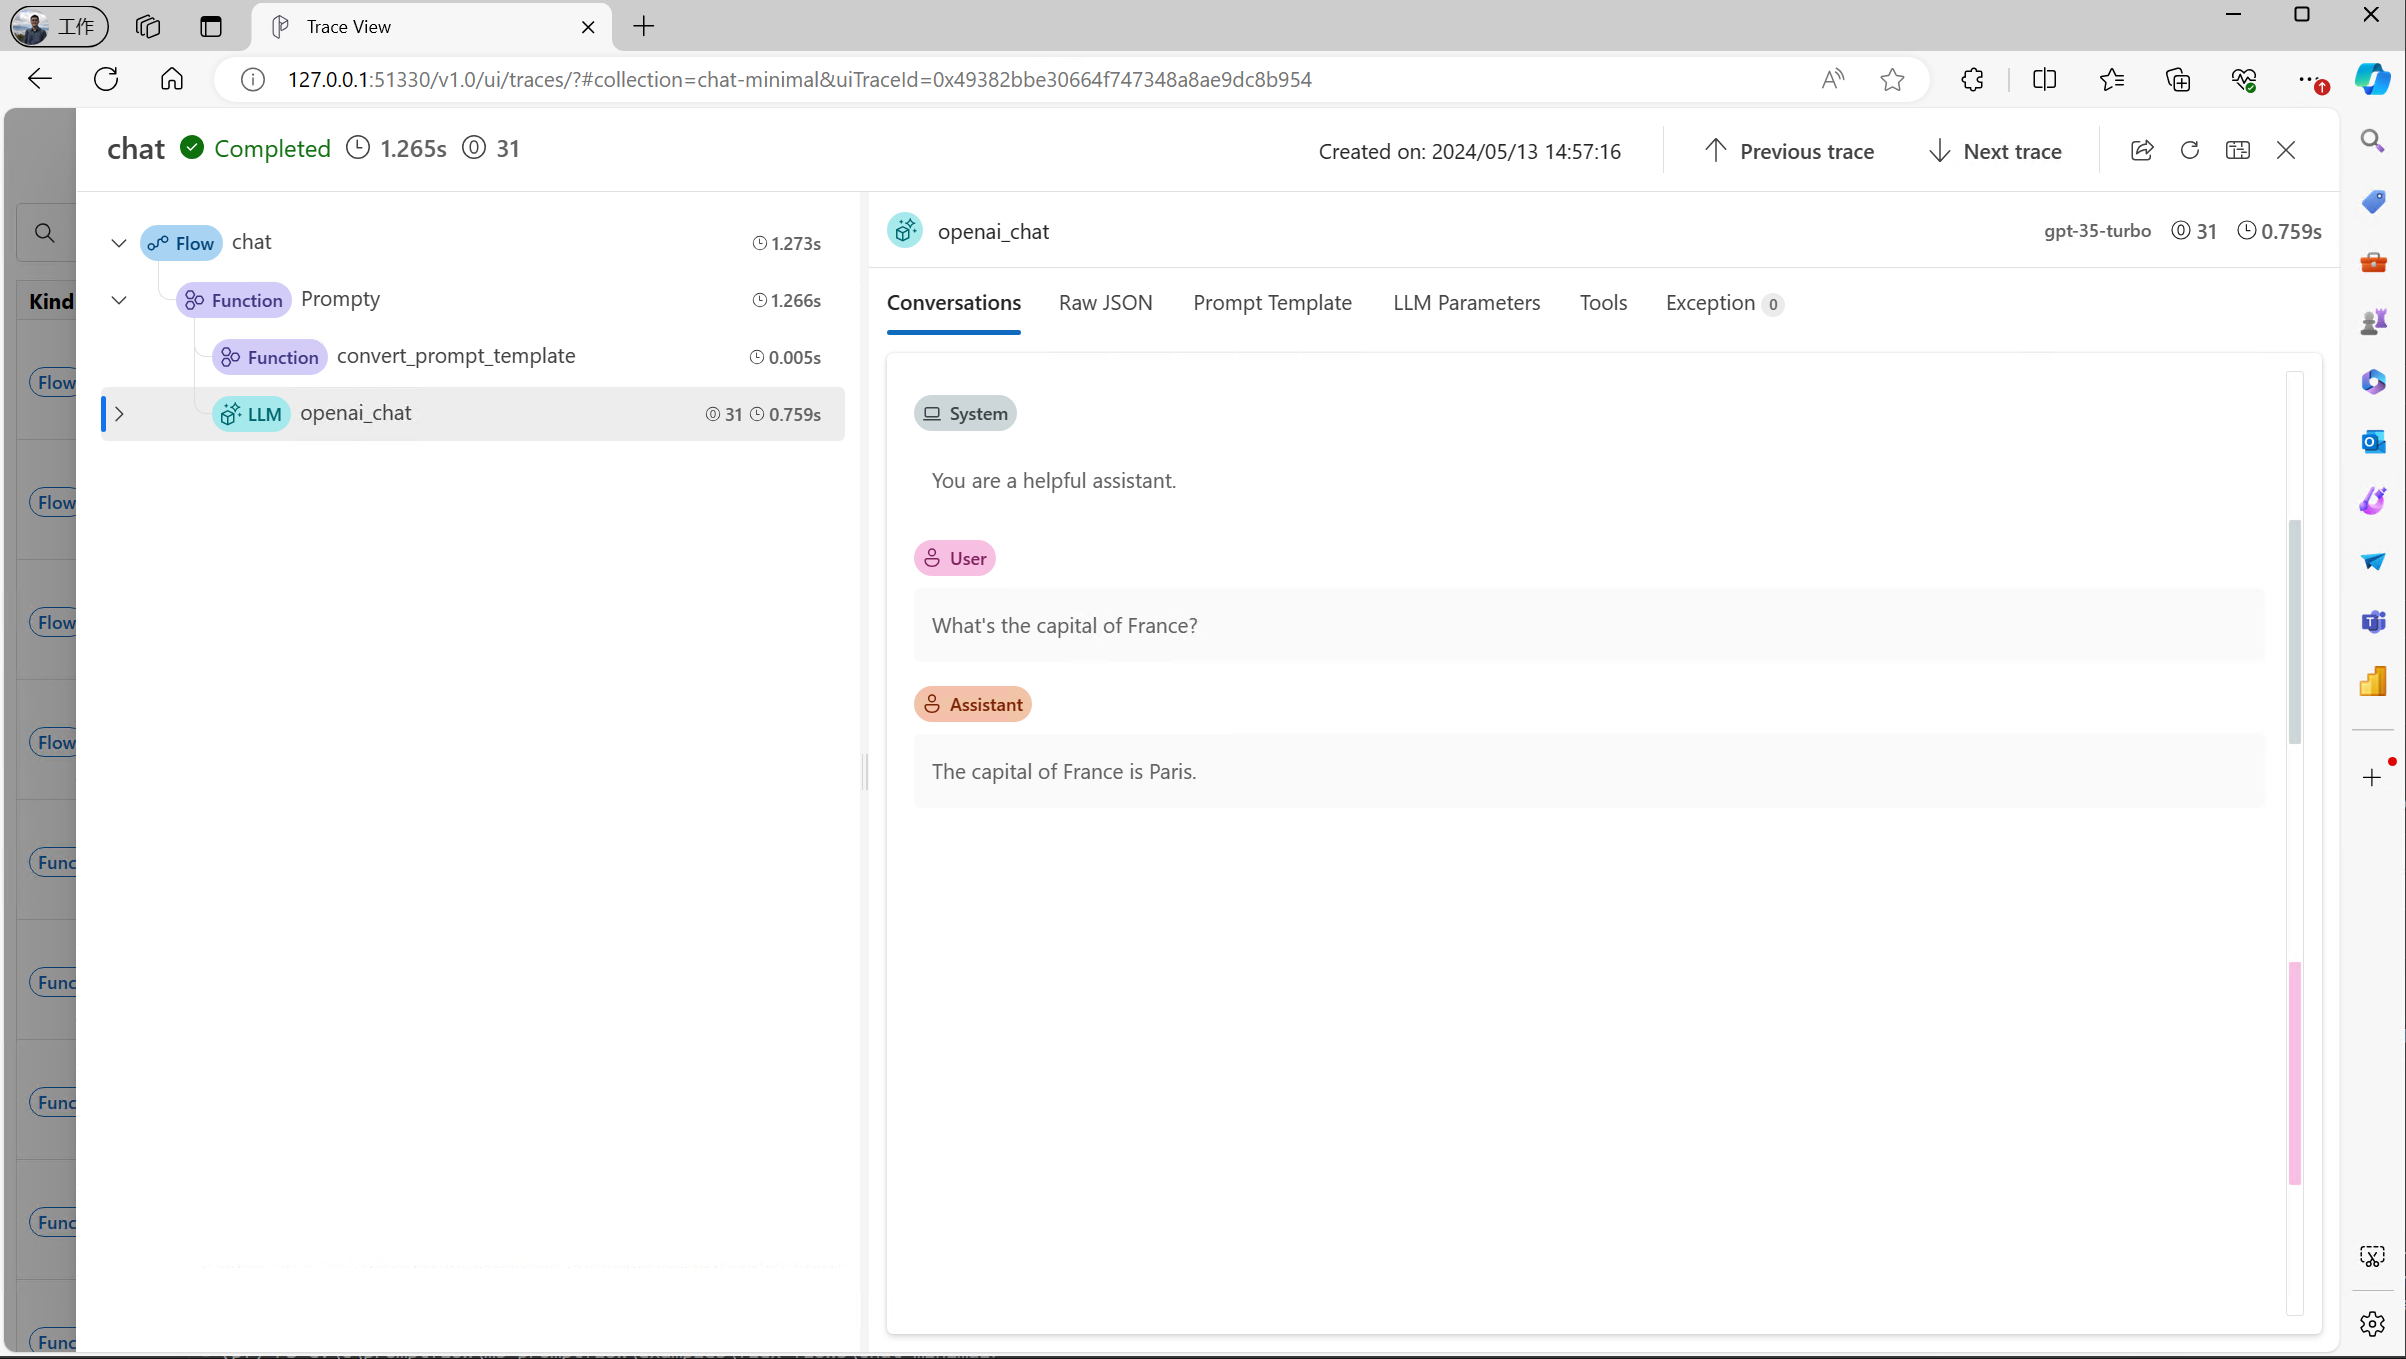
If you click the trace URL printed, you will see a trace UI which helps you understand the actual LLM call that happened behind the scenes.
Call the chat function with your question. Assume you have a flow.py file with the following content.
if __name__ == "__main__":
    from promptflow.tracing import start_trace

    start_trace()

    result = chat("What's the capital of France?")
    print(result)
Run the script with python flow.py, and you will get some output like below:
Prompt flow service has started...
You can view the trace detail from the following URL:
http://127.0.0.1:51330/v1.0/ui/traces/?#collection=chat-minimal&uiTraceId=0x49382bbe30664f747348a8ae9dc8b954

The capital of France is Paris
If you click the trace URL printed, you will see a trace UI which helps you understand the actual LLM call that happened behind the scenes.
Start test chat ui with below command.
pf flow test --flow flow:chat --ui
The command will open a browser page like below:
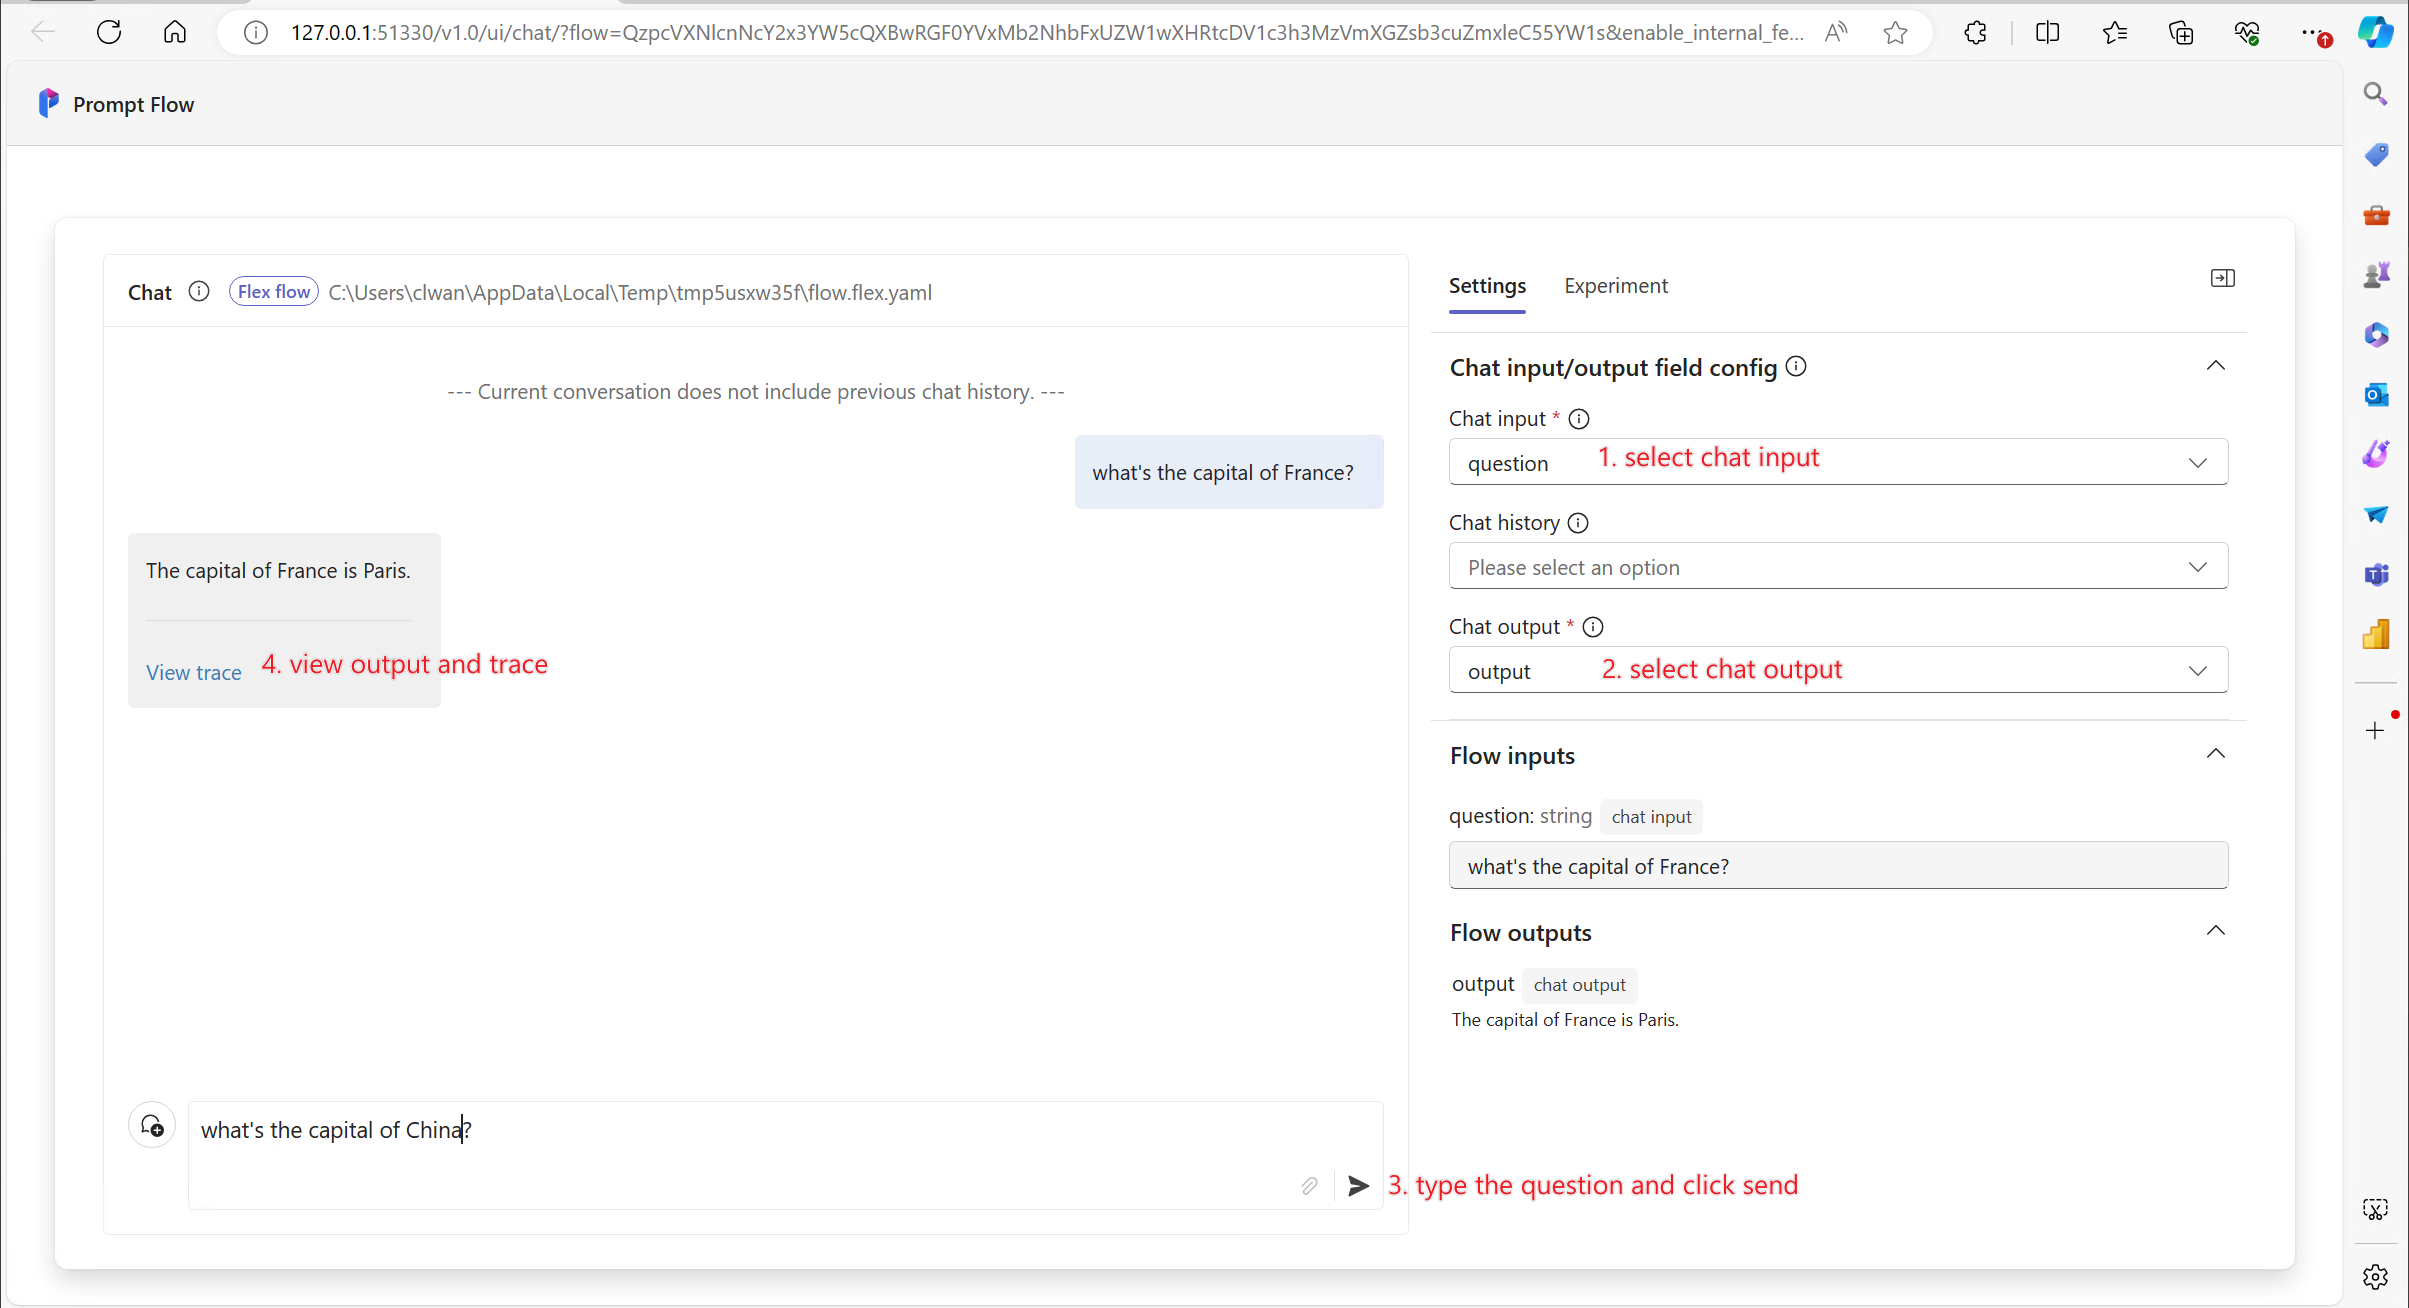
See more details of this topic in Chat with a flow.
Click the “View trace” button to see a trace UI which helps you understand the actual LLM call that happened behind the scenes.
Next steps#
Learn more on how to:
Tracing: details on how tracing works.
Develop a prompty: details on how to develop prompty.
Develop a flow: details on how to develop a flow using a python function or class.
Develop a DAG flow: details on how to develop a flow using friendly DAG UI.
And you can also check our Tutorials, especially:
Tutorial: Chat with PDF: An end-to-end tutorial on how to build a high quality chat application with prompt flow, including flow development and evaluation with metrics.