Task 2.2: Connect the target machine to Microsoft Sentinel - All Events DCR
In this task, you’ll connect the target machine on which the attacks will be performed to Microsoft Sentinel using the built-in All Security Events data collection rule.
The following document may help you understand Sentinel data connectors for Windows virtual machines.
-
Minimize the RDP session to return to the @lab.VirtualMachine(Windows 11).SelectLink VM.
-
If necessary, open Microsoft Edge, go to the Azure portal, then sign in using these credentials:
Username @lab.CloudPortalCredential(User1).Username Password @lab.CloudPortalCredential(User1).Password If you encounter the Welcome to Microsoft Azure screen, select Get started and then select Skip for the next two screens.
-
In the search bar of the Azure portal, type Microsoft Sentinel, then select Microsoft Sentinel from the results.
-
In the list of Microsoft Sentinel Workspaces, select the workspace named MSSen2Go*.

-
In the Microsoft Sentinel left menu, scroll down to the Content management section and select Content hub.
-
On the Content hub panel in the Search… field search for the Windows Security Events solution and then select it from the list.
-
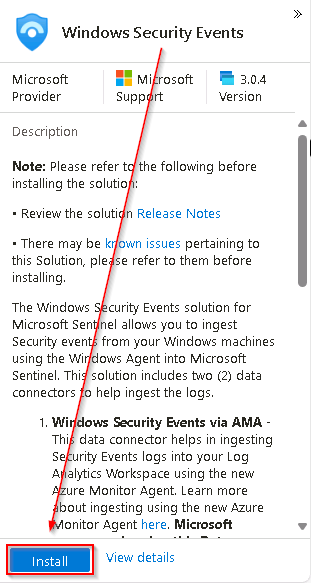
On the Windows Security Events panel to the right, select Install and wait for the installation job to complete.
 {150}
{150}The Windows Security Events solution installs both the Windows Security Events via AMA and the Security Events via Legacy Agent Data connectors. Plus two Workbooks, 20 Analytic Rules, and 43 Hunting Queries.
-
When the installation completes, select Windows Security Events from the list and then, in the right blade, select Manage.
You can monitor the status of the Install job from the Bell notifications icon at the top of the Microsoft Azure page

-
On the Windows Security Events blade, in the Content list, select the Windows Security Events via AMA data connector.
-
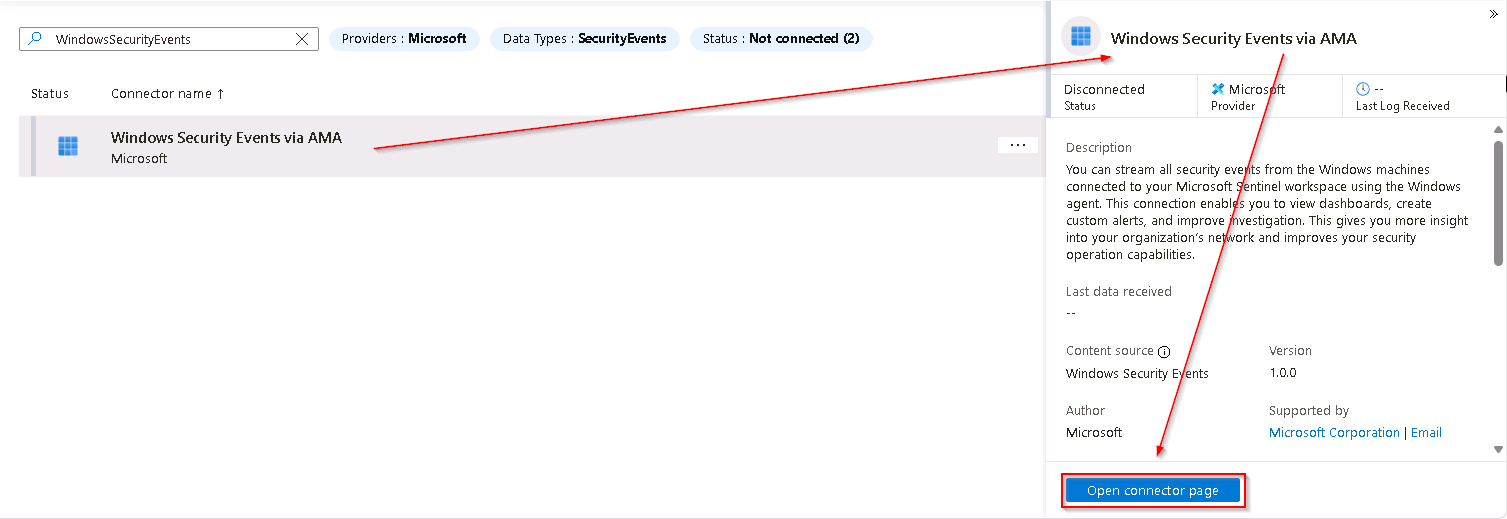
On the Data connectors blade, select the Windows Security Events via AMA connector, then select Open connector page.
-
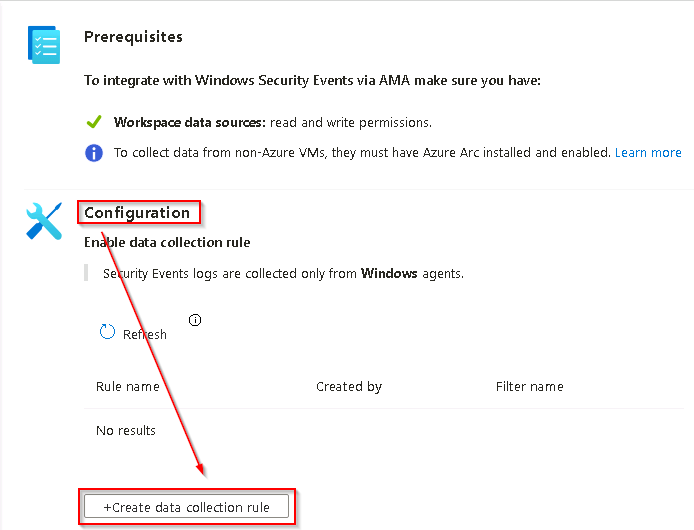
In the Configuration section, select +Create data collection rule.
-
On the Create Data Collection Rule blade, in the Basic tab, use the following table to complete the fields and then select Next: Resources >.
Rule name WindowsDCR Subscription @lab.CloudSubscription.Name Resource group @lab.CloudResourceGroup(RG1).Name -
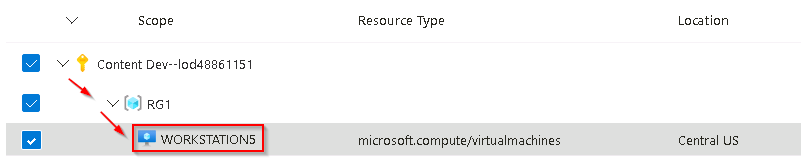
On the Resources tab expand the @lab.CloudSubscription.Name subscription scope, then expand the @lab.CloudResourceGroup(RG1).Name resource group scope, then select the virtual machine WORKSTATION5.
-
Select Next: Collect >.
-
On the Collect tab ensure that All Security Events is selected and then select Next: Review + create >.
-
On the Review + create tab, wait for the validation to pass and then select Create
-
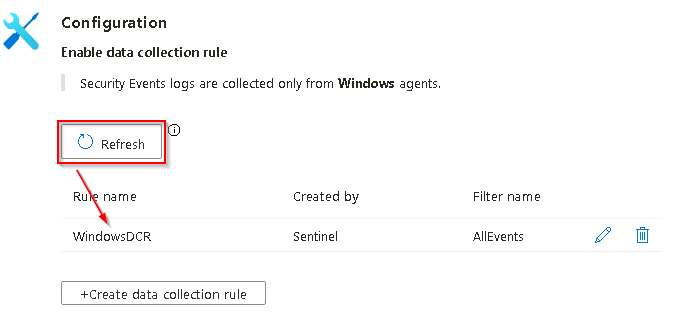
When the data collection rule has been properly created you’ll be returned to the Windows Security Events via AMA page. In the Configuration section select Refresh to display the newly created data collection rule in the list.