Task 01 - Azure Arc-enable SQL Server
Introduction
Tailspin Toys is beginning the migration of its SQL Server workloads to Azure. To support hybrid replication and failover with MI‑Link, the company first needs to connect its on‑premises SQL Server VM to Azure using Azure Arc. By Arc‑enabling the VM, Tailspin can extend Azure management capabilities to its existing environment and prepare for seamless database migration to Azure SQL Managed Instance.
Description
In this task, you will Arc‑enable the simulated on‑premises SQL Server VM using a PowerShell scripted generated in the Azure portal. Azure Arc provides a bridge between on‑premises infrastructure and Azure services, allowing Tailspin Toys to manage, secure, and migrate workloads consistently. Once enabled, the SQL Server instance can participate in MI‑Link replication, enabling hybrid migration and high availability/disaster recovery scenarios.
The key tasks are as follows:
- Log in to the
tailspin<uniqueid>-onprem-sql-vmVirtual machine using Azure Bastion. This VM represents the Tailspin’s on-premises SQL Server environment. - Install and configure Azure Arc on the VM to register it with Azure.
- Install the Azure extension for SQL Server to connect the SQL Server to Arc.
Success Criteria
- You have successfully connected to the SQL Server VM via Azure Bastion.
- The SQL Server is Arc‑enabled and visible in the Azure portal under Azure Arc SQL servers.
- The SQL Server instance is ready to be linked with Azure SQL Managed Instance using MI‑Link in the next task.
Step-by-Step Instructions
-
In the Azure Portal, navigate to your lab resource group and select the
tailspin<uniqueid>-onprem-sql-vmvirtual machine from the list of resources.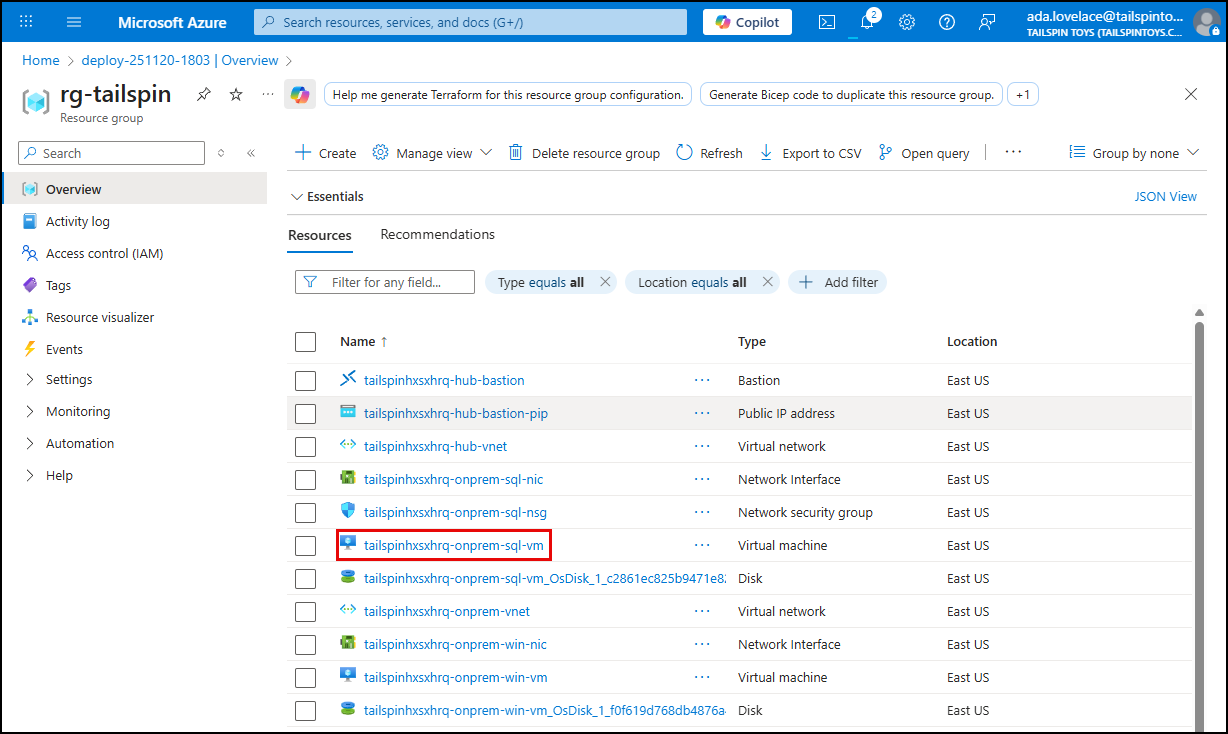
IMPORTANT: In this lab, the “on‑premises” SQL Server VM is simulated using the guidance for evaluating Azure Arc-enabled servers on an Azure virtual machine. This configuration is intended only for demo and testing purposes and should not be used in a production environment.
-
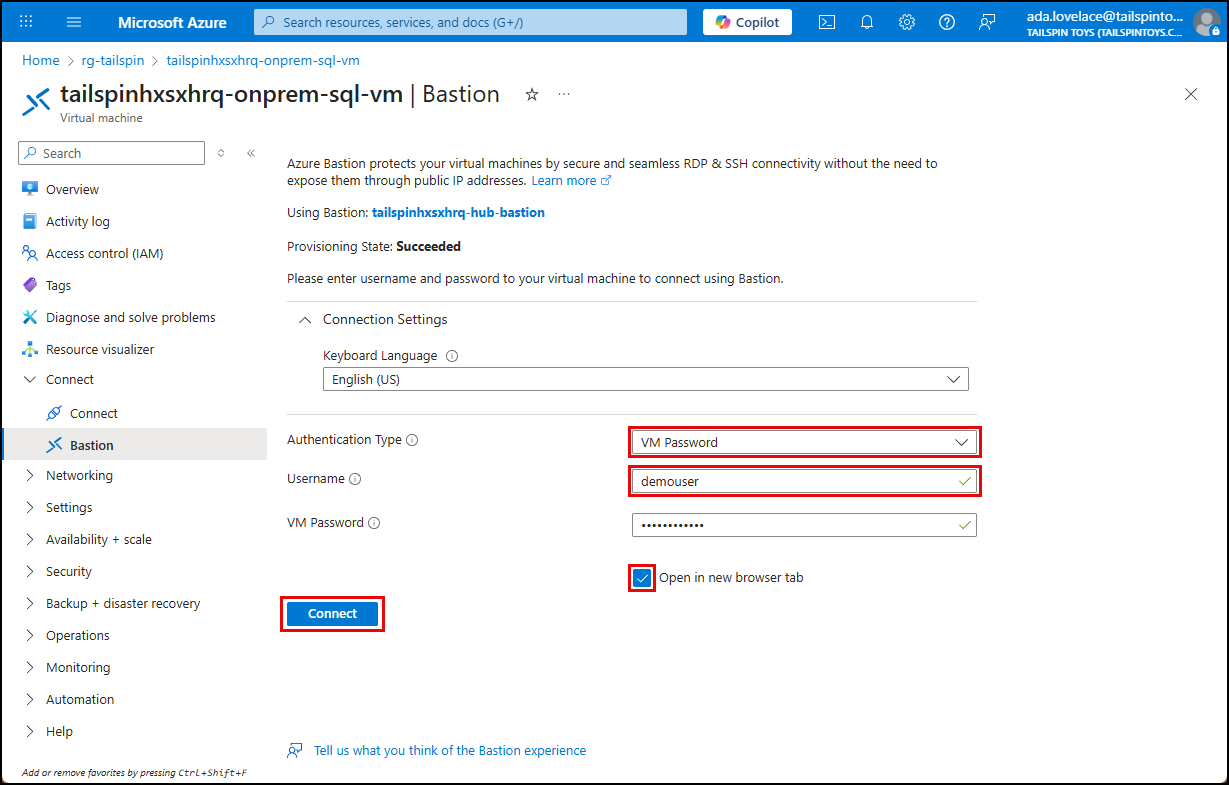
On the VM blade, select Bastion under Connect in the left menu, and on the Bastion blade, enter the following username and password, ensure Open in a new browser window is checked, then select Connect.
- Username:
demouser - Password:
demo!pass123
IMPORTANT: When connecting via Bastion, you must ensure your browser permits pop-ups to allow the Bastion session to open in a new tab.
- Username:
-
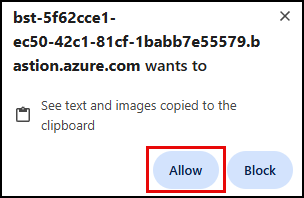
If prompted to allow the browser to “see text and images copied to the clipboard,” select Allow.
-
Once logged in to the SQL VM, open a web browser and navigate to the Azure portal.
-
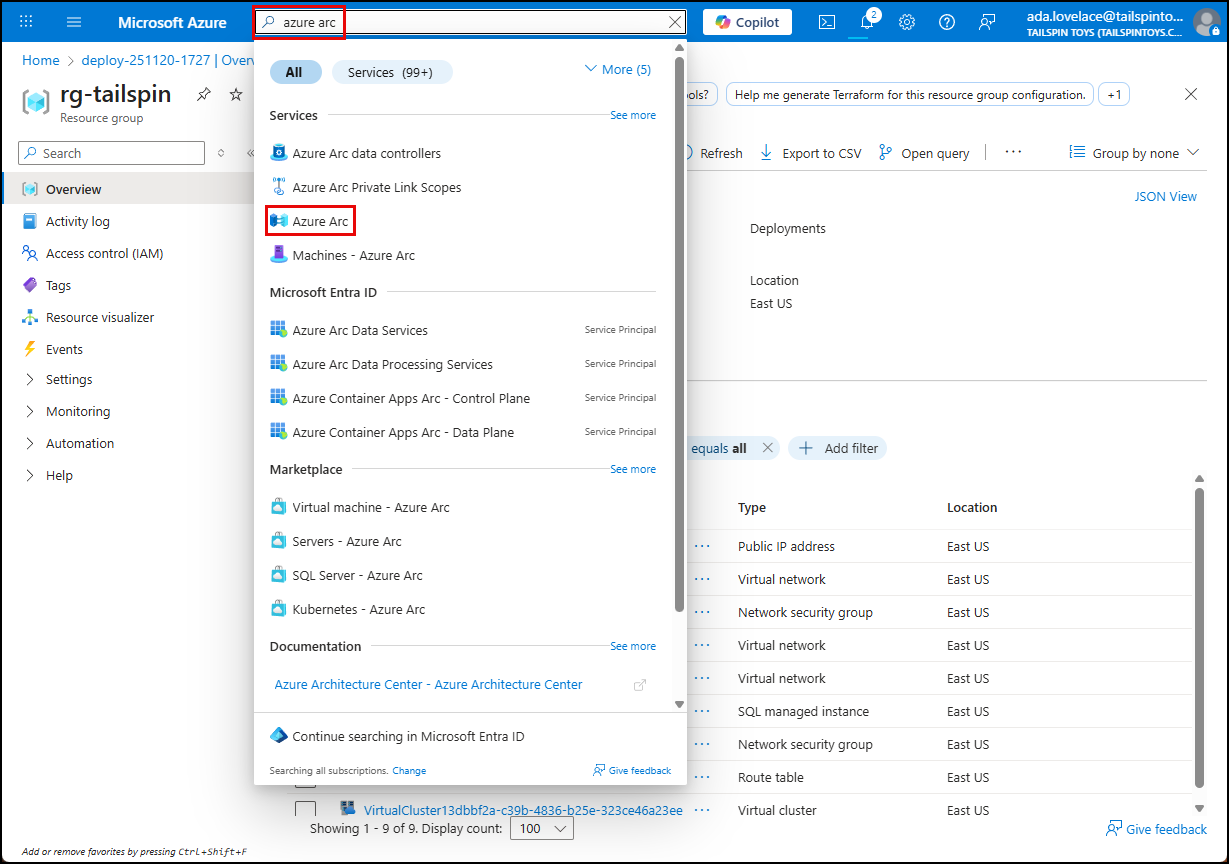
In the Azure portal, enter “azure arc” into the search bar, and select Azure Arc (Classic) under Services in the results.
-
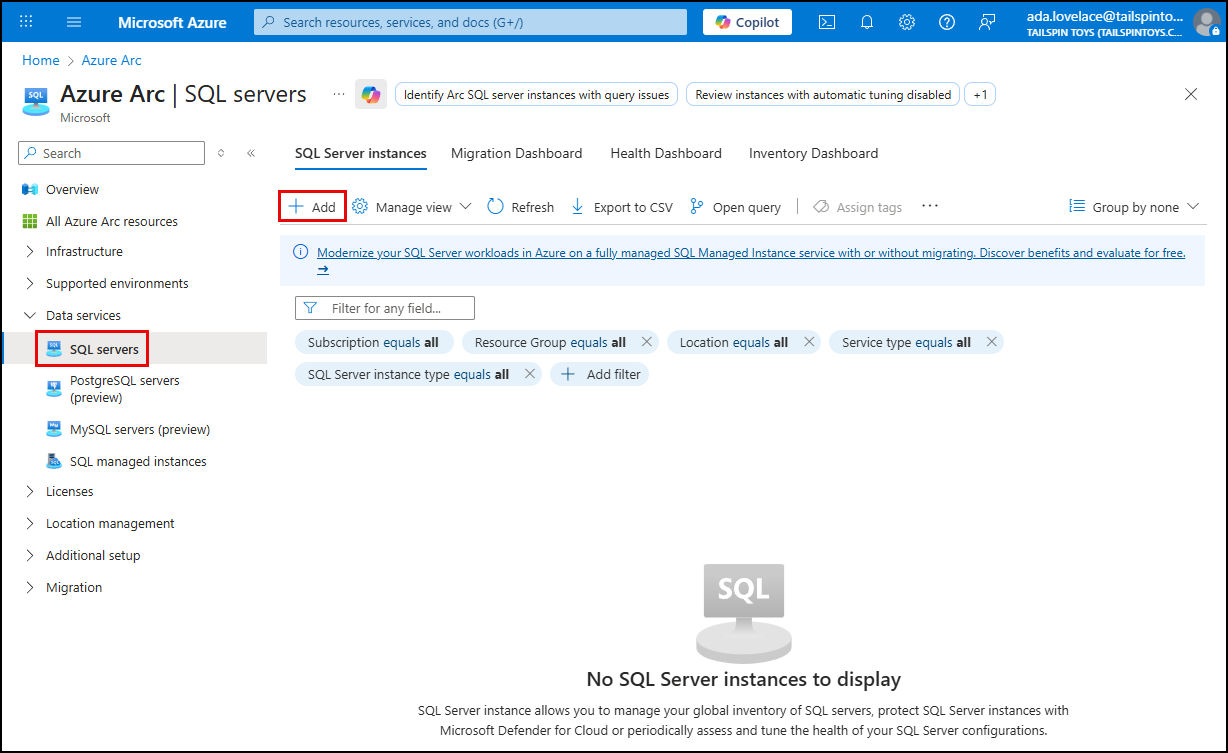
On the Azure Arc blade, select SQL servers under Data services in the left menu, then select Add on the toolbar.
-
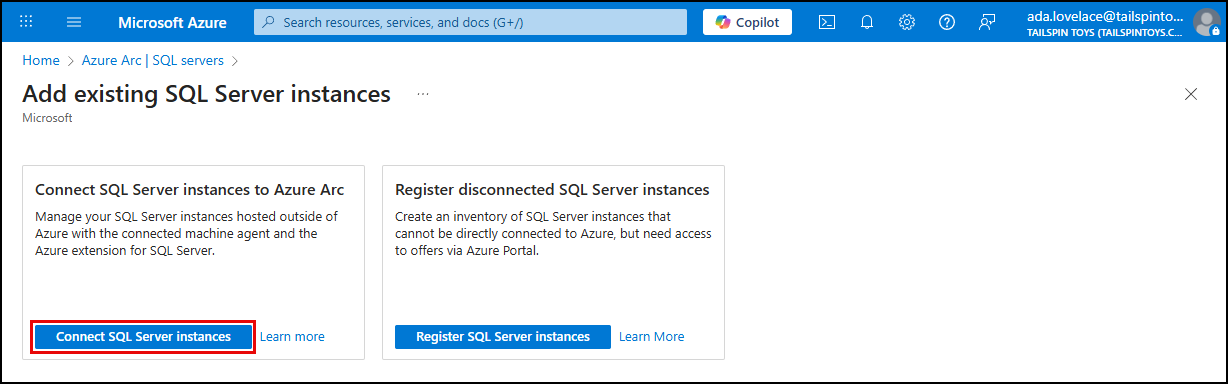
On the Add existing SQL Server instances page, select Connect SQL Server instances in the Connect SQL Server instances to Azure Arc tile to create a new registration.
-
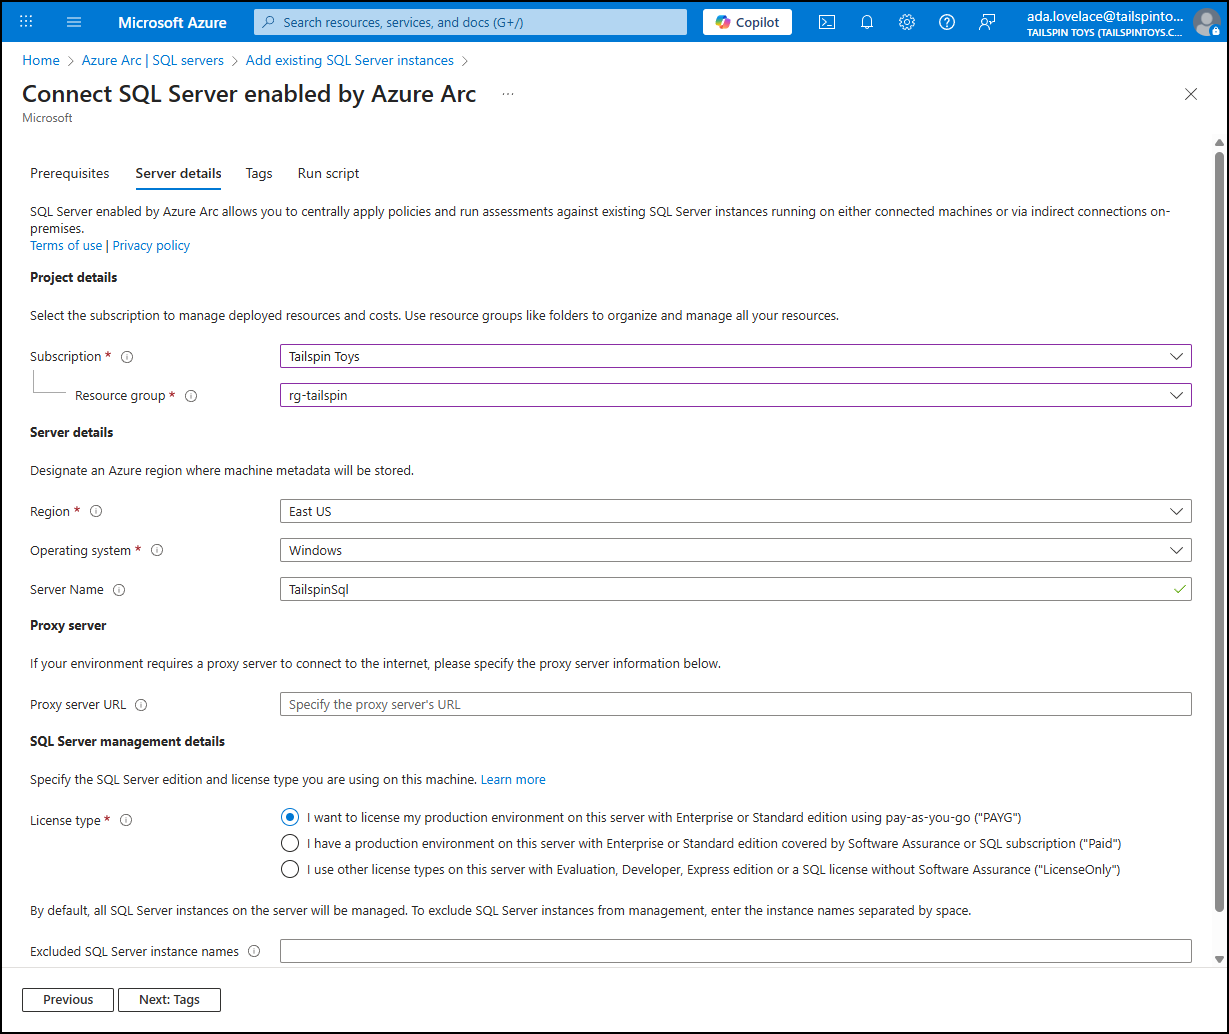
After reviewing the Prerequistes, select Next: Server details.
-
On the Server details tab, enter the following:
- Subscription: Select your subscription
- Resource group: Select the resource group you created for this lab
- Region: Select the region associated with your resource group
- Operating system: Choose
Windows - Server Name: Enter
TailspinSql - License type: Select
I want to license my production environment on this server with Enterprise or Standard edition pay-as-you-go ("PAYGO") - Select Next: Tags
-
On the Tags tab, select Next: Run script.
-
On the Run script tab, select Download. Alternatively, you can select the Copy to clipboard link, then paste the script into a file named
RegisterSqlServerArc.ps1that you save to the SQL VM.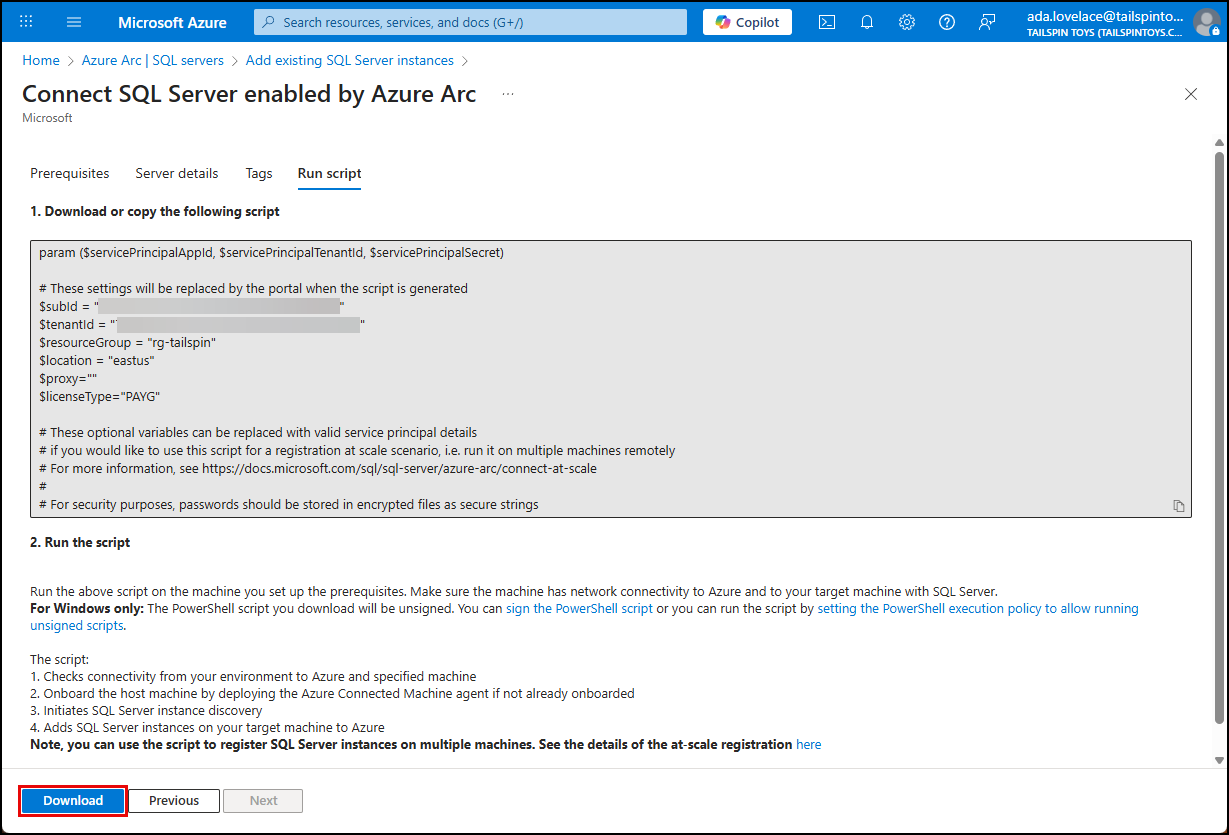
-
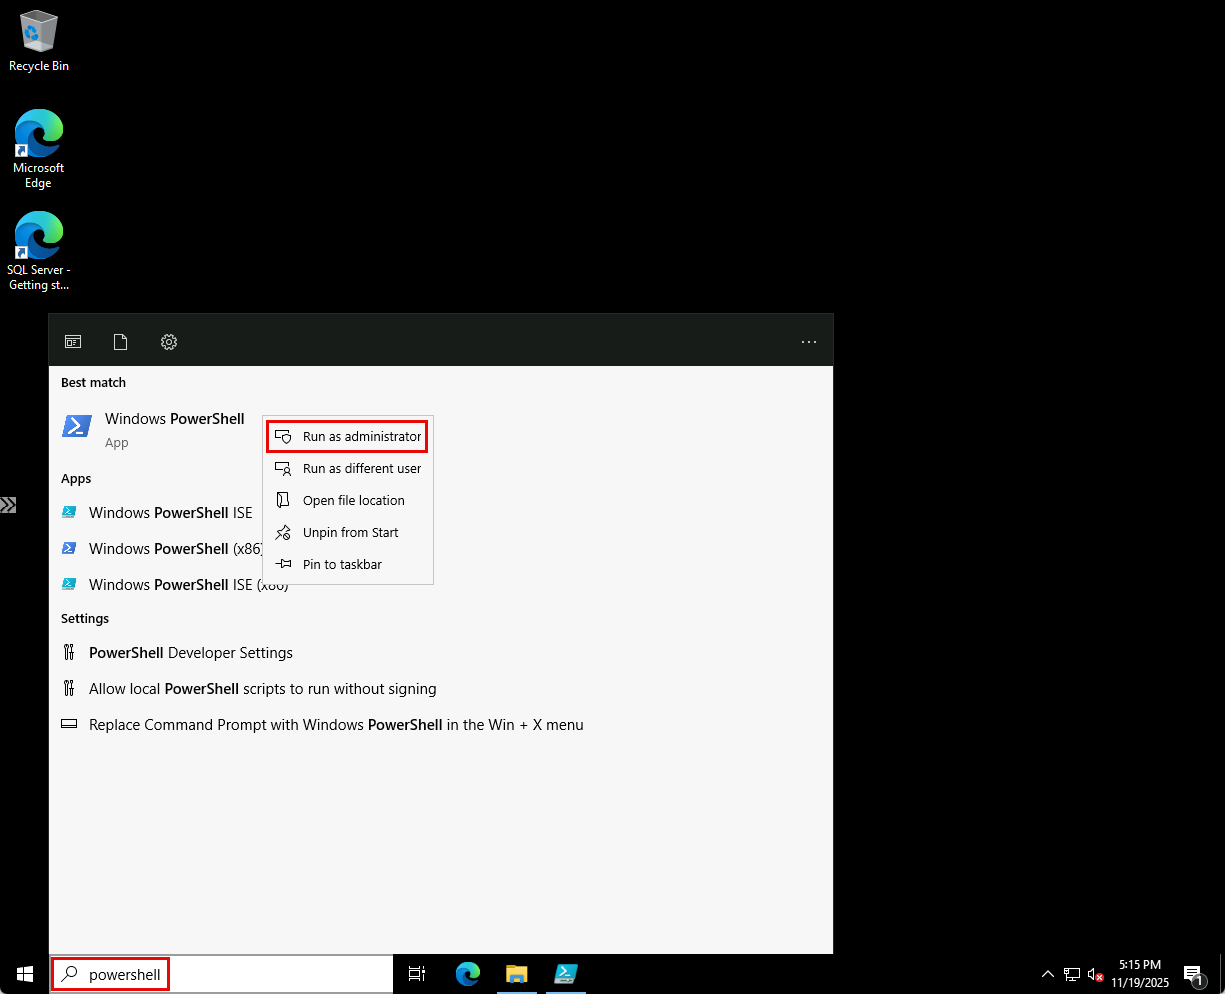
On the SQL VM, open PowerShell as an administrator.
-
At the PowerShell prompt, change directories to the location where you saved the downloaded file.
NOTE: You can simplify the commands by copying the downloaded file to
C:\scriptsor a similarly short path. -
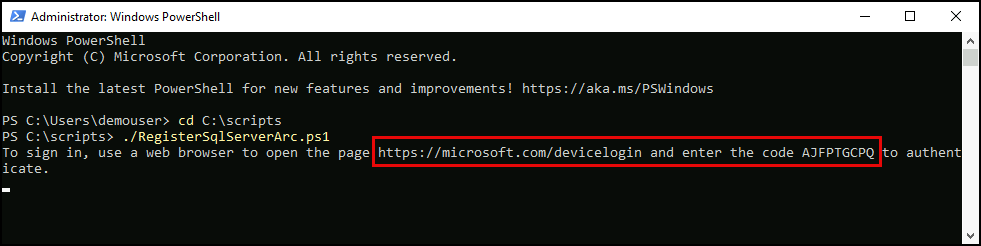
Run the following command:
.\RegisterSqlServerArc.ps1IMPORTANT: If you receive the error, ‘Cannot install Azure Connected Machine agent on an Azure Virtual Machine. Azure Connected Machine Agent is designed for use outside Azure,’ execute the steps in PowerShell found in the step-by-step guide to enable Azure Arc on an Azure VM to prepare your VM.
-
When prompted, navigate to https://microsoft.com/devicelogin, enter the code provided in the PowerShell window, and follow the prompts to log into your Azure account.
-
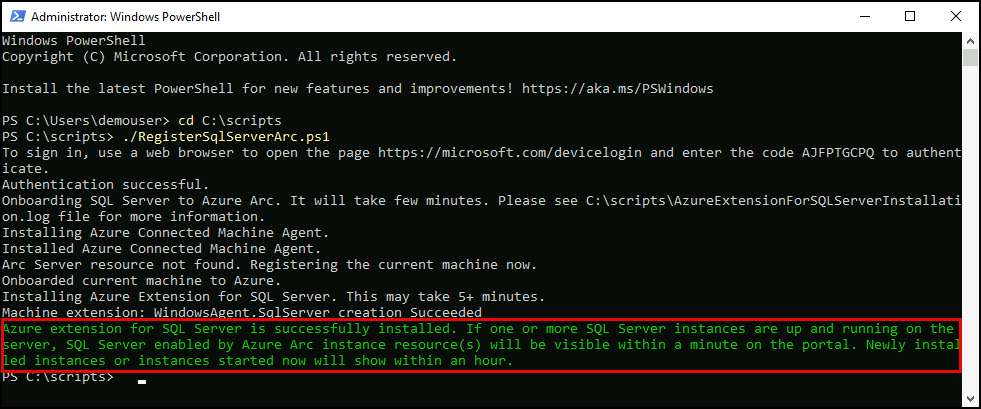
The script will take 5-10 minutes to complete. It onboards SQL Server by installing the Azure Connected Machine Agent and the Azure Extension for SQL Server, and registering the machine with Azure Arc. When the script completes, verify you see the successful installation message.
-
Return to the Azure Arc SQL servers page in the Azure portal, select Refresh, and verify the
TailspinSqlSQL server appears in the list.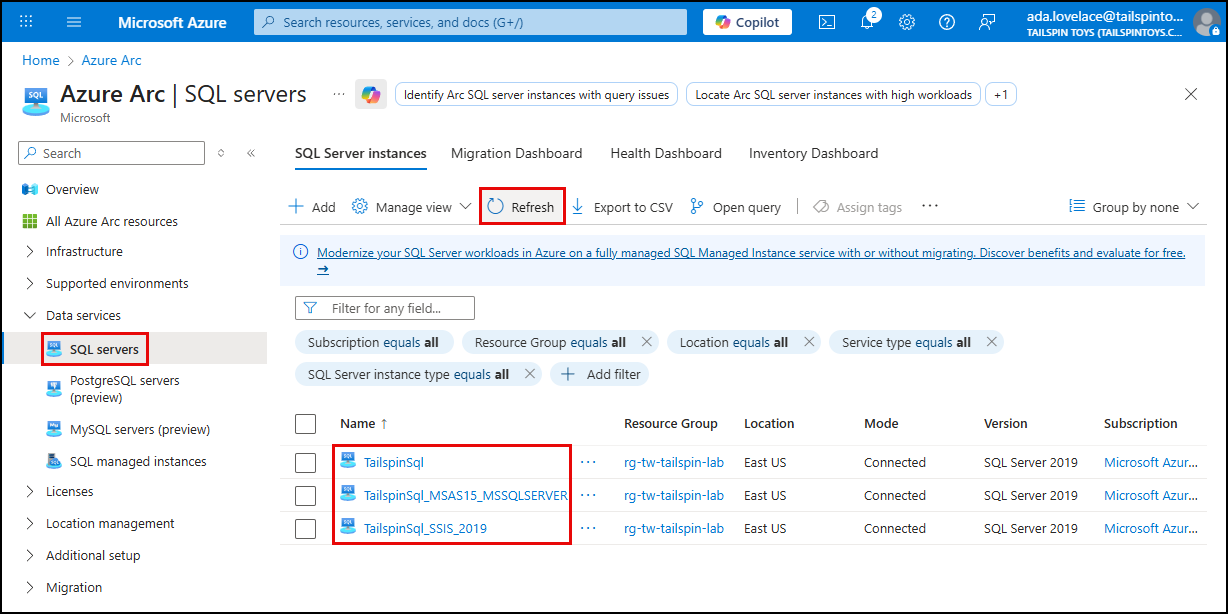
-
You have successfully onboarded your SQL Server to Azure Arc.