Task 05 - Deploy and configure Azure Firewall
Introduction
Tailspin Toys is migrating their on-premises SQL Server database to Azure SQL Managed Instance. In this task, you will implement an Azure Firewall to protect network traffic.
Description
In this task, you will implement an Azure Firewall to protect network traffic.
The key tasks are as follows:
- Test network traffic from the Virtual Machine to the Internet. You should have access to bing.com.
- Deploy Azure Firewall.
- Configure rules to block access to bing.com.
- Test network traffic from the Virtual Machine to the Internet. Access to bing.com is now blocked.
Success Criteria
- Azure Firewall is deployed and fully worked as expected.
Step-by-Step Instructions
-
In the Azure Portal, navigate to your lab resource group and select the
tailspin<uniqueid>-onprem-sql-vmvirtual machine from the list of resources.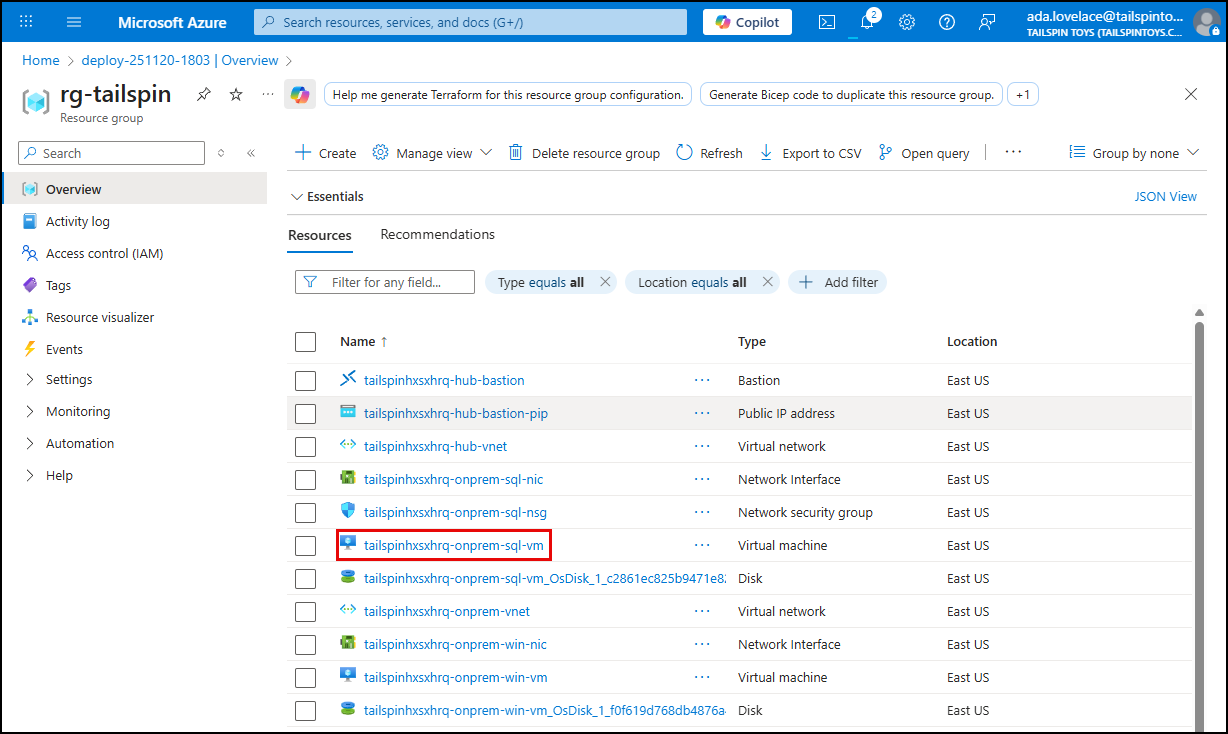
-
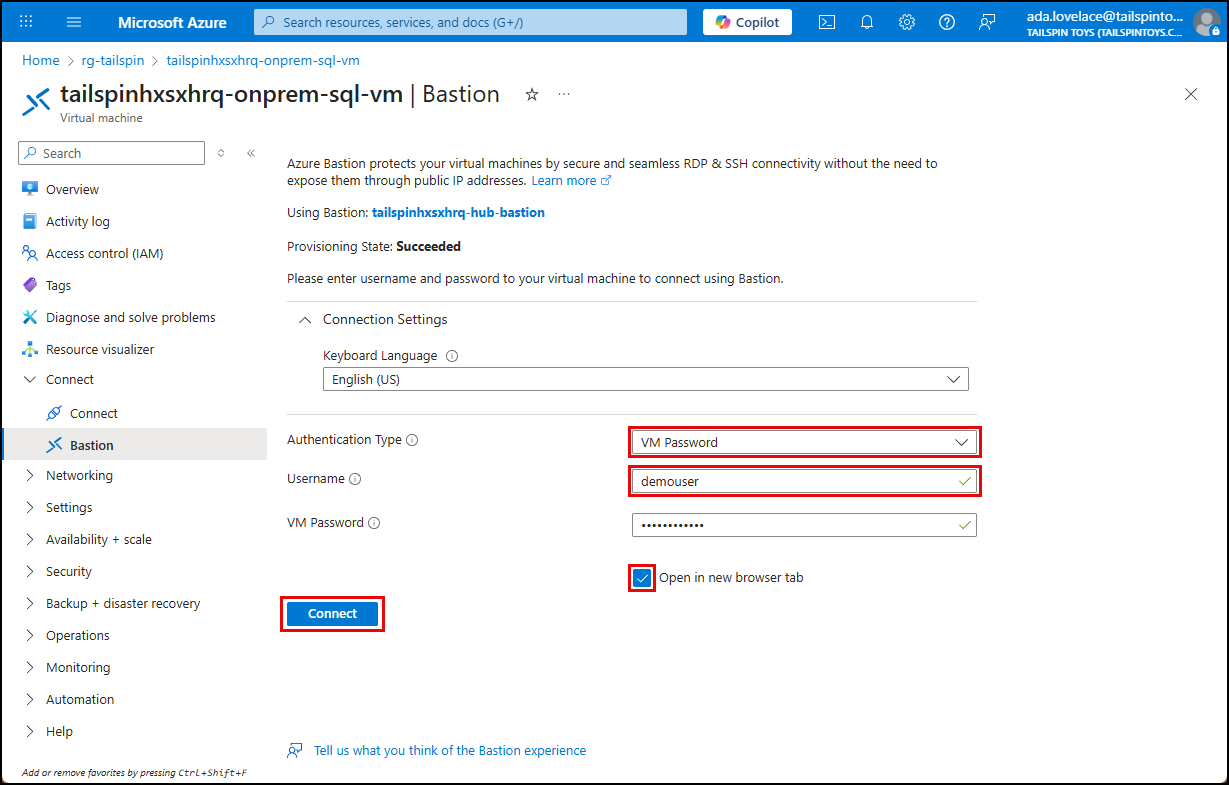
On the VM blade, select Bastion under Connect in the left menu, and on the Bastion blade, enter the following username and password, ensure Open in a new browser window is checked, then select Connect.
- Username:
demouser - Password:
demo!pass123
- Username:
-
On the VM, launch a web browser and navigate to https://www.bing.com. The Bing web page should load successfully in the browser on the VM.
-
In a separate browser tab on your local machine, open the Azure portal, navigate to your lab resource group, and select the
tailspin<uniqueid>-hub-vnetvirtual network resource. -
On the Hub VNet blade, expand Settings in the left menu, select Subnets and then create a new subnet by selecting the + Subnet button on the toolbar.

-
On the Add a subnet pane, enter the following values, then select Add.
- Subnet purpose: Select Azure Firewall.
- IPv4 Starting address:
10.1.100.0/24

-
In the Search resources, services, and docs text box at the top of the Azure portal, search for Firewalls, and select Firewalls unser Services.
-
On the Firewalls page, create a new firewall by selecting + Create on the toolbar.
-
On the Create Firewall Basics tab, enter the following values, then select Add new on the Firewall policy section.
- Resource group: Select your lab resource group.
- Name:
hub-fw - Region: Select the same region where your other resources in your resource group are located. IMPORTANT: If you choose a difference region this will not work.
- Firewall SKU:
Standard - Firewall management:
Use a Firewall Policy to manage this firewall

-
On the Create a new Firewall Policy popup, enter the following values, then select OK.
- Name:
hub-fw-pol - Region: Select the same region where your other resources in your resource group are located. IMPORTANT: If you choose a difference region this will not work.

- Name:
-
On the Basics tab, enter the following values, then select Add new on the Public IP address section.
- Choose a virtual network:
Use existing - Virtual network:
tailspin-hub-vnet

- Choose a virtual network:
-
On the Add a public IP popup, enter the following values, then select OK.
- Name:
hub-fw-pip

- Name:
-
On the Basics tab, ensure that the Enable Firewall Management NIC option in
Not Checked.
IMPORTANT: Unchecking this option may result in your public IP address settings being cleared. If that happens, repeat the previous step to add a publi IP named
hub-fw-pip. -
Review the values entered, then select Next : Tags >.

-
On the Tags tab, select Next : Review + create >.

-
Once the validation passes, select Create.

-
Wait for the deployment to complete, then select Go to resource to navigate to the
hub-fwFirewall resource in the Azure portal. -
On the hub-fw blade, copy the Private IP address that was assigned to the firewall. This is located in the Essentials section of the Overview blade.

-
Next, in the Search resources, services, and docs text box at the top of the Azure portal, search for Route tables, and select the Route tables service.
-
On the Route tables blade, create a new route table by selecting + Create on the toolbar.

-
On the Create Route table pane, enter the following values.
- Resource group: Select your lab resource group.
- Region: Select the same region as your resource group and other lab resources.
- Name:
firewall-rt

-
Select Review + create, then select Create.
-
On the Route tables blade, click Refresh and, in the list of route tables, select firewall-rt.

-
On the firewall-rt blade, expand Settings in the left menu, then select Subnets.

-
On the Subnets blade for firewall-rt, select + Associate on the toolbar.

-
On the Associate subnet pane, enter the following values, then select OK.
- Virtual network: Select the
tailspin<uniqueid>-onprem-vnet - Subnet:
default
- Virtual network: Select the
-
On the firewall-rt blade, expand Settings in the left menu, then select Routes.

-
On the Routes blade for firewall-rt, select + Add.

-
On the Add route pane, enter the following values, then select Add.
- Route name:
FW-DG - Destination type:
IP Addresses - Destination IP addresses/CIDR ranges:
0.0.0.0/0 - Next hop type:
Virtual appliance - Next hop address: Paste the private IP address of the firewall that you copied from the Essentials section of your Azure Firewall. For example:
10.1.100.4.

Note: Azure Firewall is actually a managed service, but virtual appliance works in this situation.
- Route name:
-
Return to your Bastion session for the
tailspin<uniqueid>-onprem-sql-vm. -
Using Microsoft Edge navigate to https://www.bing.com (or refresh the page if your browser is still running from the previous step). You should no longer be able to access Microsoft Bing.
-
In the Azure portal, navigate back to the hub-fw firewall.
-
On the hub-fw blade, in the Firewall policy section, select hub-fw-pol.

-
On the hub-fw-pol Firewall Policy blade, expand Rules in the left menu, then select Application rules.

-
On the **hub-fw-pol Application rules** blade, select + Add a rule collection from the toolbar. 
-
On the Add a rule collection pane, enter the following values.
- Name:
App-Coll01 - Rule collection type: Select Application
- Priority:
200 - Action:
Allow - Rule collection group:
DefaultApplicationRuleCollectionGroup

- Name:
-
Within the Rules section, create a new entry with the following values.
- Name:
AllowBing - Source type:
IP Address - Source:
10.0.0.0/24 - Protocol:
http:80,https:443 - Destination Type:
FQDN - Destination:
www.bing.com
- Name:
-
Select Add.
-
Wait until you get a notification in the Azure portal that the rule collection has been added successfully, and the rule collection group appears on the Application rules blade. This may take several minutes.
- Return to your Bastion session for the
tailspin<uniqueid>-onprem-sql-vm, and once again attempt to navigate to https://www.bing.com using Microsoft Edge. You should be able to access Microsoft Bing.