Task 02 - Implement MI-Link for hybrid replication and failover
Introduction
With Tailspin’s SQL Server now Arc‑enabled, the next step is to establish connectivity between the on‑premises environment and Azure SQL Managed Instance. This task focuses on configuring Azure Arc MI‑Link, which provides hybrid replication and failover capabilities. By setting up MI‑Link, Tailspin can begin synchronizing data securely and prepare for seamless migration without disrupting mission‑critical workloads.
Description
In this task, you will:
- Run an assessment on the Arc‑enabled SQL Server to validate readiness for MI‑Link.
- Enable MI‑Link replication to establish synchronization between the on‑premises SQL Server and Azure SQL Managed Instance.
- Perform an initial failover test to Azure SQL Managed Instance, confirming that workloads can be redirected successfully.
Success Criteria
- Assessment completes successfully and confirms readiness for MI‑Link.
- MI‑Link replication is enabled and data begins synchronizing between on‑premises SQL Server and Azure SQL Managed Instance.
- A planned failover to Azure SQL Managed Instance is executed and validated.
Step-by-Step Instructions
-
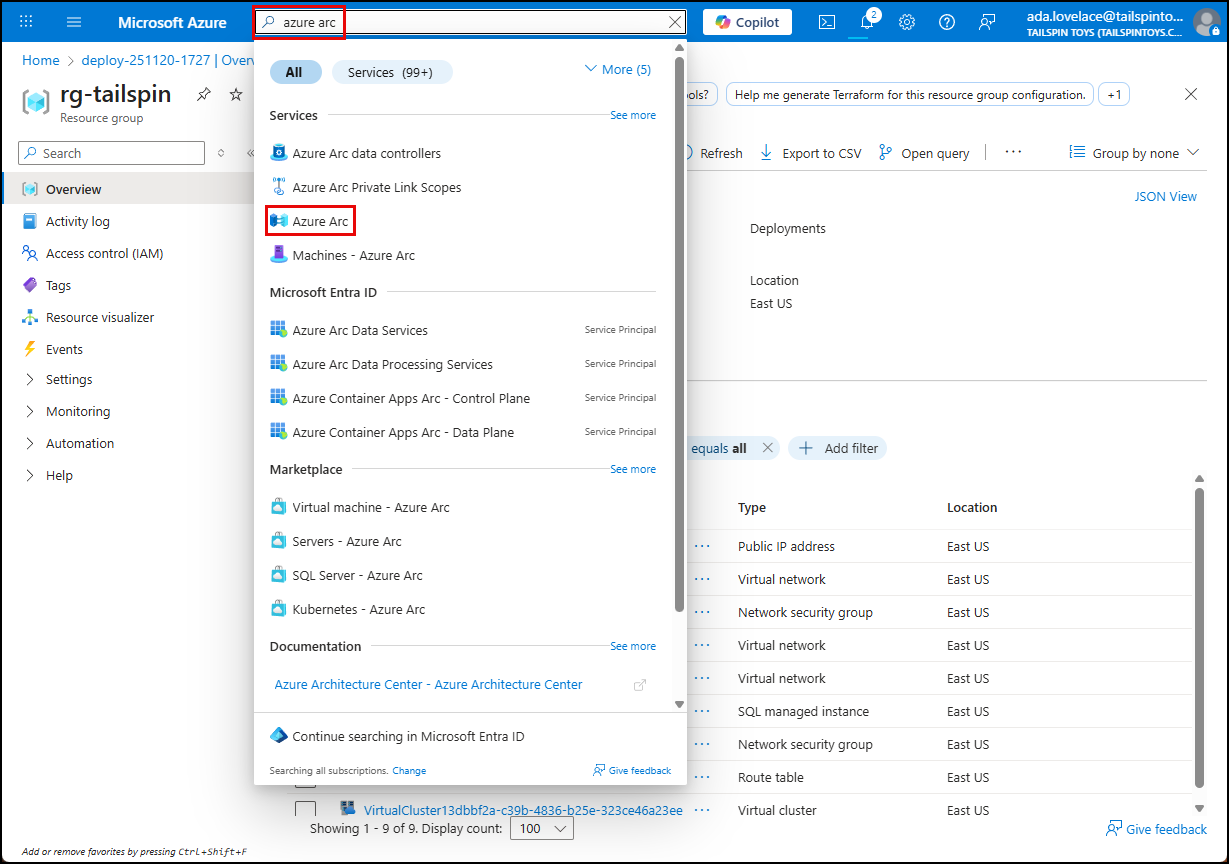
Navigate to the Azure portal, enter “azure arc” into the search bar, and select Azure Arc under Services in the results.
-
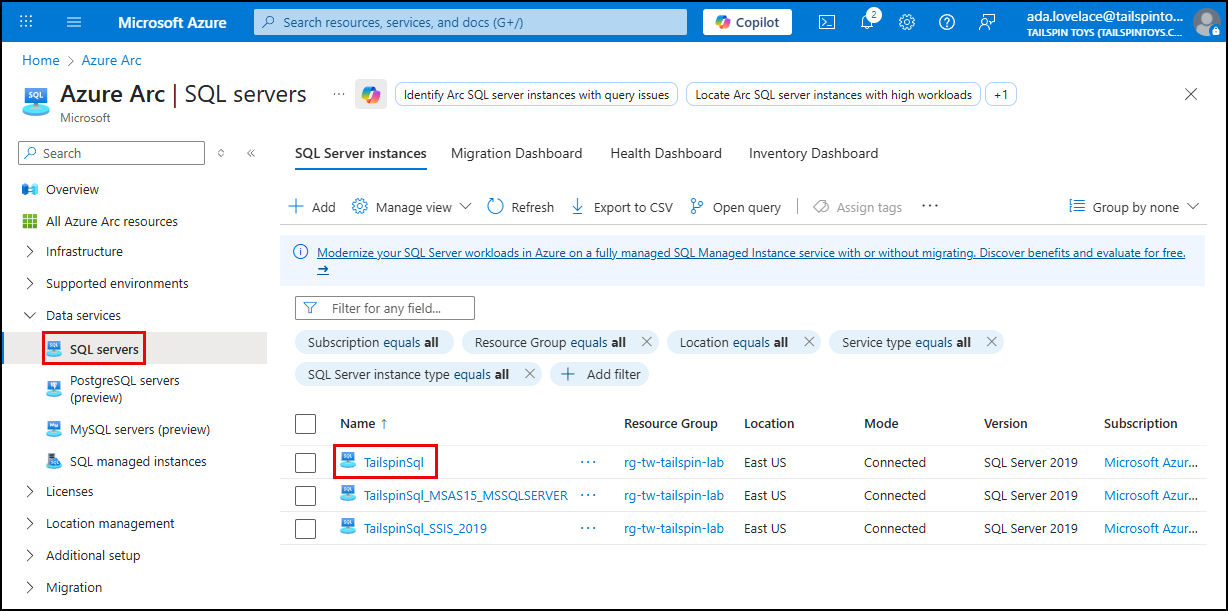
On the Azure Arc blade, select SQL servers under Data services in the left menu, then select the TailspinSql server from the list of SQL Server instances.
-
On the TailspinSql page, expand Migration in the left menu, select Assessments, then select Run assessment on the Assessments page.

IMPORTANT: If you recieve an error that the request to run the assessment has failed, you may need to wait a few minutes and try again. This can happen when the discovery process has not yet fully completed. If the assessment fails or reports warnings, you can re-run it at any time by selecting the database, choosing Migrate, and selecting Run assessment again. You do not need to recreate the migration project. You may proceed with the migration even if the assessment reports warnings or non-blocking issues. Blocking issues must be resolved before the migration can start.
NOTE: Assessments are automatically run on all Arc-enabled SQL Servers. However, you will need to manually run the assessment since the SQL Server was just added and the scheduled assessment has not run yet.
-
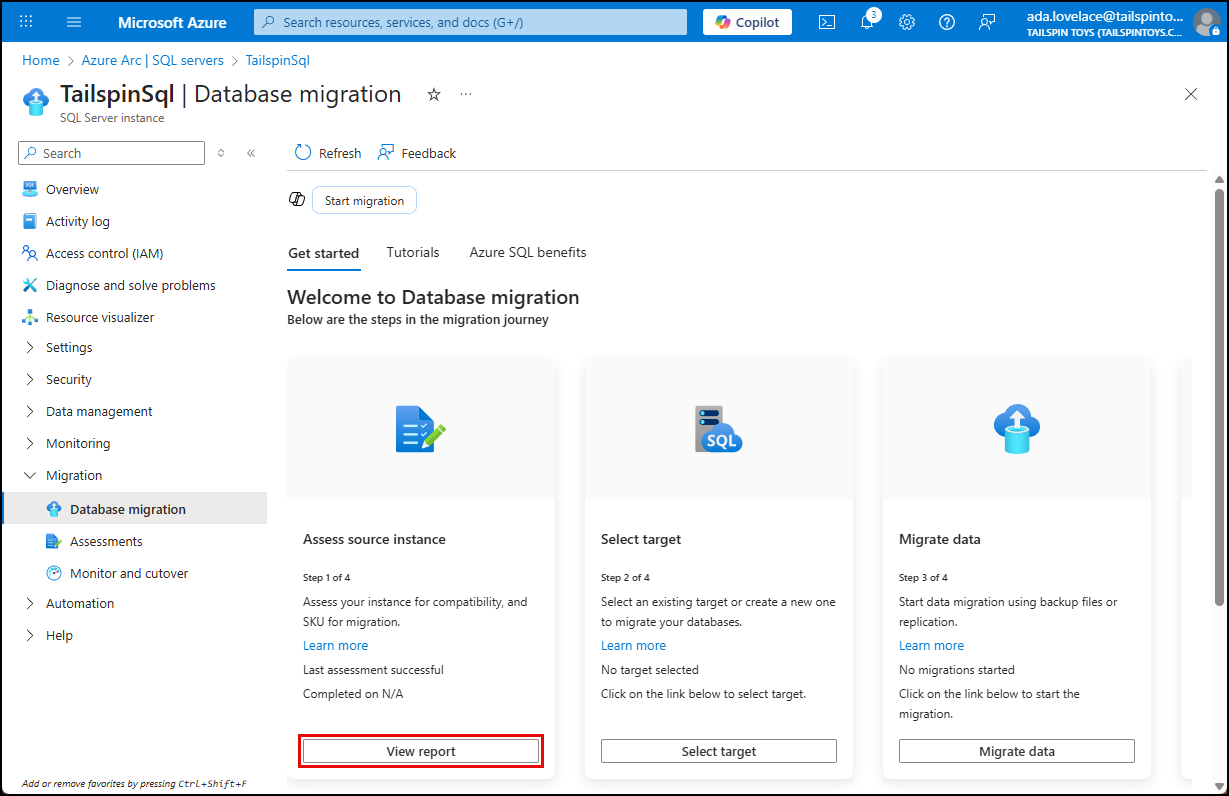
Since you have a few minutes before the assessment is available, select Database migration in the left menu to review the migration steps. This unified dashboard provides an end-to-end view of the migration journey of your SQL Server Instance by providing access to Assessments, Target creation, Data migration and Cutover.
-
Before starting the migration, review the Azure SQL Benefits tab, where you will see key advantages such as built-in monitoring, automatic performance tuning, extended security updates, and high availability. This helps you understand the value proposition of migrating to Azure SQL.
-
On the Database migration blade, select Start migration to launch Copilot and generate an overview of the SQL Server migration process. This includes high-level steps for completing a migration.

NOTE: The Copilot chat capability within the Arc migration experience provides guided step by step instructions of the migration journey. It can also answer questions about next steps and help troubleshoot issues.
-
When ready, close the Copilot panel by selecting the
Xin the upper right corner. -
The tiles within the Database migration blade highlight the steps required for beginning the migration journey. Step 1 is Assess source instance, which you already stated by running an assessment. Select View report, which will take you back to your assessment.
-
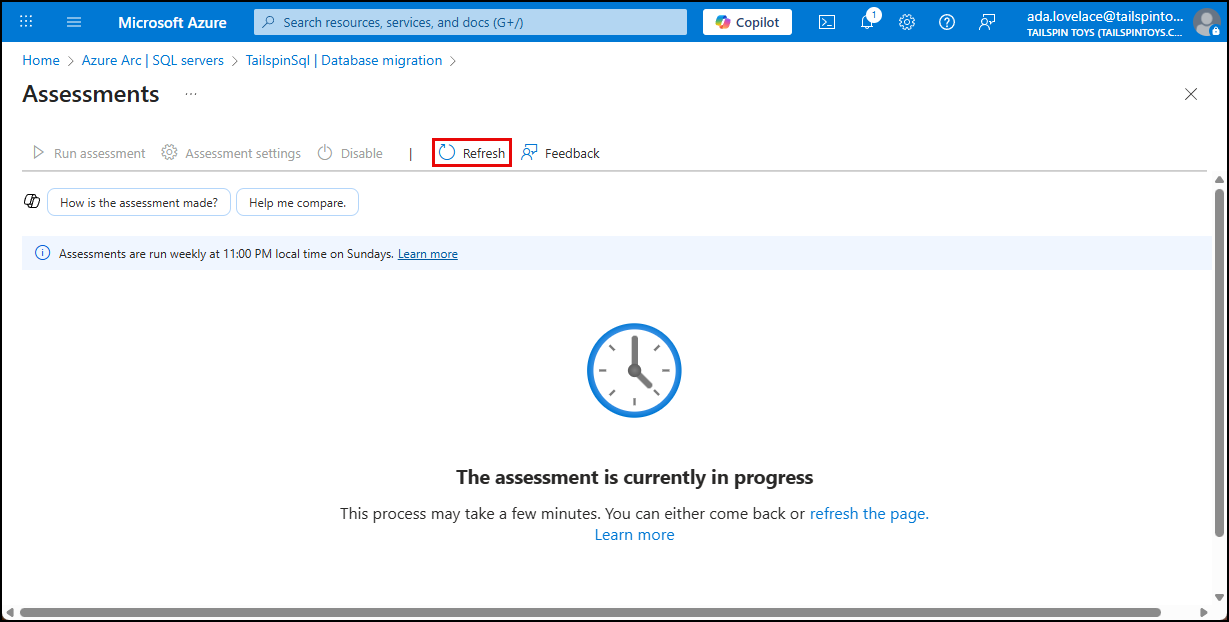
If your assessment is not ready, select Refresh on the toolbar to periodically until it is available.
-
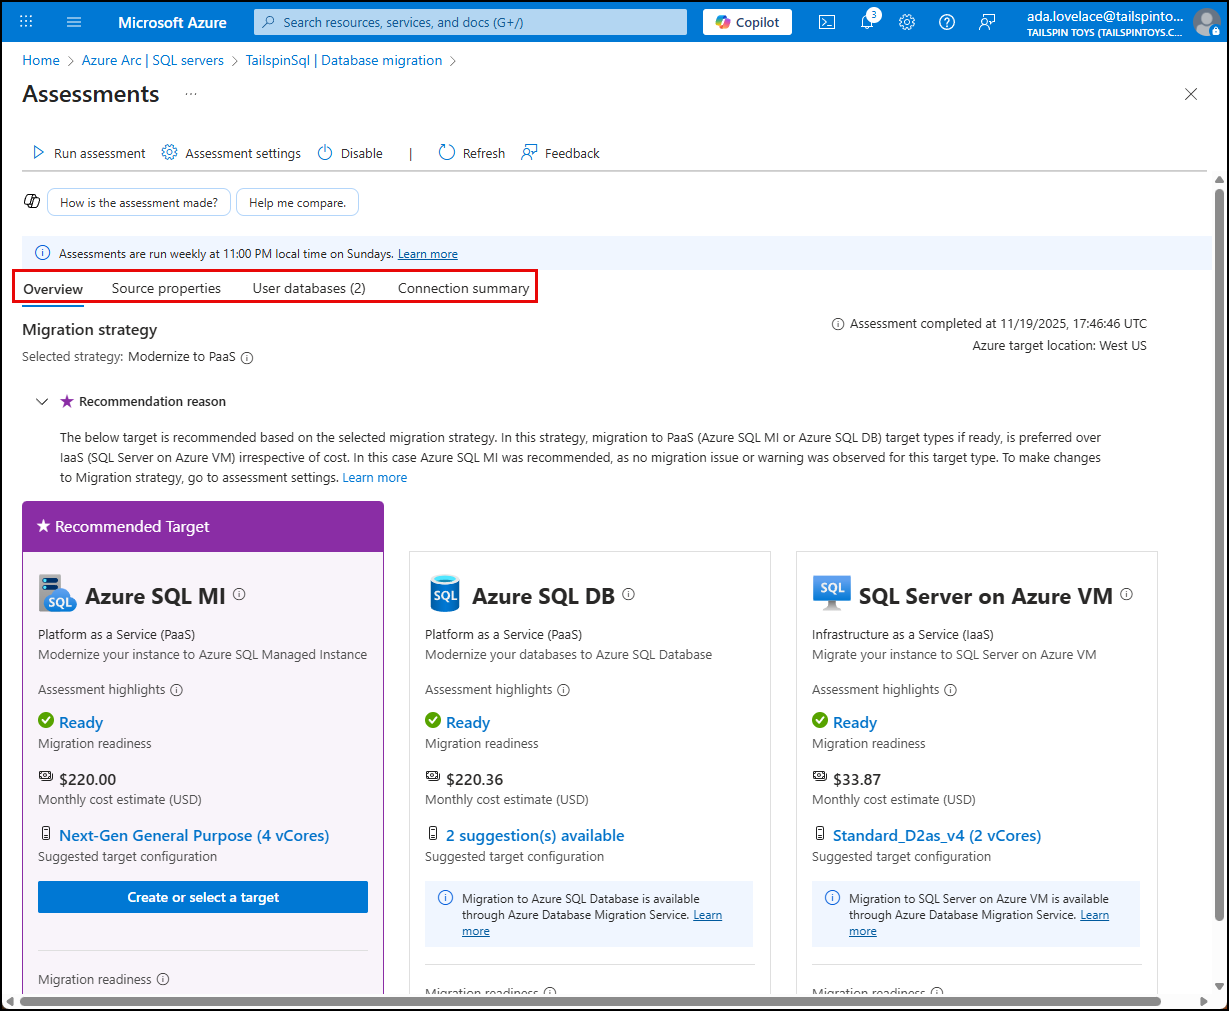
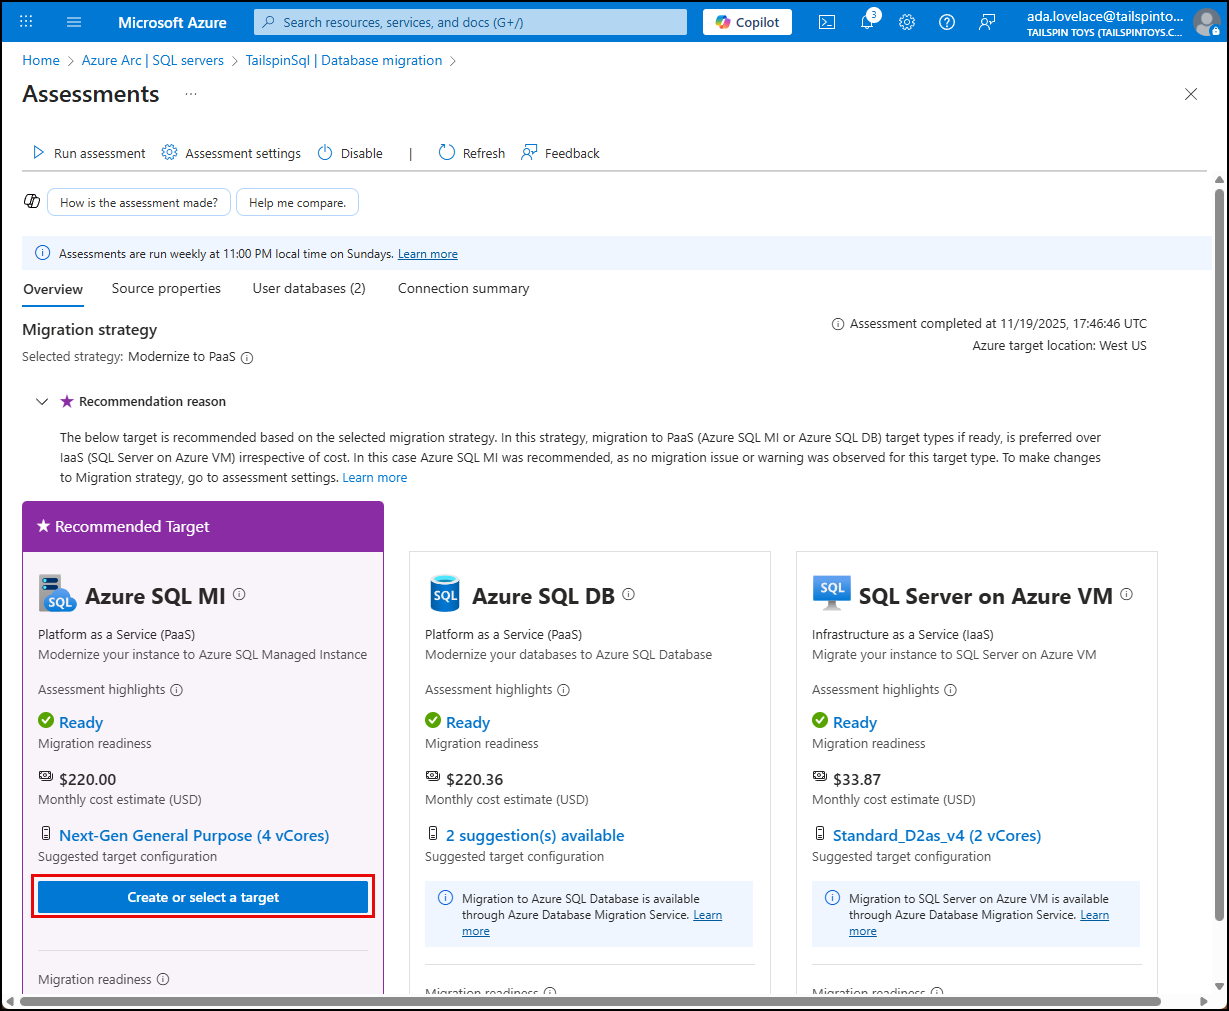
Take some time to review the assessment, selecting each tab (Overview, Source properties, User databases, and Connection summary) to gain an understanding of the information available and the proposed migration strategy and recommended target.
-
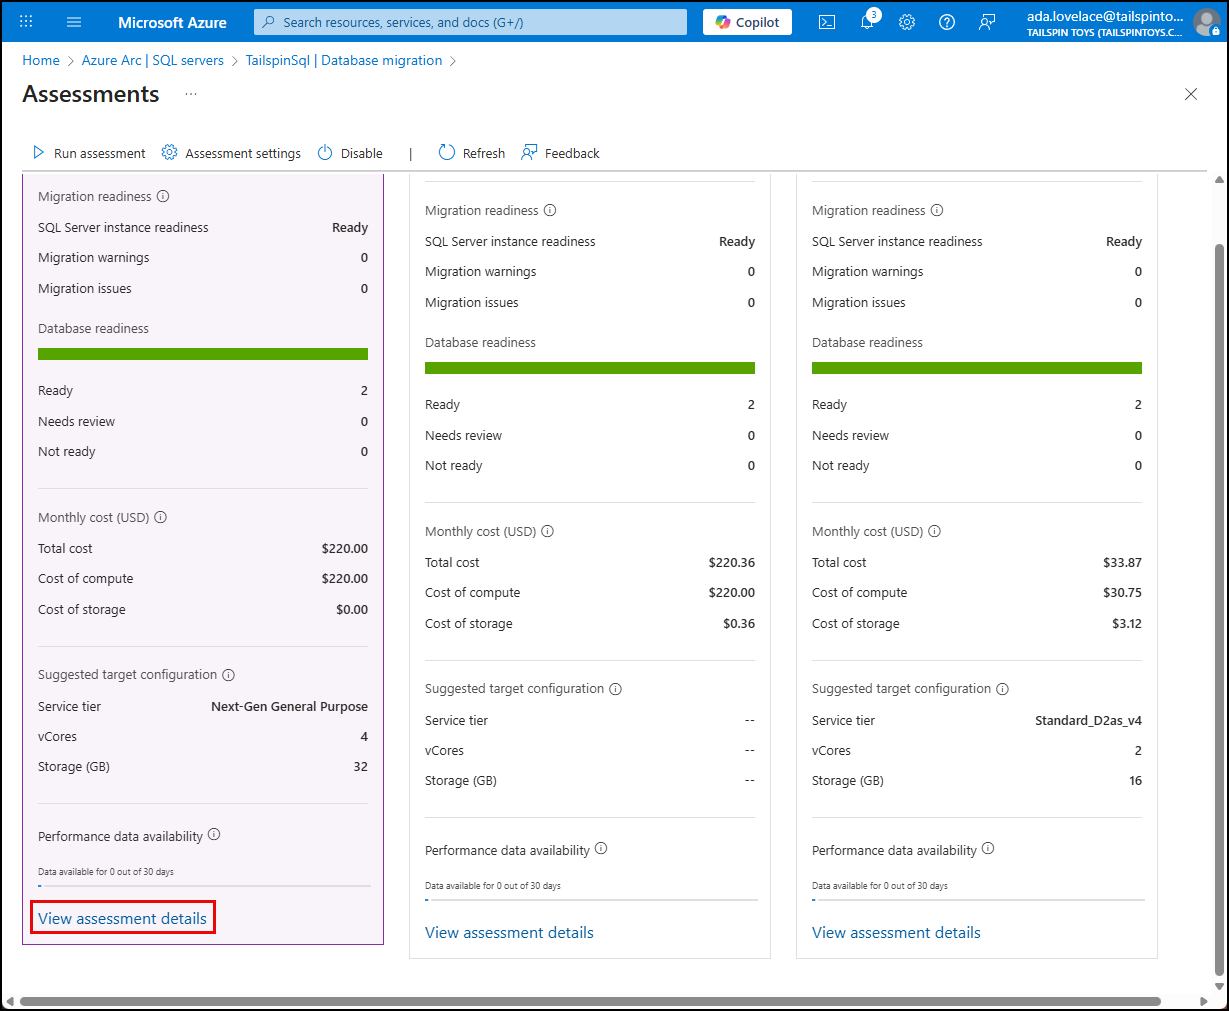
When ready, scroll down on the Overview tab and select View assessment details at the bottom of the Azure SQL MI panel. This view provides details on the blockers and warnings for each finding and recommendations on the remedial actions to resolve those blockers.
-
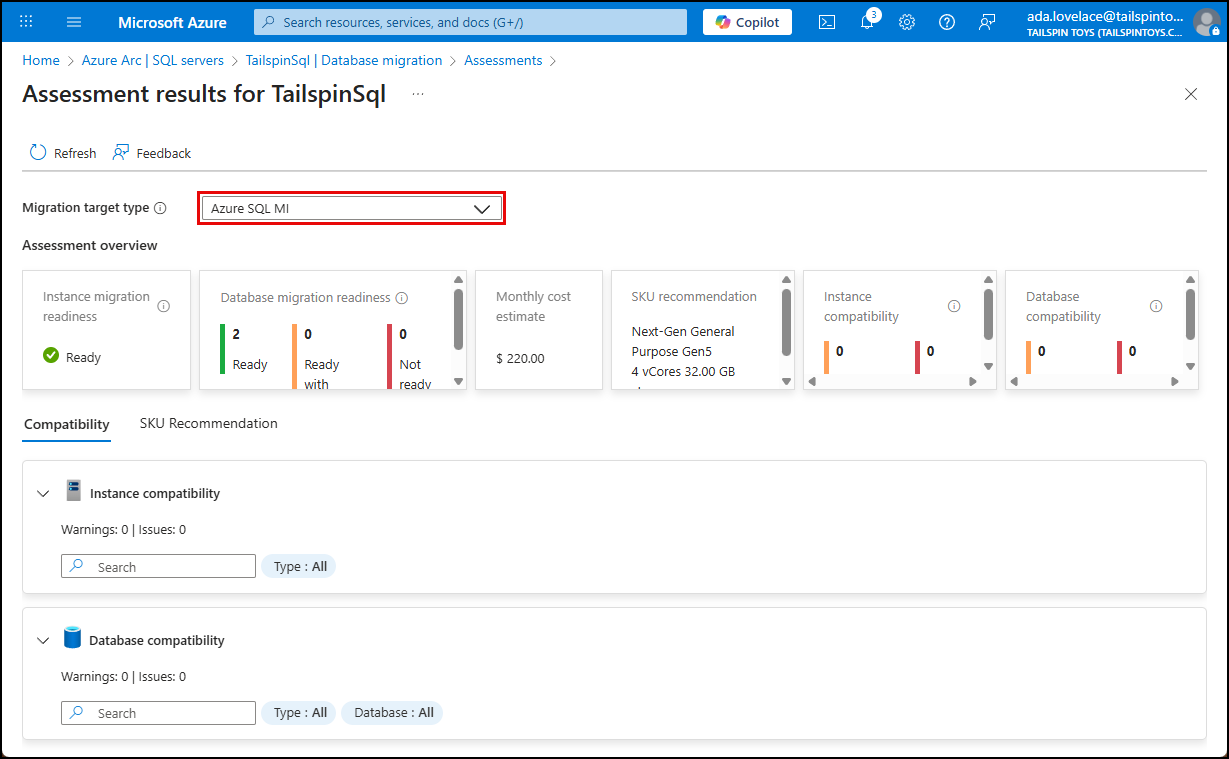
On the Assessment results for TailspinSql page, ensure Azure SQL MI is selected for the Migration target type, then review the assessment overview, evaluating the database migration readiness and compatability details in the tiles.
-
In the Instance compatability section of the Compatability tab, you may see a warning under Findings that unsuppored trace flags were found. You can select this to get more details.

NOTE: The trace flags not supported in Azure SQL Managed Instance were found warning is expected. Trace flags were added to the TailspinSql database during the ARM deployment to improve performance during the migration.
-
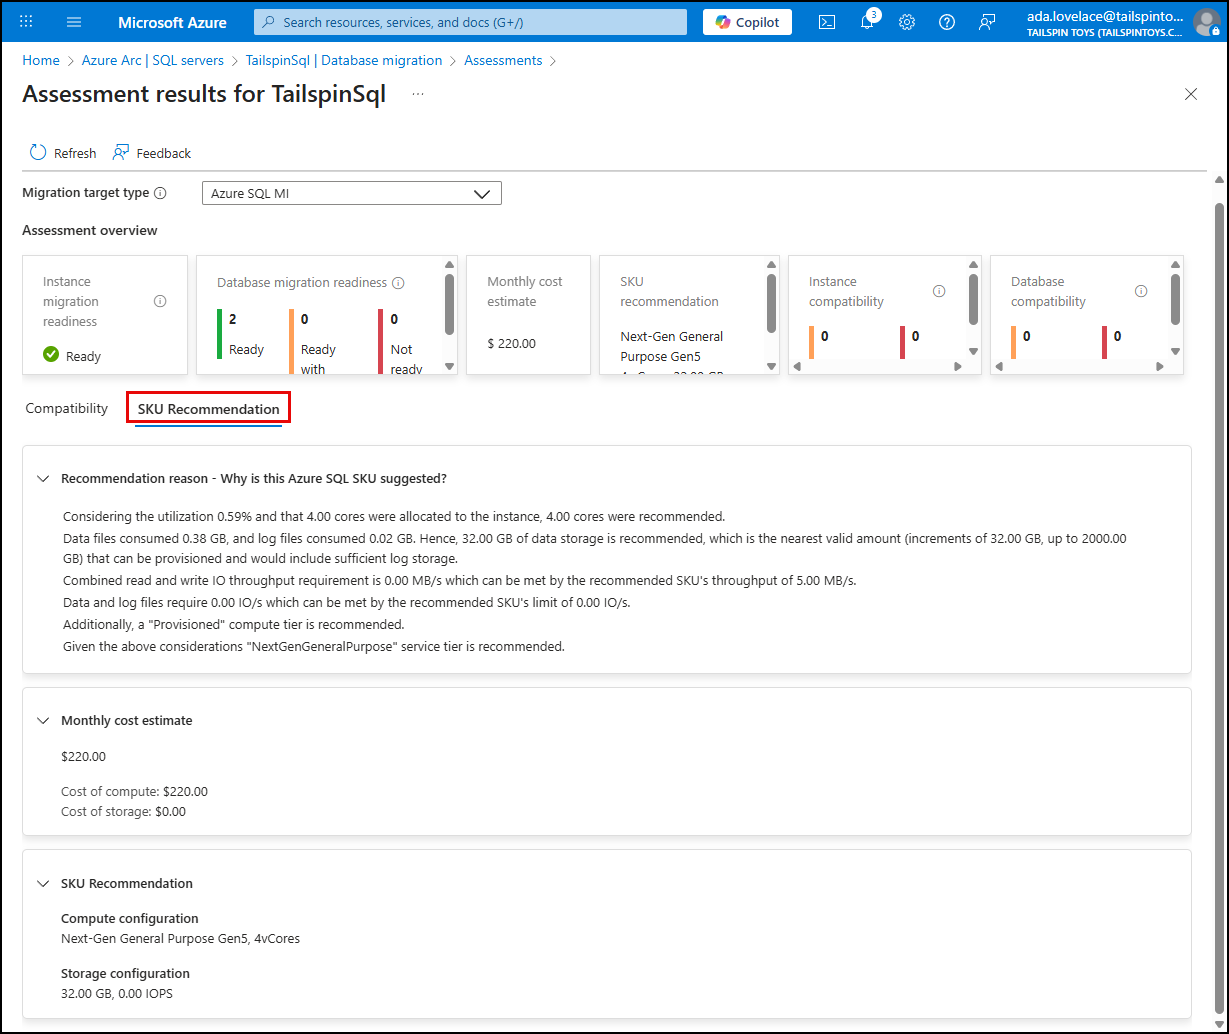
Select the SKU Recommendation tab and review the recommendation reason, monthly cost estimate, and SKU recommendation.
-
Return to your assessment and select Create or select a target within the Azure SQL MI tile.
-
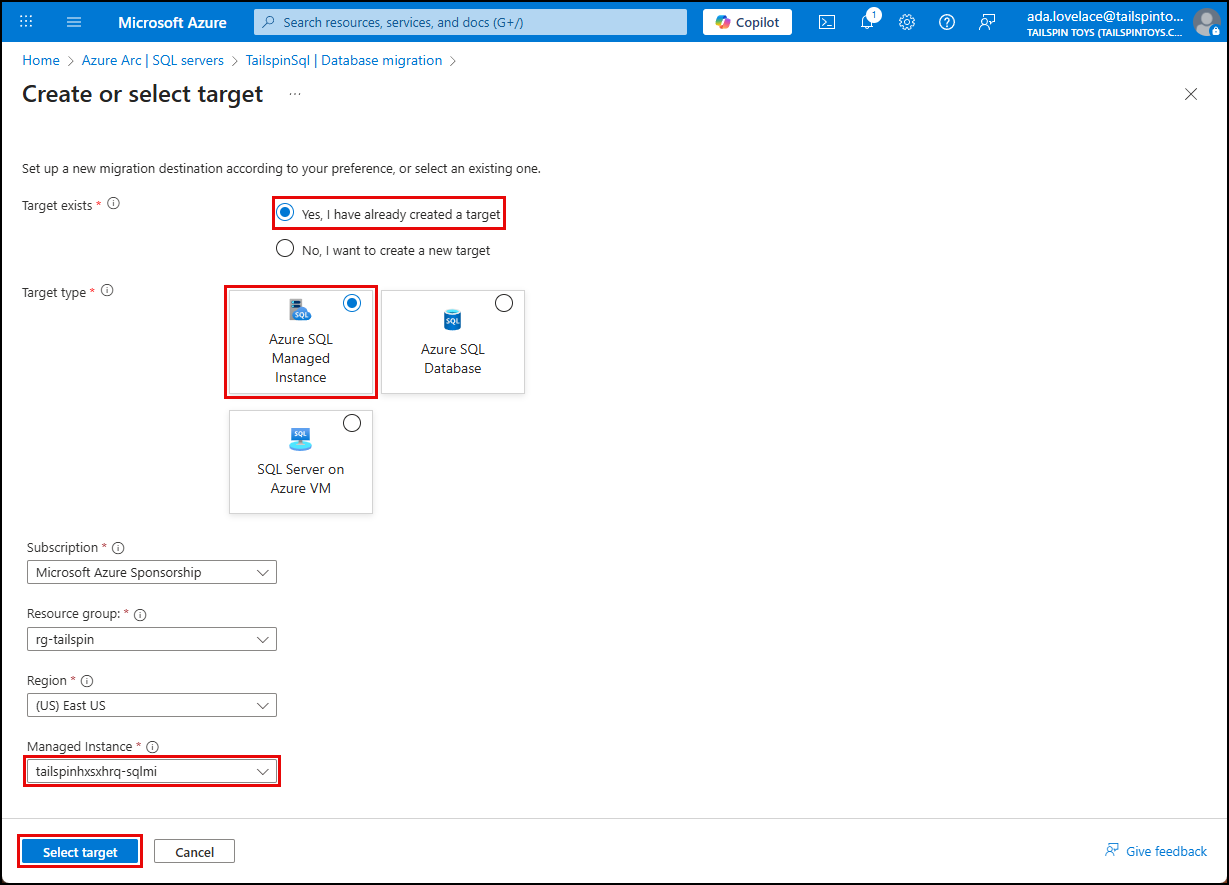
On the Create or select target blade:
- Select Yes, I have already created a target
- Choose Azure SQL Managed Instance as the Target type
- Select the Managed instance that was created by the ARM template deployment
- Select Select target
-
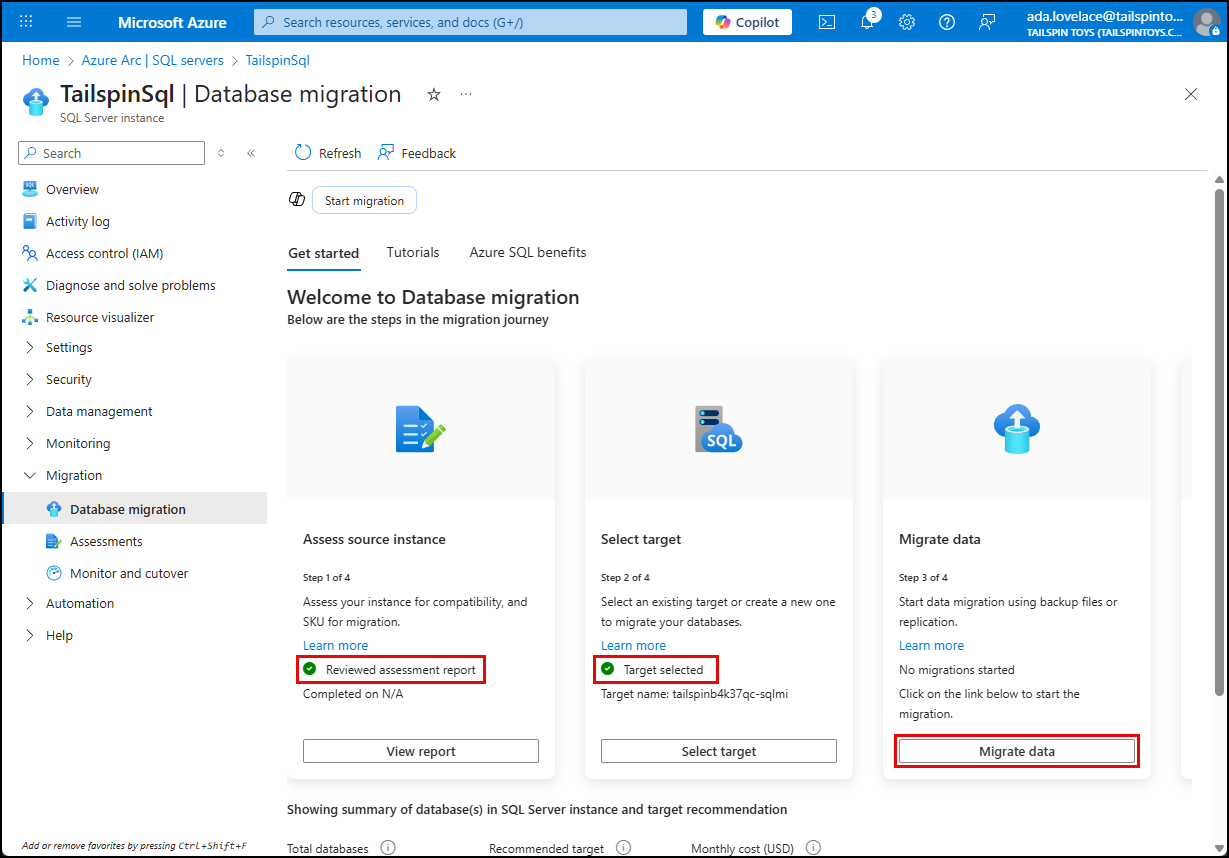
You should be returned to the Database migration page, where Steps 1 and 2 of the migration process are marked as complete, as indicated by green checkmarks on those tasks. Select Migrate data in Step 3 to start the data migration process.
-
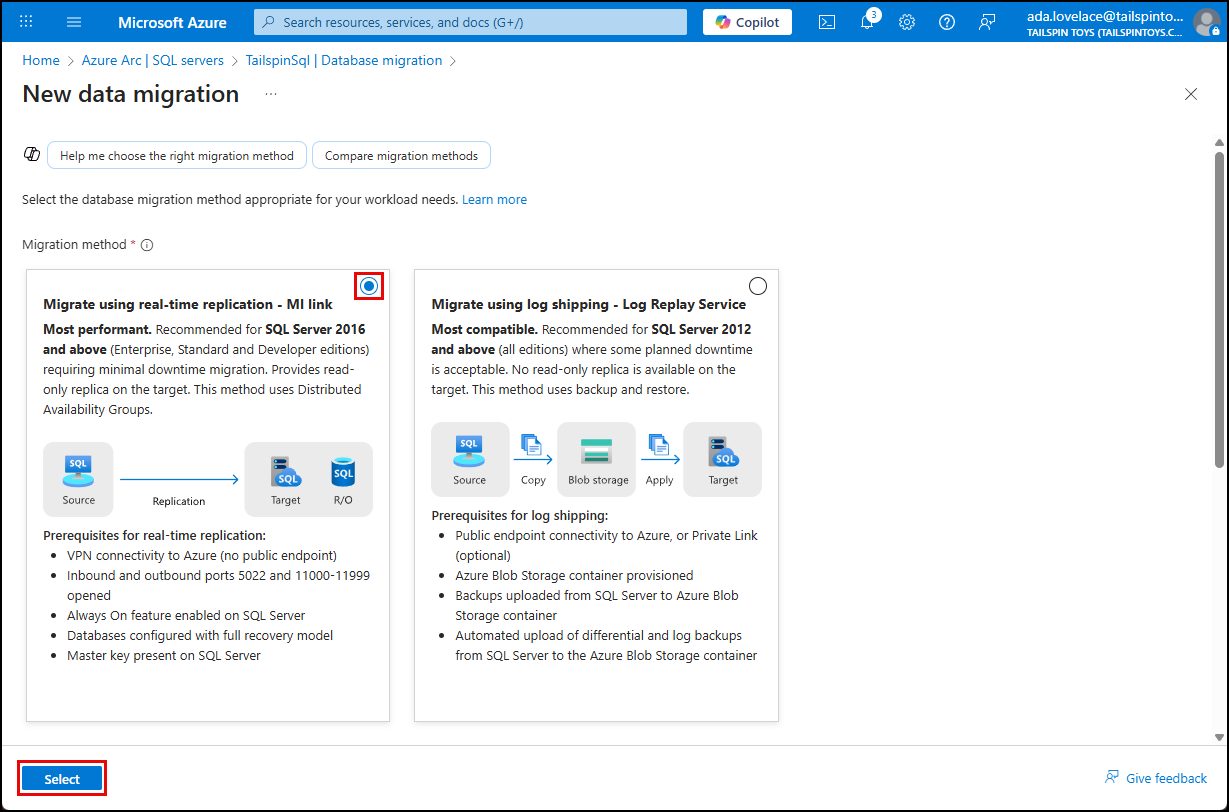
On the New data migration page, select Migrate using real-time replication - MI Link, then select Select.
-
On the Select source databases tab, review the migration readiness of the databases on the TailspinSql server. Select the Not ready status next to the Customer360 database and review the readiness issues.
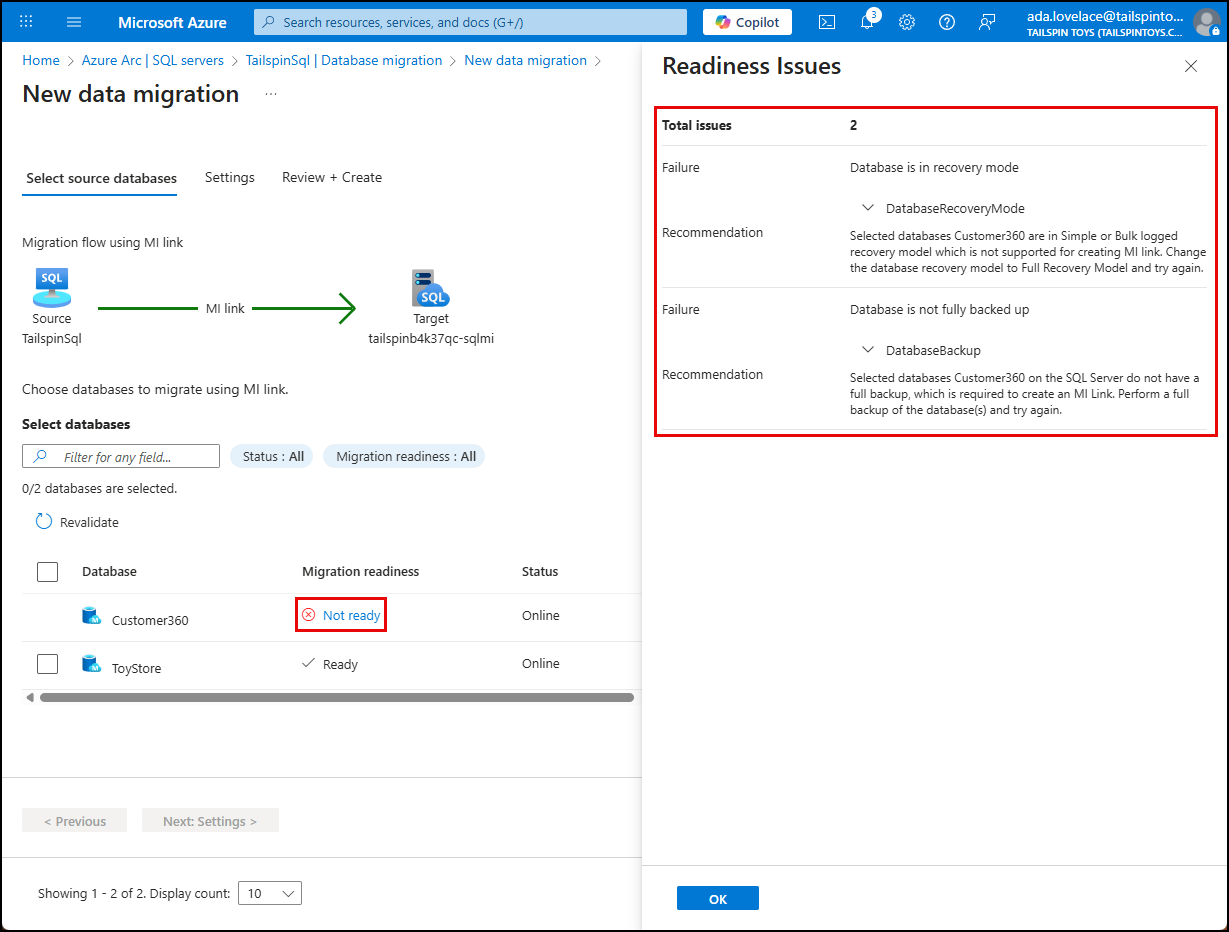
NOTE: For this lab, you will only be migrating the ToyStore database, so you do not need to fix the issues with the Customer360 database, but this demonstrates how Azure Arc can help guide you to ensure successful migrations.
-
Select OK to close the Readiness Issues dialog.
-
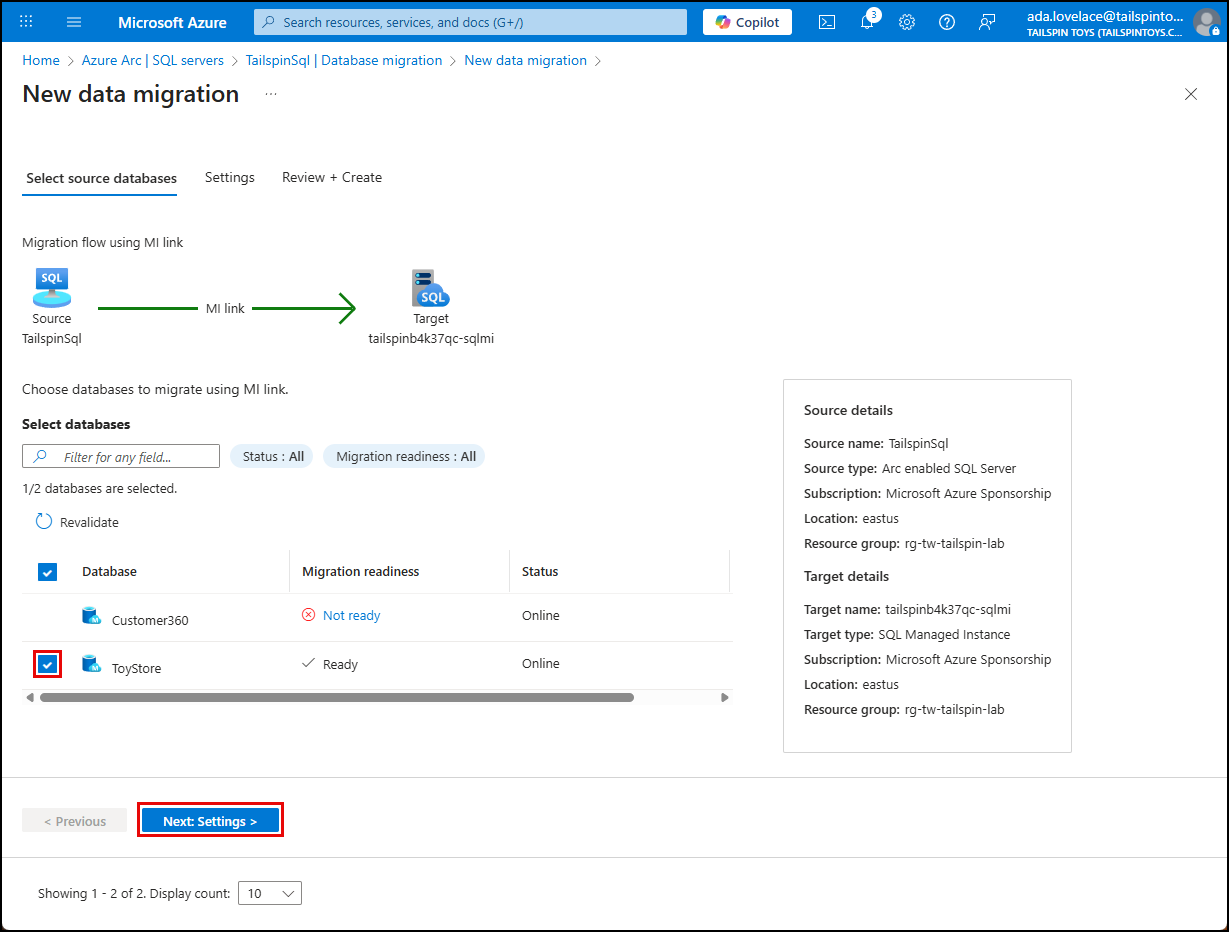
Select the ToyStore database by checking the box in front of it, then select Next: Settings.
-
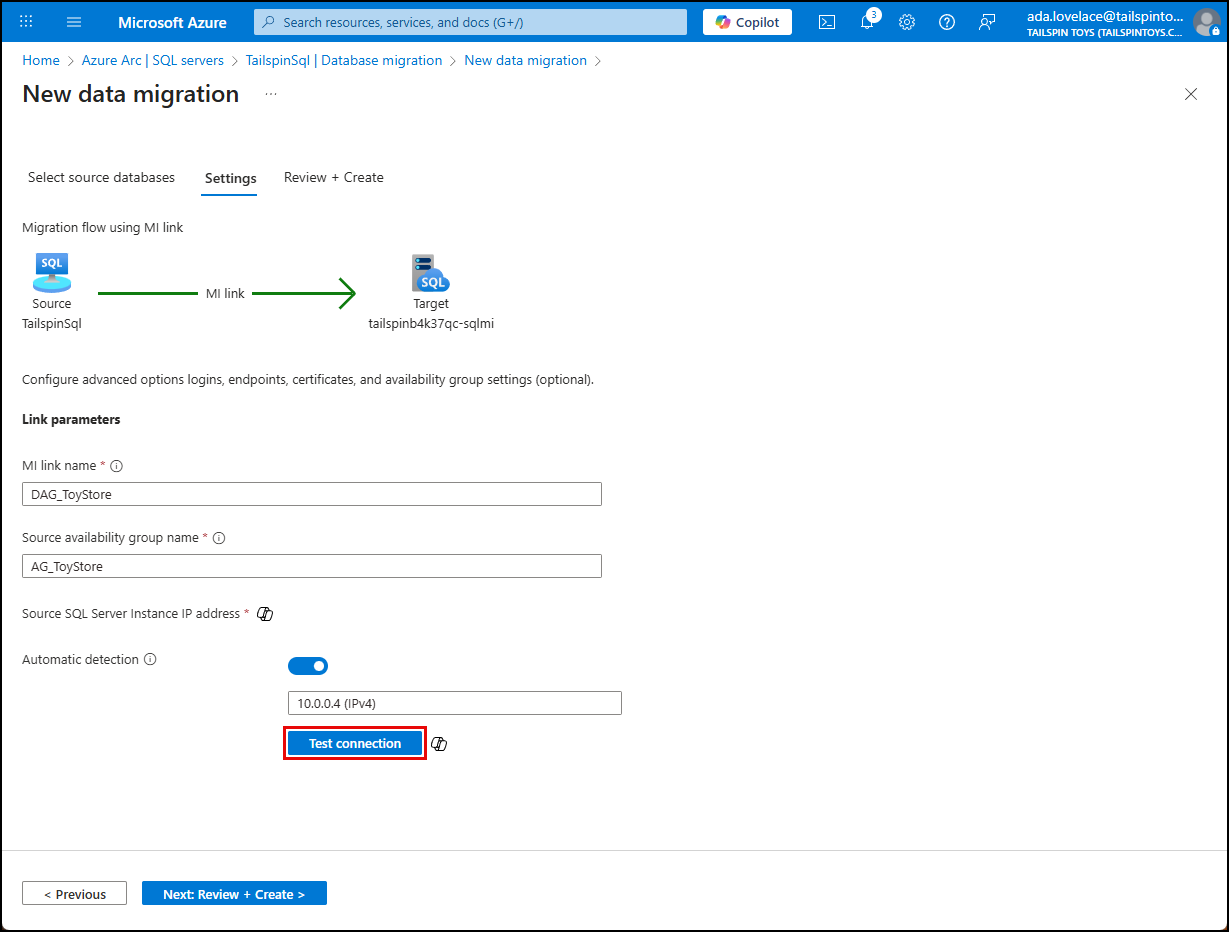
On the Settings tab, accept the default MI link and Source availability group names, verify automatic IP address detection is enabled, then select Test connection.
-
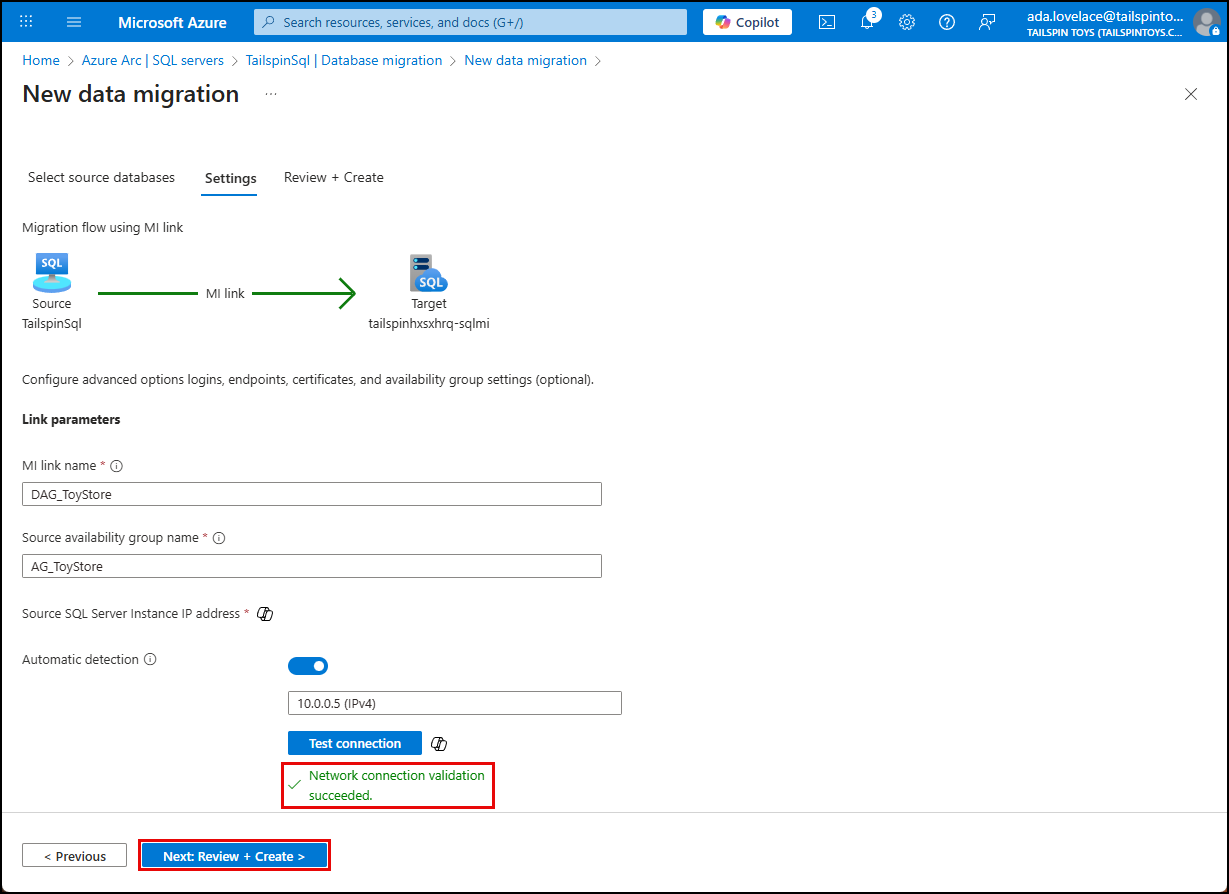
Ensure your network connection validation succeeds, then select Next: Review + Create.
-
On the Review + Create tab, review the data migration, you may see a SQL Server configuration status of Ready with warnings. Select the link to view the warnings. Otherwise, proceed to starting the migration.
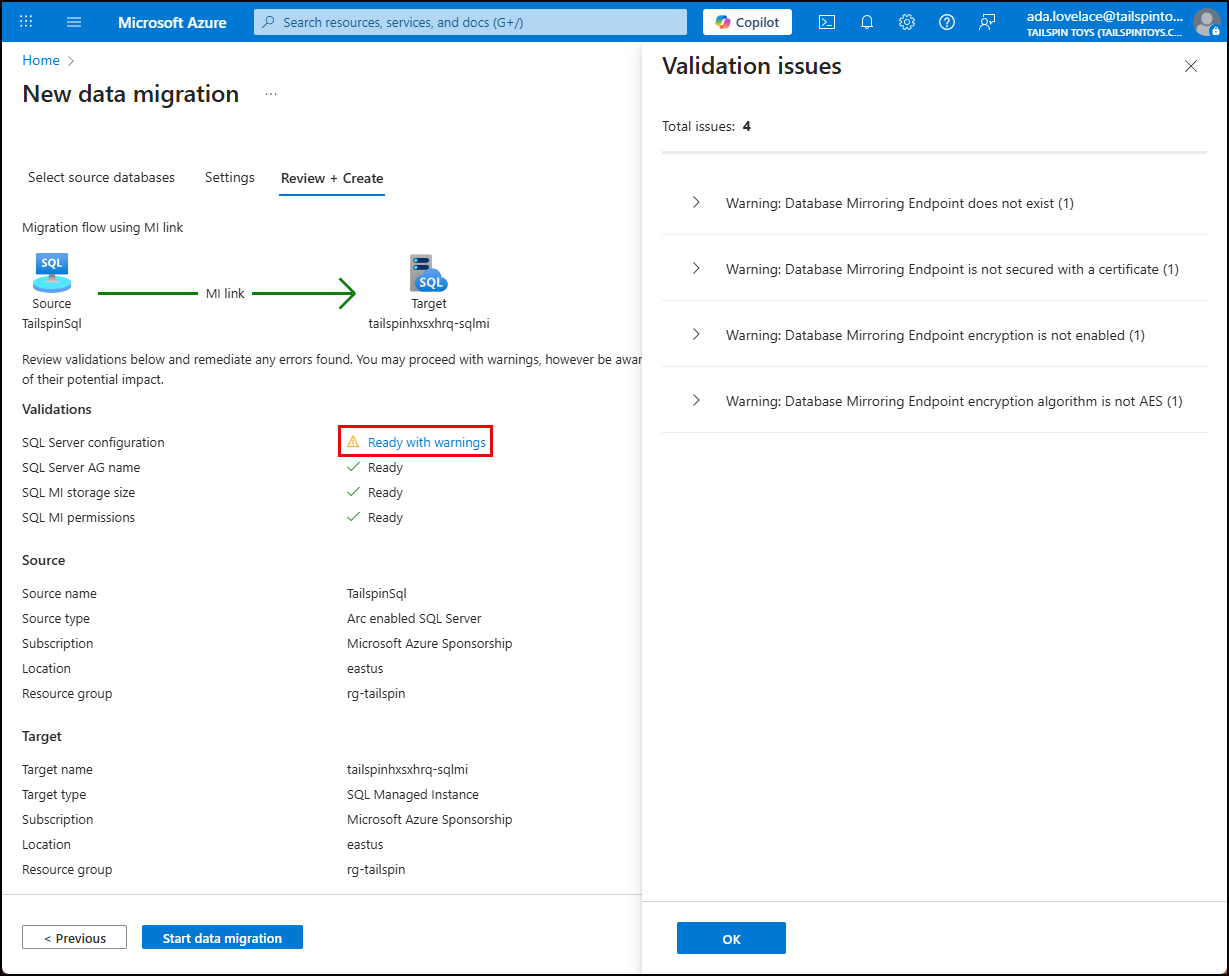
NOTE: The warnings about the database endpoint mirroring are a bug that can be safely ignored.
-
Select OK to close the Validation Issues dialog.
-
Select Start data migration.
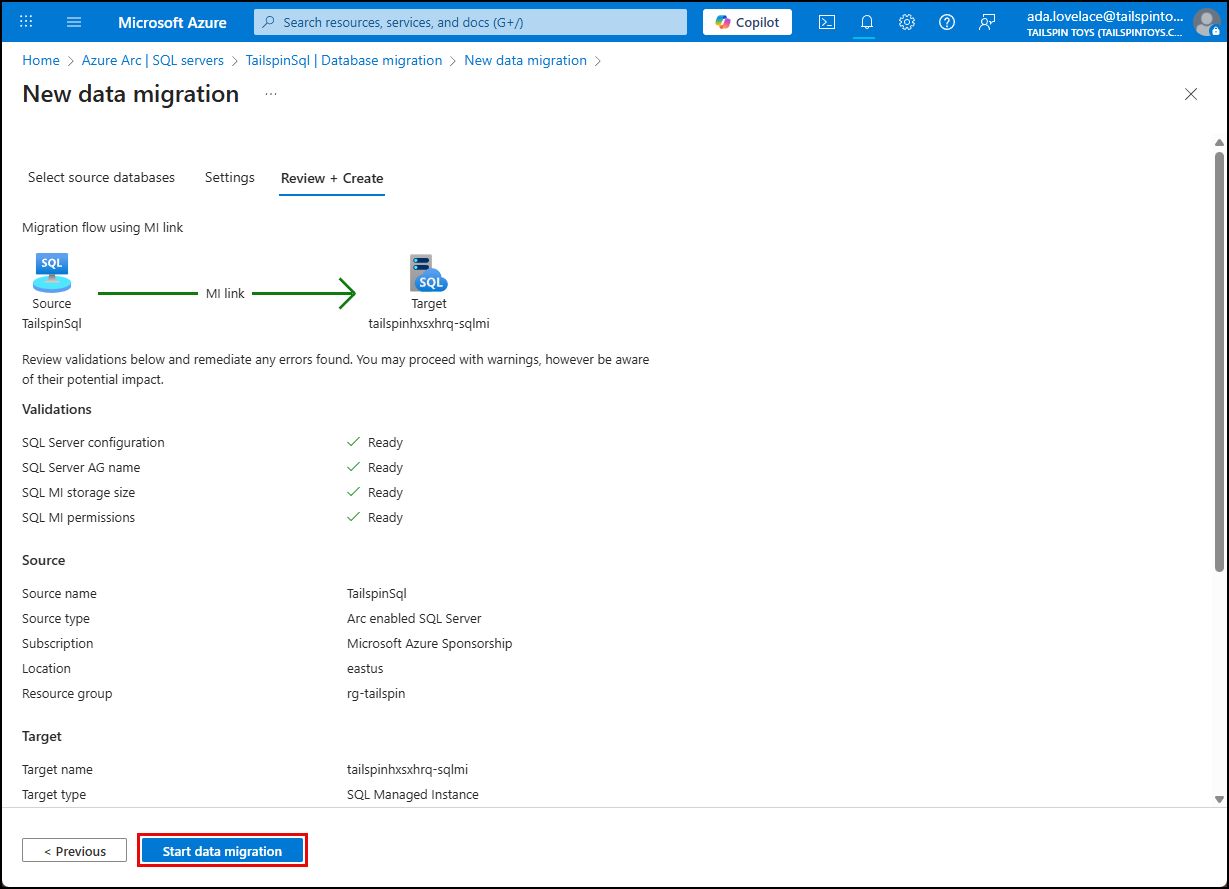
WARNING: Only click Start data migration once. It may appear to not respond for a few seconds, so be patient. Clicking a second time will start another migration and result in failures.
-
You should be returned to the TailspinSql page. Select Monitor and cutover under Migration in the left menu. The migration is a long running process, and it can take several minutes for the migration to appear. Select Refresh every few minutes until it shows up in the list.

NOTE: If you had the Ready with warnings status on your SQL Server configuration, you might be redirected back to the Azure portal home page. Navigate back to the Azure Azc SQL Servers page and select the TailspinSql server, and then complete the step above.
-
If the Migration status shows as Stalled, you can select the notifications icon on the Azure portal top bar and monitor the progress of the migration deployment. It may show a status of Stalled until the deployment has finished.
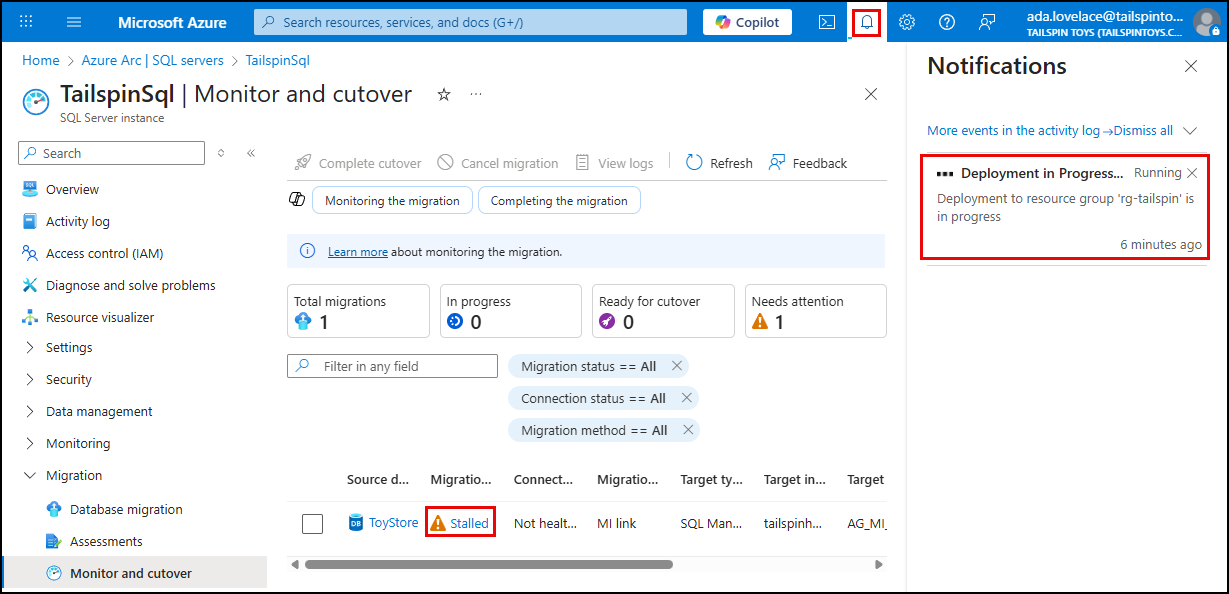
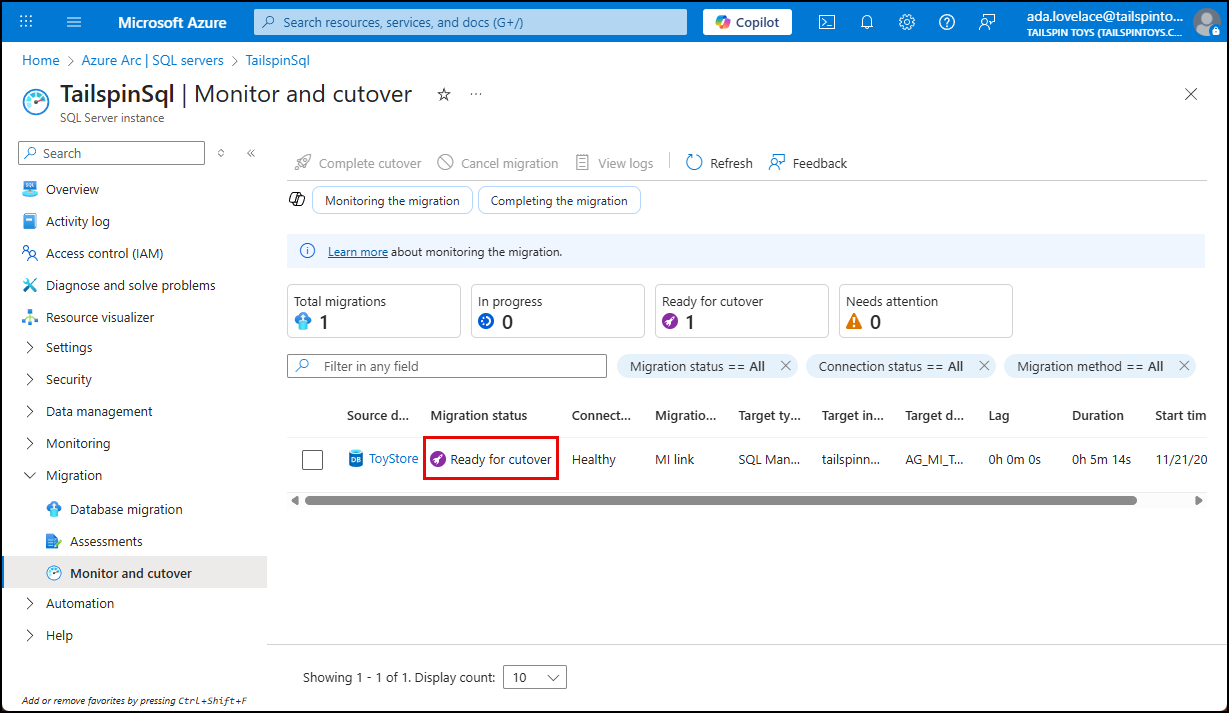
-
After 5-10 minutes, you should receive an Azure notification that the deployment was successful and the migration status will change to Ready for cutover.
-
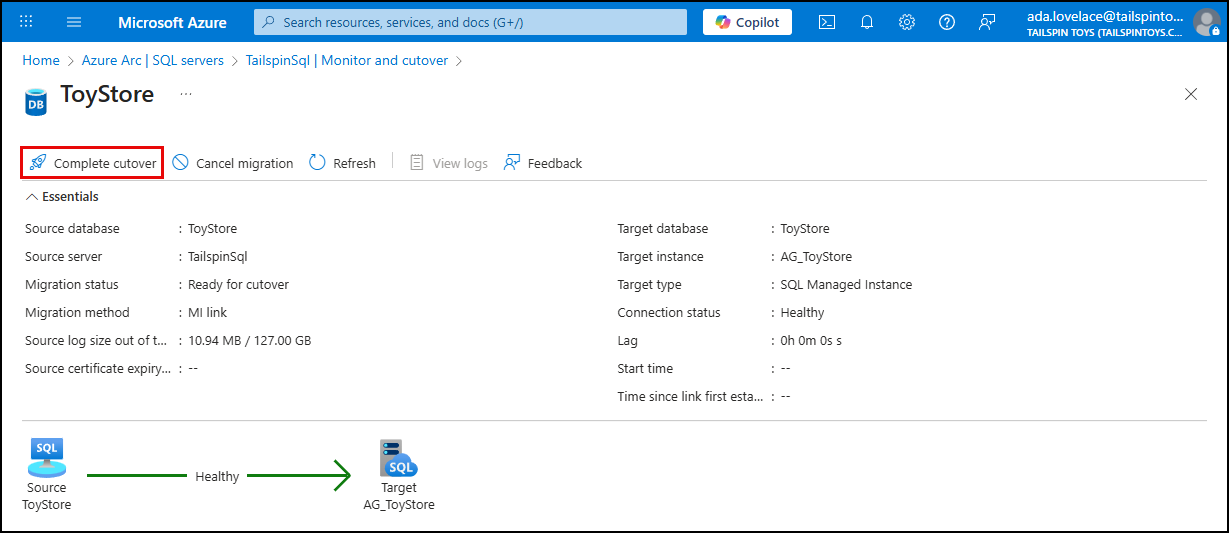
Select the ToyStore migration and on the ToyStore blade, select Complete cutover.
-
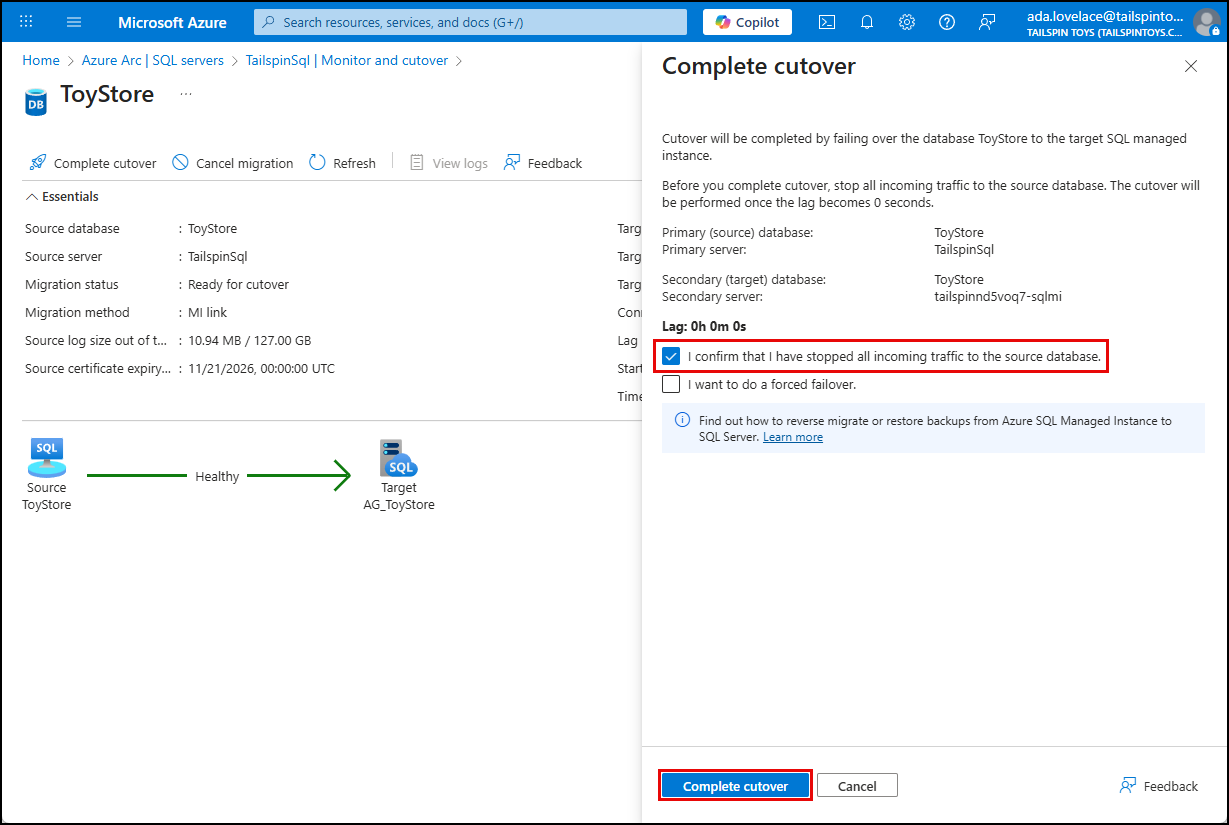
In the Complete cutover dialog, check the box to confirm that all incoming traffic to the source database has been stopped, then select Complete cutover.
-
After a few minutes you will receive a notification that the cutover completed.
Note: If the cutover fails, try again, this time selecting I want to do a forced failover. on the Complete cutover dialog.
-
On the Monitor and cutover screen, select Refresh and the migration should disappear, as it is now complete.
-
Congratulations! You have successfully establish the link between Tailspin’s on-premises
ToyStoredatabase and SQL MI and migrated theToyStoredatabase.