Importing and exporting data with Airlock
This guide will take you through the process of importing data into a TRE workspace, and exporting data from a workspace to the outside world, using the Airlock feature.
The Airlock feature is intended for ad-hoc use when you need to bring in and export out files that you need for your research. It ensures that when you import or export this data all the appropriate approvals and procedures configured by your organisation take place.
You can read more about the Airlock feature in the Airlock documentation.
Importing data to a workspace
To bring in external data to a secure TRE workspace so you can use it for your research, follow the steps outlined below.
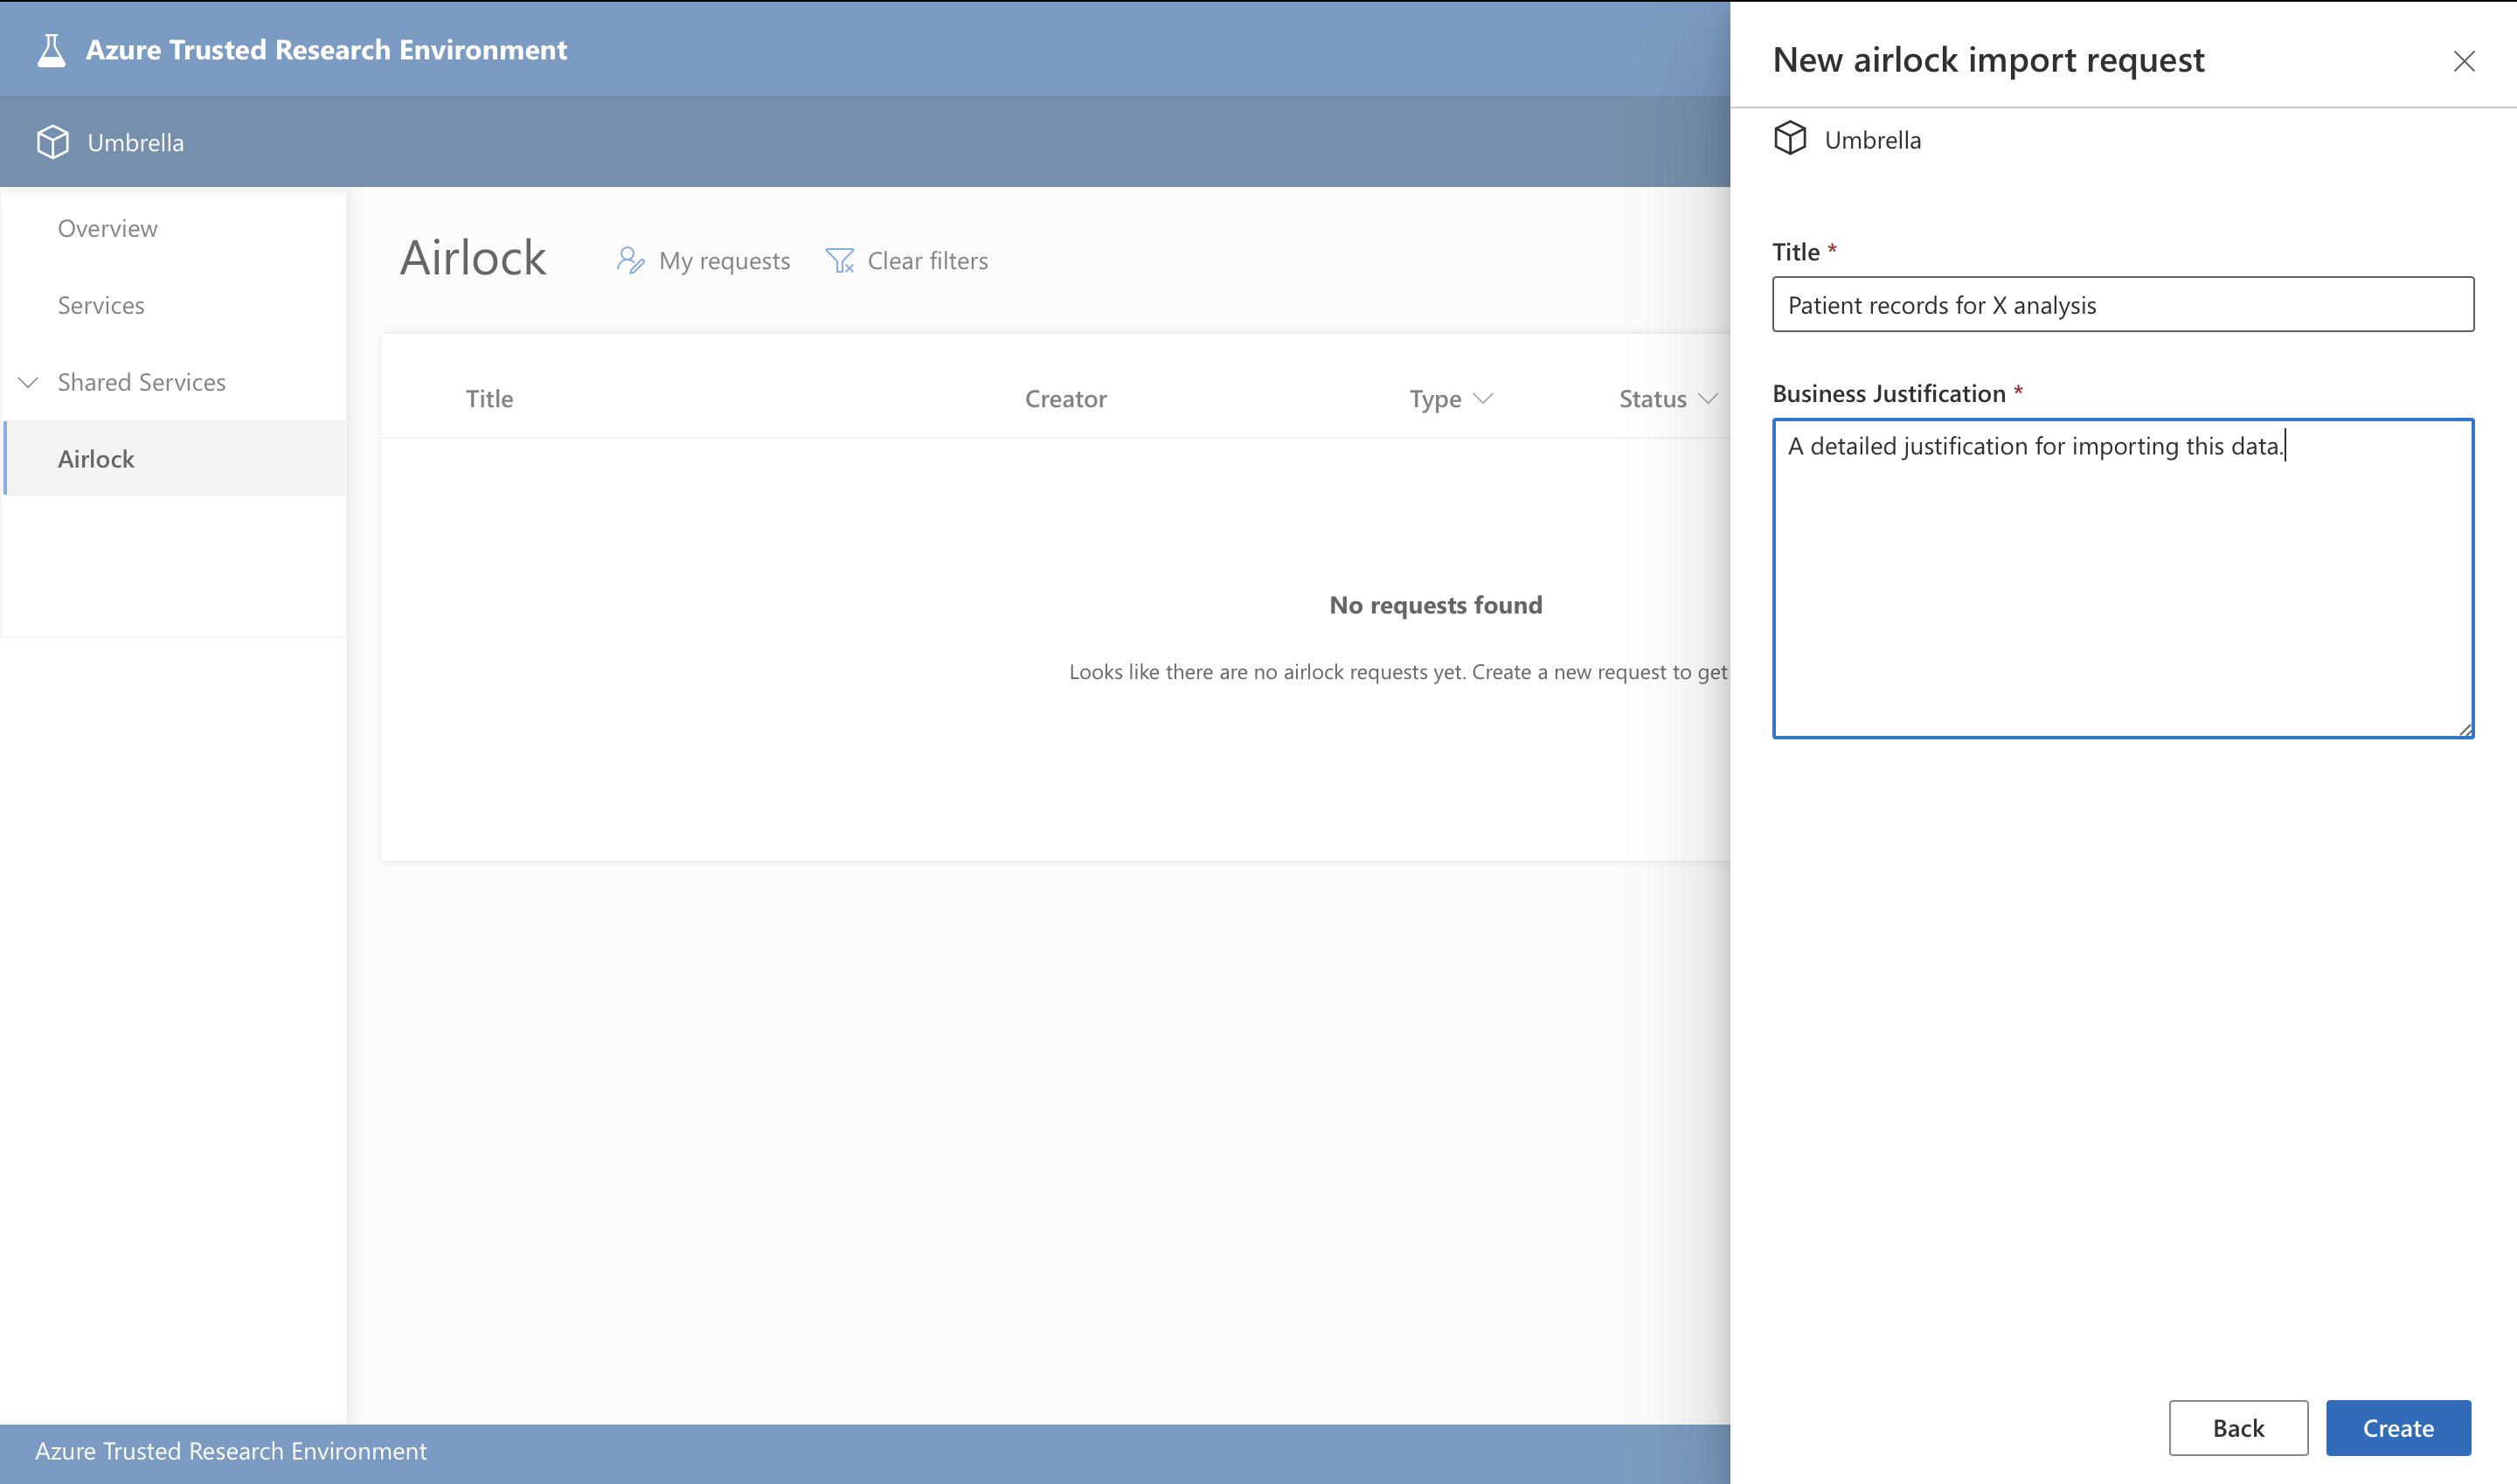
Step 1: Create a draft import request
-
Open your TRE UI and navigate to the workspace you wish to import data into
-
Navigate to the Airlock tab (in the left-hand menu)
-
Click Create new and select Import
-
Fill in a suitable Title for your request (make this short but descriptive to help you and others identify it in a list of many other requests)
-
Provide a Business Justification for bringing the data into the workspace (this will be used to help your organisation's data stewards decide whether to approve or reject the request)
-
Click Create when ready. This will create your draft request and allow you to proceed with adding the data you'd like to import
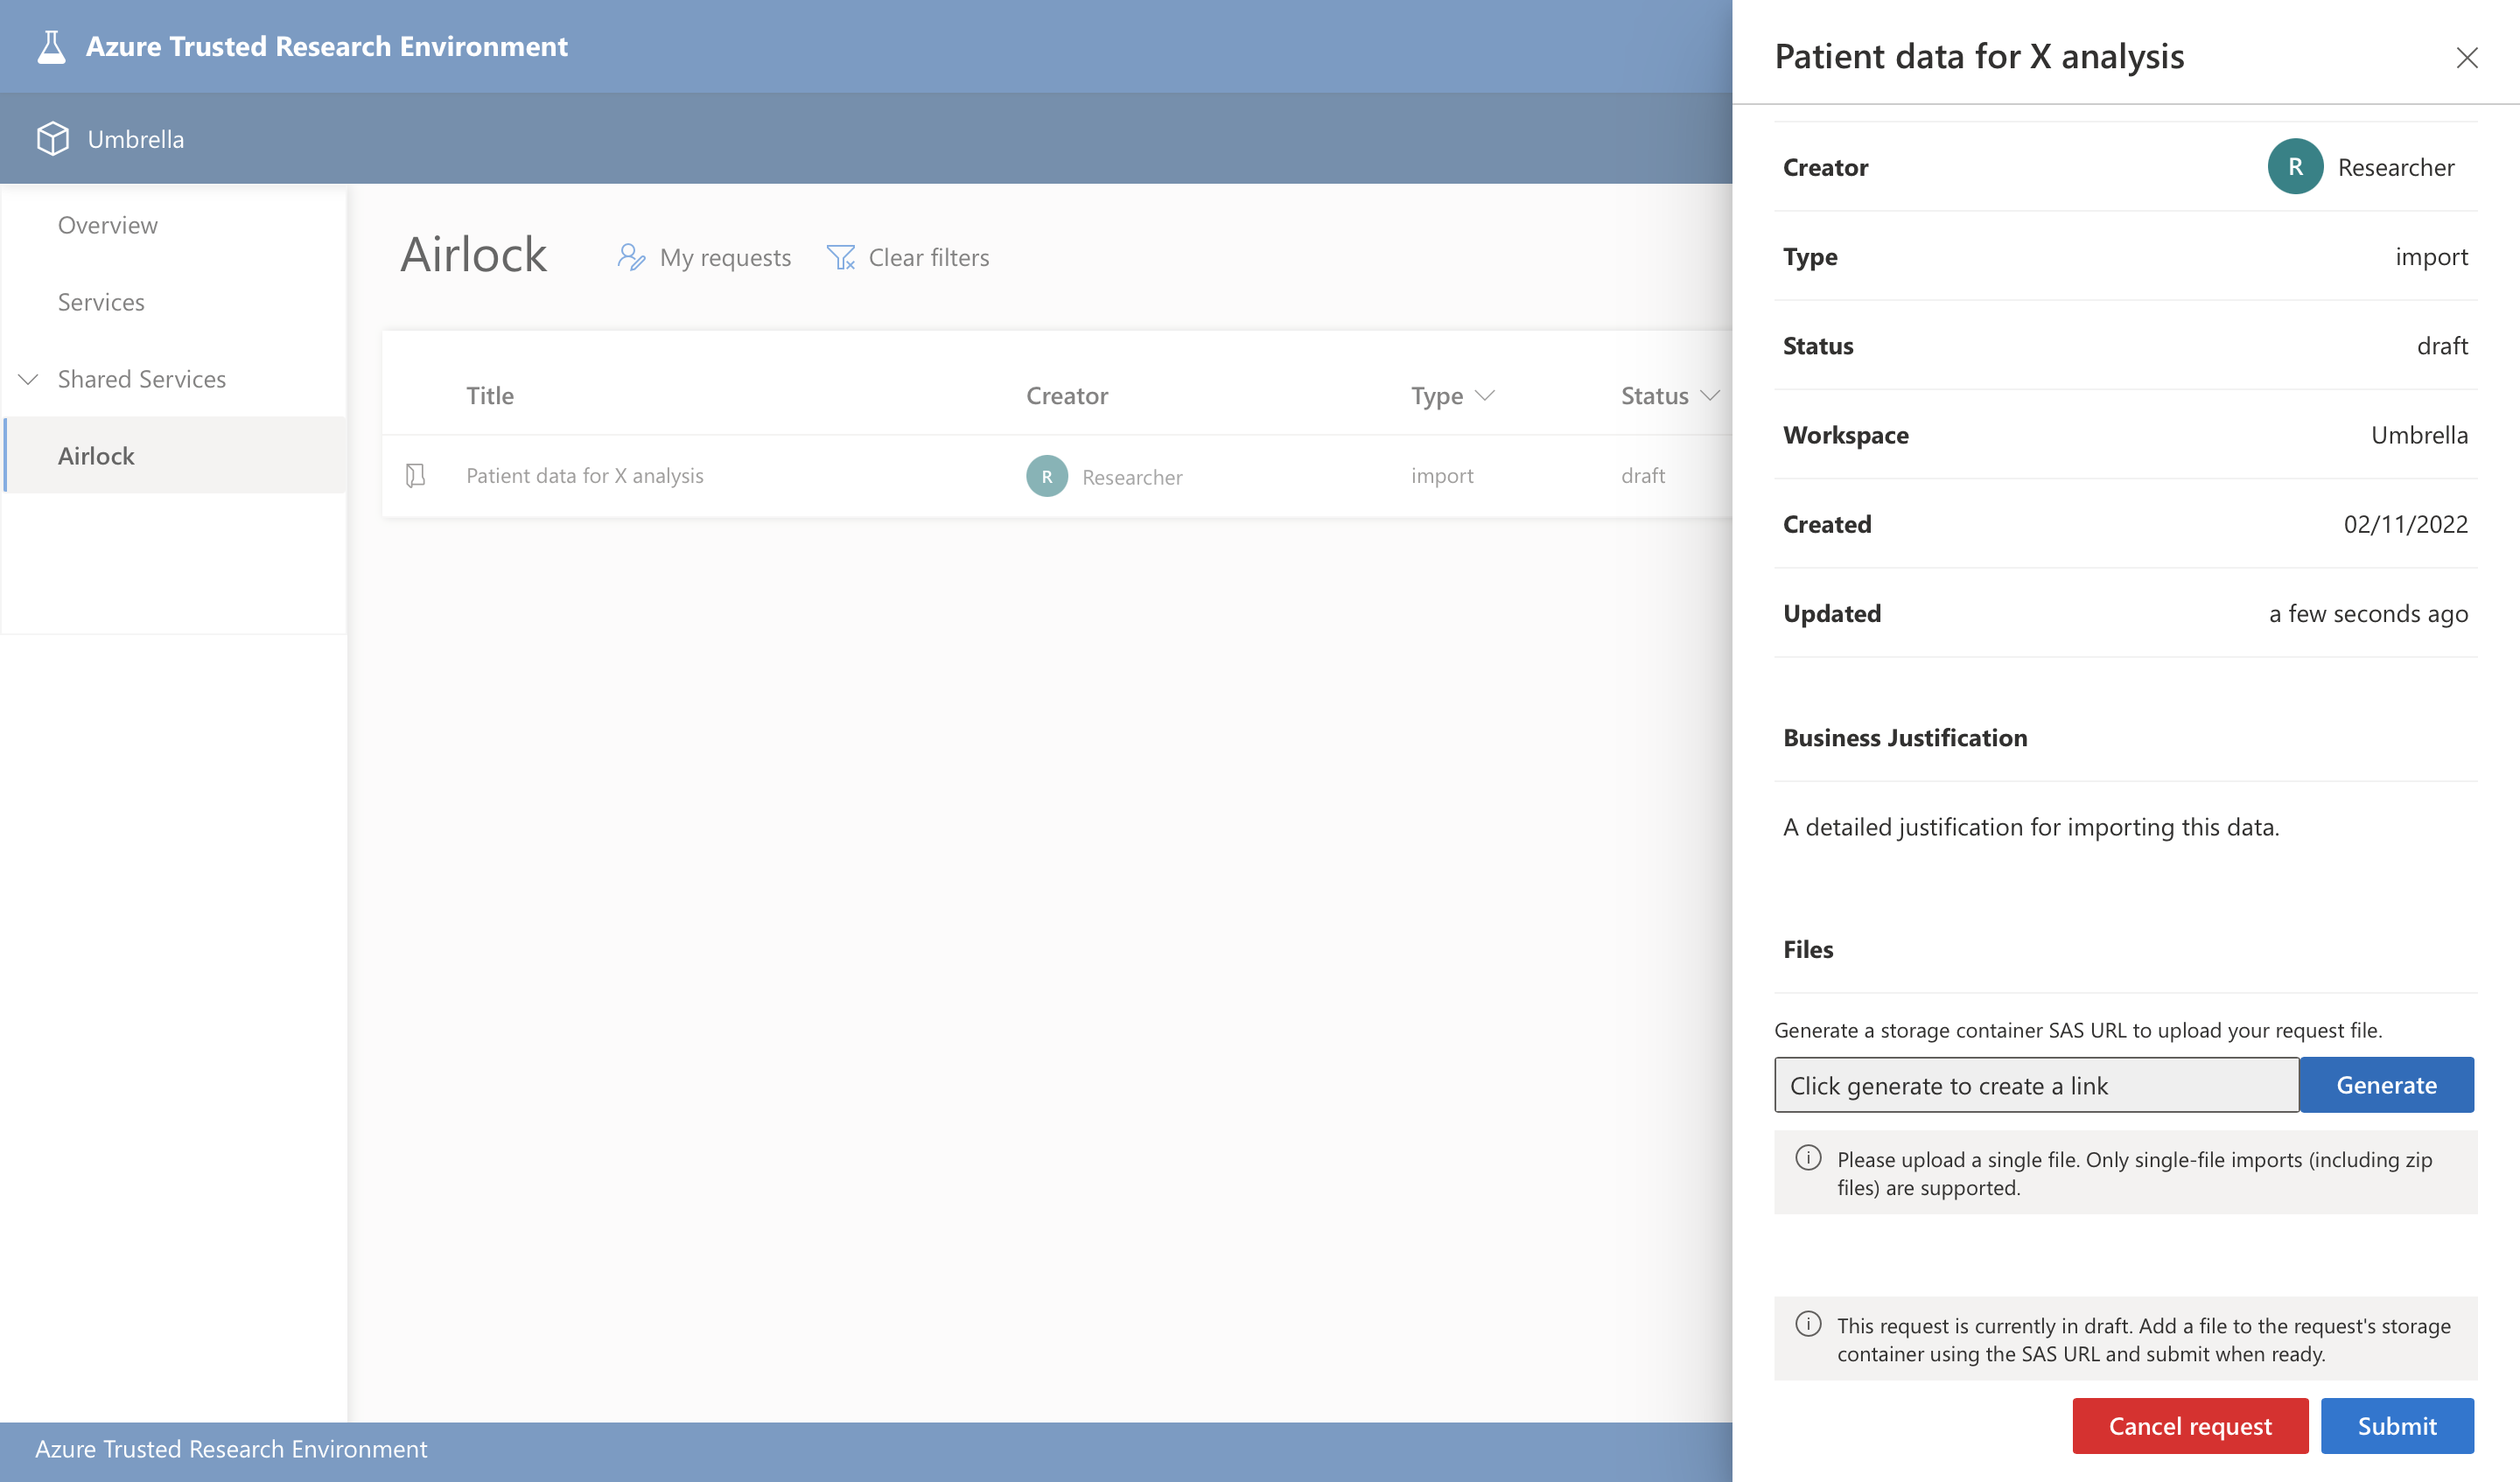
Step 2: Add data to your import request
-
The request you've just created should pop up automatically; however, you can return to it at any time within the Airlock page by finding it in the list of requests. (Use the My requests quick filter to find it more easily)
-
Click Generate in the Files section to generate a Storage SAS URL to use for uploading your data.
-
Copy the URL and use it to upload your data to the Azure Storage account. You can use several tools for this that accept SAS URLs, such as the Azure Storage Explorer, or the Azure CLI, depending on your preference.
- To use Storage Explorer, follow this guide
- With the Azure CLI, you can run
az storage blob upload -f /path/to/file --blob-url SAS_URL. More info
Warning
Airlock only supports a single file per request. If you need to import multiple files, please zip them before uploading to the request's storage container.
- Once you've uploaded your data, head back to the TRE UI and click Submit on your draft request. This will submit your request for approval.
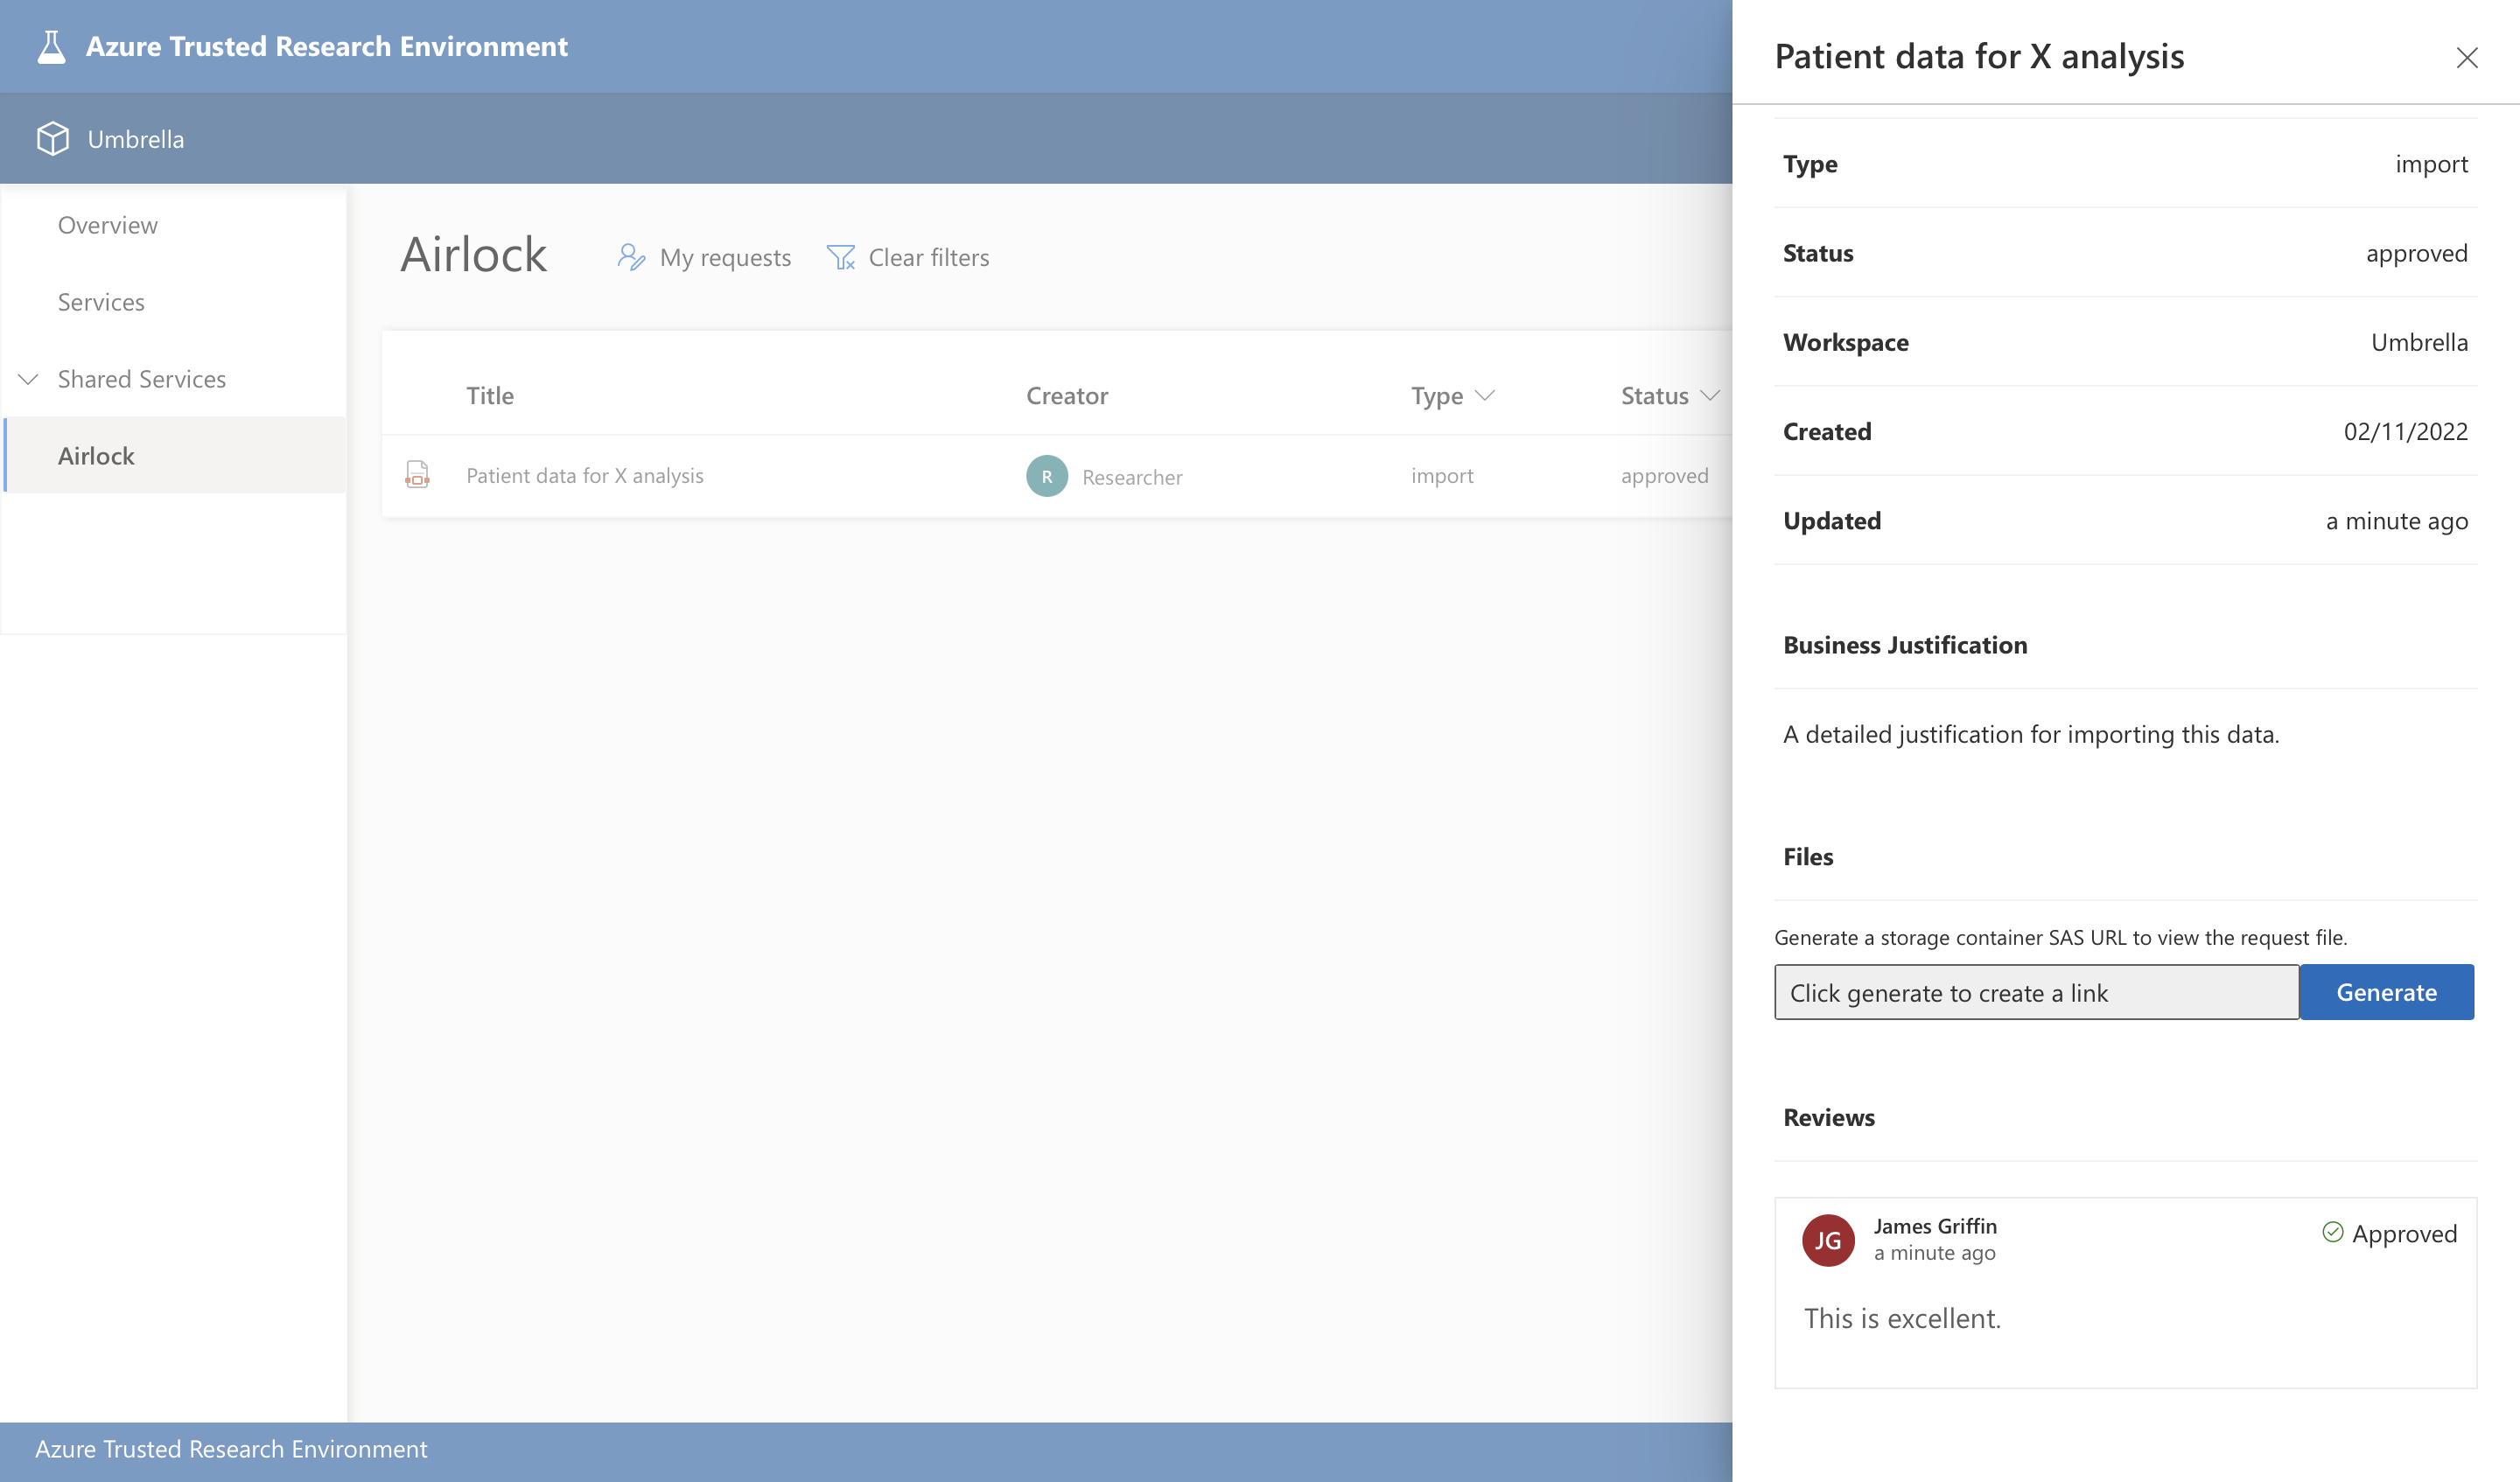
Step 3: Get your approved data
The request will be in an In Review state until it is either approved or rejected by your Airlock Manager(s) manually or by an automated workflow (depending on your organisation's specific configuration).
Note
Your organisation may have the Airlock Notifier service configured which will send email notifications when your request has been approved/rejected, or you may have another mechanism in place. Please check with your TRE administrator.
If the request is rejected, your data will be deleted and your request will move into a Rejected state. You will be able to see feedback in the Reviews section on why your request was rejected so you can create a new request that addresses any concerns.
If your request is approved, you can follow the below steps to get your data from within your workspace:
- Head back to your Airlock request in the TRE UI. You should find that it is now in an Approved state and ready for you to get your data. You can also see the notes from the reviewer in the Reviews section.
-
Click Generate in the Files section to generate another Storage SAS URL which you'll use for downloading your data.
-
Paste this link into your Workspace VM (or whichever workspace resource you're wanting to access the data from). Like before, use your preferred tool to access the data using the SAS URL, but this time to download the data.
- With the Azure CLI, you can use
az storage blob download --file /path/to/write/to --blob-url SAS_URL. More info
- With the Azure CLI, you can use
Tip
If you are using a Workspace VM that uses one of the standard TRE Data Science VM images, you will likely have both Storage Explorer and the Azure CLI pre-installed.
Exporting data from a workspace
Exporting data from a secure TRE workspace to the outside world involves similar steps to Import, but with a couple of key differences. Follow these steps:
-
Open your TRE UI and navigate to the workspace you wish to export data from
-
Navigate to the Airlock tab (in the left-hand menu) and click Create new, then select Export
-
Fill in a suitable Title and Business Justification for the request then hit Create
-
Once the draft request pop-out opens, click Generate in the Files section to generate a Storage SAS URL to use for uploading your data.
-
You now need to head into your Workspace VM/resource containing the data you wish to export, and paste in the SAS URL you've just generated. Use your preferred storage tool to upload the data to the request container. See Step 2 in the Importing data section for more details on using these tools
-
Once you've uploaded your data, head back to the TRE UI in your host and click Submit on your draft request. This will submit your request for approval.
-
Like in Step 3 of Importing data, your request will be in an In Review state until it's either approved or rejected by your organisation's approval workflow.
-
Once it's approved, head back to your request in the UI and click Generate a second time to get a download link.
-
In your host, you can use this link with your tool of choice to download the data from the request container.