Set up of a Virtual Machine
This document will talk you through how to deploy a Virtual Machine via the Guacamole Workspace Service and access imported data.
Creating your VM
-
Open the UI link
https://<TRE_ID>.<LOCATION>.cloudapp.azure.com/- You will need the Microsoft Authenticator app on your phone. The above will take you through the set up process.
-
Within the UI, under the Workspaces tab you should be able to see any Workspaces assigned to you.
-
Click on the title of the Workspace to go into it. Within there should be the Guacamole Workspace Service, click the title to go into the Workspace Service.
- Clicking Connect will take you to the Guacamole Home Page where it will list out all of your deployed VMs.
-
Within the Workspace Service tab, you’ll need to choose Create new to create a user resource. This will be your VM.
-
Choose the template you’d like to base your VM on, at the moment the choice will be between a Windows or Linux VM.
- Fill in all of the details to your requirements.
-
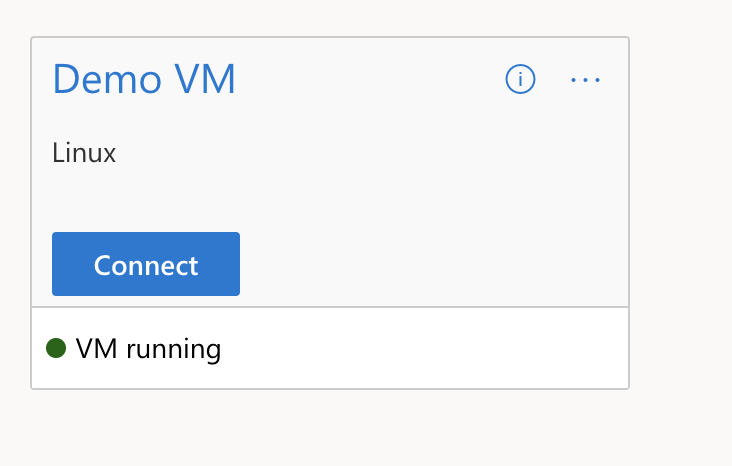
Once the resource is deployed, you should be able to choose Connect and view your VM in a browser.
You may see a pop-up asking for guacamole to have permission to use your clipboard, please allow that.
Accessing Data
You may have data pre-provisioned into your workspace, or you may import data via the airlock.
Starting and Stopping your VM
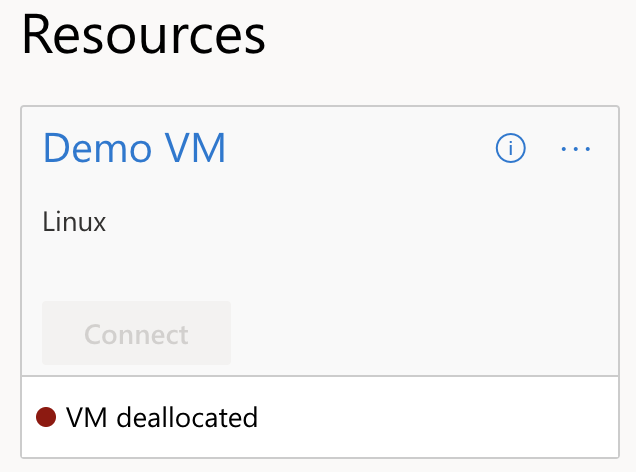
When you are no longer using a VM, it is good practice to stop it so that the VM is deallocated and no unnecessary costs will be applied. To do this, navigate to the UI and find your VM.
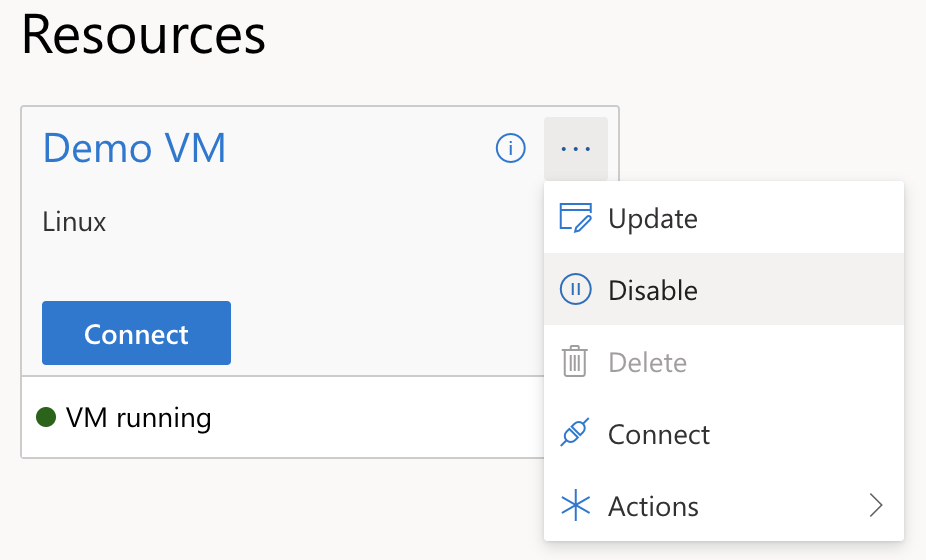
- Click on the three small dots in the top right of the user resource card and choose Actions and then Stop.
- It will take a few minutes to take effect and the card should then display 'VM deallocated'.
The same steps can be followed to Start your VM.
Deleting your VM
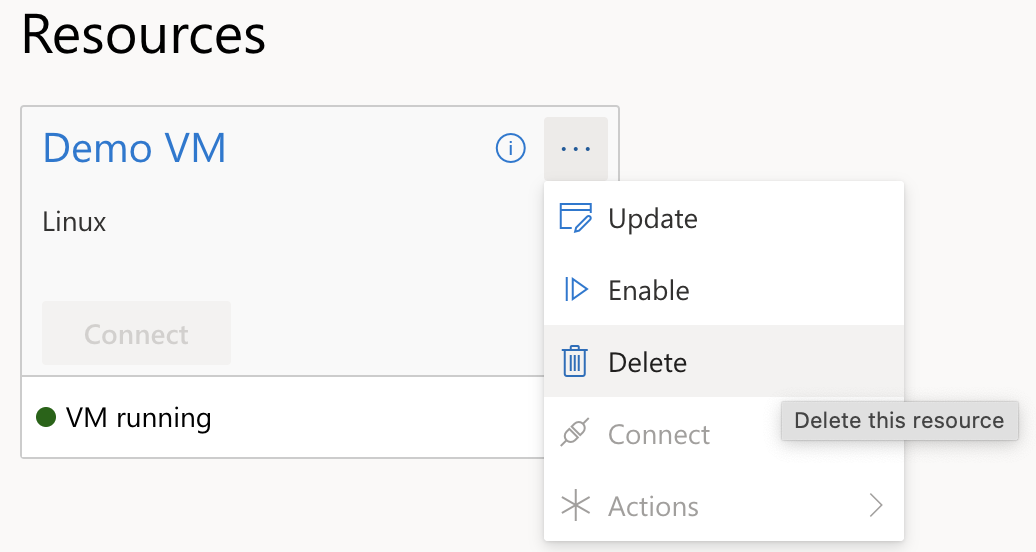
If you no longer wish to use the VM you have created there is an option to delete it. First you'll need to disable the VM, similar to above when stopping it:
- Click on the three small dots in the top right and choose Disable.
- Once it is disabled (this can take a few minutes), click on the three dots again and you should then have the option to delete it.
VM Actions
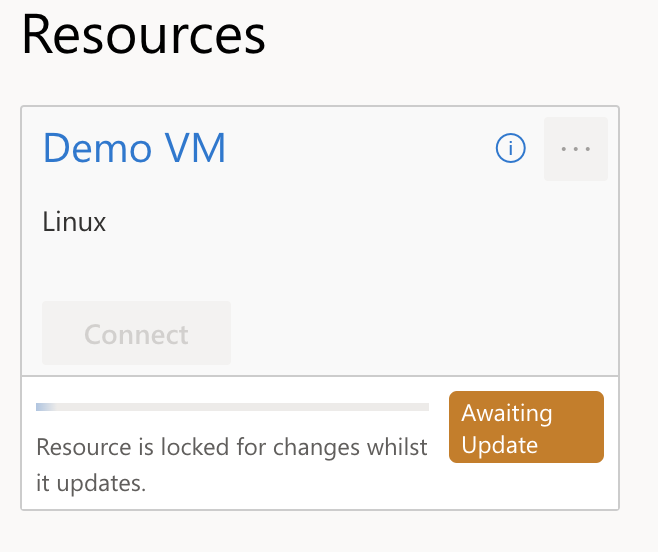
Whilst the VM is currently updating due to an invoked action it will display a message similar to the one below. This will occur any time a service or user resource is deployed, disabled, deleted etc.
You can also view any current operations by clicking on the bell in the top right hand corner of the screen.