
TIP
📺 Watch the video : How to deploy ASP.NET application to Docker Hub and Azure (opens new window).
💡 Learn more : Azure App Service Web App for Containers (opens new window)
# How to deploy ASP.NET application to Docker Hub and Azure
Running your application in a container is a great way to make sure that it can run anywhere and that its environment is the same, regardless of where you run it. You can run almost any type of application in a container and you can run containers almost anywhere. Azure has a lot of options for running containerized applications. One of those is Azure App Service Web App for Containers (opens new window). This is a service that can run a container on the App Service platform, which gives you some of the PaaS features like deployment slots and easy authentication. Let's take a look at how to containerize an ASP.NET Core application with Visual Studio and host it in Docker Hub. And then let's take a look at how to deploy that container to Web Apps for Containers and run it in Azure.
# 1. Taking care of the prerequisites
Before you get started, you need to make sure that you have all of the prerequisites to follow along.
- You'll need the latest version of Visual Studio 2019 with the Azure and .NET Core workloads installed
- You need Docker on your PC to develop container-based applications. Download it here (opens new window)
- For hosting a container image on Docker Hub, you need a Docker Hub (opens new window) account
# 2. Containerize an ASP.NET Core application and host the image in Docker Hub
We'll create a new ASP.NET Core web application and make sure that it can run in a Windows container. Once we've created this, we'll host the container image in Docker Hub so that we can use it later in Azure.
- in Visual Studio, create an ASP.NET Core application. You can do that by using File > New > Project and selecting the ASP.NET Core Web Application template. In the screen that follows, choose the Web Application (Model-View-Controller) option and leave the Enable Docker Support checkbox unchecked
- Once the application is created, go to the solution explorer and right-click on the project and choose Add > Docker Support
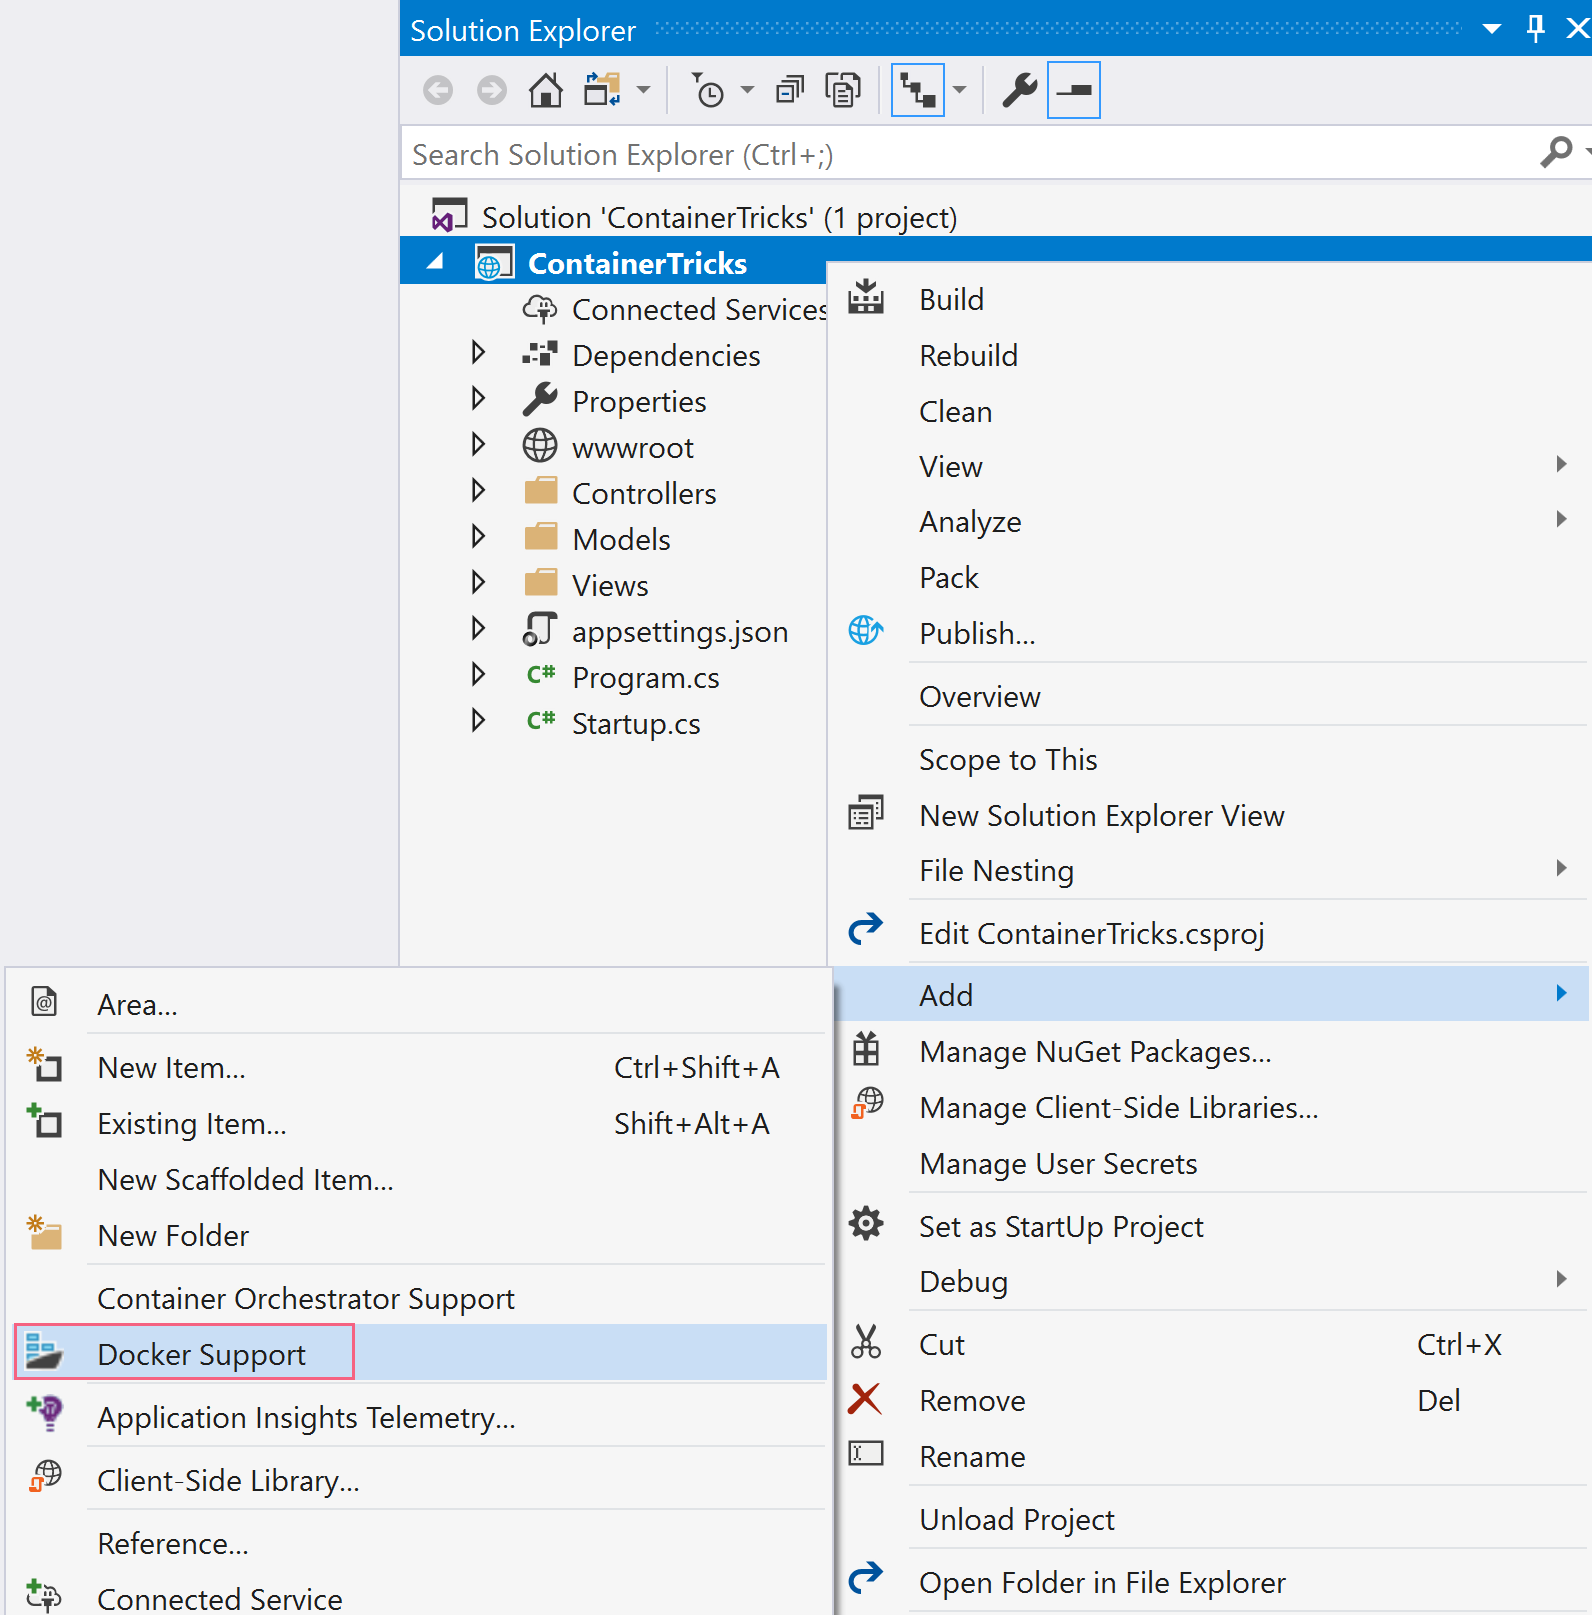
(Add Docker support in Visual Studio)
- Choose Windows as the Target OS and click OK
- In the Docker file, change the From as base and FROM a build lines to
FROM microsoft/dotnet:2.1-aspnetcore-runtime-nanoserver-sac2016 AS base
FROM microsoft/dotnet:2.1-sdk-nanoserver-sac2016 AS build
2
These images are for .NET Core 2.1, but you can also use images for later versions of .NET Core.
- Build the project
- From the solution explorer, right-click the project file and click Publish
- Choose Container Registry as the publish target
- Select Docker Hub and click publish
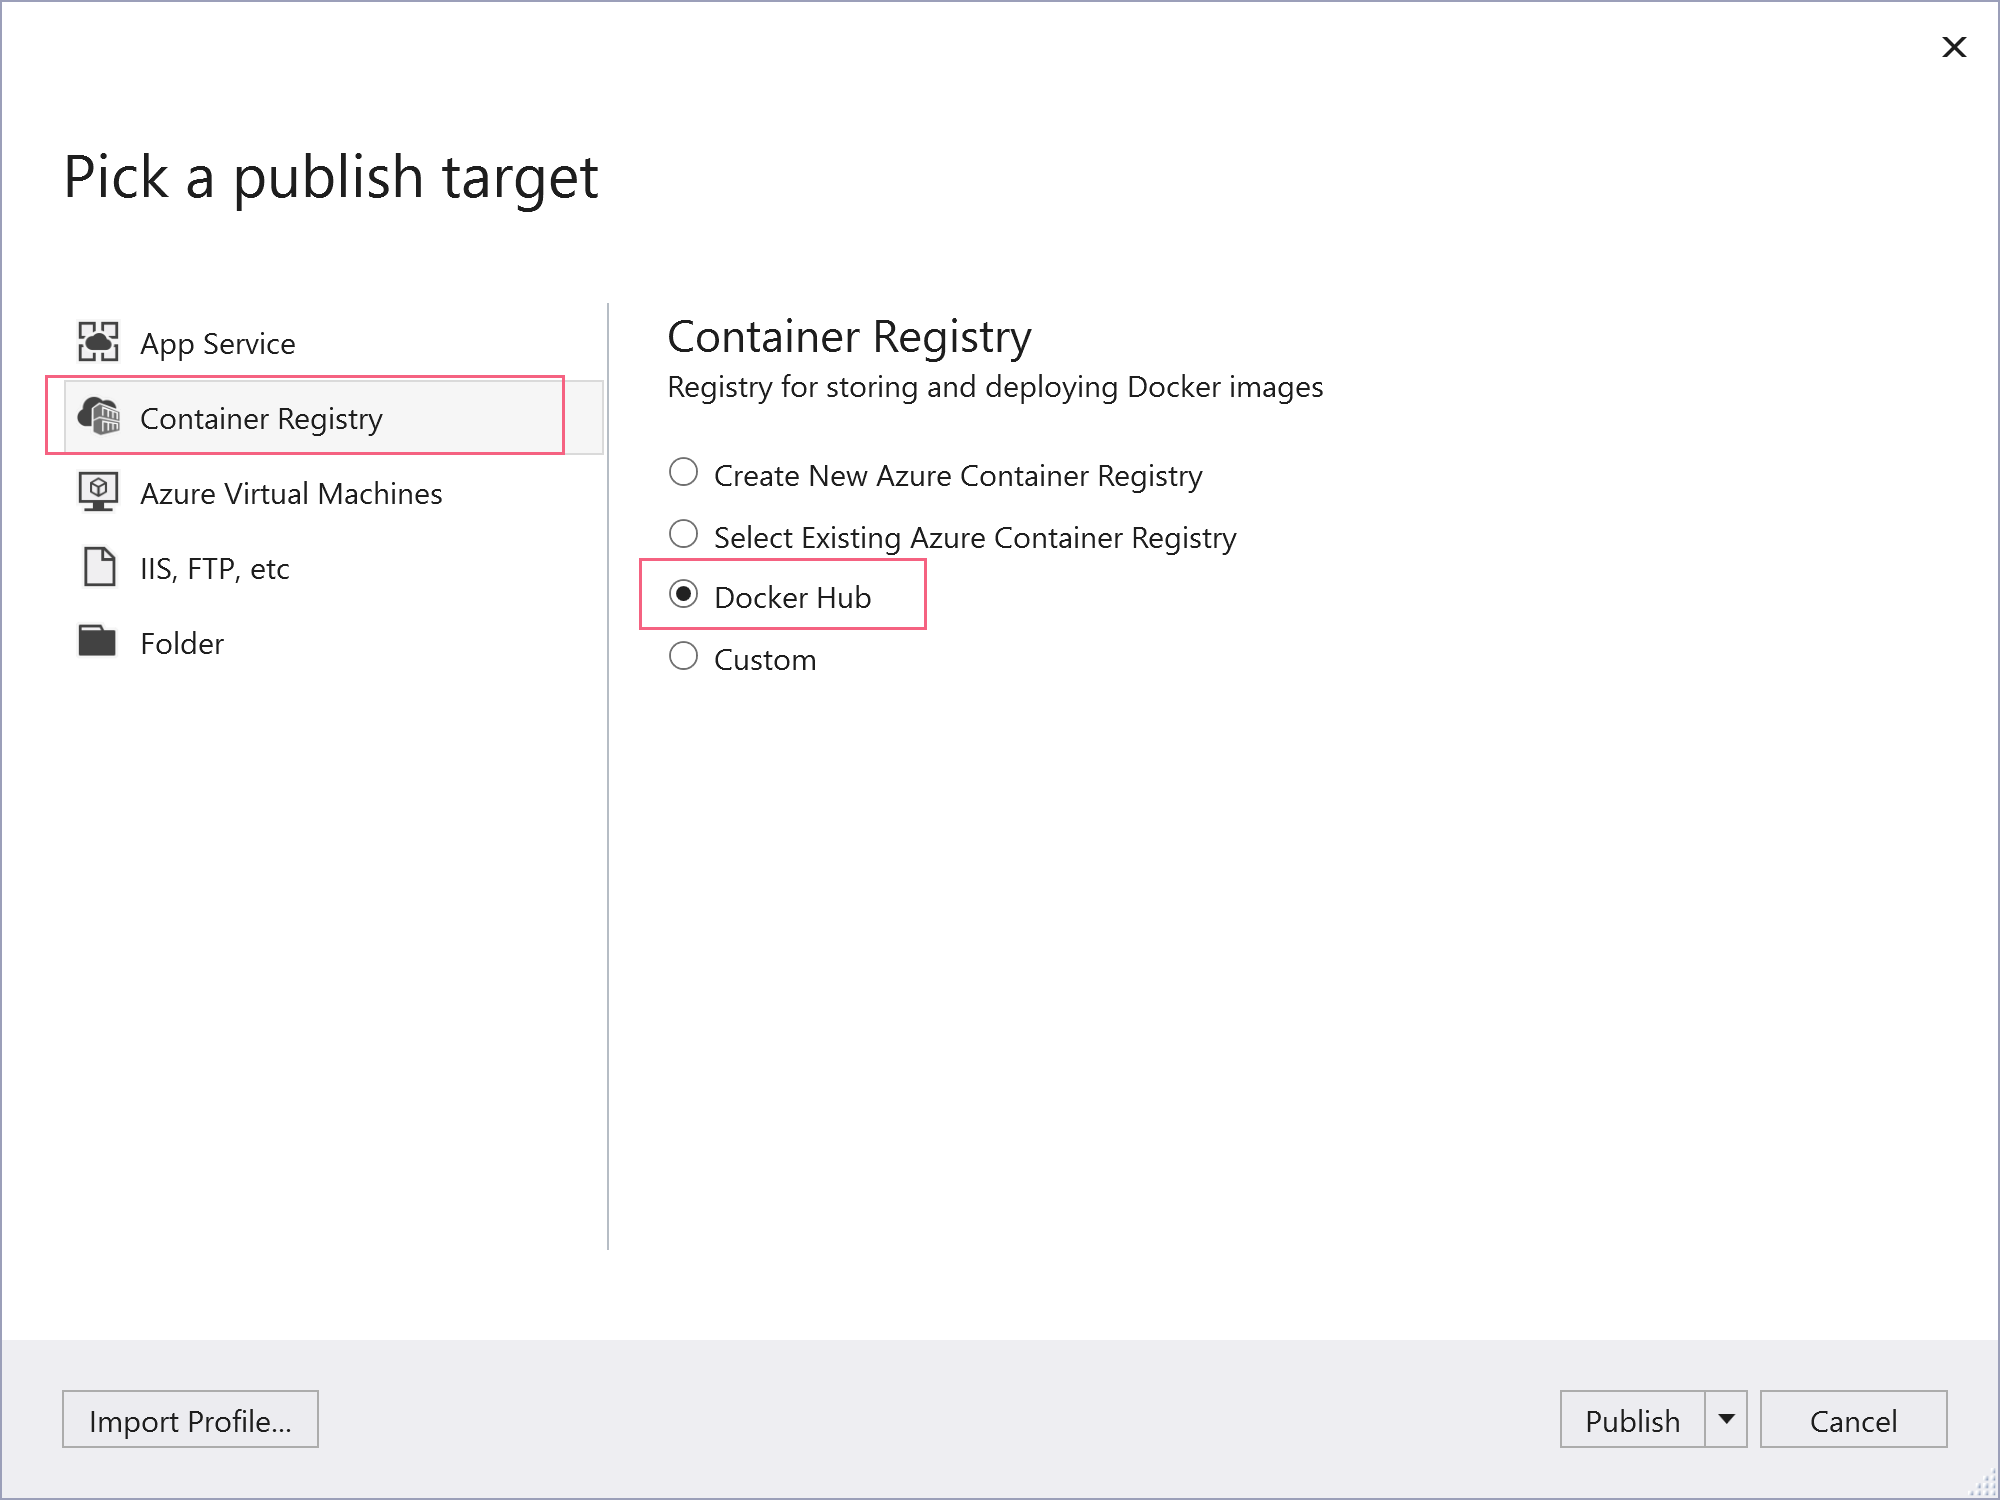
(Publish to Docker Hub from Visual Studio)
- Fill in the credentials to Docker Hub. Your username should be a username that's not an email address
- Now click publish to push the image to Docker Hub
You should now be able to see the container image in Docker Hub.
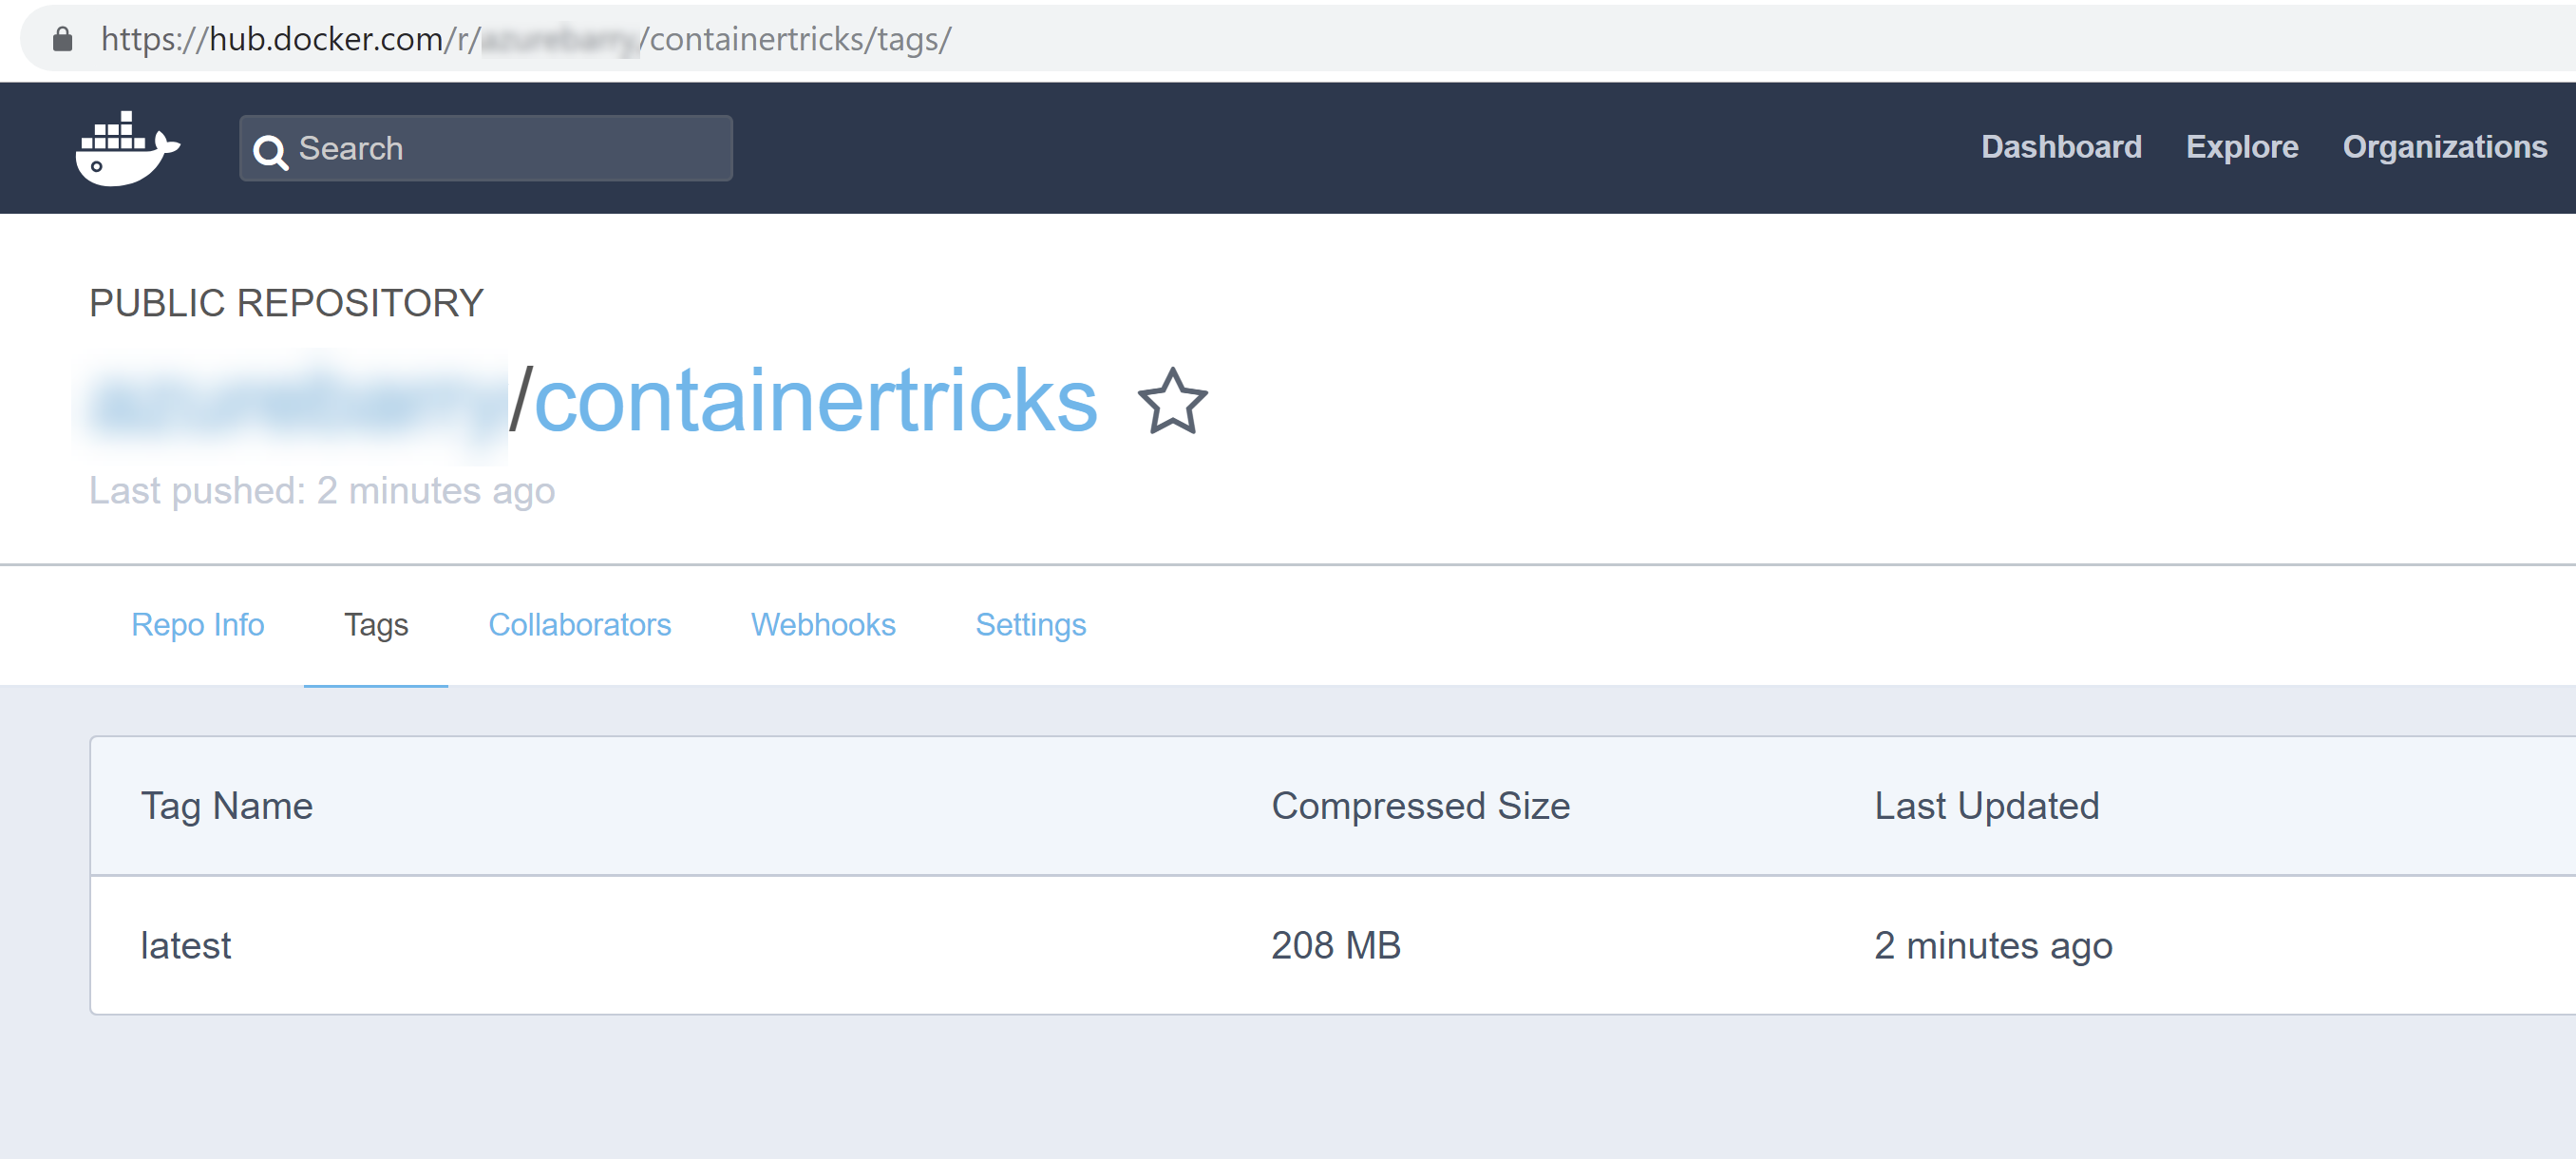
(Container image in Docker Hub)
# 3. Run the container image in Azure App Service Web Apps for Containers
Now that we have a container in Docker Hub, we can run it in Azure App Service Web Apps for Containers.
- First, create a new Web Apps for Containers. In the Azure portal, click the "Create a resource" button and search for "Web Apps for Containers"
- Click on Web Apps for Containers in the search results and click Create
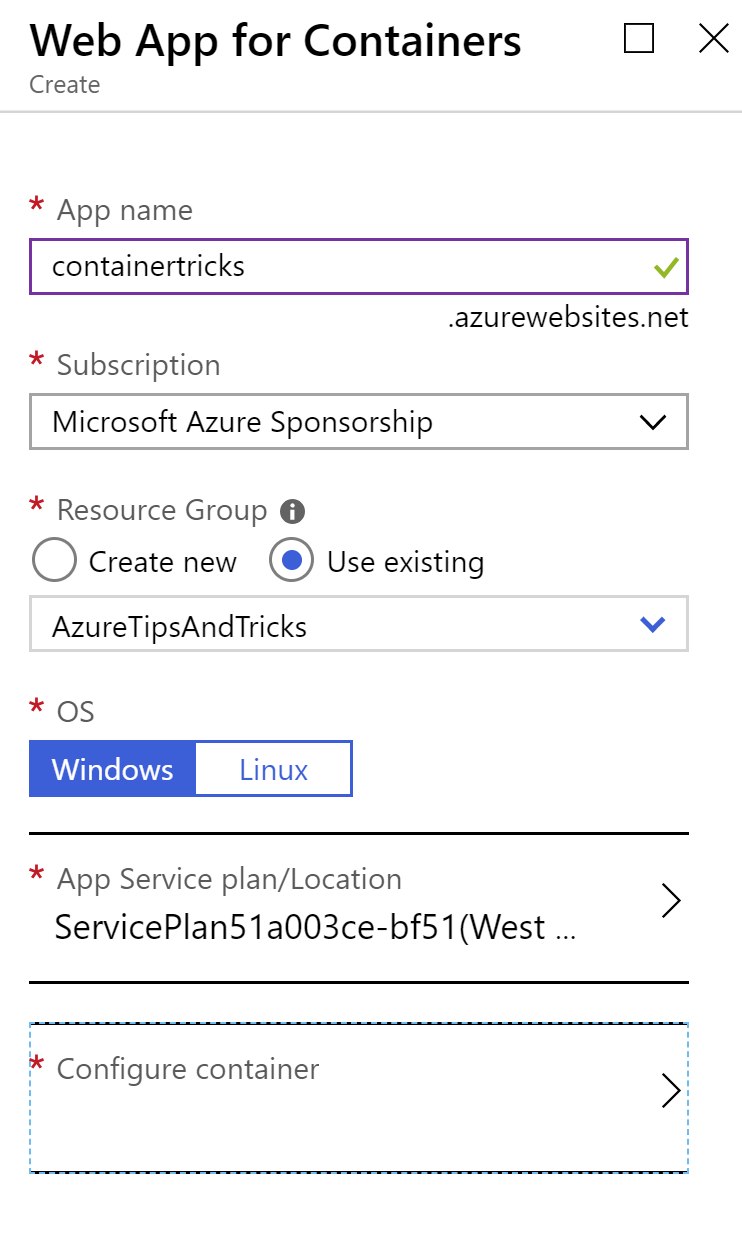
(Create Web App blade in the Azure portal)
- Fill in a Name
- Pick or create the Resource group
- Leave the OS to Windows
- And click on Configure container
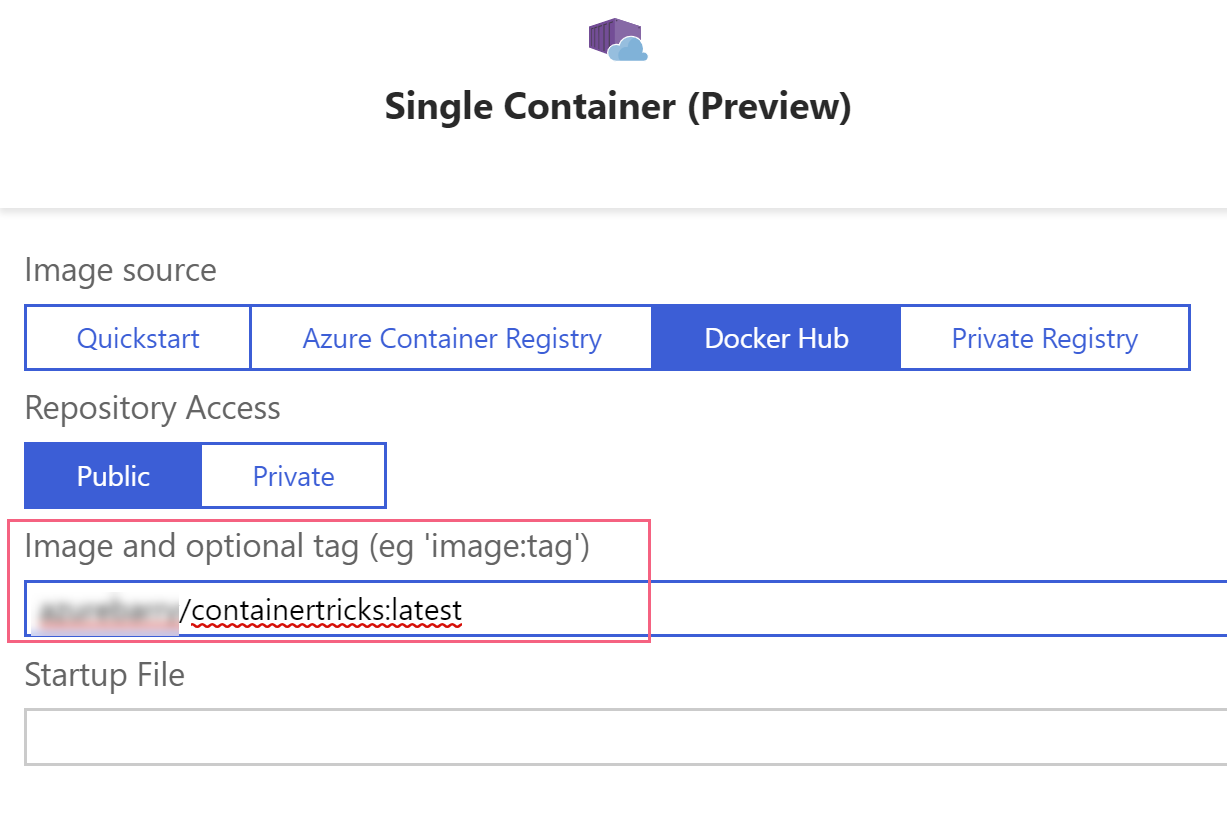
(Configure container blade in the Azure portal)
- In the Configure container blade, pick Single container and pick Docker Hub
- Now type in the name to the image that we've just published including the tag. This should be something like azuremichael/containertricks:latest and click OK
- Click Create to create the Web App. Once the Web App is created, it will spin up the container. This can take a while.
- In the Web App overview blade in the Azure portal, you will find the URL to the Web App. Click on it to open the application. If it's not working, you should wait a few minutes for the container to initialize and try again

(Application running in a browser)
You can now use the application, which is running in a Windows container in Azure Web Apps for Containers.
# Conclusion
Visual Studio makes it very easy to containerize applications and publish them. Once published, it is very easy to use a container image in a service like Azure App Service Web Apps for Containers. And the cool thing is that the app runs in a container, even when it is running in Azure. This means that it is the exact same thing that you run locally. So if it runs locally it will also run in Azure. Also, Web Apps for Containers comes with some cool features, like the ability to use deployment slots, which means that you can publish a new version of your app in a slot and test it. And once you are ready, you can swap the slot into production with almost no downtime. And, as you saw in this post, you can use Windows containers in Web Apps for Containers. You can also use Linux containers if you want. Go and check it out!