TIP
💡 Learn more : Azure for Containers (opens new window).
# Use Visual Studio 2017 with Docker Support
# Intro
I've recently covered a variety of Docker topics including:
- Create and Publish a .NET Core WebAPI project
- Add it to a Docker Container using Docker Compose and push it to a Docker Cloud
- Use it in Azure with Web App for Containers
- Docker Registry vs. Docker Repository
- Continuous Deployment with Docker and Web App for Containers
One topic that keep coming up is how do you use Visual Studio 2017 with Docker support. If you go back and read this post, then you'll see that I did everything manually on my mac, but Visual Studio 2017 makes this much easier. Let's take a look.
# Use Visual Studio 2017 with Docker Compose
Before we begin, make sure you have Docker for Windows (opens new window) installed.
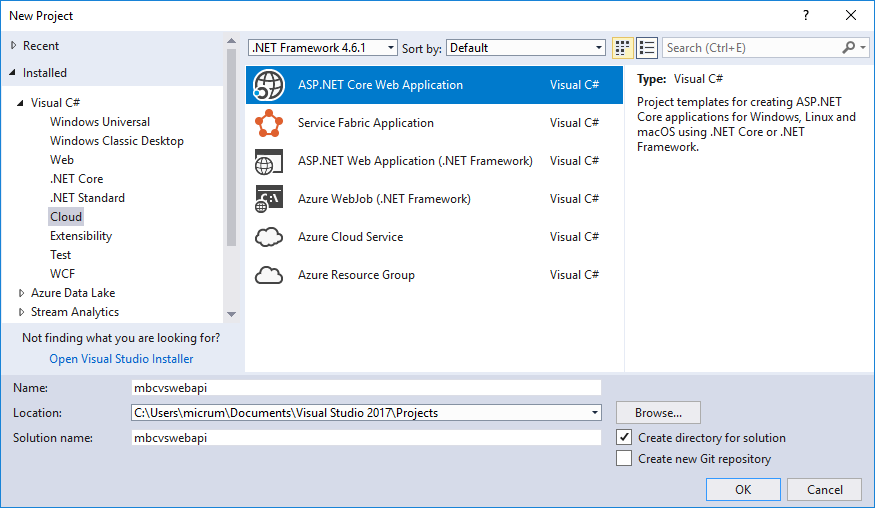
Open Visual Studio 2017 and create a .NET Core WebAPI project.
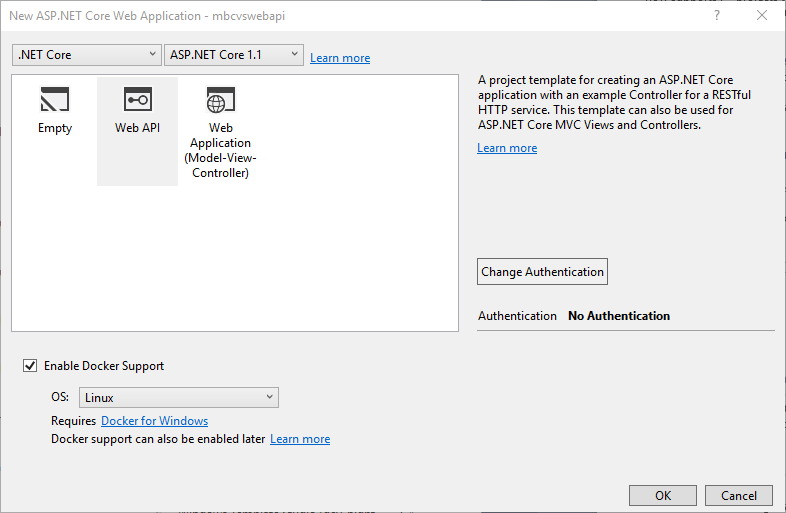
When I select Web API, you can click a checkbox to enable docker support. I went ahead and toggled the OS to Linux for those that wish to follow on with my existing guide using Visual Studio 2017.
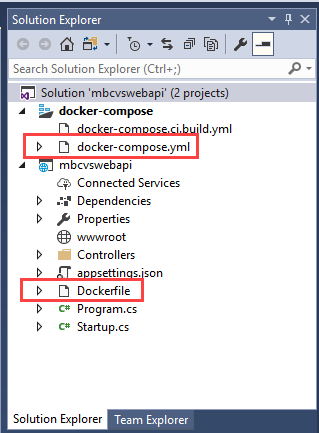
Look at the Solution Explorer
Do you remember the three steps that I used to add an ASP.NET WebAPI project to a Docker Container using Docker Cloud? If not, here they are:
1.) We need a Dockerfile for the entire to understand the image we are creating. 2.) We need a docker-compose.yml file to pass to the Docker Compose Command 3.) We need to run the Docker Compose command.
If you look back at the solution explorer, then you'll see there are two projects in the solution:
A docker-compose project
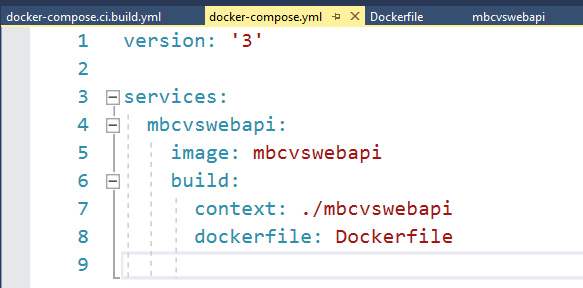
This project is going to run docker-compose to create our image and is the default startup project. It also contains the docker-compose.yml file that we created in Step 2.
Keep it Simple This project takes care of steps 2 and 3 that we performed manually before.
A ASP.NET WebAPI project
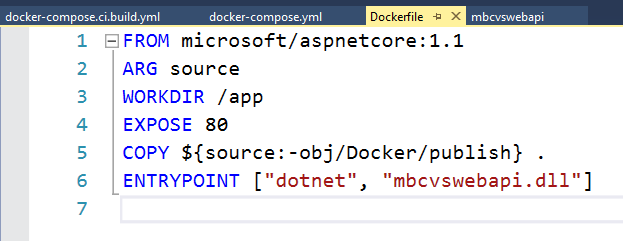
The Dockerfile is already created and waiting for us in the ASP.NET WebAPI project.
Sweet, so what do I have to do...
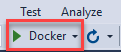
Press this button. Yeah, that easy. If you look in your Visual Studio Output and select Docker, then you'll see the commands running (that we performed manually in step 3)
For those that want to examine the output see below:
docker-compose -f "C:\Users\azureappsdev\Documents\Visual Studio 2017\Projects\mbcvswebapi\docker-compose.yml" -f "C:\Users\azureappsdev\Documents\Visual Studio 2017\Projects\mbcvswebapi\docker-compose.override.yml" -f "C:\Users\azureappsdev\Documents\Visual Studio 2017\Projects\mbcvswebapi\obj\Docker\docker-compose.vs.debug.g.yml" -p dockercompose2735583743043077288 config
services:
mbcvswebapi:
build:
args:
source: obj/Docker/empty/
context: C:\Users\azureappsdev\Documents\Visual Studio 2017\Projects\mbcvswebapi\mbcvswebapi
dockerfile: Dockerfile
entrypoint: tail -f /dev/null
environment:
ASPNETCORE_ENVIRONMENT: Development
DOTNET_USE_POLLING_FILE_WATCHER: '1'
NUGET_FALLBACK_PACKAGES: /root/.nuget/fallbackpackages
image: mbcvswebapi:dev
labels:
com.microsoft.visualstudio.debuggee.arguments: ' --additionalProbingPath /root/.nuget/fallbackpackages bin/Debug/netcoreapp1.1/mbcvswebapi.dll'
com.microsoft.visualstudio.debuggee.killprogram: /bin/bash -c "if PID=$$(pidof
-x dotnet); then kill $$PID; fi"
com.microsoft.visualstudio.debuggee.program: dotnet
com.microsoft.visualstudio.debuggee.workingdirectory: /app
ports:
- 80/tcp
volumes:
- C:\Users\azureappsdev\Documents\Visual Studio 2017\Projects\mbcvswebapi\mbcvswebapi:/app:rw
- C:\Users\azureappsdev\vsdbg:/remote_debugger:ro
- C:\Users\azureappsdev\.nuget\packages:/root/.nuget/fallbackpackages:ro
- C:\Users\azureappsdev\.nuget\packages:/root/.nuget/packages:ro
version: '3.0'
docker ps --filter "status=running" --filter "name=dockercompose2735583743043077288_mbcvswebapi_" --format {{.ID}} -n 1
682958fa63f8
docker inspect --format="{{json .NetworkSettings.Ports}}" 682958fa63f8
{"80/tcp":[{"HostIp":"0.0.0.0","HostPort":"32768"}]}
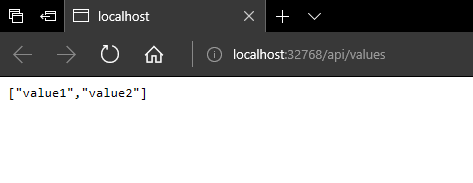
Waiting for response from http://localhost:32768/api/values ...
Launching http://localhost:32768/api/values ...
2
3
4
5
6
7
8
9
10
11
12
13
14
15
16
17
18
19
20
21
22
23
24
25
26
27
28
29
30
31
32
33
34
At this point, it has spun up a localhost and started our site.
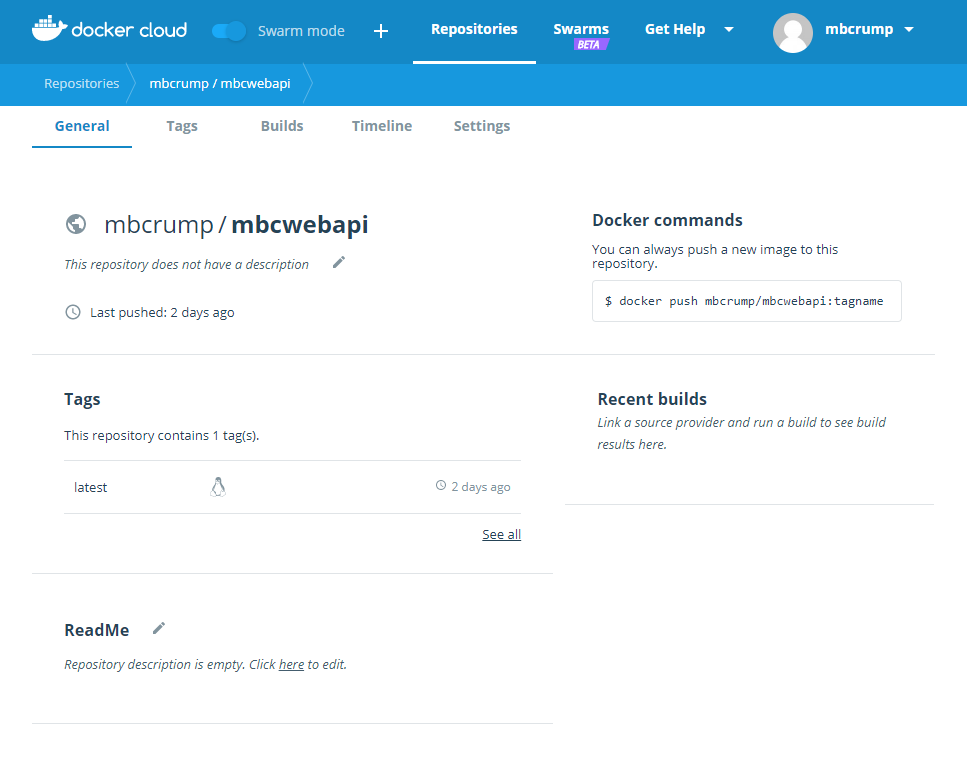
# We can now push the image to Docker Cloud
Head back to the command prompt and enter:
docker login to authenticate your account.
docker push mbcrump/mbcwebapi:latest or whatever you called it in your docker-compose.yml to push your image to Docker Cloud. Please ensure you have a Docker repo already setup.
You can go back to Docker Cloud to verify it pushed successfully.