
TIP
💡 Learn more : Azure for Containers (opens new window).
📺 Watch the video : How to Push a Container Image to a Docker Repo (opens new window).
# Pushing a Container Image to a Docker Repo
# Containers for the rest of us
For some reason, I find containers are confusing and my goal with my Azure Tips and Tricks (opens new window) is to try to make things easier. In this mini-series, I'll walk you through Docker (opens new window) and how I use it with Azure. Below is a list of post that you can expect for this week.
- Azure Tips and Tricks Part 45 - Getting Started with Docker and Azure
- Today - Azure Tips and Tricks Part 46 - Run an app inside a Container Image with Docker
- Azure Tips and Tricks Part 47 - Creating a Container Image with Docker
- Azure Tips and Tricks Part 48 - Pushing a Container Image to a Docker Repo
# Pushing a Container Image to a Docker Repo
Let's continue where we left off (opens new window) in our last post, in which we created a new image that we can distribute that contains our new app. In this post, we'll go ahead and push the image to a Docker repo to prep it for later.
Make sure you have a Docker account (opens new window) (It's free) and type docker login at the terminal or command prompt to ensure we are authenticated.
Michaels-MacBook-Pro:~ mbcrump$ docker login
Login with your Docker ID to push and pull images from Docker Hub. If you don't have a Docker ID, head over to https://hub.docker.com to create one.
Username (mbcrump): mbcrump
Password:
Login Succeeded
2
3
4
5
Now in order to push to a new repo, you'll need to tag the existing image. You can do so by typing docker tag mbcrump:mynewapp mbcrump/firstimage. Where mbcrump:mynewapp is the existing image that contains our new app and mbcrump/firstimage will be our repo name. Play close attention to the mbcrump/firstimage part as mbcrump is your Docker username.
Once that is complete, then use docker push mbcrump/firstimage to move it to a repository.
Michaels-MacBook-Pro:~ mbcrump$ docker push mbcrump/firstimage
The push refers to a repository [docker.io/mbcrump/firstimage]
1fd4467b1c0e: Pushed
0a3794bad5d4: Pushed
54f3762778cc: Pushed
88f0e0eb260c: Pushed
1361e5e30088: Pushed
52121b397f2e: Pushed
480d03264b1d: Pushed
a4212622fd11: Pushed
a4af43f268c6: Pushed
c2dca236d8e6: Pushed
d4417cb76edb: Pushed
0dc1ec77adb3: Pushed
a75caa09eb1f: Pushed
latest: digest: sha256:5458bbf2b1e35568c1542bc15551383737d379ddcd6e720d9701583925289157 size: 3060
Michaels-MacBook-Pro:~ mbcrump$
2
3
4
5
6
7
8
9
10
11
12
13
14
15
16
17
Great! Now you can log into your account on store.docker.com (opens new window) and if you click on repos, then you'll see it.
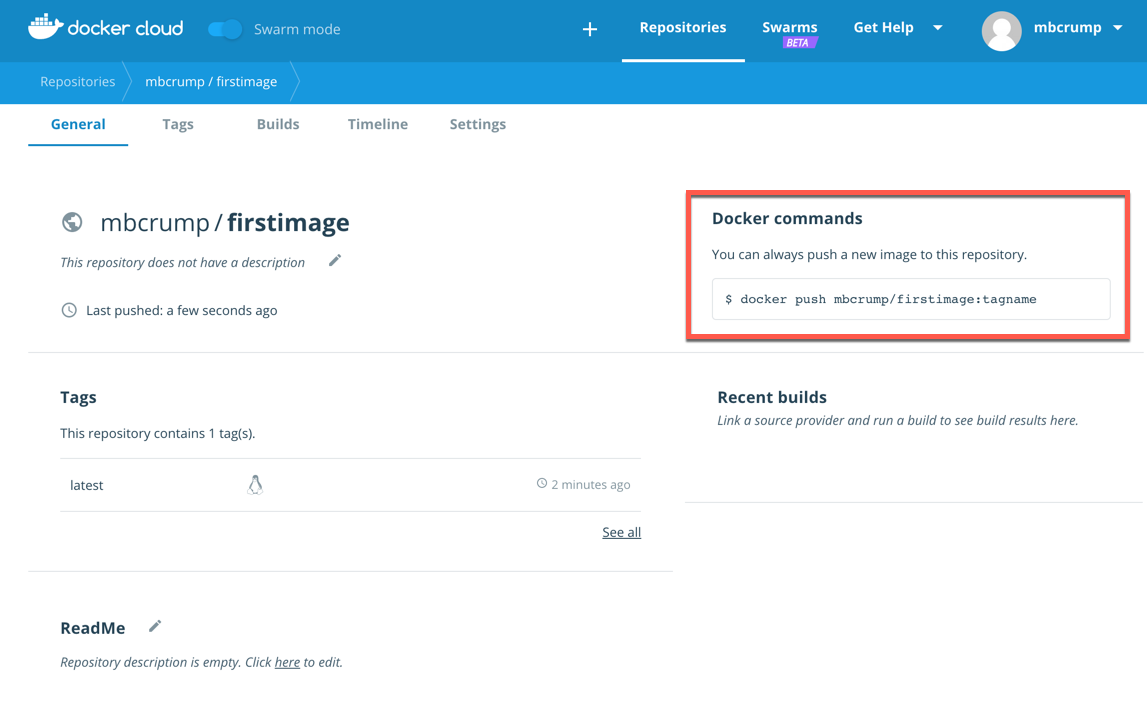
You'll see that it provides instructions to push a new version of the image as well as the commands to do so from the CLI.
# To Recap what we've done so far
If you've been following the last four post, then we've went through the following steps:
- Installed and Setup Docker
- Verified installation through the CLI
- Took a look at the Docker Store
- Used an image from the Docker Store to build upon
- Ran a Container and created a .NET Core app to it
- Created a Shell Script to call the app through the new image
- Added our app to a new container image
- Called the app through the command line and executed our program
- Packaged up the image container to send to a Docker repo
- Pushed our image container to Docker through the CLI
I think we have a great foundation to keep building on this in the coming weeks and months. I hope you've learned a lot this week and I'll see you next week.
Bonus: You can also go to store.docker.com (opens new window) and create a repository. You'll also notice that they provide the CLI commands as well.