
TIP
🔥 Checkout the Azure Developer page at azure.com/developer (opens new window).
💡 Learn more : about Azure Service Bus (opens new window).
📺 Watch the video : How to use Azure Service Bus Topics (opens new window).
# How to use Azure Service Bus Topics
# Use Azure Service Bus Topics for publish/subscribe
Modern applications are made up of many components and services. You might have a website, a mobile application, and an API that are being used to send data to your backend APIs. Sending this data directly to the APIs becomes a problem when the APIs are overwhelmed or offline.
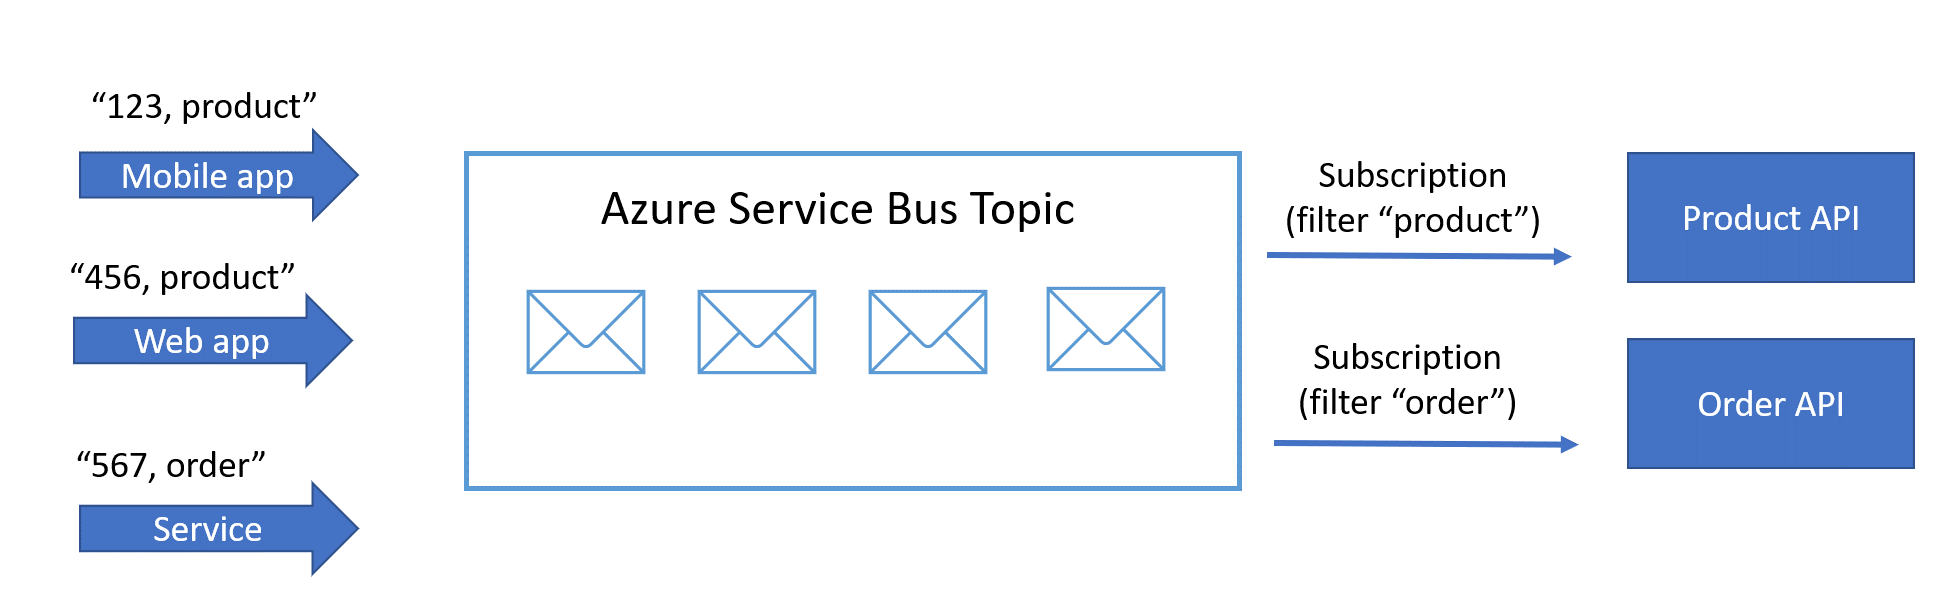
Azure Service Bus Topics (opens new window) can help with this scenario by providing a publish/subscribe mechanism. Applications, like your website and mobile app, publish messages to Azure Service Bus. And receiving applications, like the backend APIs, subscribe to certain message topics, and process the messages that are meant for them. The APIs and the sending applications can be scaled independently, and don't depend on each other for availability.
In this post, we'll explore Azure Service Bus Topics by creating and using one in the Azure portal.
# Prerequisites
If you want to follow along, you'll need the following:
- An Azure subscription (If you don't have an Azure subscription, create a free account (opens new window) before you begin)
# Creating and using an Azure Service Bus Topic in the Azure portal
Let's create an Azure Service Bus. We'll use the Service Bus Explorer in the Azure portal to send messages to the queue.
- Go to the Azure portal (opens new window)
- Click the Create a resource button (the plus-sign in the top left corner)
- Search for service bus, select the "Service Bus" result and click Create
- This brings you to the Create namespace blade
- Select a Resource Group
- Fill in a Name for the service bus namespace
- Pick a Location
- Select a Pricing Tier. The Basic tier is fine for this demo
- Click Review + create and Create after that
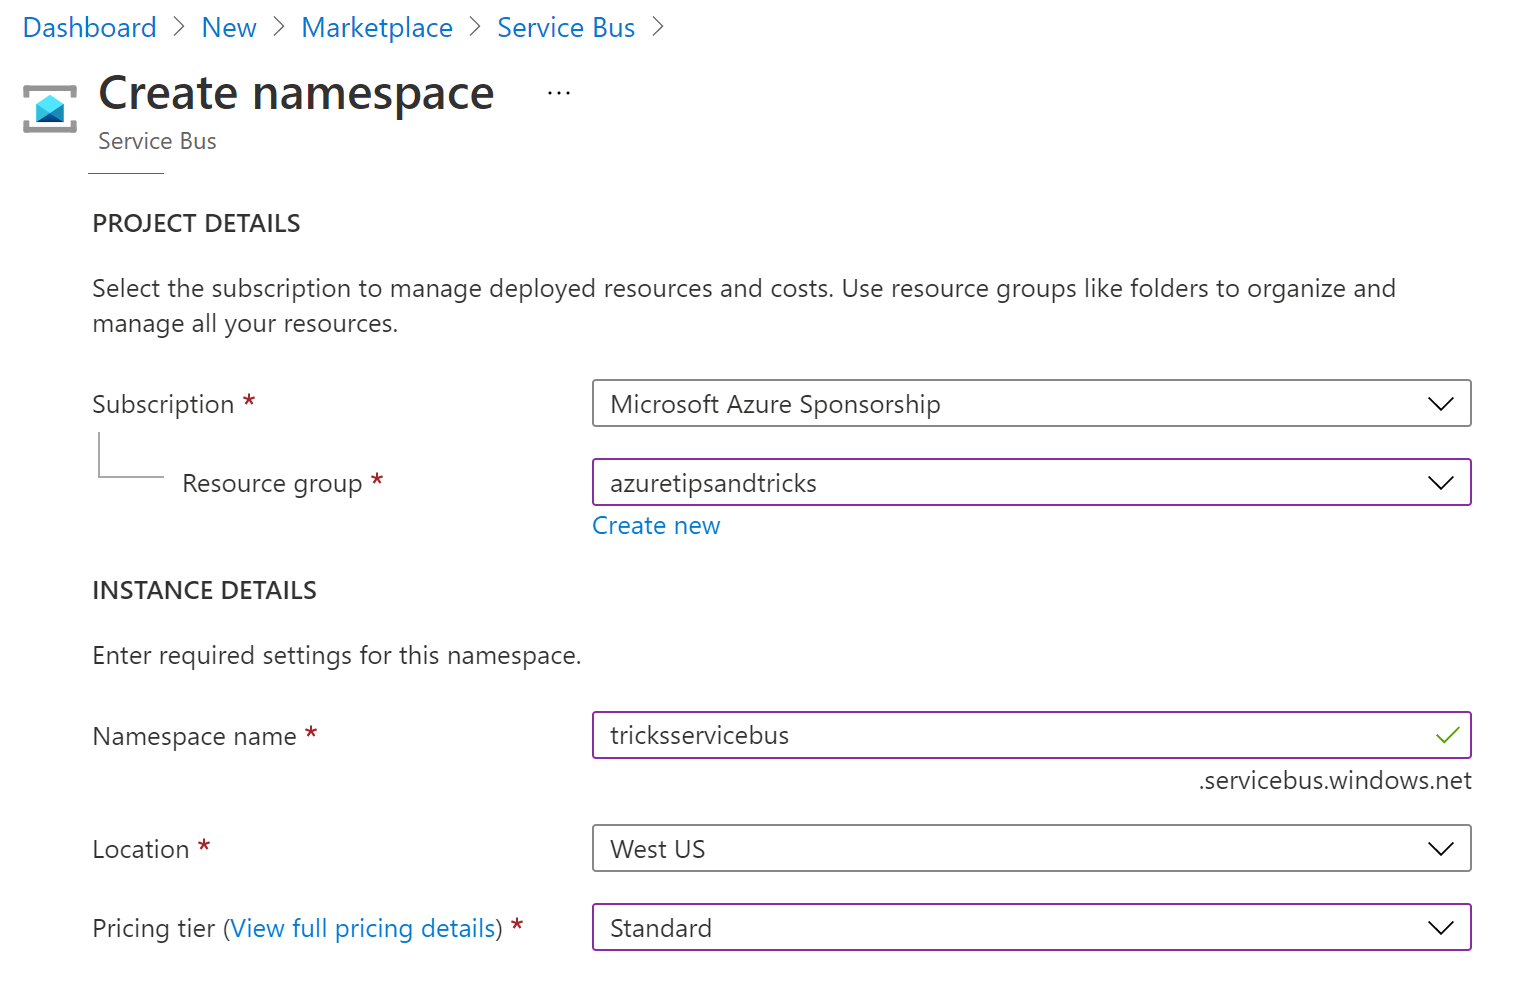
(Create an Azure Service Bus Namespace in the Azure portal)
When the Service Bus Namespace is created, navigate to it in the Azure portal.
- In the Service Bus Namespace in the Azure portal, select the + Topic button in the top menu of the overview blade

(Create a Topic button in the Azure portal)
- Fill in the Create topic blade
- Fill in a Name for the topic
- Leave everything else as it is. Notice the settings for the advanced features like duplicate detection, auto-delete, and partitioning
- Click Create to create the topic
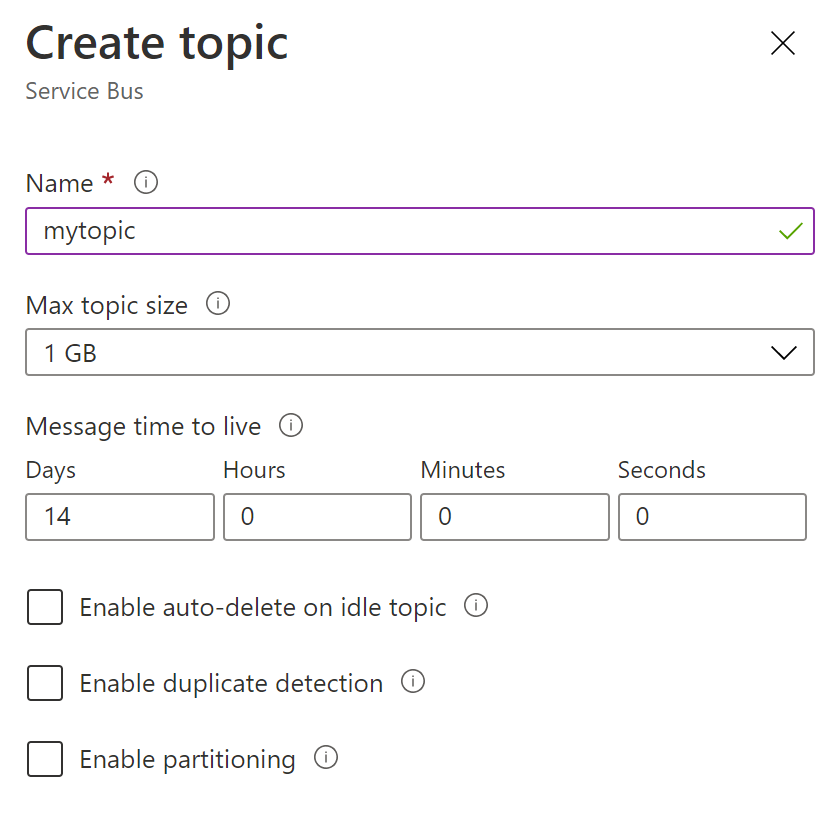
(Create a Topic blade in the Azure portal)
- Click on the topic to open it
- Messages are put on the topic and are read using subscriptions. Each subscription can receive certain messages and acts like a standalone queue. Click on the Subscription menu
- There are no subscriptions yet. Click on the + Subscription button in the top menu to create a subscription. This opens the Create subscription blade
- Fill in a Name for the subscription
- Type a Max delivery count, like 5. This tells the subscription that messages can be read 5 times before they are removed from the subscription queue
- Leave the rest of the settings as they are. These are settings that Azure Service Bus Queues also have
- Click Create to create the subscription
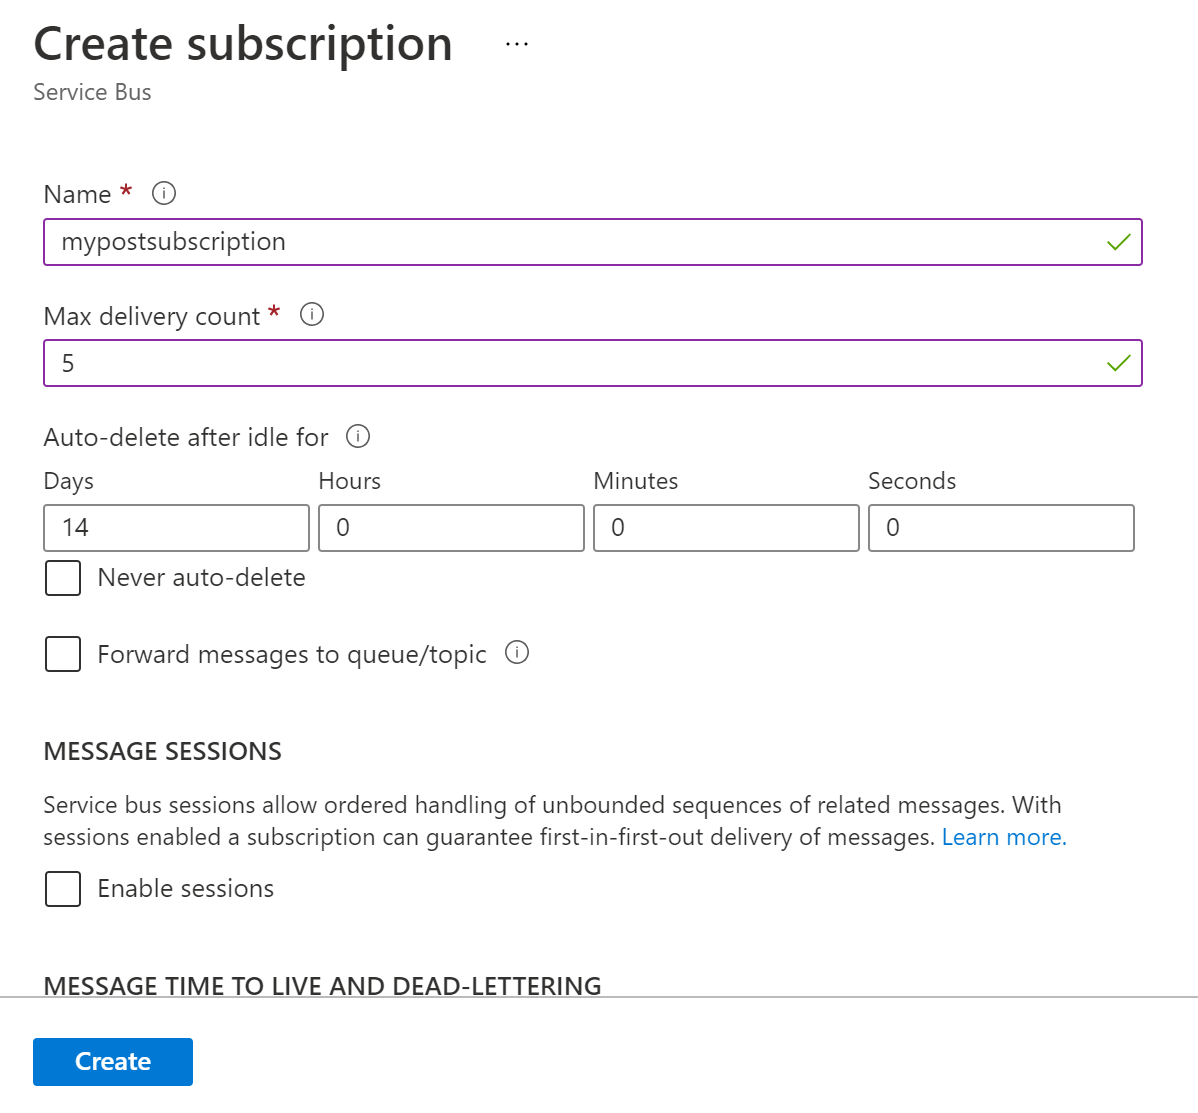
(Create a Subscription in the Azure portal)
- When the subscription is created, click on it
- The subscription needs one or more filters. Messages that match the filter will be routed to the subscription queue. Click on + Add filter
- Give the filter a Name
- You can create several types of filters. We'll use the Correlation filter
- Under System Properties, select label for Key, and type "video" in Value
- Click Save changes to add the filter. The subscription will now receive all messages that have a Label property with the value "post"
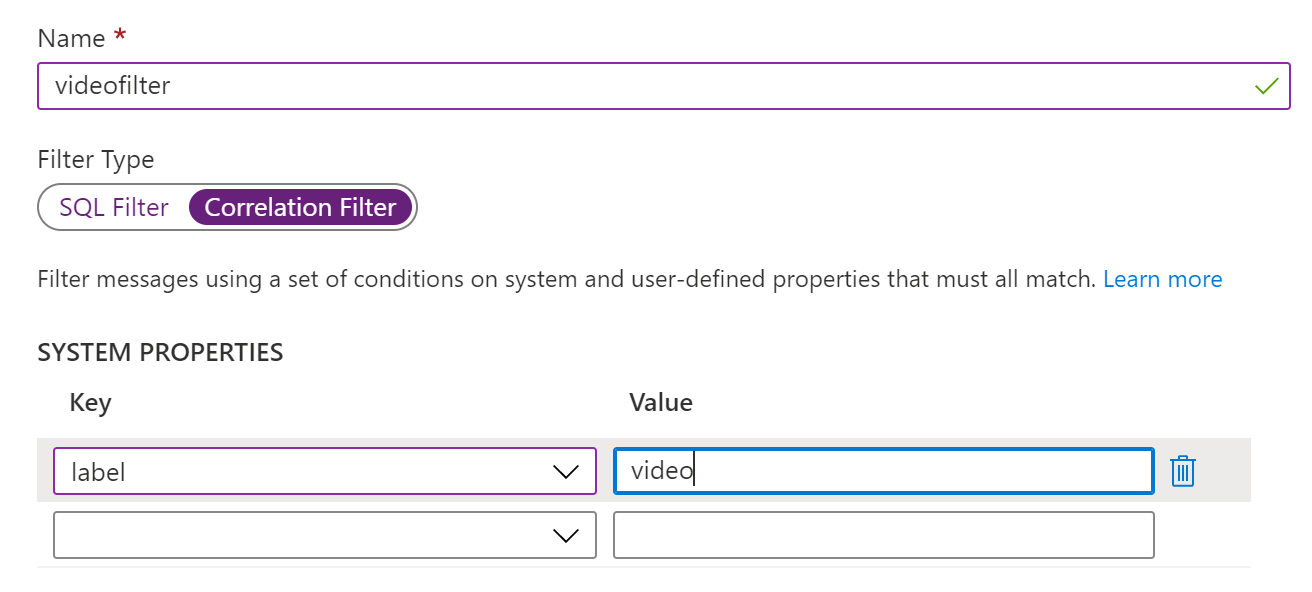
(Create a Filter in the Azure portal)
- Create another subscription and filter by repeating step 5 through 7 with different values for the names and for the filter value
Let's test the Service Bus Topic. Navigate to the Topic in the Azure portal.
- Select the Service Bus Explorer menu item
- First, we'll send a message to the topic
- Select Text/Plain for the Content Type. Messages for Azure Service Bus can also contain XML or Json content
- Type a text message in the text field
- Select Expand Advanced Properties. This allows you to edit advanced properties, like Label and Message ID. You can use these in your application to track or filter messages
- Type the value "video" in the Label property
- Click Send to put the message on the queue
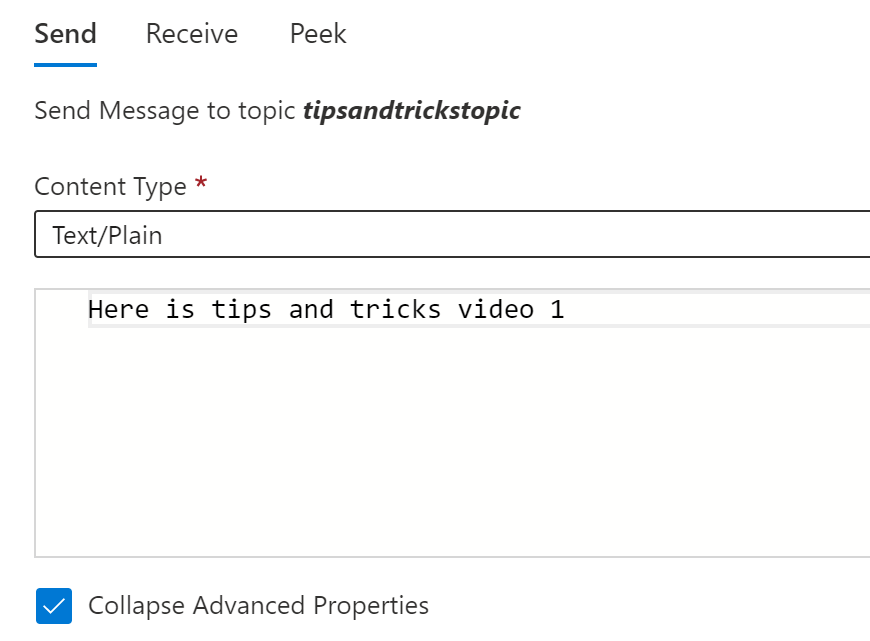
(Send message to the Service Bus Topic)
- Scroll up to the menu of the Service Bus Explorer
- Message in the Service Bus Topic will stay there until they are deleted or expire. You can use the Peek function to take a look at a message, without deleting it. Click on the Peek menu
- Select the subscription that has the "video" filter
- You'll see that there is 1 message on the queue. Click Peek
- Select the message to see its details
- Navigate to the Receive menu
- Select the subscription that doesn't have the "video" filter. This doesn't have any messages in it. Switch back to the subscription that does have the "video" filter
- The message is still on the subscription queue. Click Receive to perform a ReceiveAndDelete action, which reads the message and deletes it from the subscription queue
- Select the message to read its content. You'll see that the value of the Label property is "video"
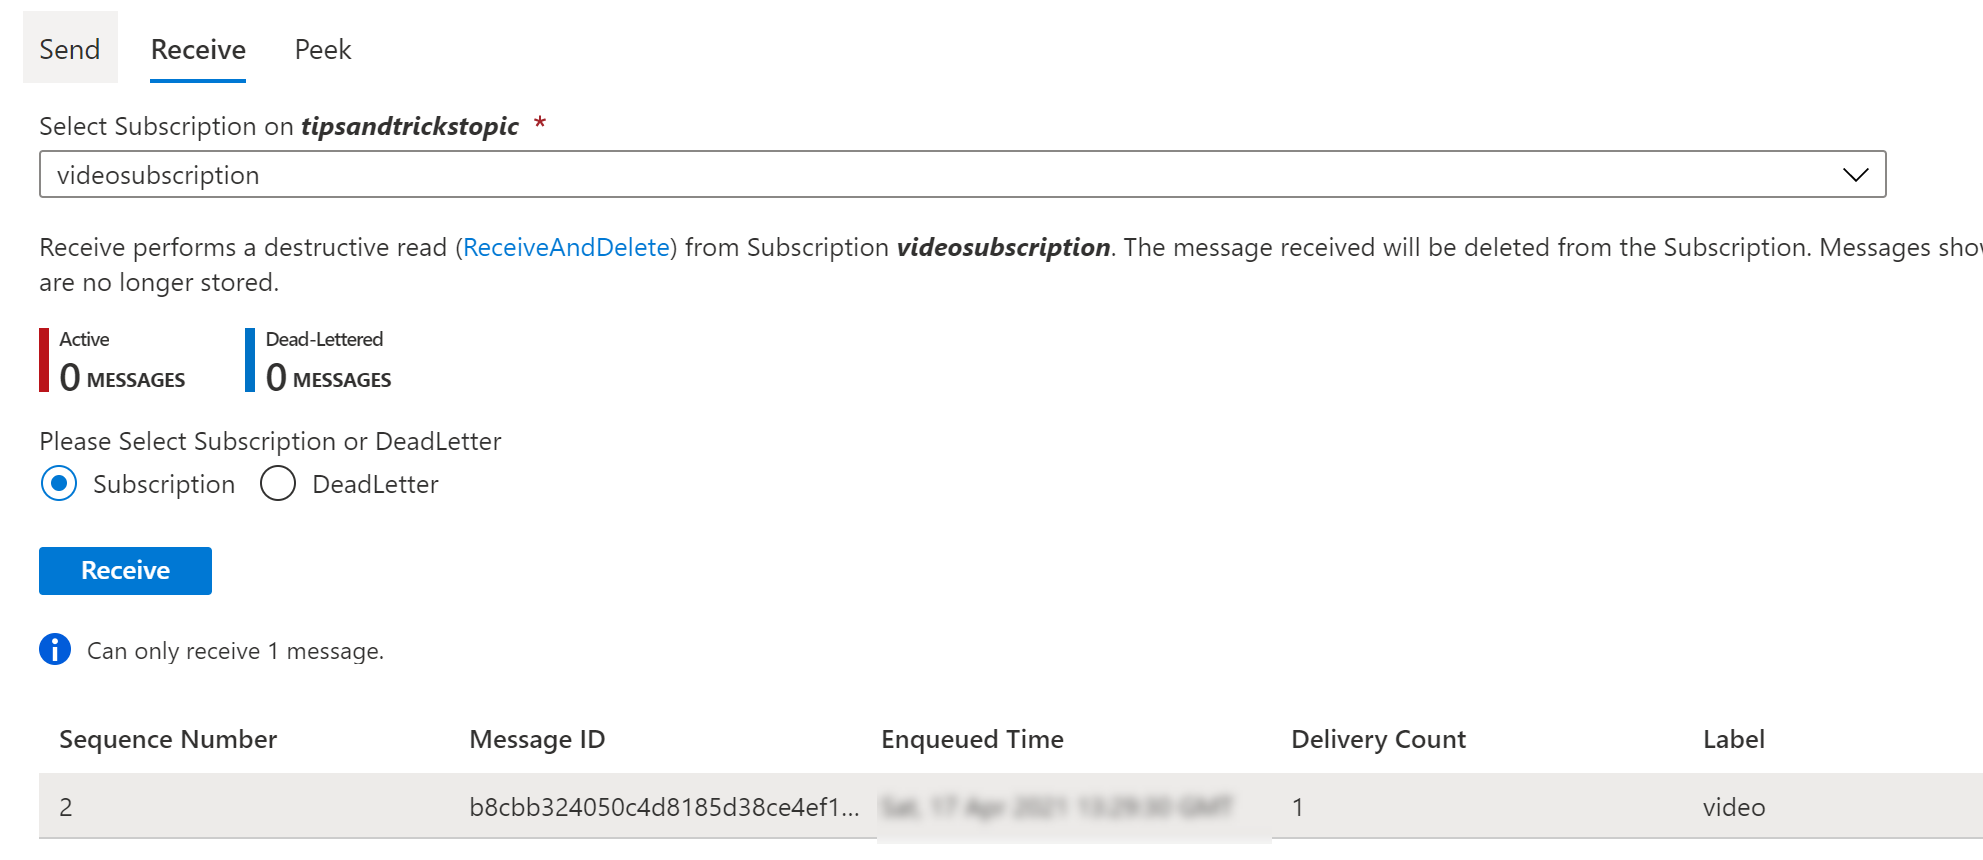
(Receive a message from the Service Bus Topic)
# Conclusion
You can use Azure Service Bus Topics (opens new window) to create a scalable publish/subscribe architecture. Azure Service Bus Topics comes with advanced features like first-in, first-out (FIFO) guarantee (opens new window), chaining Service Bus entities with autoforwarding (opens new window), and Scheduled messages (opens new window). Go and check it out!