
TIP
🔥 The FREE Azure Developer Guide eBook is available here (opens new window).
💡 Learn more : Azure Virtual Machine Sizes (opens new window).
📺 Watch the video : 5 Tips to save money with Virtual Machines (opens new window).
# Learn 5 Tips to reduce cost with Azure Virtual Machines
# Azure Virtual Machines
You can use Azure Virtual Machines (opens new window) to run any workload you want, like an application, a database, an enterprise solution like SAP (opens new window) or anything else. Azure VMs come in many shapes and sizes and can run Windows, Linux and any other OS.
In this post, we'll explore 5 tips that will help you to reduce the costs of your Azure VMs.
# Prerequisites
If you want to follow along, you'll need the following:
- An Azure subscription (If you don't have an Azure subscription, create a free account (opens new window) before you begin)
# 5 Tips to Save Costs with Azure Virtual Machines
You can start saving money with your Azure VMs from the minute you start creating them. Let's take a look at the first tips to save money, which can be found in the creation experience of Azure VMs.
1. Azure Spot Instance
- Go to the Azure portal (opens new window)
- Click the Create a resource button (the plus-sign in the top left corner)
- Select the Compute menu and Virtual Machine after that
- This brings you to the create wizard of Azure VM
- Select a Resource Group
- Fill in a name for the VM
- Select a Region
- Select an Image for the VM
You can now select the option to use an Azure Spot instance (opens new window). When you do, you can save up to 90% of the normal VM price. You pay up to the maximum price that you optionally agree to in advance. The catch is that your VM might be stopped when other users need the underlying Azure resources. This works well if you run workloads that can be interrupted.
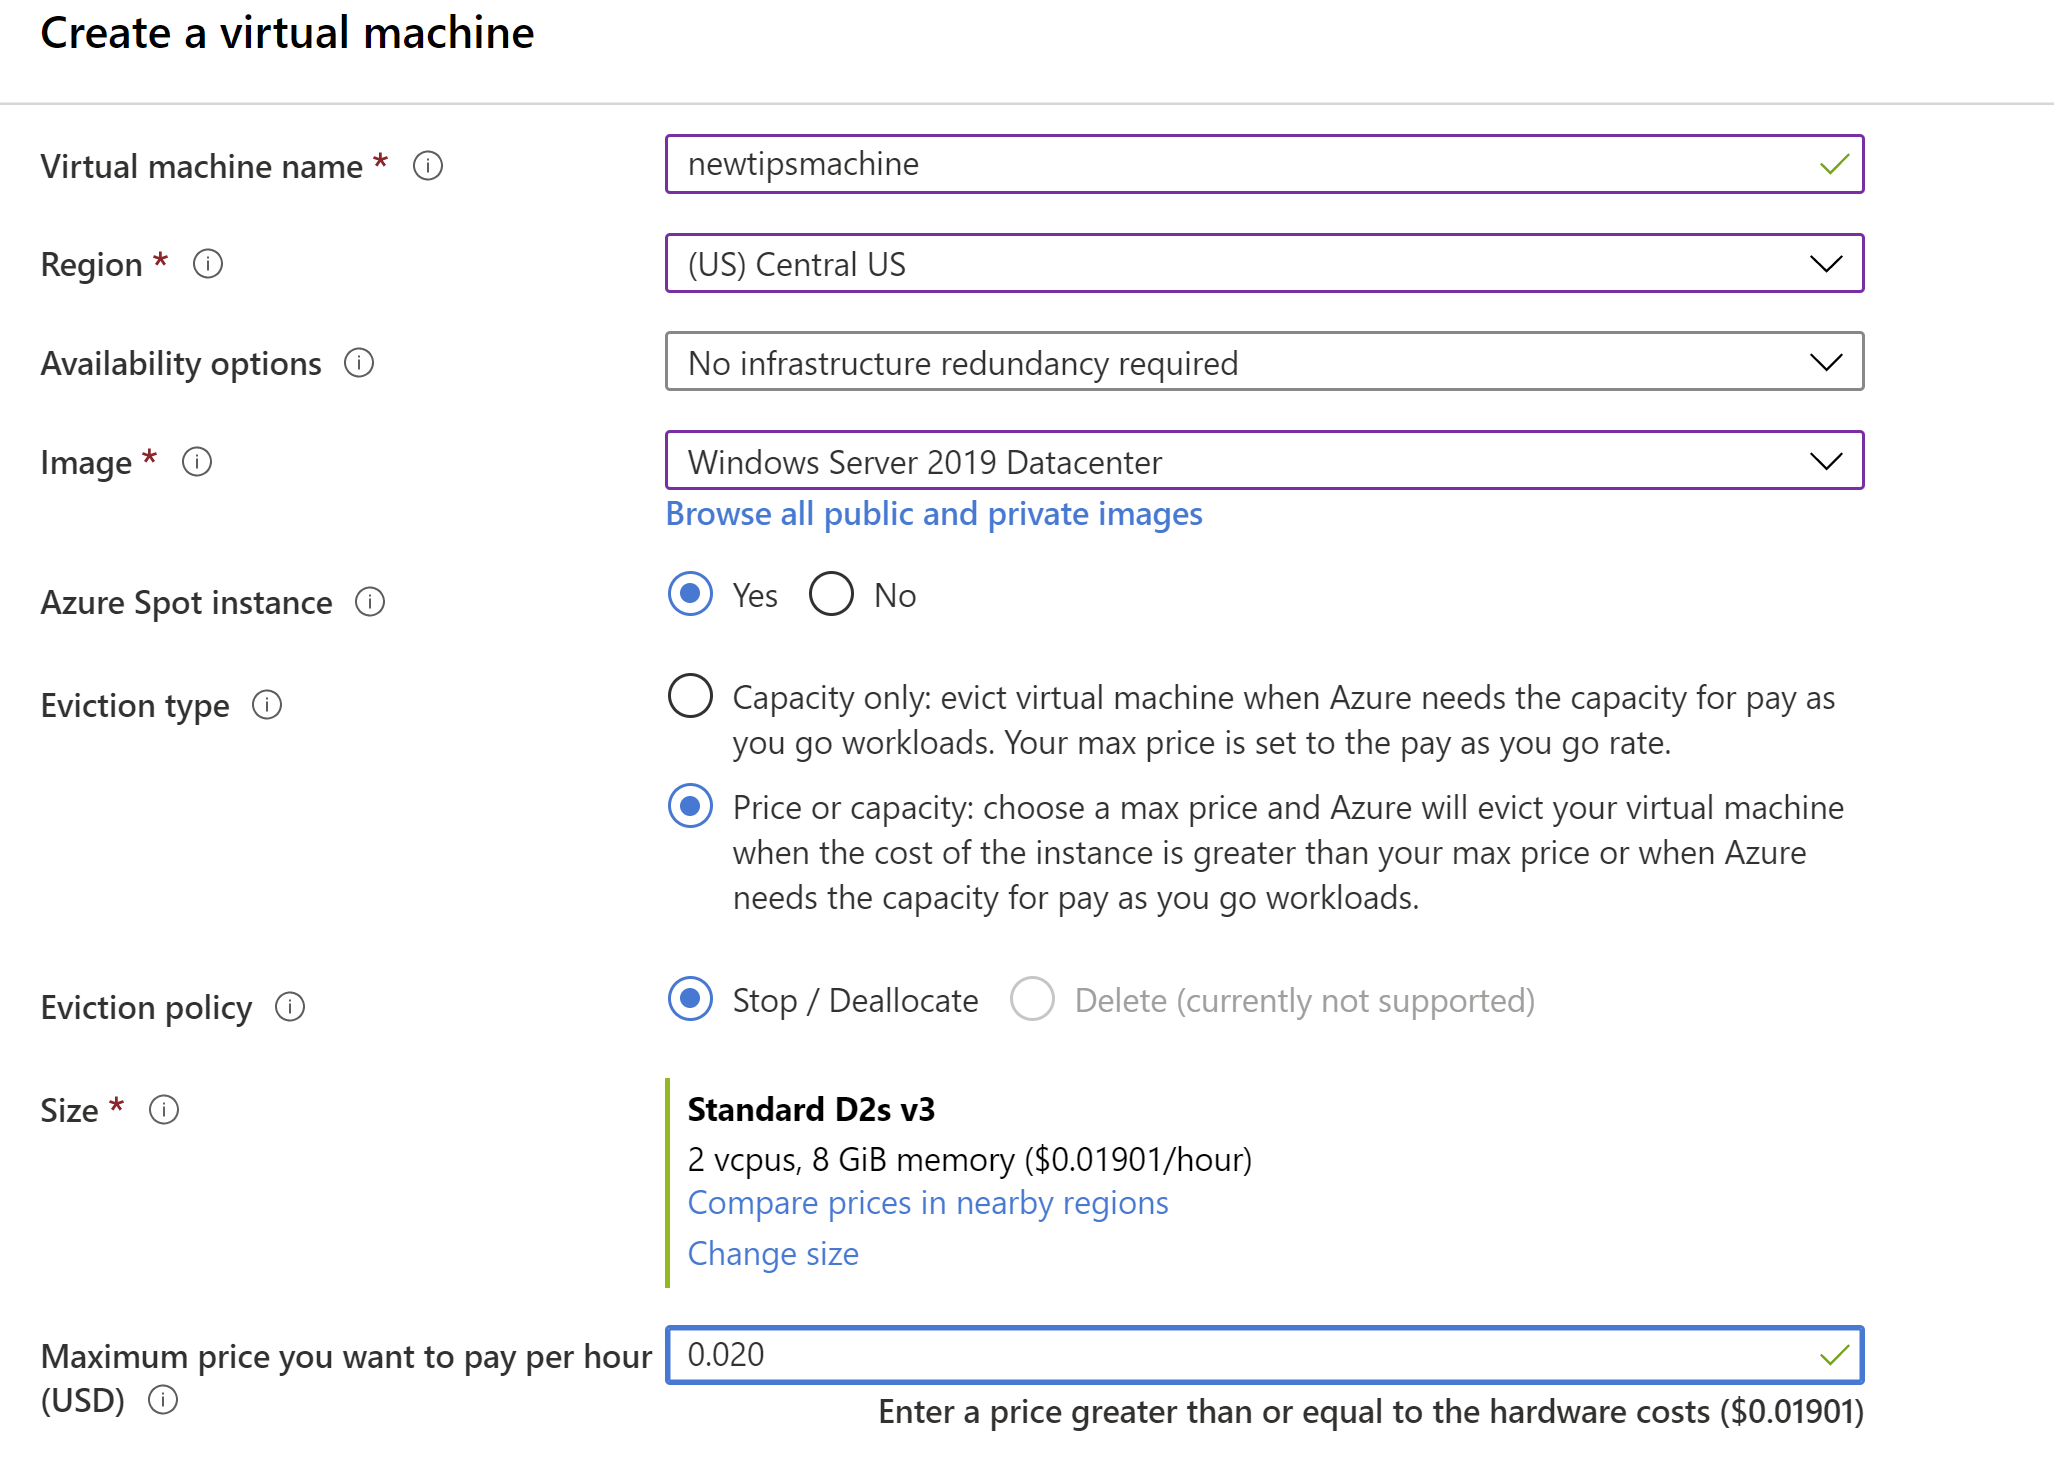
(Azure Spot Instance in the Create VM Blade)
2. Azure Hybrid Benefit
In the VM creation wizard in the Azure portal, you can choose to use the Azure Hybrid benefit (opens new window) if you can. This can save you up to 48% of the costs by bringing your own Windows Server or SQL Server license. When you provide your own license, Azure doesn't have to assign you one and you save costs.
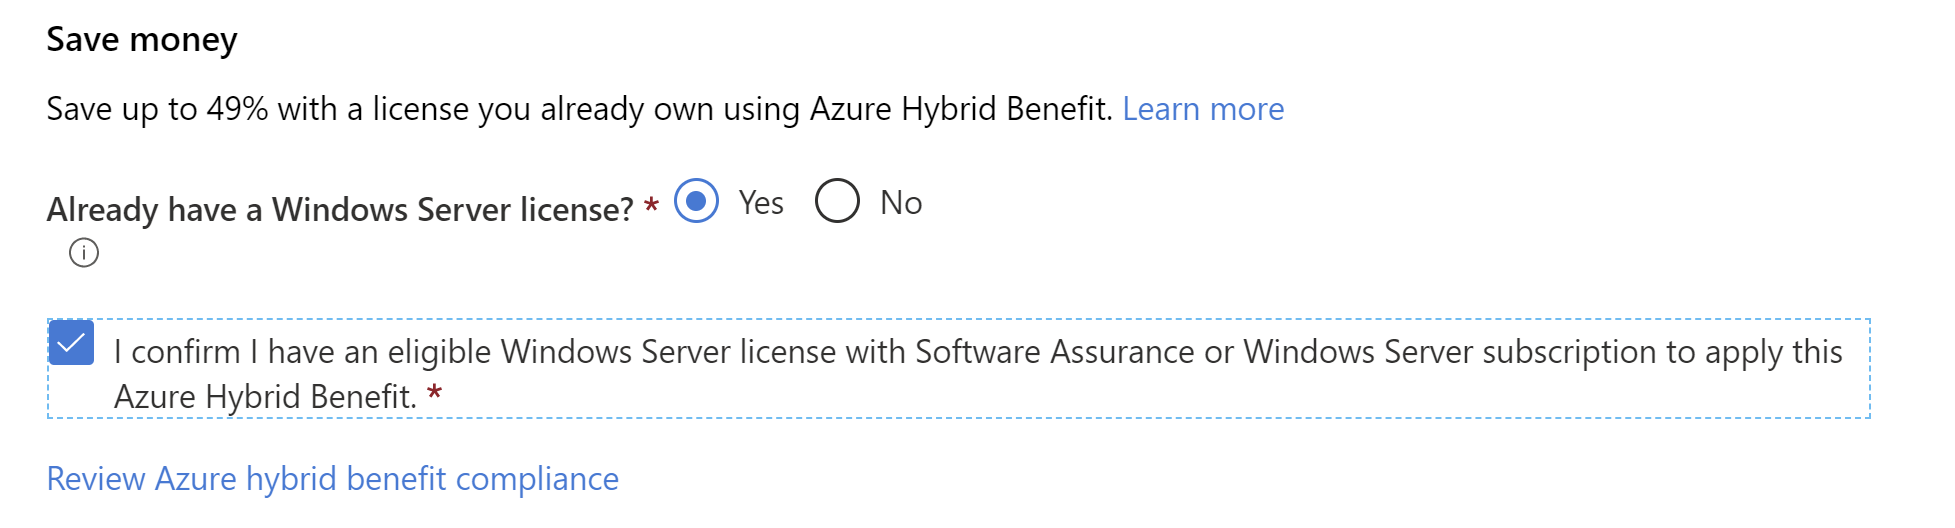
(Azure Hybrid Benefit in the Create VM Blade)
3. Auto Shutdown
In the management part of the VM creation wizard in the Azure portal, you can enable Auto-shutdown. When you do, you can tell it to shutdown your VM at a certain time every day and send you a notification when that happened. This deallocates the VM resources and makes the VM only incur minimal costs. You can also enable auto-shutdown when you have already created a VM. Additionally, you can control when VMs shutdown and startup automatically when you use Azure DevTest Labs (opens new window).
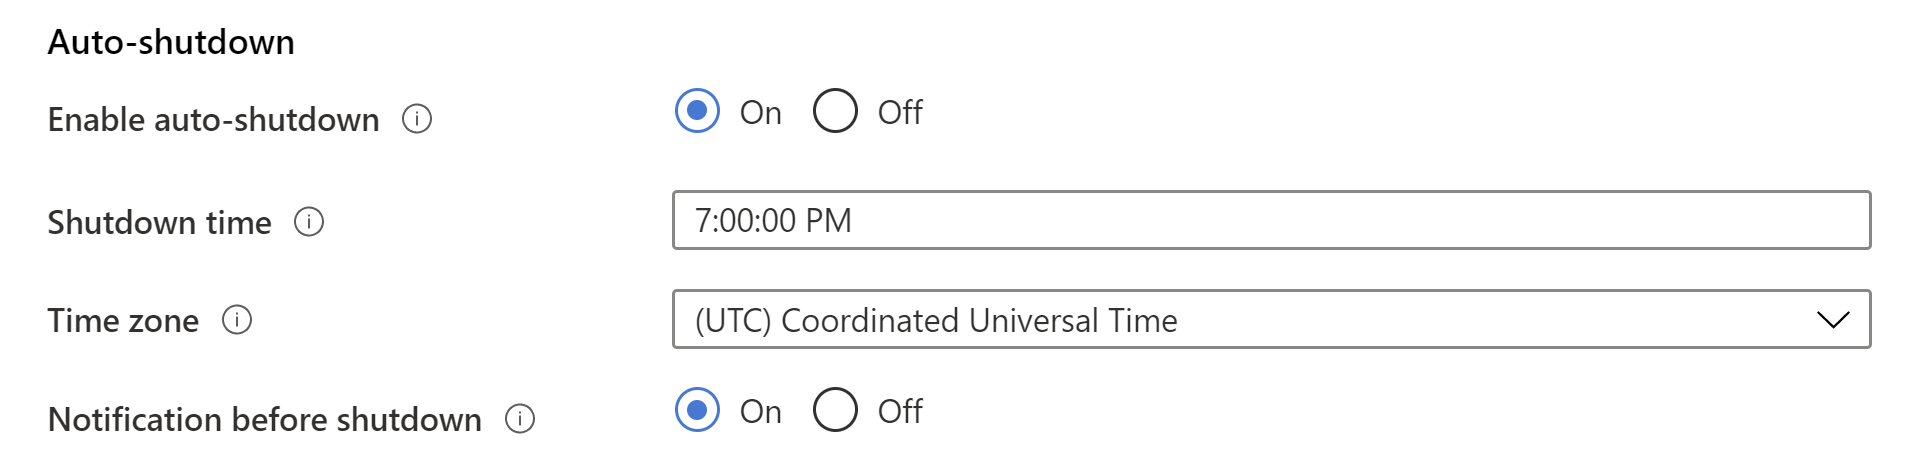
(Auto Shutdown in the Create VM Blade)
4. Deallocate VM resources Another way to save money with your VMs is to shut them down properly. When you are logged into your VM and shut it down from there within the OS, the VM is still running and you continue to pay for it. When you stop the VM through the Azure portal, you deallocate the VMs resources and only pay the minimum costs for the VM. And when you shut your VM down, you get the option to save its IP address, so that it is the same when you start the VM again.
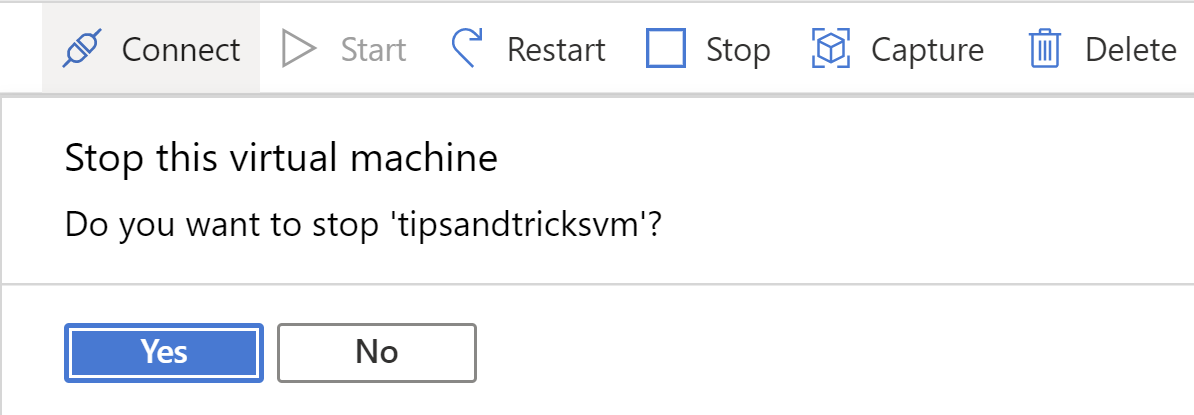
(Shutdown a VM in the Azure portal)
5. Resize VMs You should take care to pick the right size for your VM. There are many sizes and types to choose from and each one has a different price. Assess your VM usage regularly and scale the size of your VM to what it needs to be. You might not need a large, expensive VM. You can also scale your VMs automatically when they are in a VM Scale Set (opens new window).
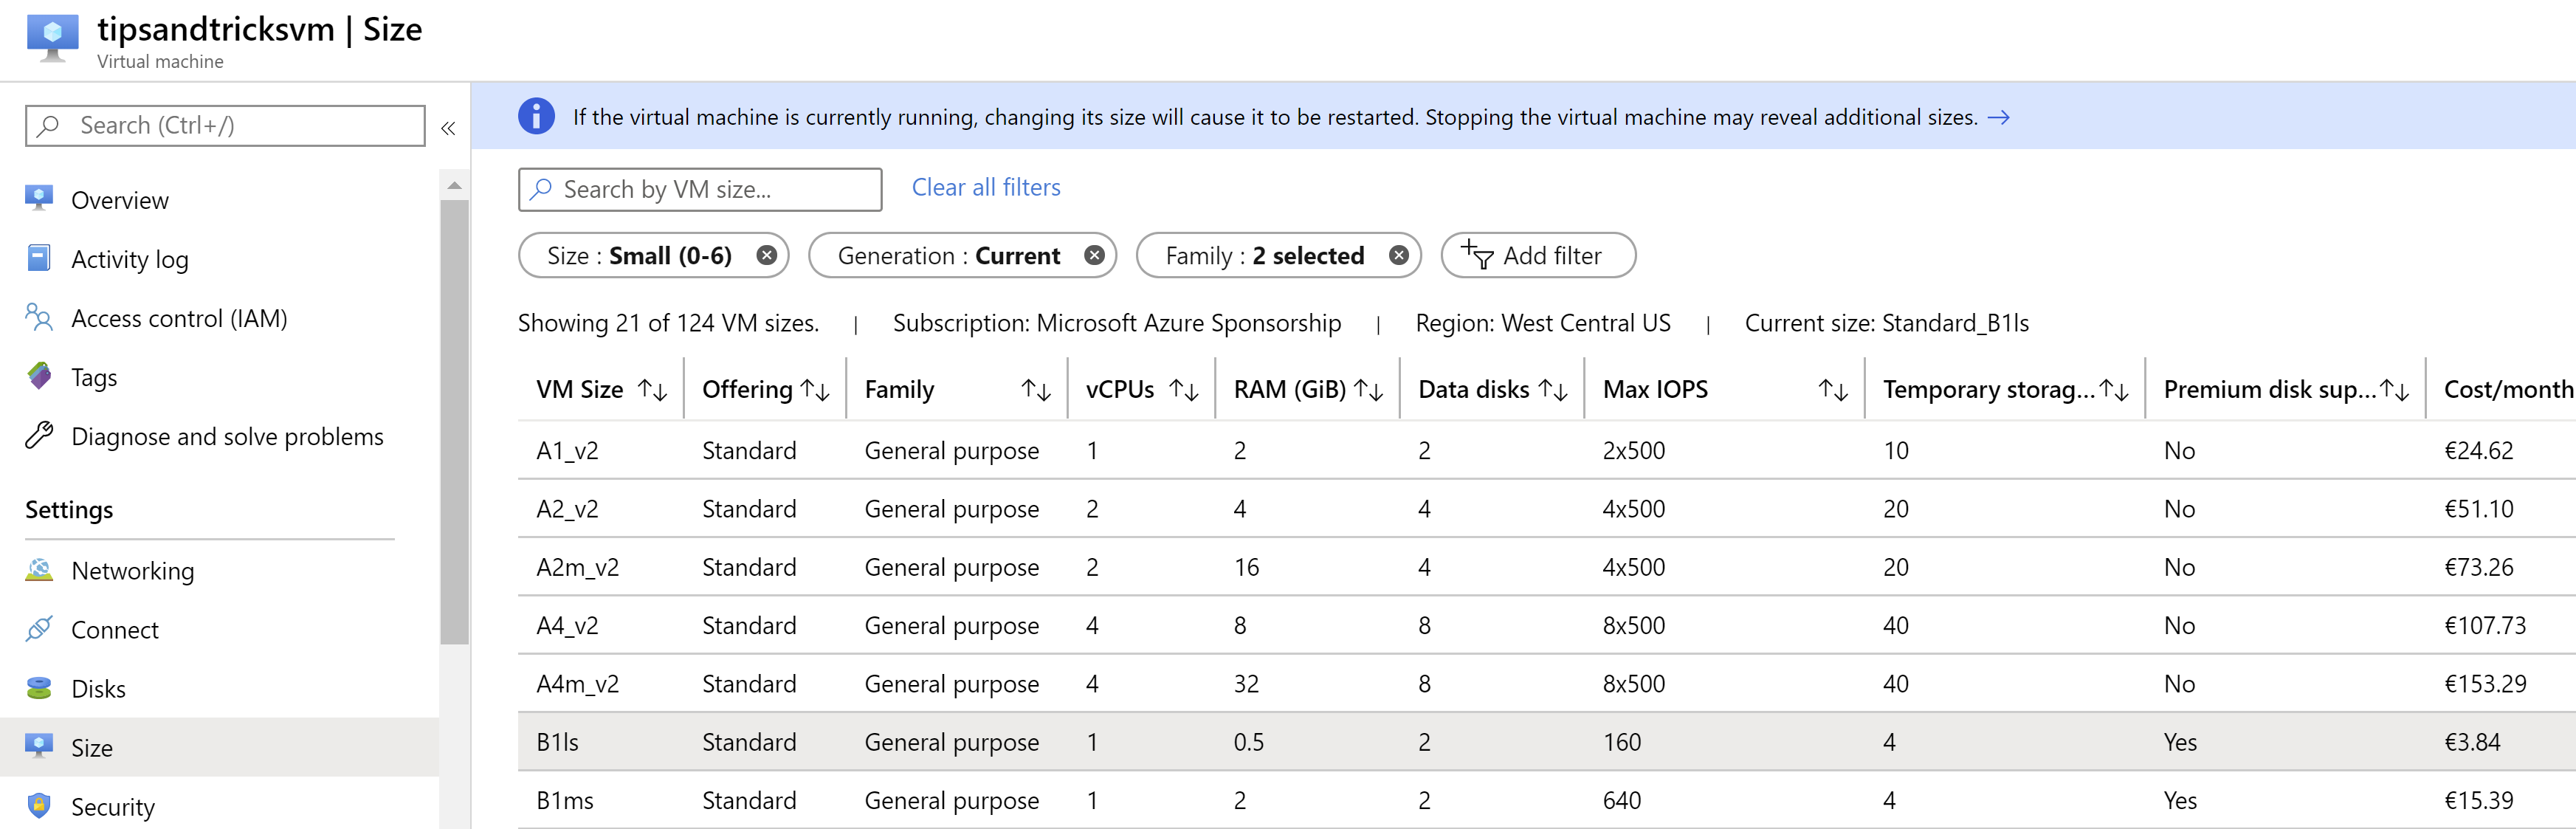
(Resize a VM in the Azure portal)
# Conclusion
Azure Virtual Machines (opens new window) are one of the basic building blocks for your solutions. In this post, we discussed 5 tips to save money with your VMs in Azure. To save more costs in Azure, regularly check the cost recommendation in Azure Advisor (opens new window). Go and check it out!