
TIP
🔥 Download the FREE Azure Developer Guide eBook here (opens new window).
💡 Learn more : Azure Batch overview (opens new window).
📺 Watch the video : How to run jobs at scale with Azure Batch (opens new window).
# How to run jobs at scale with Azure Batch
# Scaling out jobs
Azure Batch (opens new window) is designed to run jobs at scale. These can be jobs that calculate things, transform data, encode media, and so on. There are several flavors of Azure Batch, like Azure Batch Rendering (opens new window), which renders 3D models, and the Azure Batch Service (opens new window), which is used to run any other task or script at scale. Azure Batch can execute tasks on multiple compute nodes to speed up the process. It can orchestrate data and results across tasks, so that multiple nodes can work to complete a single result.
In this post, we'll execute a simple command line script over multiple compute nodes with Azure Batch Service.
# Prerequisites
If you want to follow along, you'll need the following:
- An Azure subscription (If you don't have an Azure subscription, create a free account (opens new window) before you begin)
# Create a Batch Service account and execute tasks with it
You use Azure Batch Service by creating a Batch account, a compute pool, jobs for that pool, and tasks for those jobs. We'll start by creating the Azure Batch Service account in the Azure portal.
- Go to the Azure portal (opens new window)
- Click the Create a resource button (the plus-sign in the top left corner)
- Search for batch, select the "Batch Service" result and click Create
- Select a Resource Group
- Fill in a Name
- Select a Location for the account
- Click Next: Advanced
- In the Advanced tab, you can configure security details for the Batch account. Leave the settings as they are and click Review + create
- Click Create to create the account
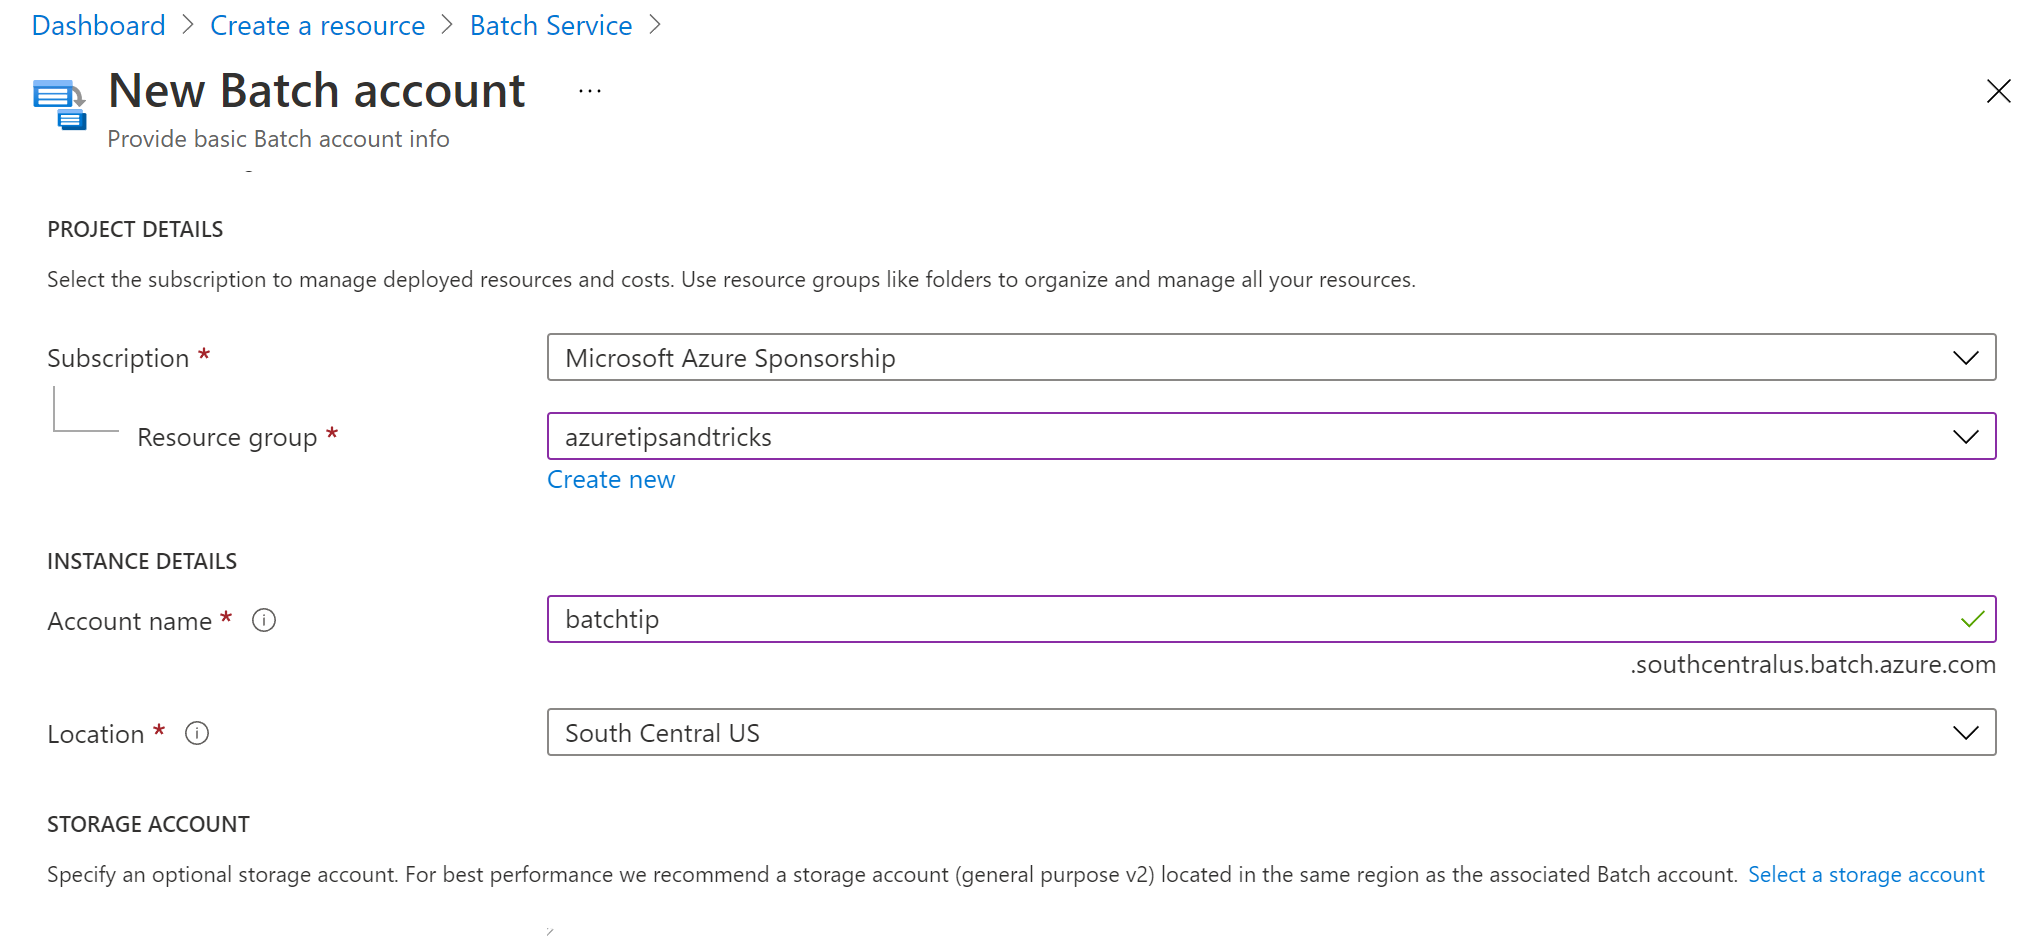
(Create an Azure Batch Service account in the Azure portal)
The Azure Batch Service account can have multiple pools of compute nodes in it. You use these to execute jobs with tasks. Let's create a compute pool.
- In the Azure Batch Service account, navigate to the Pools menu
- Click the "+ Add" button to start adding a pool
- Enter a name for the pool under Pool ID
- For Image Type, pick Marketplace
- Pick "microsoftwindowsserver" for Publisher
- Choose "windowsserver" for Offer
- Pick "2019-datacenter-core-smaldisk" for the Sku setting
- Next, under Scale, set the "Target dedicated nodes" to 2. This will scale the pool to two nodes. The nodes are Azure VMs that will be the size of the VM size setting
- Finally, under Virtual Network, select one, or create a new one and select it
- Click OK to create the pool. The pool will be created instantly and needs some time to spin up the VM nodes
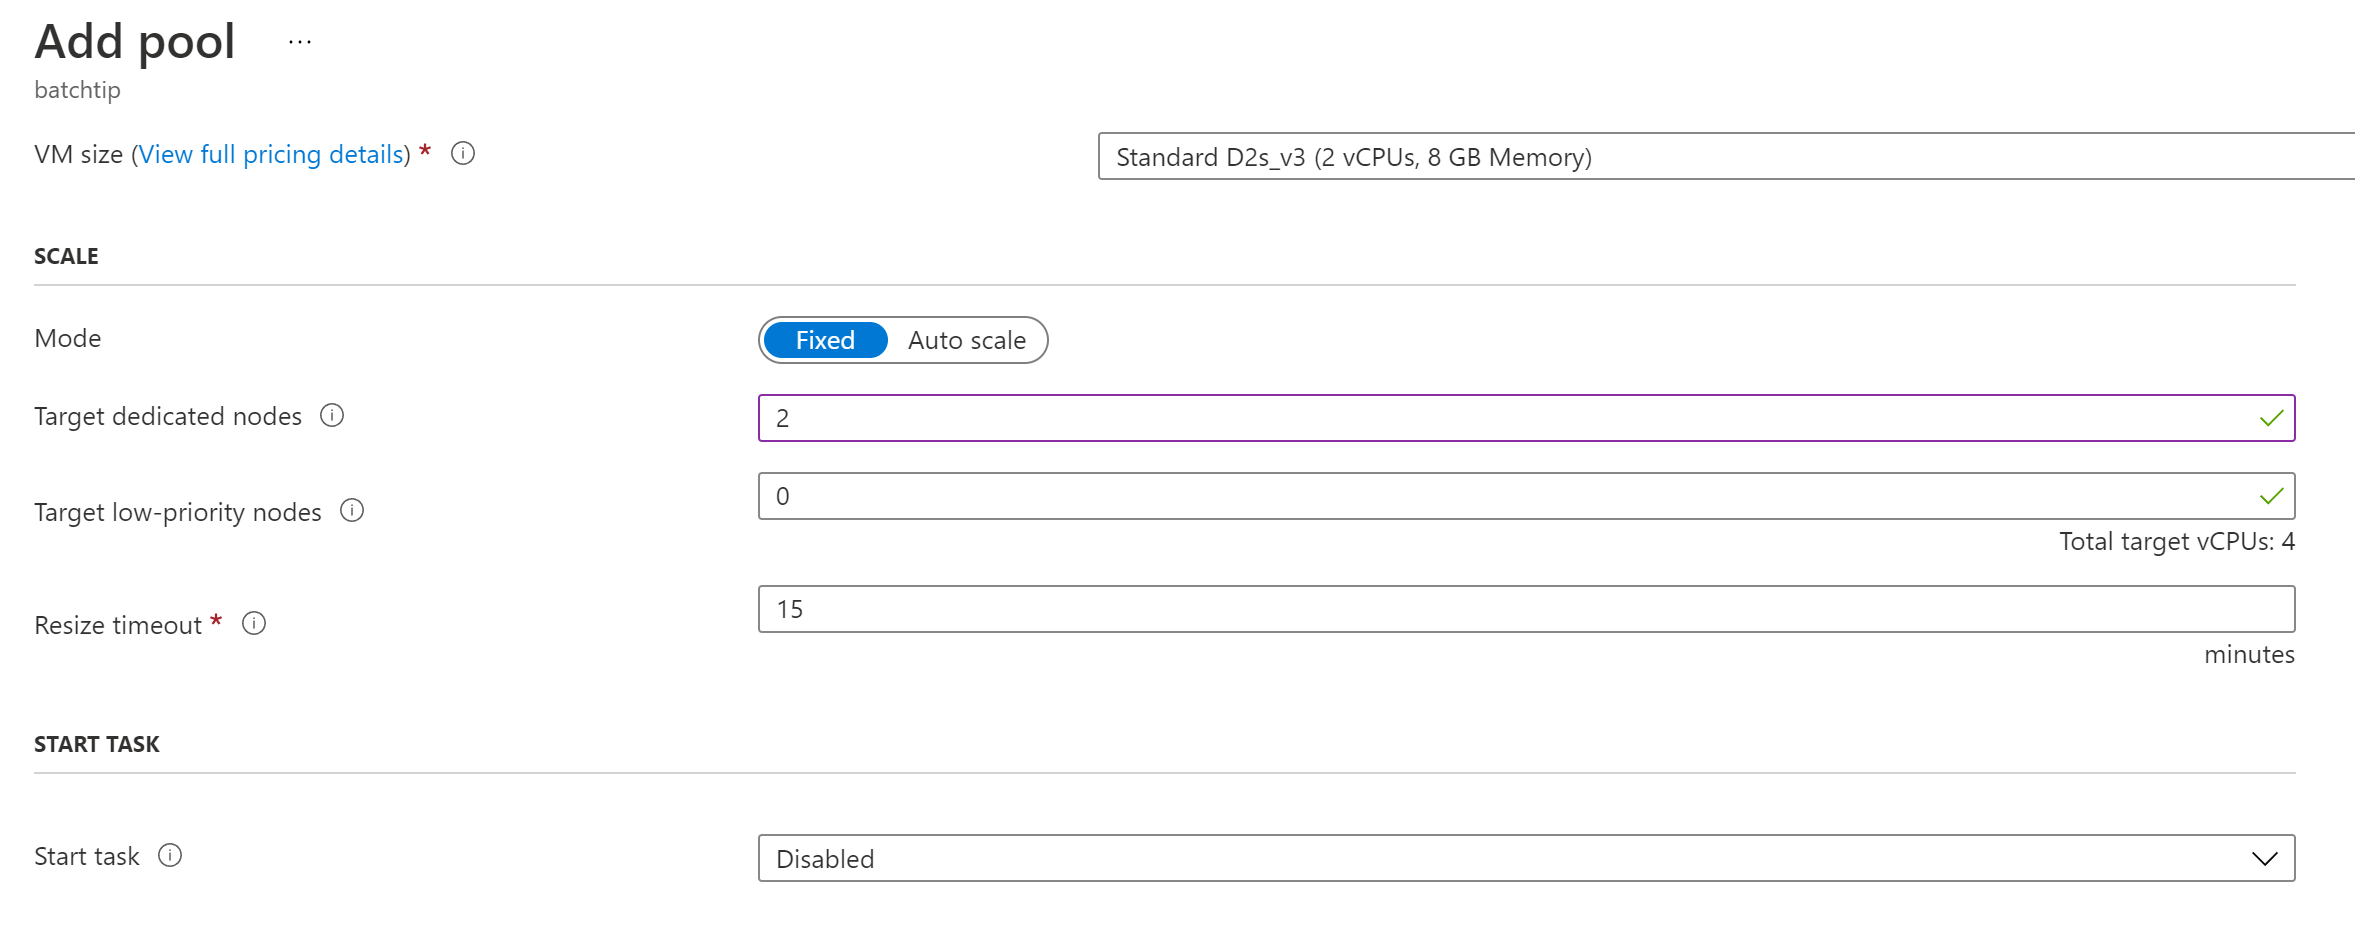
(Create the Azure Batch pool)
- Now that we have a compute pool, we can create Jobs for it. These are the things that contains the tasks that will be executed. You can schedule jobs, and jobs can contain multiple tasks. Click on the Jobs menu
- Click the "+ Add" button
- Enter a Job ID for the job
- Click Select pool and select the pool that we've just created
- Select OK to add the Job
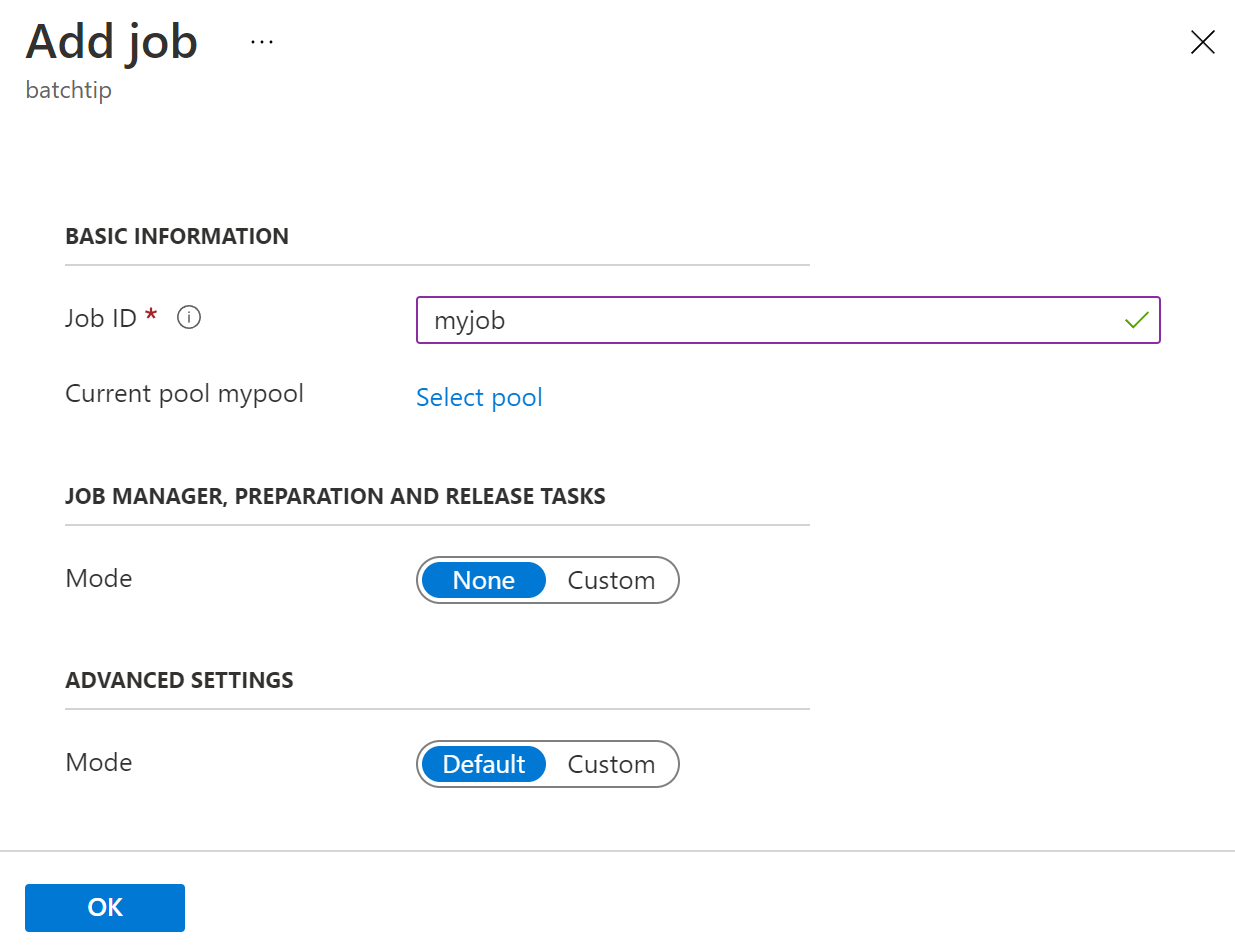
(Create a job in the Azure Batch pool)
- Let's create a Task. In the Jobs menu, select the Job that we've created
- Navigate to the Tasks menu
- Click the "+ Add" button to create a new Task
- Enter a name for the Task under Task ID
- In the command line text box, enter the following command. This will retrieve the environment variables of Azure Batch and wait for 90 seconds
cmd /c "set AZ_BATCH & timeout /t 90 > NUL"
- Leave the rest of the settings as they are and click OK to add the Task
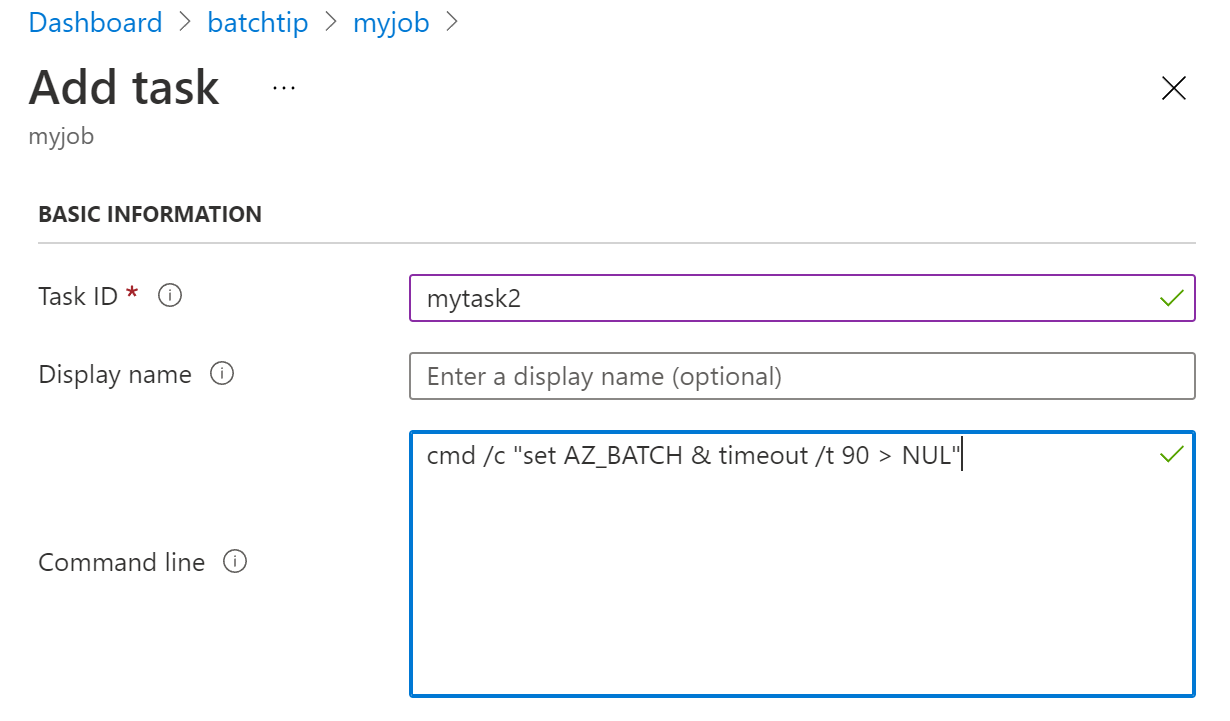
(Create a task)
- Repeat the steps to create another task with the same command
- Tasks that are created will execute automatically on available nodes in the pool. After a few minutes, you can see the results in the Tasks menu of the job. The Tasks both executed and will have run on different nodes, as they became available again.
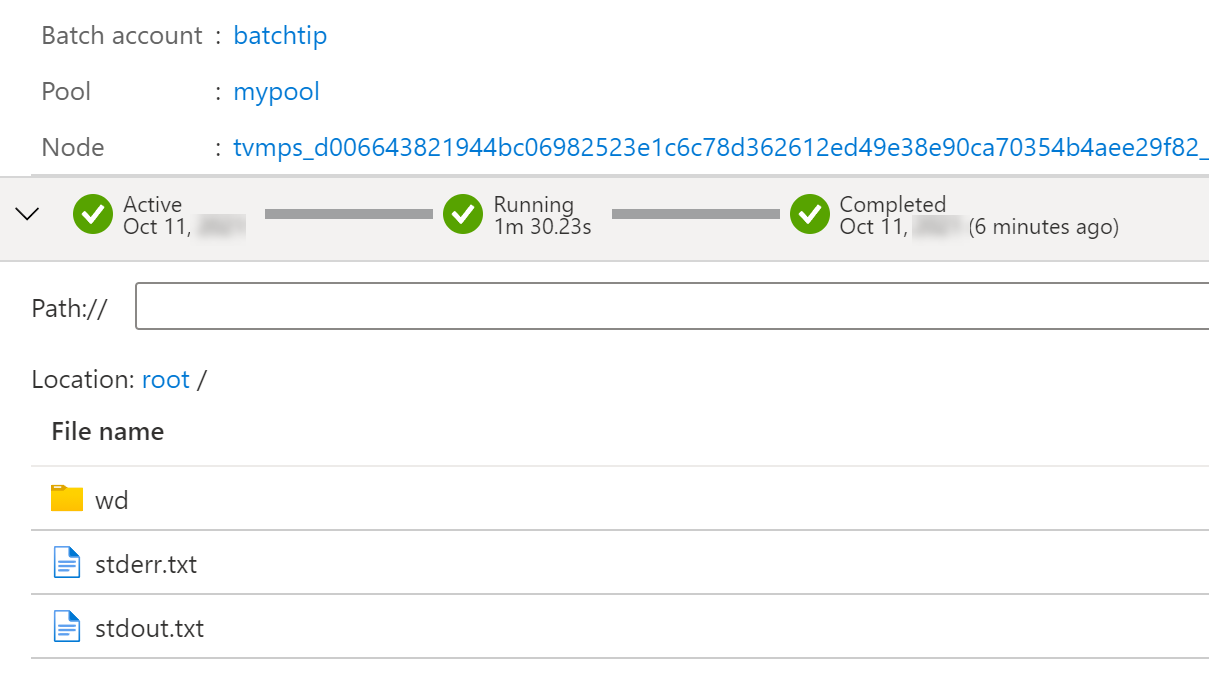
(The task executed)
The file stdout.txt contains the output of the task. Click on it to see the Batch environment variables, which will looks like this:
AZ_BATCH_ACCOUNT_URL=https://batchtip.eastus.batch.azure.com/
AZ_BATCH_POOL_ID=mypool
AZ_BATCH_NODE_ID=tvmps_d006643821944bc06982523e1c6c78d362612ed49e38e90ca70354b4aee29f82_d
AZ_BATCH_ACCOUNT_NAME=batchtip
AZ_BATCH_NODE_ROOT_DIR=D:\batch\tasks
AZ_BATCH_NODE_SHARED_DIR=D:\batch\tasks\shared
AZ_BATCH_NODE_STARTUP_DIR=D:\batch\tasks\startup
AZ_BATCH_NODE_STARTUP_WORKING_DIR=D:\batch\tasks\startup\wd
AZ_BATCH_NODE_IS_DEDICATED=true
AZ_BATCH_NODE_MOUNTS_DIR=D:\batch\tasks\fsmounts
AZ_BATCH_RESERVED_DISK_SPACE_BYTES=1000000000
AZ_BATCH_RESERVED_EPHEMERAL_DISK_SPACE_BYTES=1000000000
AZ_BATCH_OS_RESERVED_EPHEMERAL_DISK_SPACE_BYTES=1000000000
AZ_BATCH_JOB_ID=myjob
AZ_BATCH_TASK_ID=mytask
AZ_BATCH_TASK_DIR=D:\batch\tasks\workitems\myjob\job-1\mytask
AZ_BATCH_TASK_WORKING_DIR=D:\batch\tasks\workitems\myjob\job-1\mytask\wd
AZ_BATCH_TASK_USER_IDENTITY=PoolNonAdmin
AZ_BATCH_TASK_USER=PoolNonAdmin72876713
2
3
4
5
6
7
8
9
10
11
12
13
14
15
16
17
18
19
20
# Conclusion
Azure Batch Service (opens new window) is great for running jobs at scale. Go and check it out!