
TIP
🔥 The FREE Azure Developer Guide eBook is available here (opens new window).
💡 Learn more : Free video conferencing with Jitsi (opens new window).
📺 Watch the video : Creating a private chat room with Jitsi on Microsoft Azure VM (opens new window).
# Creating a private video conferencing service with Jitsi on a Microsoft Azure VM
# Private video conferencing
There are many video conferencing applications out there, like Zoom (opens new window), Microsoft Teams (opens new window) and Skype (opens new window). Sometimes, you need your own service, that you can secure yourself and and use within your own company. You can do with with the open source Jitsi (opens new window) video conferencing solution.
In this post, we'll create a Virtual Machine (opens new window) in Azure and install Jitsi on it.
# Prerequisites
If you want to follow along, you'll need the following:
- An Azure subscription (If you don't have an Azure subscription, create a free account (opens new window) before you begin)
# Creating a Jitsi service in Azure
Let's create an Azure Virtual Machine (opens new window) and install Jitsi on it.
- Go to the Azure portal (opens new window)
- Click the Create a resource button (the plus-sign in the top left corner)
(Create an Ubuntu Server VM in the Azure portal)
- Select the Compute menu and Virtual Machine after that
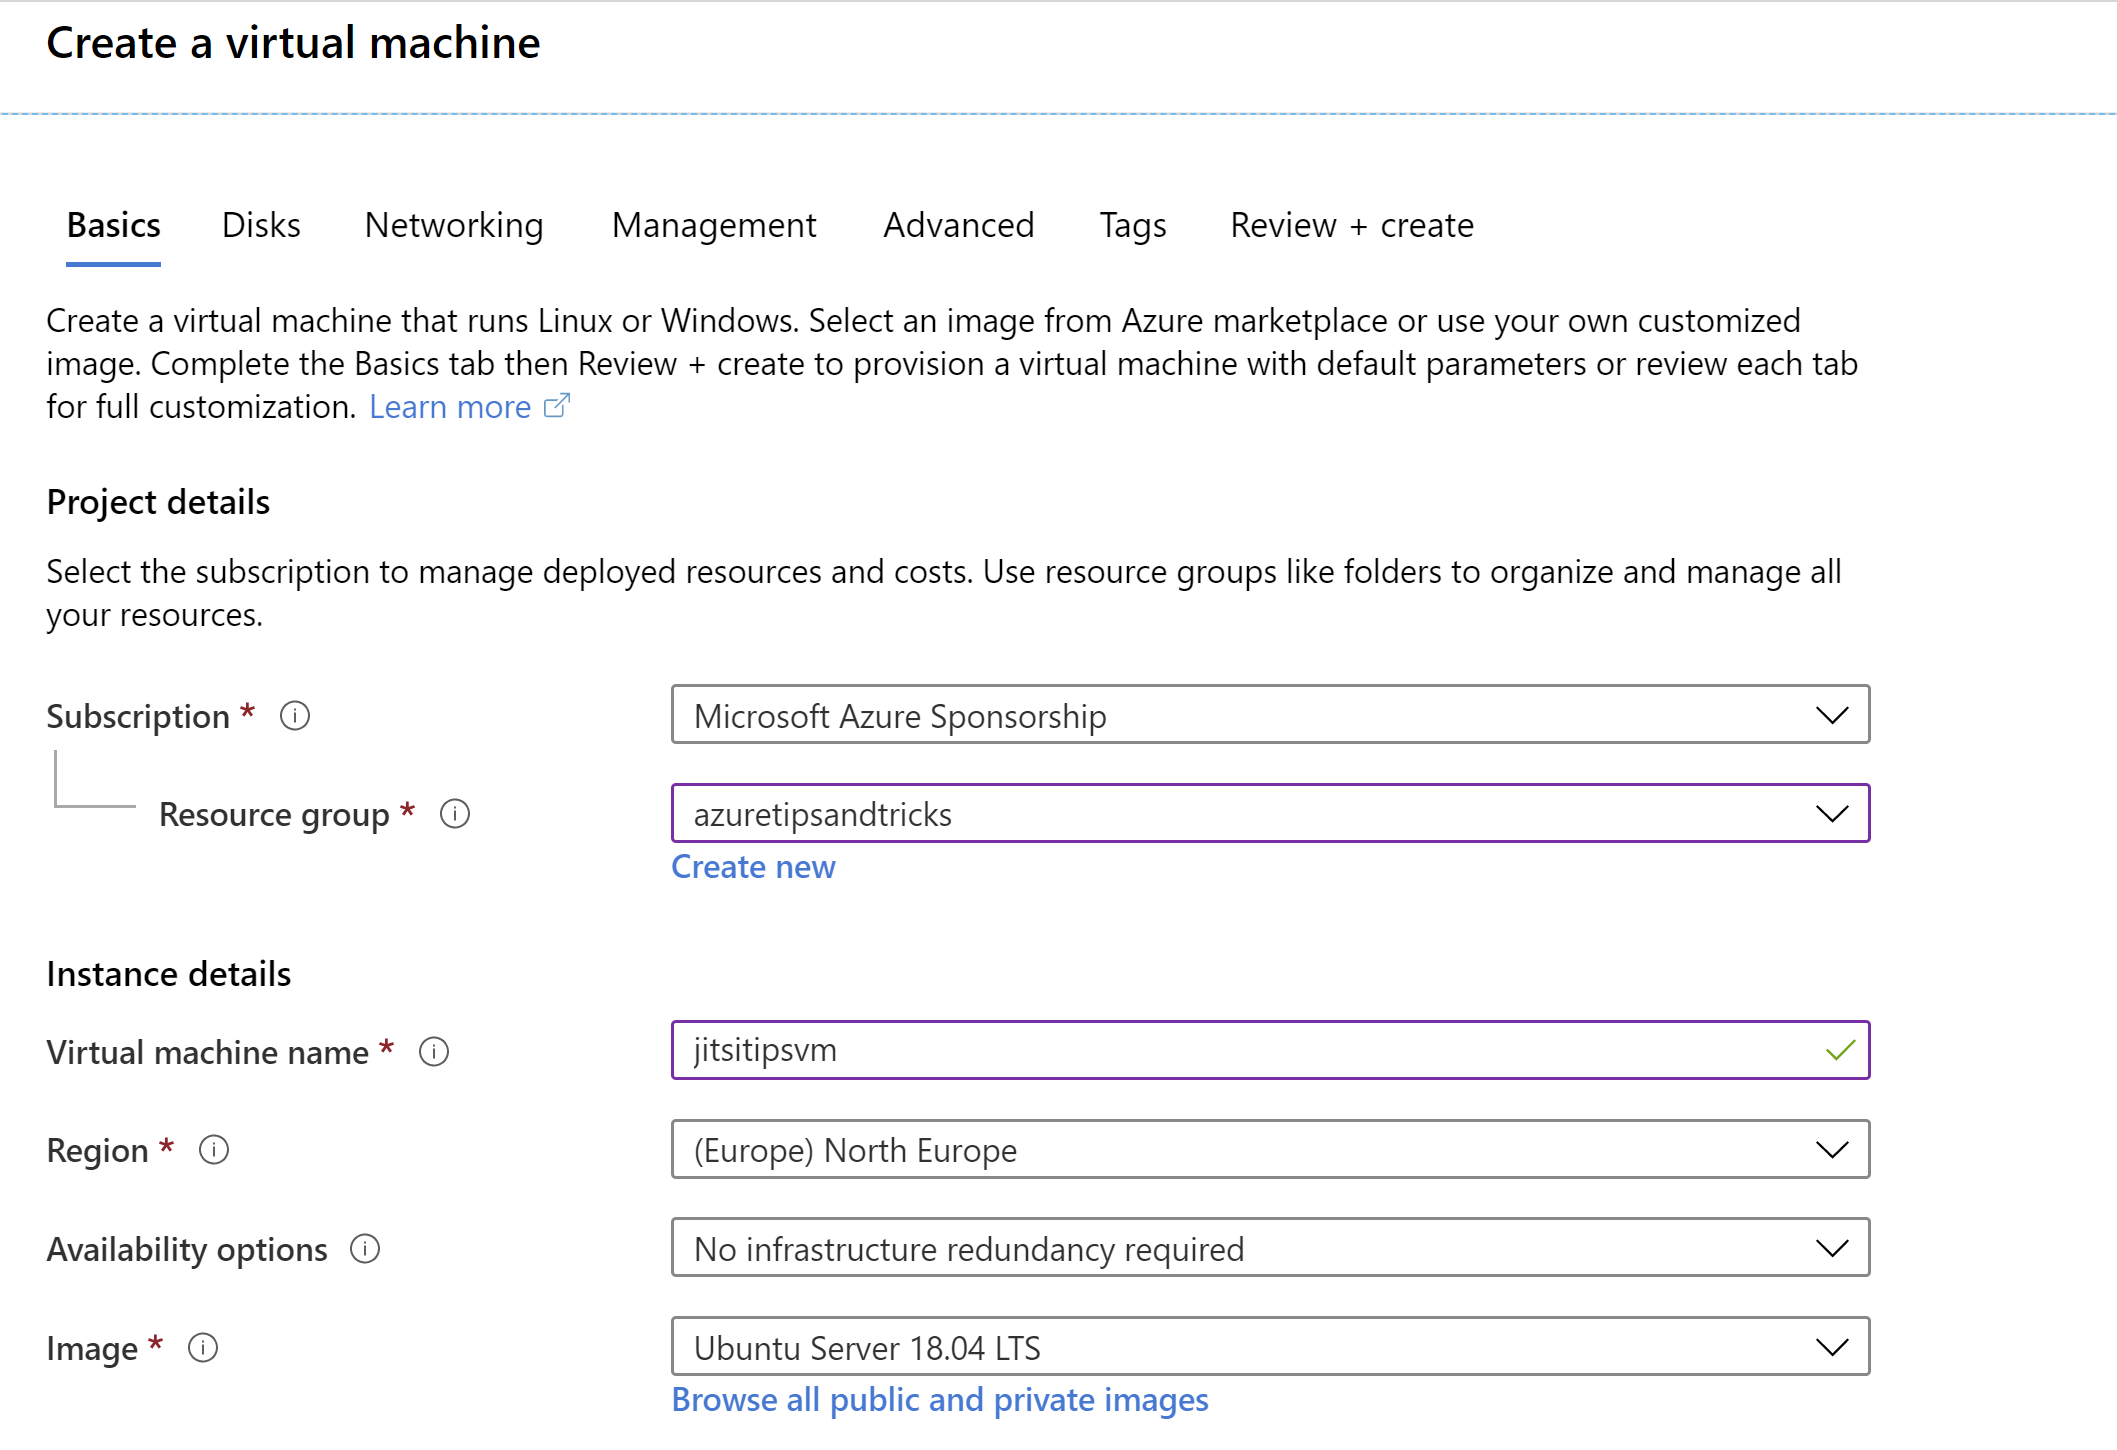
- This brings you to the create wizard of Azure VM
- Select a Resource Group
- Fill in a name for the VM
- Select a Region
- Set the Image to Ubuntu Server
- Leave the Authentication type to SSH public key
- Fill in a username
- Provide a SSH public key for the VM. You can generate a public and private key pair by following this guide (opens new window)
- Under Public inbound ports, select Allow selected ports
- And for Select inbound ports, select HTTP (80), HTTPS (443) and SSH (22)
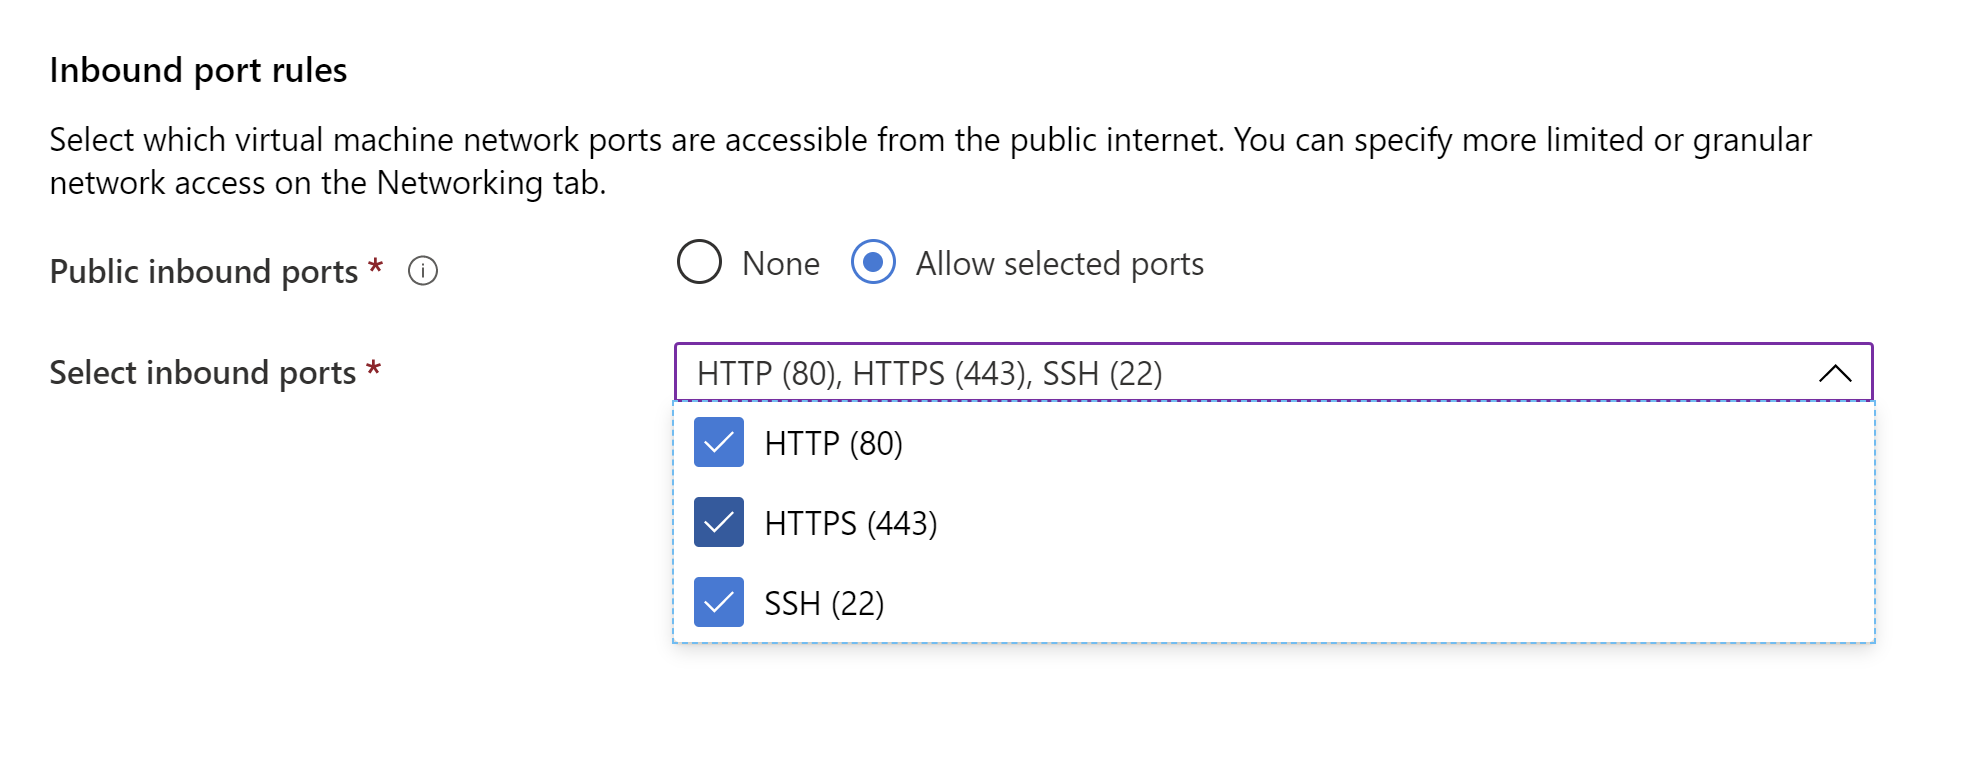
(Allow inbound traffic in the Azure portal)
- That's it. Click Review + create and Create after that to create the VM
When the VM is created, we need to configure a couple of settings in it, before we can install and use Jitsi.
- In the Azure portal, go to the Virtual Machine that we've just created
- Select the Networking menu
- In here, we need to add an inbound port to allow Jitsu to work on the VM. Select Add inbound port rule
- In the Add inbound security rule blade that appears, put in 10000 for the Destination port ranges
- Give the rule a Name and leave the rest of the settings as they are
- Select Add to add the rule
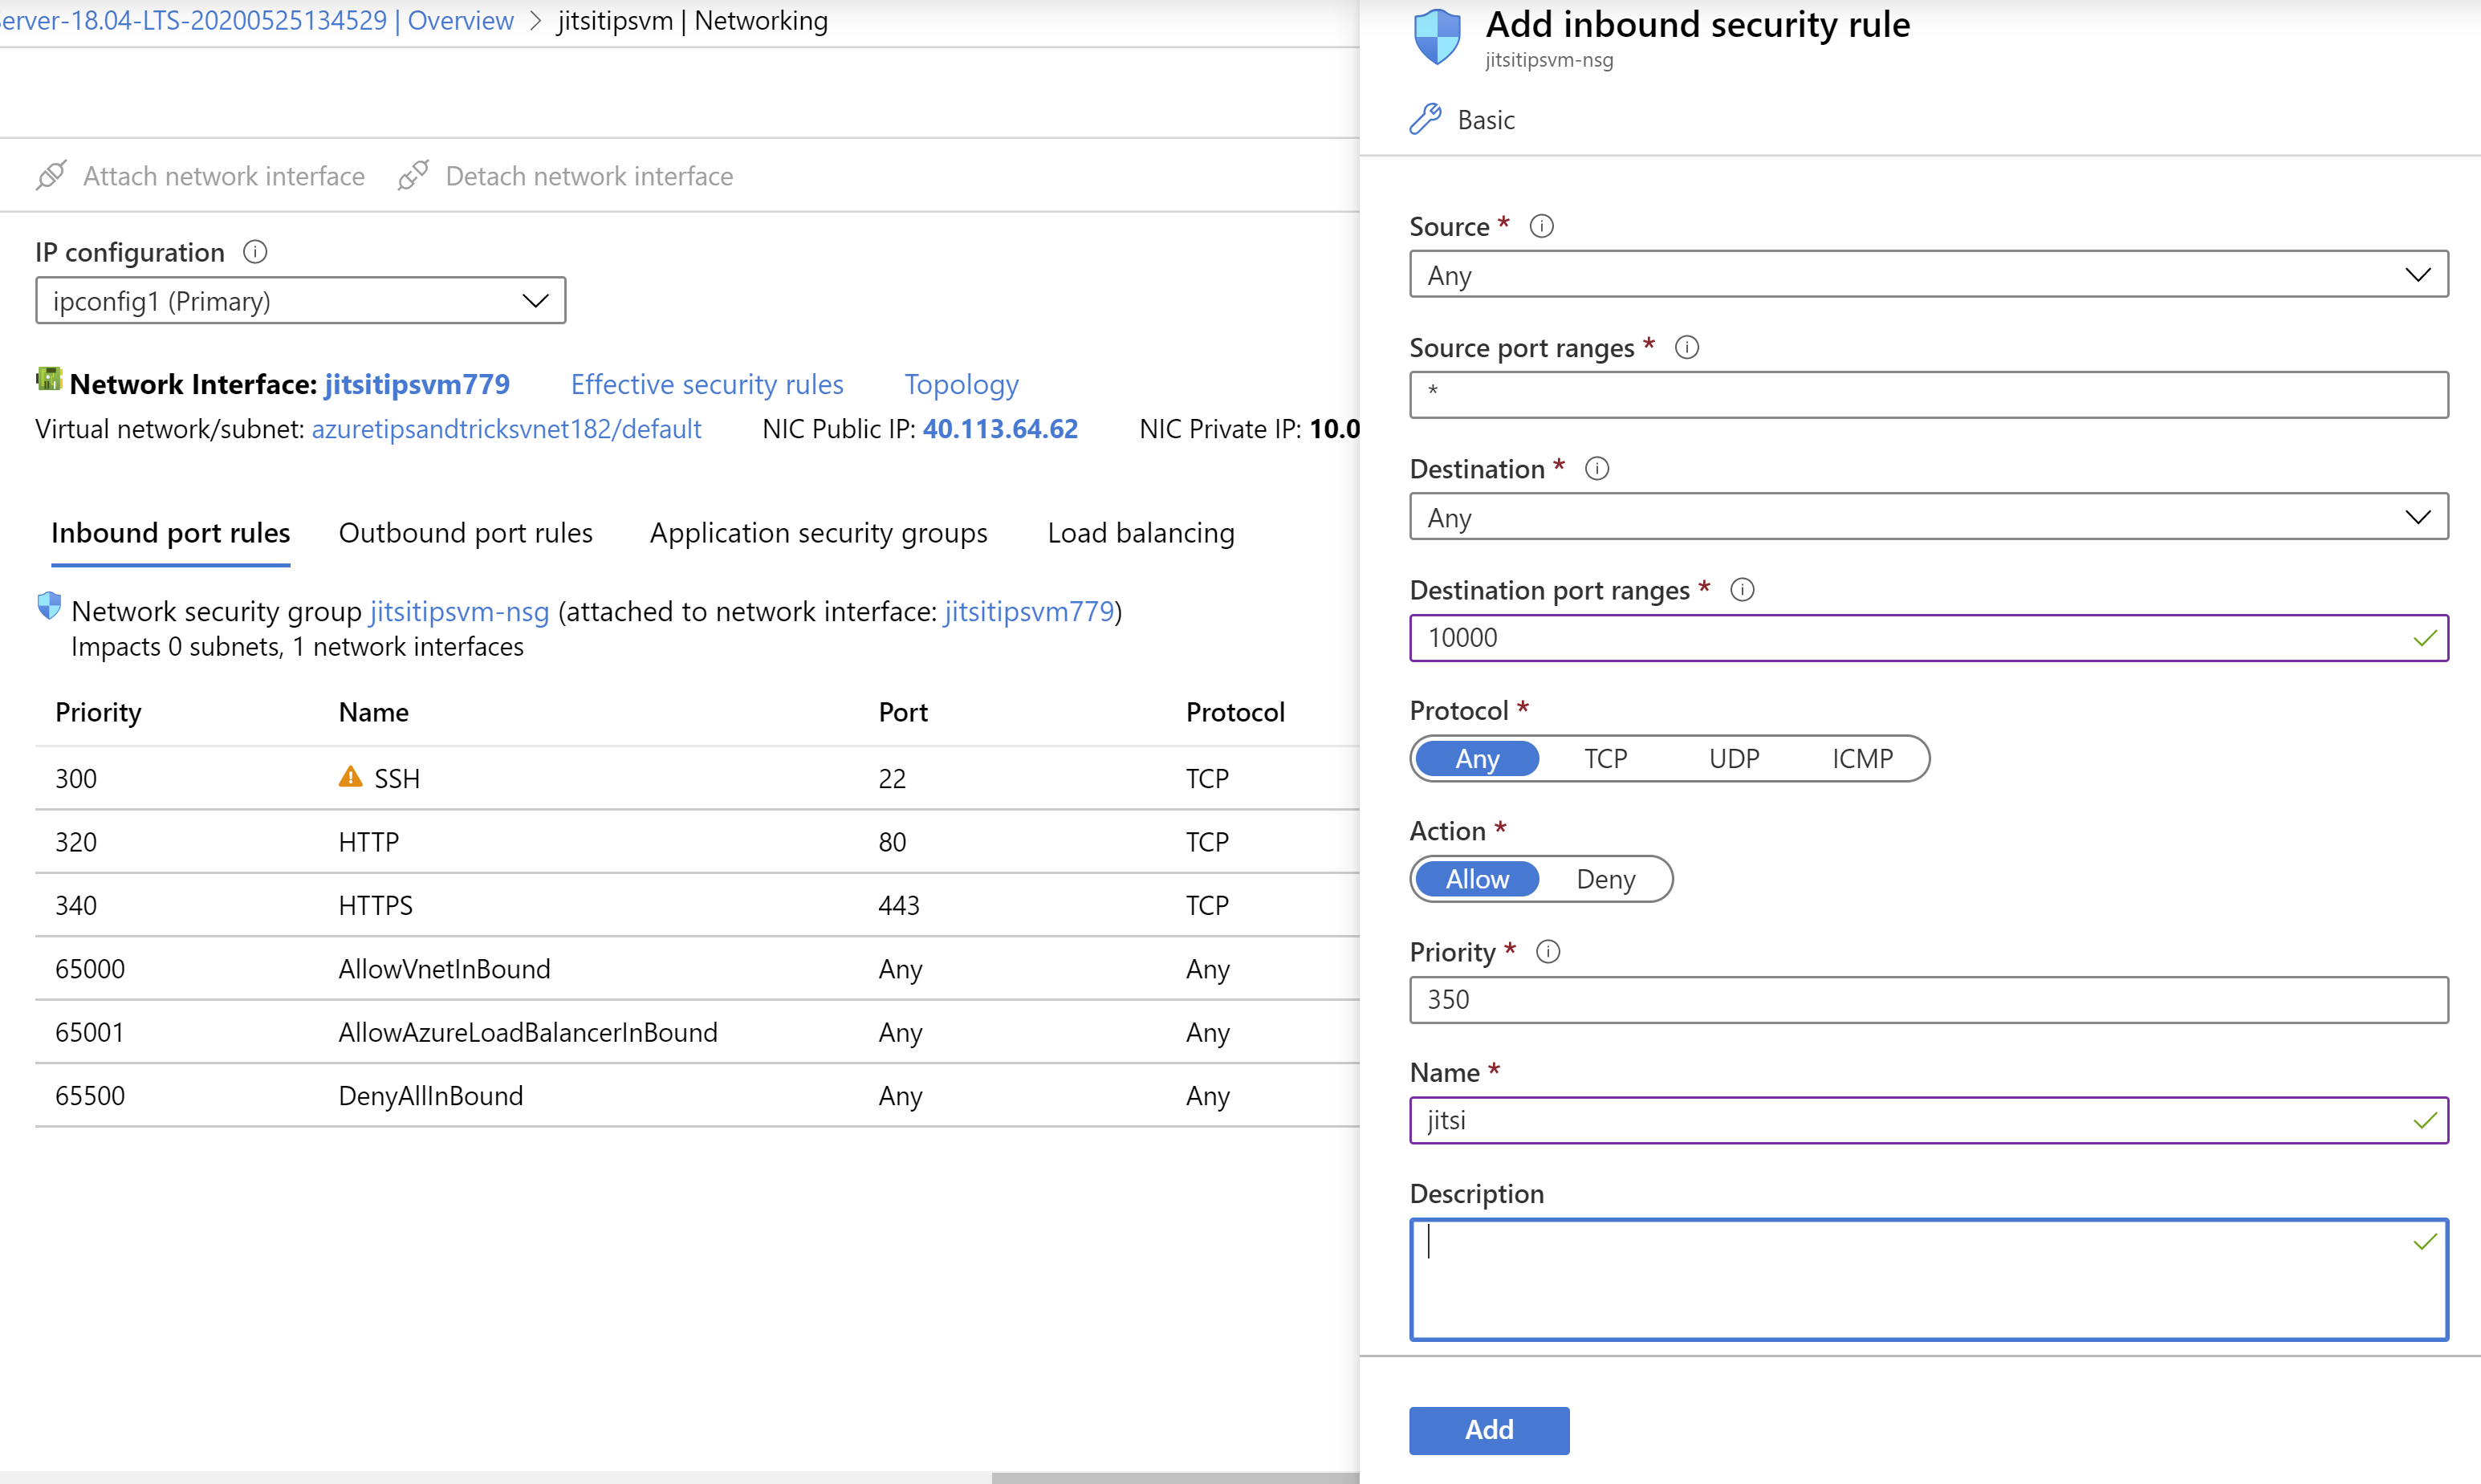
(Add inbound security rule in the Azure portal)
- Now go to the Overview menu of the VM
- Select the Public IP address to drill into it
- In the Public IP address overview, select the Configuration menu
- Fill in a DNS name label and select Save. This will generate a label like tipsvm.northeurope.cloudapp.azure.com
- If you want to use a Let’s Encrypt SSL certificate for the Jitsi server and a custom domain name, you should map the DNS label that we've just created to your own custom domain name. You do this at the portal of your hosting provider by creating a CNAME for your custom domain to the domain label of the VM. So something like jitsi.tipsandtricks.com which maps to tipsvm.northeurope.cloudapp.azure.com
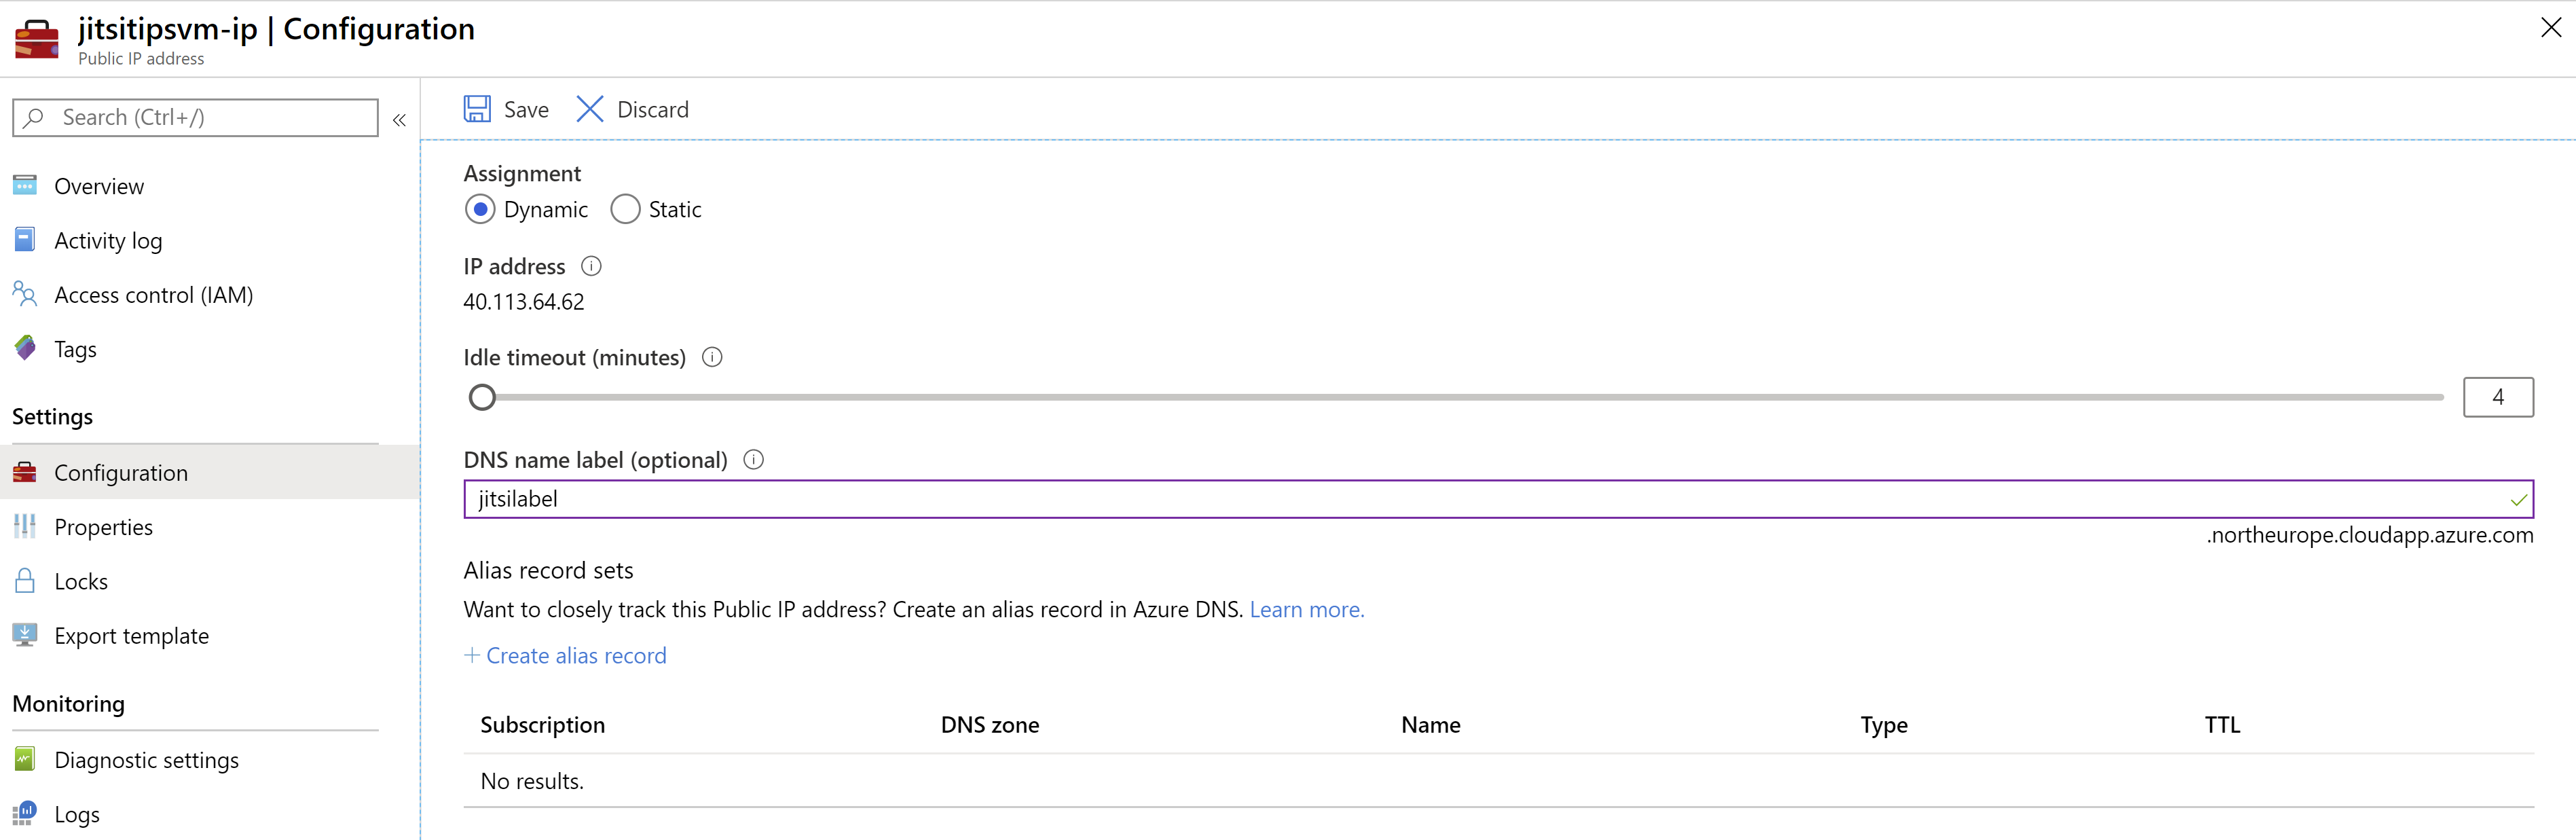
(Add DNS label to VM in the Azure portal)
Now that the VM is configured, we can install Jitsi on it.
- Open a command prompt to connect to he VM with SSH. You can do this from your local machine, with Azure Shell (opens new window) or even with the Serial Console of the VM (opens new window)
- SSH into the VM with a command like the following, where you input your path to the private key (which you get when you generate the SSH key pair) and your username and DNS label:
ssh -i <private key path> tipsandtricks@tipsjitsi.northeurope.cloudapp.azure.com
- When you are connected to the VM, open an administrative prompt to install Jitsi from. Use the following command:
sudo -s
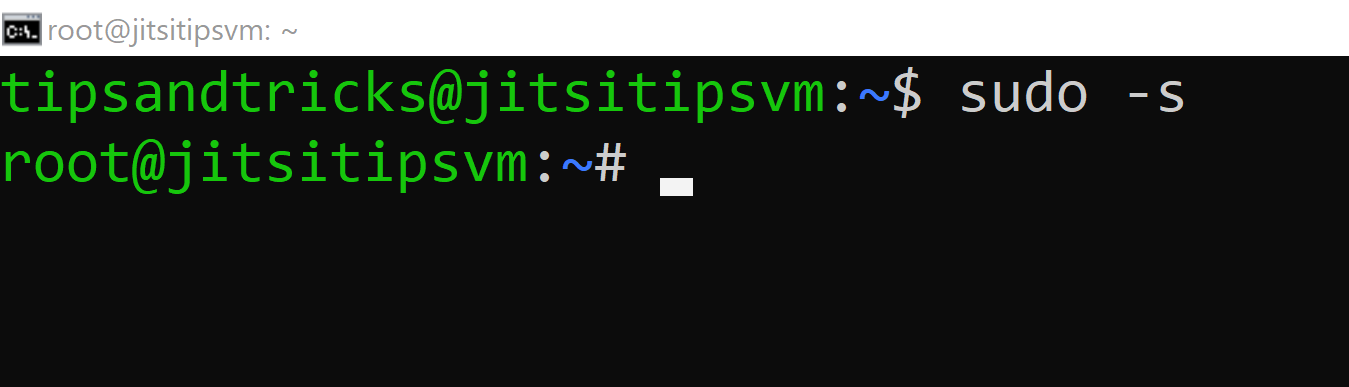
(Open administrative prompt in the VM)
- Now execute the following script to install Jitsi. Make sure to replace the HOSTNAME and EMAIL with your values. For HOSTNAME, you use your custom domain (if you have configured it, so jitsi.tipsandtricks.com or tipsvm.northeurope.cloudapp.azure.com) and for EMAIL you enter your email address that belongs to the custom domain name. This is used for the Let's Encrypt SSL certificate configuration. This only works when you use your custom domain
# config variables
# BE SURE TO ENTER YOUR CUSTOM VALUES HERE
HOSTNAME="custom-domain-name-here"
EMAIL="your-email-address-here"

# set hostname
hostnamectl set-hostname $HOSTNAME
echo -e "127.0.0.1 localhost $HOSTNAME" >> /etc/hosts

# add Jitsi to sources
wget -qO - https://download.jitsi.org/jitsi-key.gpg.key | sudo apt-key add -
sh -c "echo 'deb https://download.jitsi.org stable/' > /etc/apt/sources.list.d/jitsi-stable.list"
apt update
echo -e "DefaultLimitNOFILE=65000\nDefaultLimitNPROC=65000\nDefaultTasksMax=65000" >> /etc/systemd/system.conf
systemctl daemon-reload

# Configure Jits install
debconf-set-selections <<< $(echo 'jitsi-videobridge jitsi-videobridge/jvb-hostname string '$HOSTNAME)
debconf-set-selections <<< 'jitsi-meet-web-config   jitsi-meet/cert-choice  select  "Generate a new self-signed certificate"';

# Install Jitsi
apt install -y jitsi-meet

# letsencrypt
echo $EMAIL | /usr/share/jitsi-meet/scripts/install-letsencrypt-cert.sh
2
3
4
5
6
7
8
9
10
11
12
13
14
15
16
17
18
19
20
21
22
23
24
25
When the script is done installing, you can open a browser and navigate to the Jitsi server with your custom domain name or the DNS label (ipsvm.northeurope.cloudapp.azure.com). You can now start a meeting and invite other people to have a video call and chat. When you've started a meeting, you can secure it by selecting the "i" button in the bottom right and setting a password.

(Secure a meeting in Jitsi)
# Conclusion
Setting up your own, private, video conferencing and chat server is easy with Jitsi (opens new window). Just create an Ubuntu Virtual Machine (opens new window) in Azure and install Jitsi on it. Go and check it out!