Task 01: Build a business case and assessment
Introduction
Dennis needs a lot more to get Terra Firm’s cloud initiative funded - he needs a story backed by numbers. The business case turns discovered inventory into a cost-and-savings view, helping Terra Firm evaluate things like Azure Hybrid Benefit, operational savings, and what “moving efficiently” could actually look like.
Description
In this task, you’ll build a business case scoped to the environment and confirm it begins generating. While it runs, you’ll explore the discovered inventory and validate that key workloads have been discovered.
Success criteria
- A business case named bc-@lab.LabInstance.Id is created and visible under Decide and Plan > Business cases.
- Discovered inventory is visible in the project and includes the expected servers and workloads.
Key tasks
- Start Build business case using the specified settings (target location, modernization preference, pricing assumptions).
- Open Explore inventory and validate discovered servers and discovered workloads (web app + database).
- Drill into at least one database workload and one web app workload to review details.
-
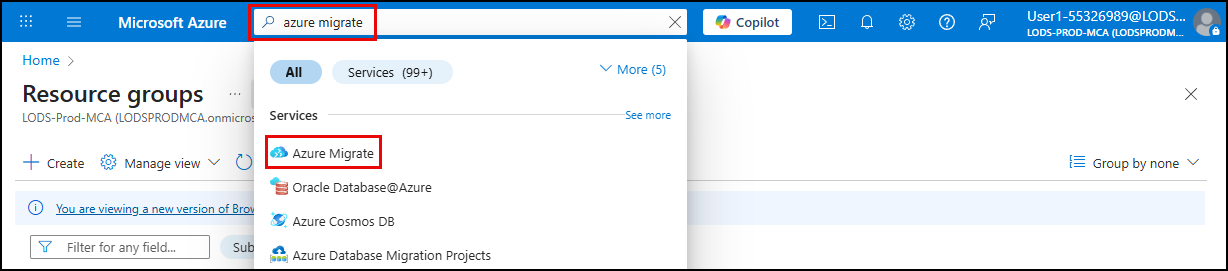
In the Azure portal, search for Azure Migrate in the search bar and select Azure Migrate, under Services.
-
On the Azure Migrate page, in the Azure portal, Select All projects>Migration-Project-58172032 expand the Decide and Plan in the left menu, then select Business cases.
-
Select Build business case.
-
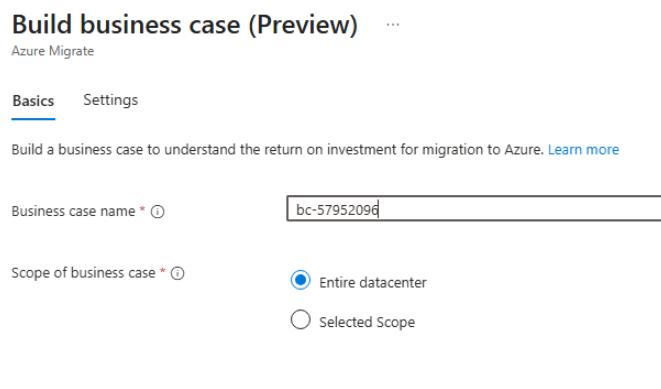
Enter bc-@lab.LabInstance.Id for the Business case name, select Entire datacenter, then select Next to continue.
-
On the Build business case (Preview) page, enter the following:
Object Value Target location @lab.CloudResourceGroup(AZMigrateRG).Location Migration preference Modernize Saving options Reserved Instance Discount (%) on Pay as you go 0 Currency US Dollar ($) -
Select Build business case.
The business case will take approximately 10 minutes to generate. You can continue with the lab while it is generating.
Building a business case automatically creates an assessment as well. You’ll evaluate both when the generation is complete.
Explore the discovered inventory
-
On the Azure Migrate blade, select All projects, and then select the Migration-Project-@lab.LabInstance.Id project.
-
On the left navigation menu, expand Explore Inventory.
-
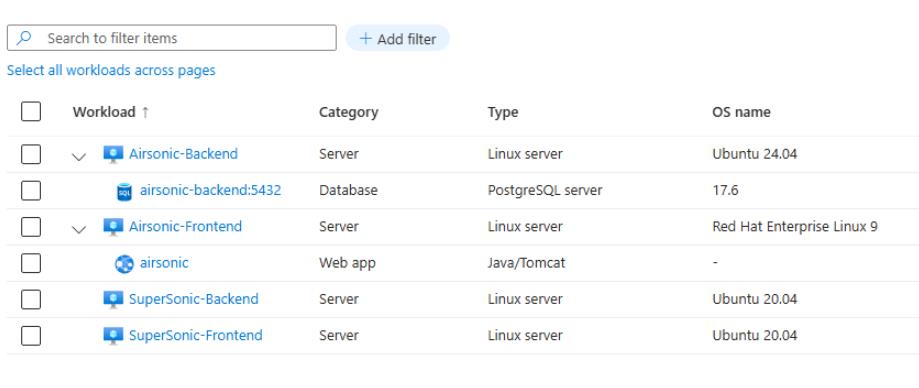
Select All inventory and then observe the discovered objects.
-
Select the > next to Airsonic-Backend to display the discovered workloads.
-
Select Databases, and then select the airsonic-backend DB instance to observe the details.
-
Select Close to return to the previous screen.
-
select All inventory, select the > next to Airsonic-Frontend to display the discovered workloads.
-
Select Web apps and then select the airsonic Web app to observe the details.
-
Select the X in the top right side of the screen, to return to the previous screen.
Congratulations!
You initiated a business case for the environment and verified the discovered inventory contains the expected servers and workload objects used for planning.