Task 02: Replicate the RHEL VM (Airsonic-Frontend)
Introduction
Terra Firm’s downtime question is front and center: “How long will we be offline?” Replication is one of Dennis’s best answers - by keeping Azure up to date with ongoing changes, the team can cut over using the latest data instead of doing a massive copy during the outage window.
Description
In this task, you’ll start replication for the Airsonic-Frontend VM, apply assessment-based settings, and monitor progress until replication is in a protected state.
Success criteria
- Replication is started for Airsonic-Frontend.
- Replication status reaches Protected.
Key tasks
- Start the Replicate workflow for Hyper-V VMs and select assessment-based settings.
- Configure target settings (RG, VNet/subnet, cache storage, availability) and VM compute sizing.
- Monitor replication jobs until the VM shows Protected.
-
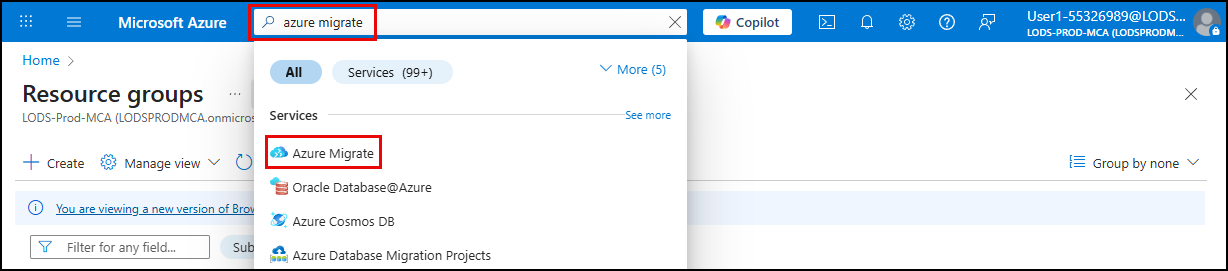
In the Azure portal, search for Azure Migrate in the search bar and select Azure Migrate under Services.
-
On the Azure Migrate blade, select All projects, and then select the Migration-Project-@lab.LabInstance.Id project.
-
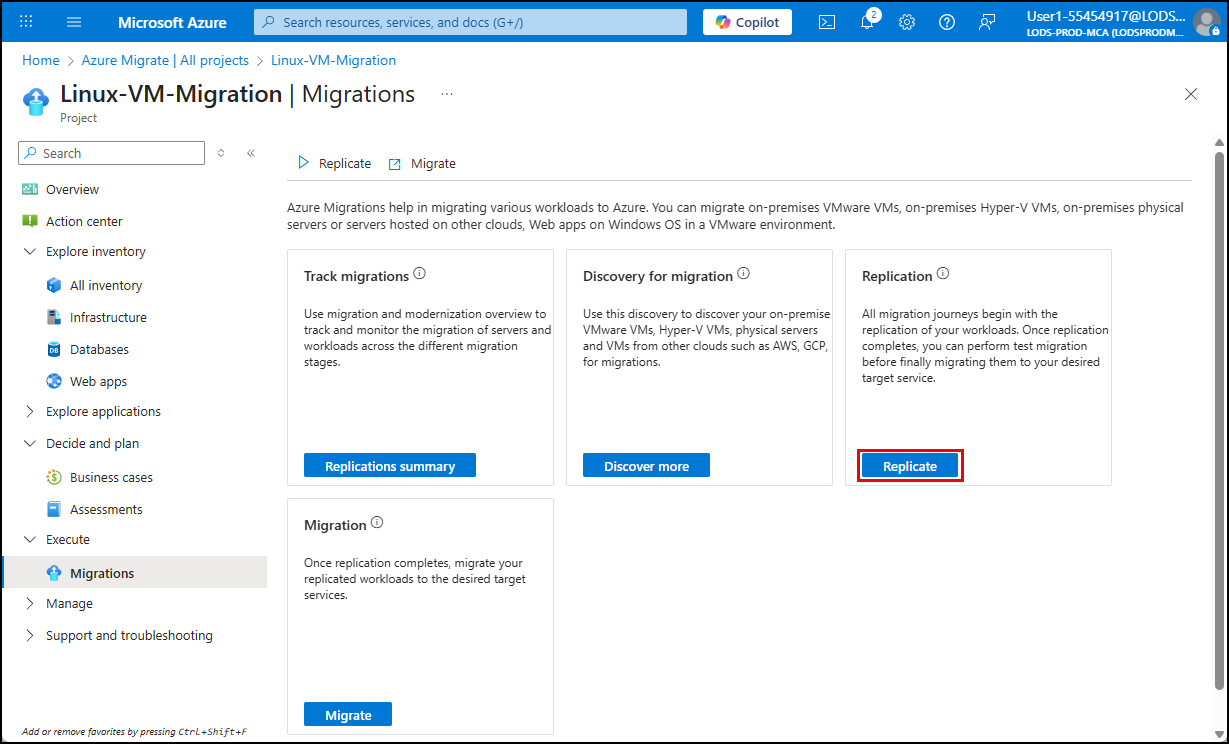
Under Execute, in the left menu, select Migrations, and then the Replicate button.
-
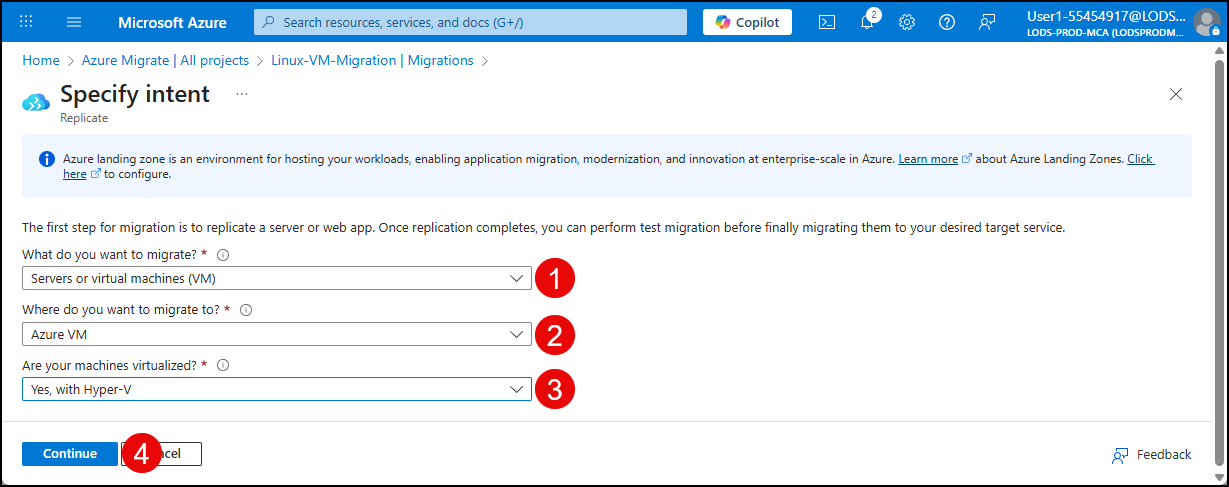
On the Specify intent page, make these selections:
-
What do you want to migrate? Choose Servers or virtual machines (VM).
-
Where do you want to migrate to? Select Azure VM.
-
Are your machines virtualized? Select Yes, with Hyper-V.
-
Select Continue.
-
-
On the Replicate virtual machines tab, make these selections:
-
Target VM security type: Choose Standard or Trusted Launch Virtual machines.
-
Import migration settings from an assessment: select Yes, apply migration settings from an Azure Migrate assessment.
-
Select assessment: Select the businesscase-bc–@lab.LabInstance.Id you created earlier.
-
Check the box next to Airsonic-Frontend.
-
Select Next.
You can safely ignore the warnings and errors on this screen.
-
On the Target settings tab, make these selections:
Object Value Resource group AZMigrateRG Register with SQL IaaS extension Uncheck I have an Enterprise Linux license Check I confirm I have an eligible Enterprise Linux subscription to apply this Azure Hybrid Benefit Check Cache storage account sto@lab.LabInstance.Id Virtual network migrate@lab.LabInstance.Id Subnet default Availability options No infrastructure redundancy required -
Select Next.
-
On the Compute tab select the following:
Object Value Azure VM Size Standard_D2s_v4 (2 Cores, 8 GB RAM) OS Type Linux Operating System Red Hat Enterprise Linux 9 
-
Select Next.
-
On the Disks page, select Next.
-
On the Tags page, select Next.
-
On the Review + Start replication page, select Replicate.
You’ll be returned to the Specify intent page. It is not necessary to go through this process again.
-
From the breadcrumbs menu at the top, select **Migration-Project-@lab.LabInstance.Id Migrations**. 
-
On the Track migrations tile, select Replications Summary.
-
On the left panel, expand Migration, and then select Replications.
-
Monitor the status of your replication job. You’ll need to select Refresh occasionally.
The replication will take approximately 30 minutes. The process is complete when the Replication status displays Protected.
Congratulations!
You started replication for the Airsonic-Frontend VM using assessment-based settings and confirmed replication progressed to a protected state.