Task 01: Set up assets
Introduction
Contoso has decided to adopt an AI-driven customer support solution to address increasing customer demands and reduce the workload on customer service representatives. To start implementing this solution, you first need to set up the required environment within the Power Platform. This task involves preparing the necessary foundational components such as Dataverse, enabling you to build the AI-powered agent effectively.
Description
In this task, you’ll create an environment and deploy Microsoft Dataverse, sample apps, and data to the environment.
Success criteria
- You’ve navigated to the Power Platform admin center and signed in by using the provided Microsoft 365 credentials.
- You’ve created an environment, enabled Dataverse, and deployed sample apps and data.
Key tasks
01: Configure Power Platform and import an agent
In this task, you’ll run a script to recreate the Power Platform environment and import a solution that includes the agent.
The agent that you import includes all work that you completed in day 1 (exercises 01-04).
-
Sign in to the virtual/local machine.
-
On the taskbar for the virtual/local machine, open the Windows PowerShell ISE.

-
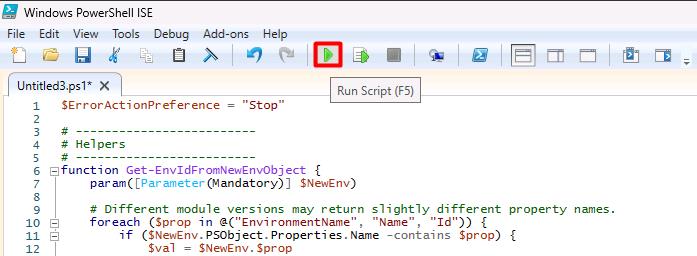
In PowerShell ISE, select File and then select New.
-
In the top pane, enter the following:
In the code block that displays below, select Copy. Then, In Windows PowerShell ISE, select Ctrl+V to paste the code into the editor.
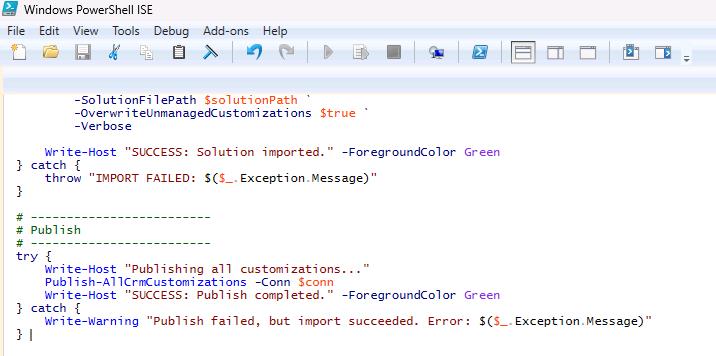
$ErrorActionPreference = "Stop" # ------------------------- # Helpers # ------------------------- function Get-EnvIdFromNewEnvObject { param([Parameter(Mandatory)] $NewEnv) # Different module versions may return slightly different property names. foreach ($prop in @("EnvironmentName", "Name", "Id")) { if ($NewEnv.PSObject.Properties.Name -contains $prop) { $val = $NewEnv.$prop if (-not [string]::IsNullOrWhiteSpace([string]$val)) { return [string]$val } } } return $null } function Wait-ForAdminEnvironment { param( [string]$EnvironmentName, # GUID string if available [Parameter(Mandatory)] [string]$DisplayName, [int]$TimeoutSeconds = 600 ) $deadline = (Get-Date).AddSeconds($TimeoutSeconds) $delay = 5 while ((Get-Date) -lt $deadline) { try { # Prefer the GUID lookup when possible (faster + more reliable). if (-not [string]::IsNullOrWhiteSpace($EnvironmentName)) { $env = Get-AdminPowerAppEnvironment -EnvironmentName $EnvironmentName -ErrorAction Stop } else { $env = Get-AdminPowerAppEnvironment | Where-Object { $_.DisplayName -eq $DisplayName } | Select-Object -First 1 } if ($env) { return $env } } catch { # Ignore and retry (eventual consistency) } Start-Sleep -Seconds $delay if ($delay -lt 30) { $delay = [Math]::Min(30, $delay + 5) } } throw "Timed out waiting for environment '$DisplayName' to appear in Get-AdminPowerAppEnvironment." } function Wait-ForDataverseUrl { param( [string]$EnvironmentName, [Parameter(Mandatory)] [string]$DisplayName, [int]$TimeoutSeconds = 900 ) $deadline = (Get-Date).AddSeconds($TimeoutSeconds) $delay = 10 while ((Get-Date) -lt $deadline) { $env = Wait-ForAdminEnvironment -EnvironmentName $EnvironmentName -DisplayName $DisplayName -TimeoutSeconds 60 # Try the known URL locations (your original logic) $rawUrl = $null if ($env.EnvironmentUrl) { $rawUrl = $env.EnvironmentUrl } elseif ($env.InstanceApiUrl) { $rawUrl = $env.InstanceApiUrl } else { try { $rawUrl = $env.Internal.properties.linkedEnvironmentMetadata.instanceApiUrl } catch {} } if (-not [string]::IsNullOrWhiteSpace($rawUrl)) { # Normalize: api.crm -> crm return ($rawUrl -replace "\.api\.crm", ".crm") } Start-Sleep -Seconds $delay if ($delay -lt 60) { $delay = [Math]::Min(60, $delay + 10) } } throw "Timed out waiting for Dataverse URL to be populated for '$DisplayName'." } function Publish-AllCrmCustomizations { param([Parameter(Mandatory)] $Conn) # Different modules expose different publish cmdlets. Prefer the one that exists. if (Get-Command -Name Publish-CrmAllCustomization -ErrorAction SilentlyContinue) { Publish-CrmAllCustomization -conn $Conn -Verbose return } if (Get-Command -Name Publish-CrmAllXml -ErrorAction SilentlyContinue) { Publish-CrmAllXml -conn $Conn -Verbose return } Write-Warning "No publish cmdlet found (Publish-CrmAllCustomization / Publish-CrmAllXml). Skipping publish step." } # ------------------------- # Auth (interactive) # ------------------------- Add-PowerAppsAccount # ------------------------- # Inputs # ------------------------- $envDisplayName = "Contoso@lab.LabInstance.Id" $locationName = "unitedstates" $environmentSku = "Developer" $languageCode = 1033 $currencyName = "USD" $region = "eastus" $solutionPath = "F:\LabFiles\Solution\TechExcel_1_0_0_1.zip" # ------------------------- # Create environment # ------------------------- $newEnv = New-AdminPowerAppEnvironment ` -DisplayName $envDisplayName ` -LocationName $locationName ` -RegionName $region ` -EnvironmentSku $environmentSku ` -ProvisionDatabase ` -LanguageName $languageCode ` -CurrencyName $currencyName ` -WaitUntilFinished $true Write-Host "Environment '$envDisplayName' created (provisioning finished)." -ForegroundColor Green # Capture the GUID if the object includes it (best case) $envId = Get-EnvIdFromNewEnvObject -NewEnv $newEnv # ------------------------- # Wait for env + URL to be ready # ------------------------- Write-Host "Waiting for environment to be discoverable in admin listings..." $targetEnv = Wait-ForAdminEnvironment -EnvironmentName $envId -DisplayName $envDisplayName -TimeoutSeconds 1200 # If we did not get envId from the create response, pull it now from the discovered env if ([string]::IsNullOrWhiteSpace($envId)) { $envId = $targetEnv.EnvironmentName } Write-Host "Waiting for Dataverse URL to be ready..." $cleanUrl = Wait-ForDataverseUrl -EnvironmentName $envId -DisplayName $envDisplayName -TimeoutSeconds 2700 Write-Host "Target Environment URL: $cleanUrl" -ForegroundColor Cyan # ------------------------- # Connect to Dataverse + import # ------------------------- Write-Host "Connecting to Dataverse..." $connStr = "AuthType=Office365;Url=$cleanUrl;RequireNewInstance=True" $conn = Get-CrmConnection -ConnectionString $connStr -ErrorAction Stop if (-not $conn.IsReady) { throw "Failed to connect. Error: $($conn.LastCrmError)" } Write-Host "Connected successfully. Starting import..." try { Import-CrmSolution ` -conn $conn ` -SolutionFilePath $solutionPath ` -OverwriteUnmanagedCustomizations $true ` -Verbose Write-Host "SUCCESS: Solution imported." -ForegroundColor Green } catch { throw "IMPORT FAILED: $($_.Exception.Message)" } # ------------------------- # Publish # ------------------------- try { Write-Host "Publishing all customizations..." Publish-AllCrmCustomizations -Conn $conn Write-Host "SUCCESS: Publish completed." -ForegroundColor Green } catch { Write-Warning "Publish failed, but import succeeded. Error: $($_.Exception.Message)" } -
After pasting the code into the editor, move to the bottom of the code segment and press the Enter key.
-
The code may start running right away. If it does not, on the Windows PowerShell ISE toolbar, select Run Script.
At the bottom left of the Windows PowerShell ISE window, a message will display if the code is running.

-
The code requires interactive authentication. In the Sign in dialog that displays, sign in with the following credentials:
Item Value Username @lab.CloudPortalCredential(User1).UsernameTemporary Access Pass (TAP) token @lab.CloudPortalCredential(User1).AccessToken -
Wait until the script completes, checking the output in the bottom pane.
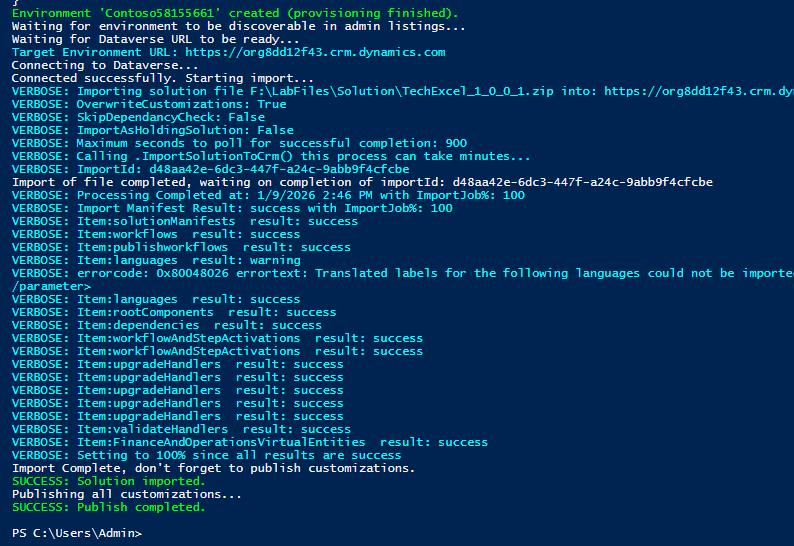
During testing, we observed completion times of 1-5 minutes.
-
Close the PowerShell ISE window.
02: Configure SharePoint
Next, you’ll set up a SharePoint site and upload documents to the site. The agent that you create will use the documents as an authoritative source of information.
You completed this task in Exercise 01. However, due to recent changes in permissions required to programmatically create SharePoint sites and upload files to document libraries, it is difficult to automate this task.
-
Open a new browser tab and go to
lodsprodmslearnmca.sharepoint.com/_layouts/15/sharepoint.aspx. -
If prompted, sign in by using the following credentials:
Item Value Username @lab.CloudPortalCredential(User1).UsernameTemporary Access Pass (TAP) token @lab.CloudPortalCredential(User1).AccessToken -
On the command bar, select Create site.
-
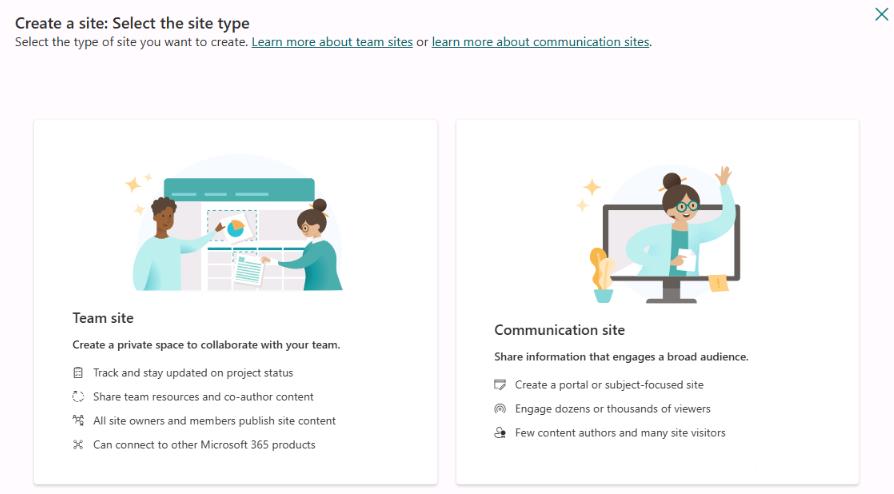
In the Create a site: Select the site type dialog, select Communication site.
-
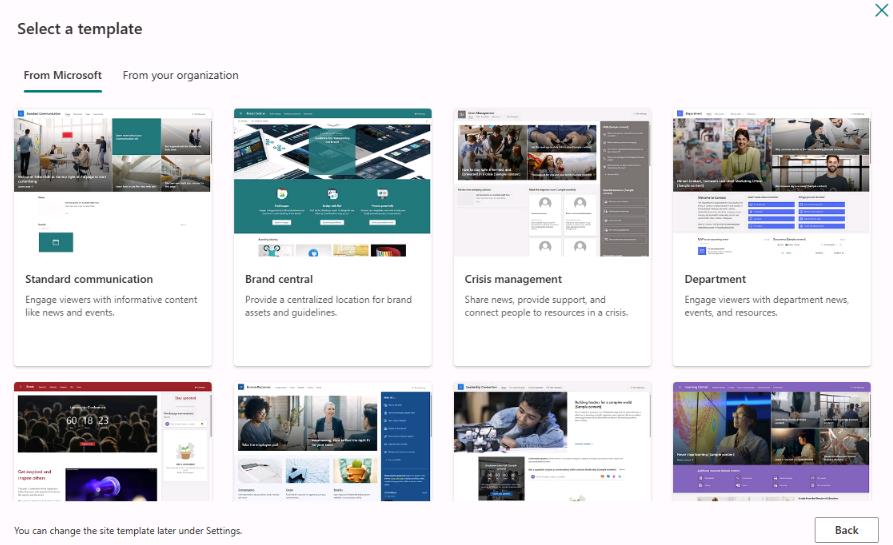
In the Select a Template dialog, select Standard communication.
-
In the Preview and use… dialog, select Use template.
-
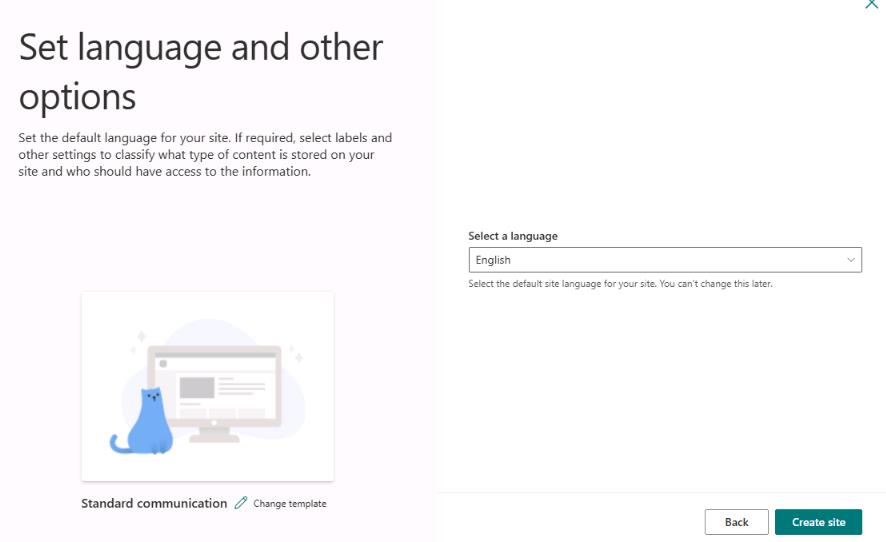
In the Give your site a name dialog, enter the following details and then select Next.
Item Value Site name Mark 8 Project TeamSite description The team dedicated to the Mark 8 Project.Site address Mark8ProjectTeam@lab.LabInstance.Id -
Select Create site.
-
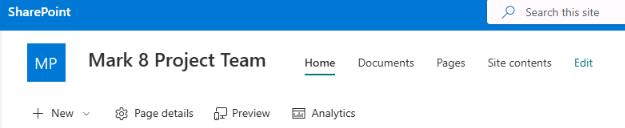
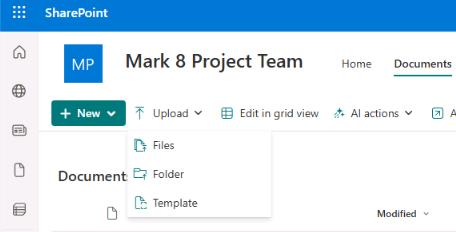
On the command bar for the site, select Documents.
-
On the Documents page, on the command bar, select Upload and then select Folder.
-
Go to
F:\LabFiles, select SharePointFiles, and then select Upload.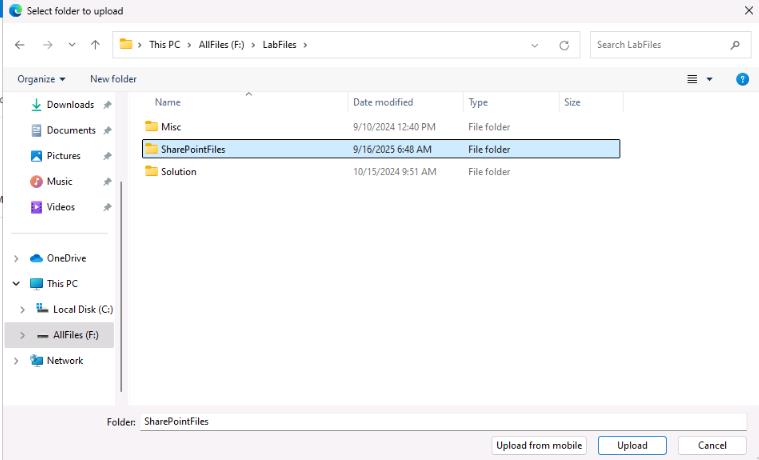
-
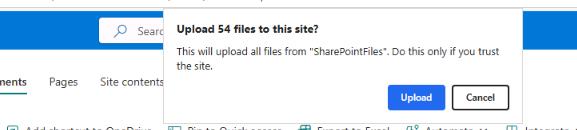
In the confirmation dialog that displays, select Upload.
-
After the upload completes, close the SharePoint browser window.

Lab activities for “test out” version of lab are in progress. Please disregard Score button for now.