
TIP
🔥 🔥 Download the FREE Azure Developer Guide eBook here (opens new window).
💡 Learn more : What is Translator (opens new window).
📺 Watch the video : How to translate text with the Azure Cognitive Services Translator Service (opens new window).
# How to translate text with the Azure Cognitive Services Translator Service
# Translate text with an API
Azure Cognitive Services (opens new window) is a collection of powerful intelligent services. One of those services is the Translator service (opens new window). Translator is an API that you can call to translate text from one language to another in real time. It does this by using a predefined machine learning model that you don't have to train. You can also use Translator to translate documents (opens new window), and to translate text based on customized models (opens new window) that contain domain- and industry-specific language.
In this post, we'll create a Translator resource and use it to translate text.
# Prerequisites
If you want to follow along, you'll need the following:
- An Azure subscription (If you don't have an Azure subscription, create a free account (opens new window) before you begin)
- The latest version of Visual Studio (opens new window) or VS Code (opens new window)
# Create and use an Azure Cognitive Services Translator Service
We'll start by creating a Translator resource from the Azure portal.
- Go to the Azure portal (opens new window)
- Click the Create a resource button (the plus-sign in the top left corner)
- Search for Translator, select the "Translator" result and click Create
- Select a Resource Group
- Pick a Region for the service
- Fill in a Name
- Select a Pricing tier. The "Free F0" tier is fine for now
- Click Review + create and then Create
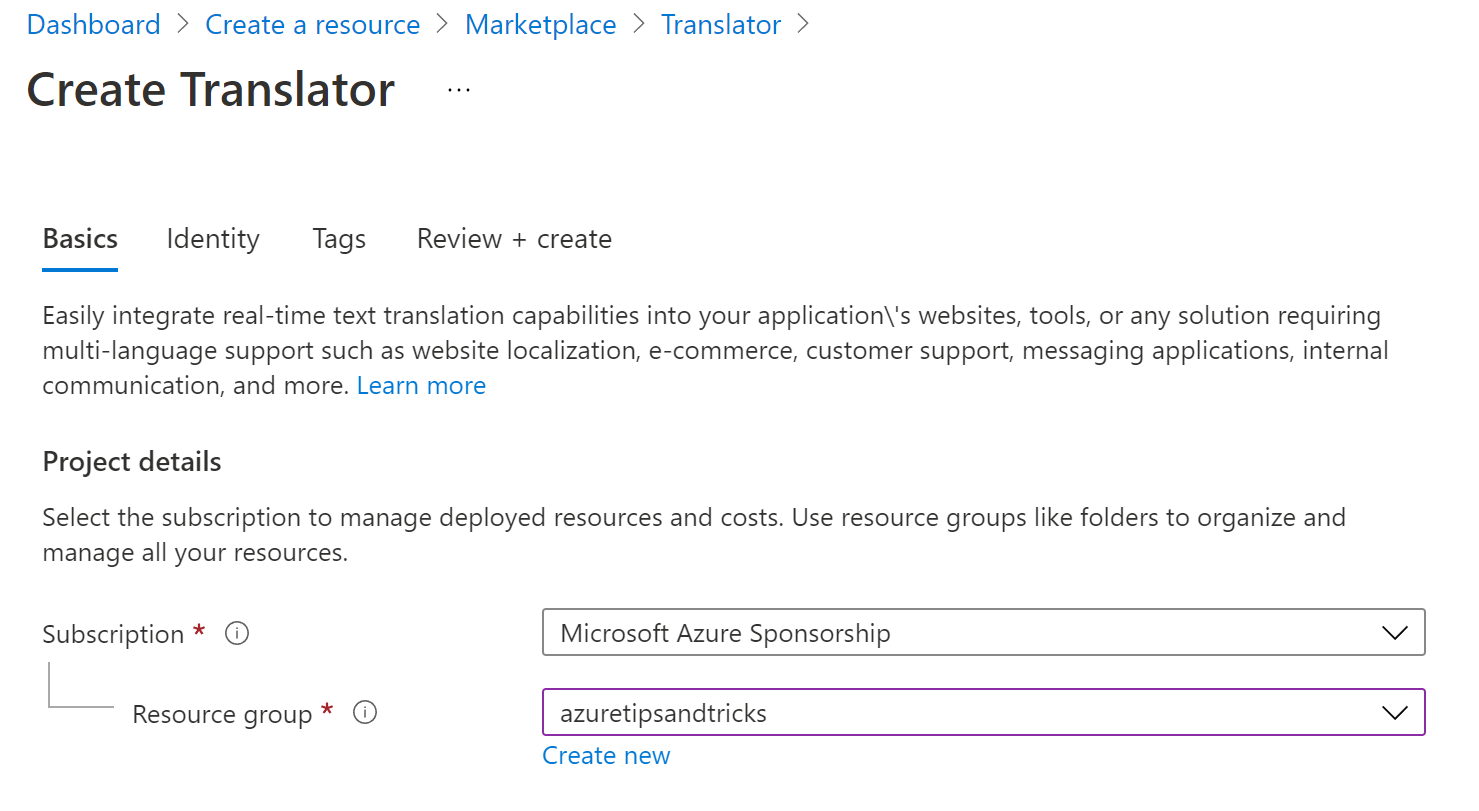
(Create a Translator resource)
When the Translator resource is created, we need to copy its connection details.
- Navigate to the Translator resource in the Azure portal
- Click on the Keys and Endpoint menu
- Copy the Key and Location/Region. We'll need those later
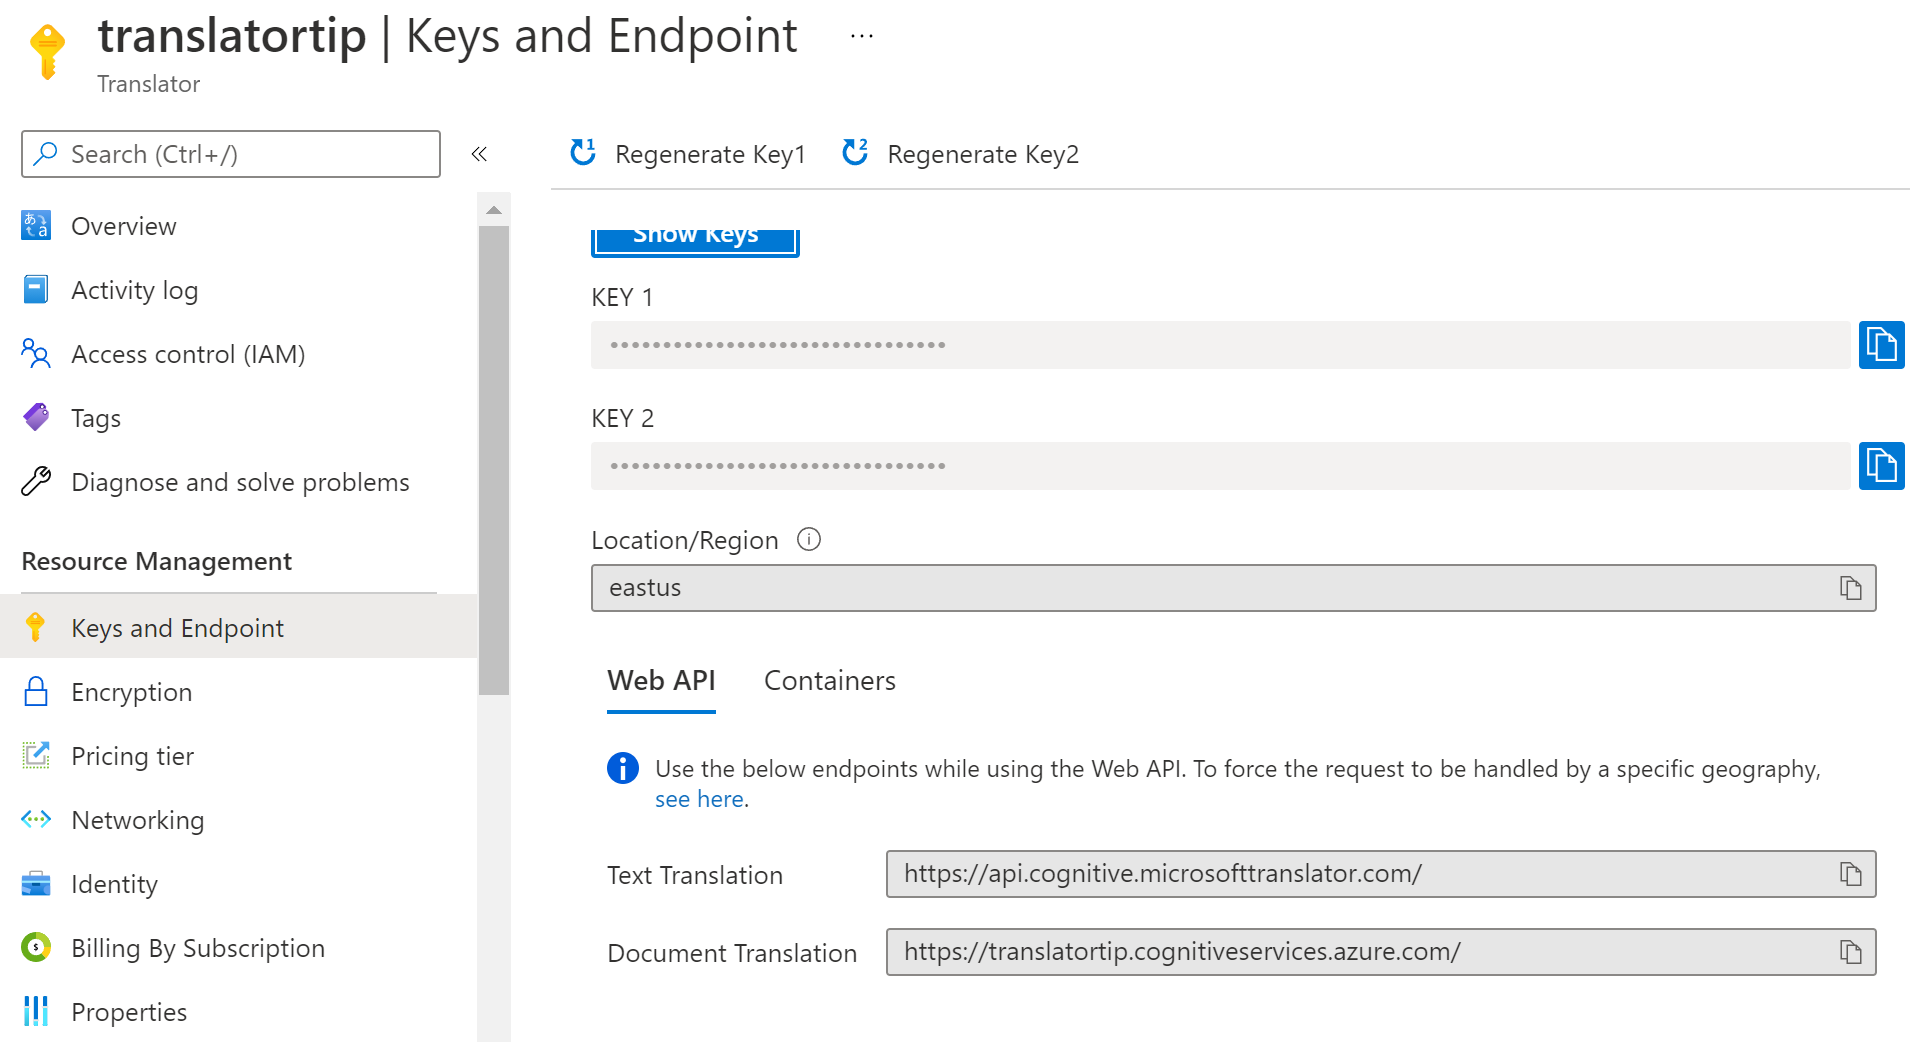
(Translator Keys and Endpoint in the Azure portal)
Next, we'll create a console application that connects to the Translator resource, and translates text. We'll use Visual Studio for that, and you can also use VS Code if you prefer.
- In Visual Studio, create a new project (New > Project)
- Choose Console Application
- Give the project a Name
- Choose a Location for the project
- Click Next
- Select the latest version of .NET
- Click Create to create the Console Application project
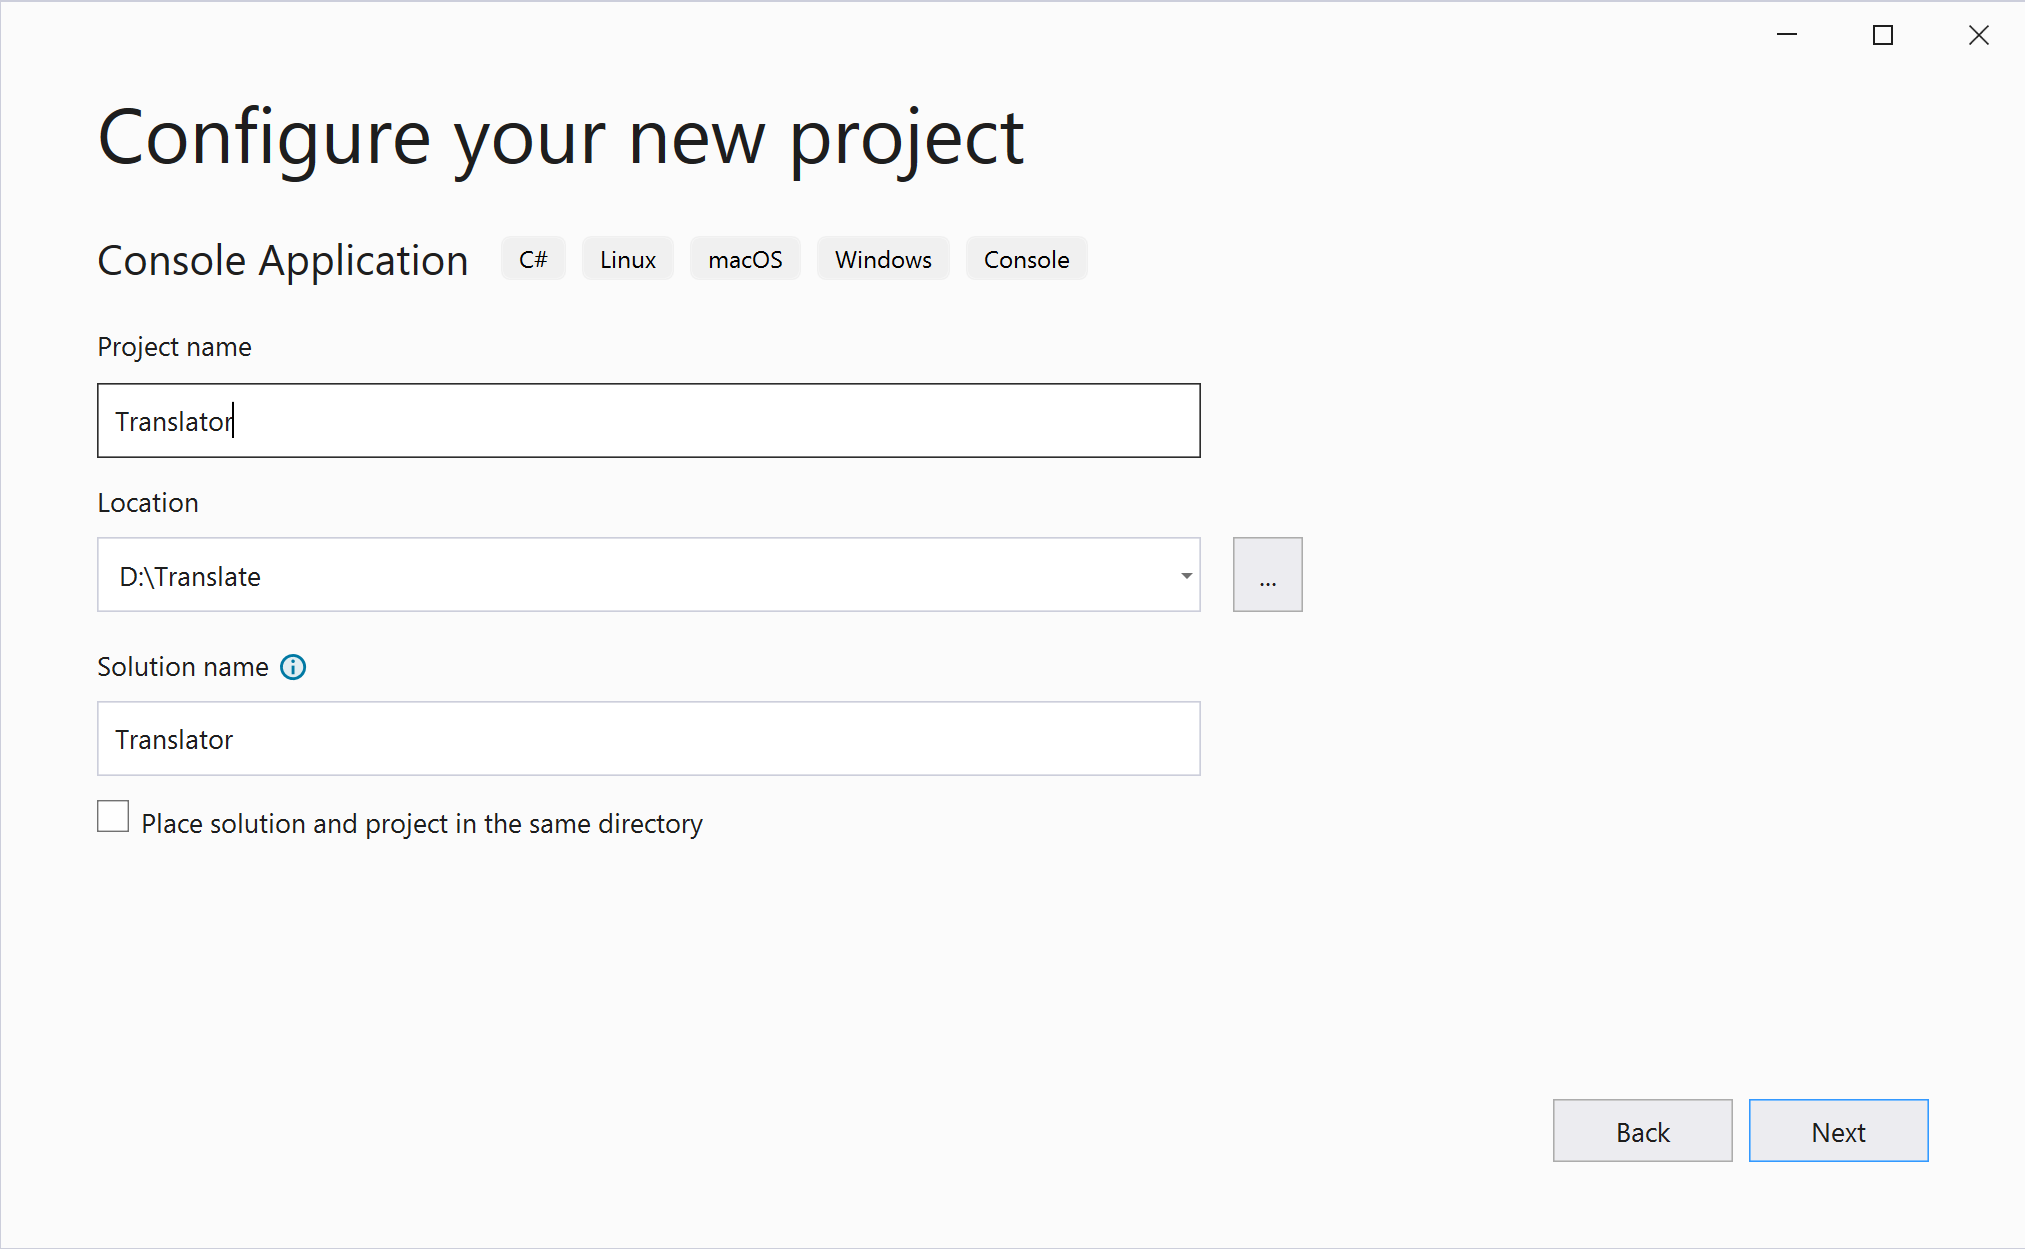
(Create a Console Application with Visual Studio)
- Right-click the project file and click Manage NuGet Packages
- Click Browse
- Search for and install the NuGet package Newtonsoft.Json. We'll need this in our code
- Open Program.cs and replace the code with the code below:
using System;
using System.Net.Http;
using System.Text;
using System.Threading.Tasks;
using Newtonsoft.Json; // Install Newtonsoft.Json with NuGet

class Program
{
    private static readonly string subscriptionKey = "YOUR-SUBSCRIPTION-KEY";
    private static readonly string endpoint = "https://api.cognitive.microsofttranslator.com/";

    // Add your location, also known as region. The default is global.
    // This is required if using a Cognitive Services resource.
    private static readonly string location = "YOUR_RESOURCE_LOCATION";

    static async Task Main(string[] args)
    {
        // Input and output languages are defined as parameters.
        string route = "/translate?api-version=3.0&from=en&to=de&to=it";
        string textToTranslate = "Hello, world! This is an Azure tip.";
        object[] body = new object[] { new { Text = textToTranslate } };
        var requestBody = JsonConvert.SerializeObject(body);

        using (var client = new HttpClient())
        using (var request = new HttpRequestMessage())
        {
            // Build the request.
            request.Method = HttpMethod.Post;
            request.RequestUri = new Uri(endpoint + route);
            request.Content = new StringContent(requestBody, Encoding.UTF8, "application/json");
            request.Headers.Add("Ocp-Apim-Subscription-Key", subscriptionKey);
            request.Headers.Add("Ocp-Apim-Subscription-Region", location);

            // Send the request and get response.
            HttpResponseMessage response = await client.SendAsync(request).ConfigureAwait(false);
            // Read response as a string.
            string result = await response.Content.ReadAsStringAsync();
            Console.WriteLine(result);
        }
    }
}
2
3
4
5
6
7
8
9
10
11
12
13
14
15
16
17
18
19
20
21
22
23
24
25
26
27
28
29
30
31
32
33
34
35
36
37
38
39
40
41
This code uses HttpClient to connect to the Translator API. It sends the string textToTranslate to the service and shows the API response in the console output. In the route string, it sends the from=en and to=de&to=it parameters. These indicate that the API should translate from English (en) to German (de) and Italian (it).
- To make the code work, replace "YOUR-SUBSCRIPTION-KEY" with the Translator Key, and "YOUR_RESOURCE_LOCATION" with the Location\Region
- Run the application
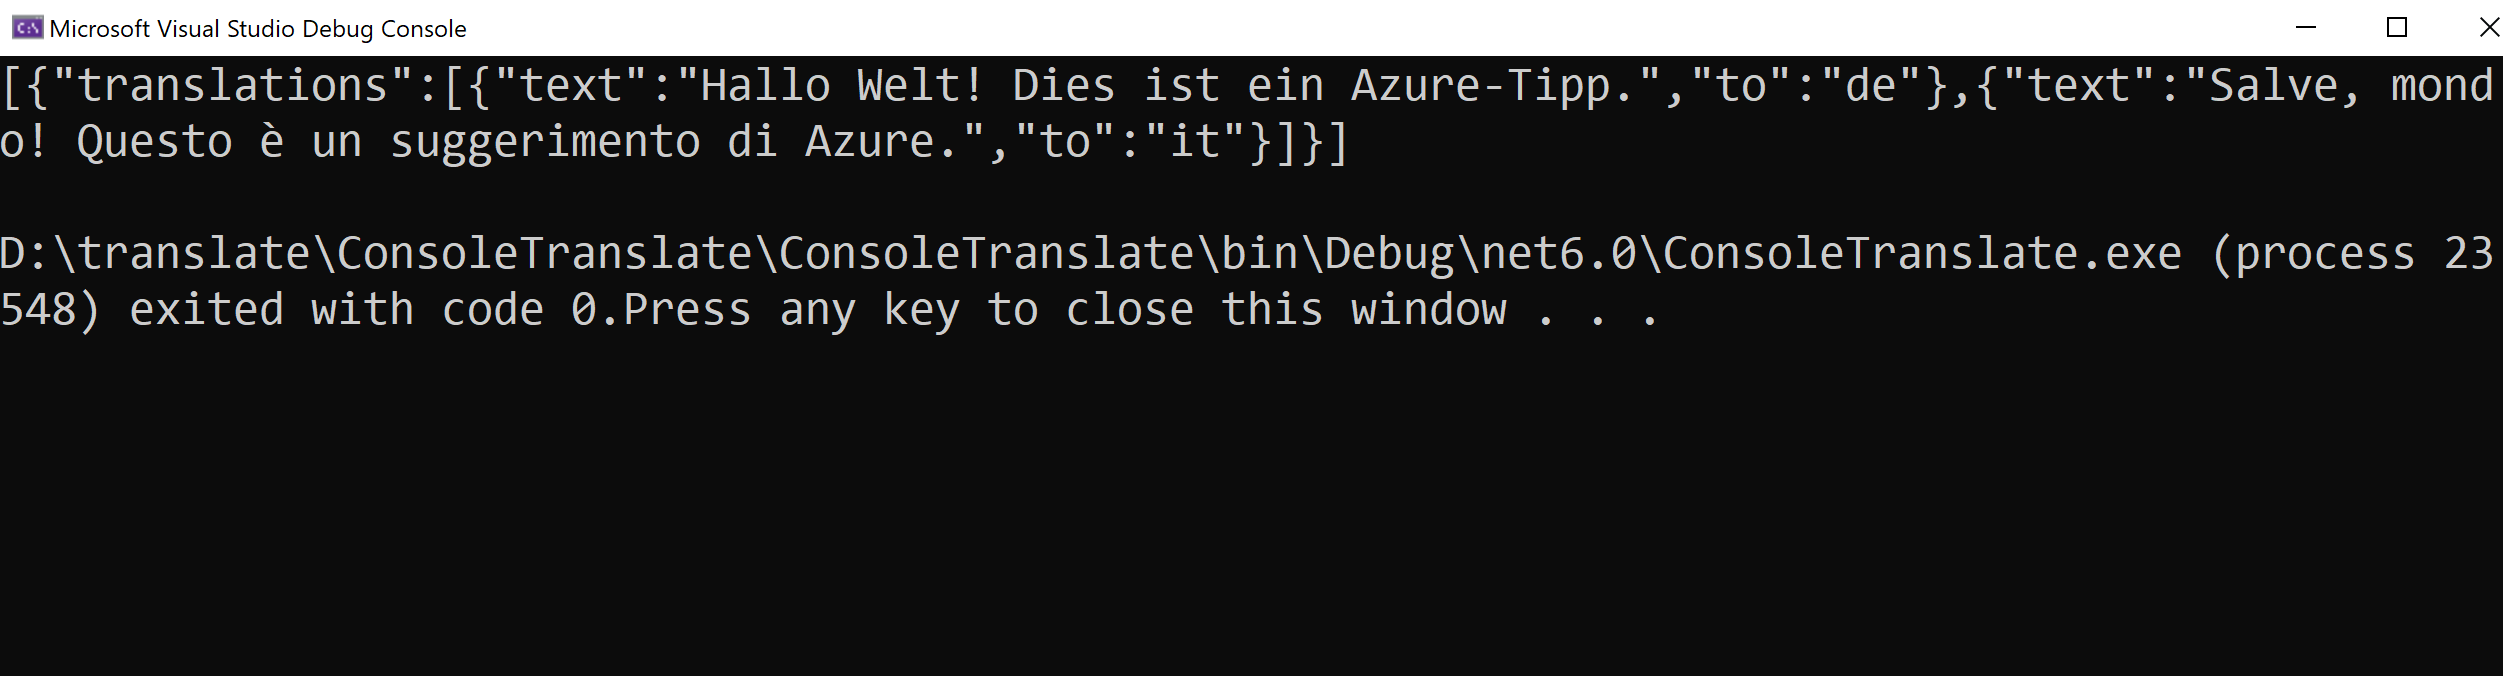
(Response from the Translator service)
As you can see, the text is translated in German and Italian with just one simple API request.
# Conclusion
Azure Cognitive Services Translator Service (opens new window) enables you to translate text to different languages in real time. You can use it from any programming language that can communicate with an API, which makes it really easy to use. Go and check it out!