
TIP
🔥 Make sure you star the repo (opens new window) to keep up to date with new tips and tricks.
💡 Learn more : Azure Metrics Advisor Overview (opens new window).
💡 Checkout Azure AI resources for developers (opens new window).
📺 Watch the video : How to get started with Metrics Advisor (opens new window).
# How to get started with Metrics Advisor
# Use AI to analyze your data
When you gather a lot of data, like time series data (data of things that happen in time), you want to extract anomalies and insights from that data. To do that, you would typically analyze the data and create a machine learning algorithm to surface any exiting and future anomalies, which can be time consuming and difficult to do. Azure Metrics Advisor (opens new window) makes this process a lot easier. Metrics Advisor is part of the Azure Cognitive Services (opens new window) family and can analyze time series data for you, without you having to create a machine learning algorithm. Azure Metrics Advisor takes the data, analyzes it, surfaces incidents and anomalies and lets you create alerts for them. Once this process is fine-tuned, Metrics Advisor will be able to analyze any future incoming data from the source that you have configured and report and alert on that.
In this post, we'll take a look at what Azure Metrics Advisor looks like and how to get started with it.
# Prerequisites
If you want to follow along, you'll need the following:
- An Azure subscription (If you don't have an Azure subscription, create a free account (opens new window) before you begin)
# Get started with Azure Metrics Advisor
Let's start by creating an Azure Metrics Advisor resource in the Azure portal.
- Go to the Azure portal (opens new window)
- Click the Create a resource button (the plus-sign in the top left corner)
- Search for Metrics Advisor, select the result and click Create
- This brings you to the create Metrics Advisor blade
- Select a Resource Group
- Select a Region
- Fill in a Name for the Metrics Advisor
- Select a Pricing Tier
- Click Review + create and Create after that to create the Metrics Advisor resource
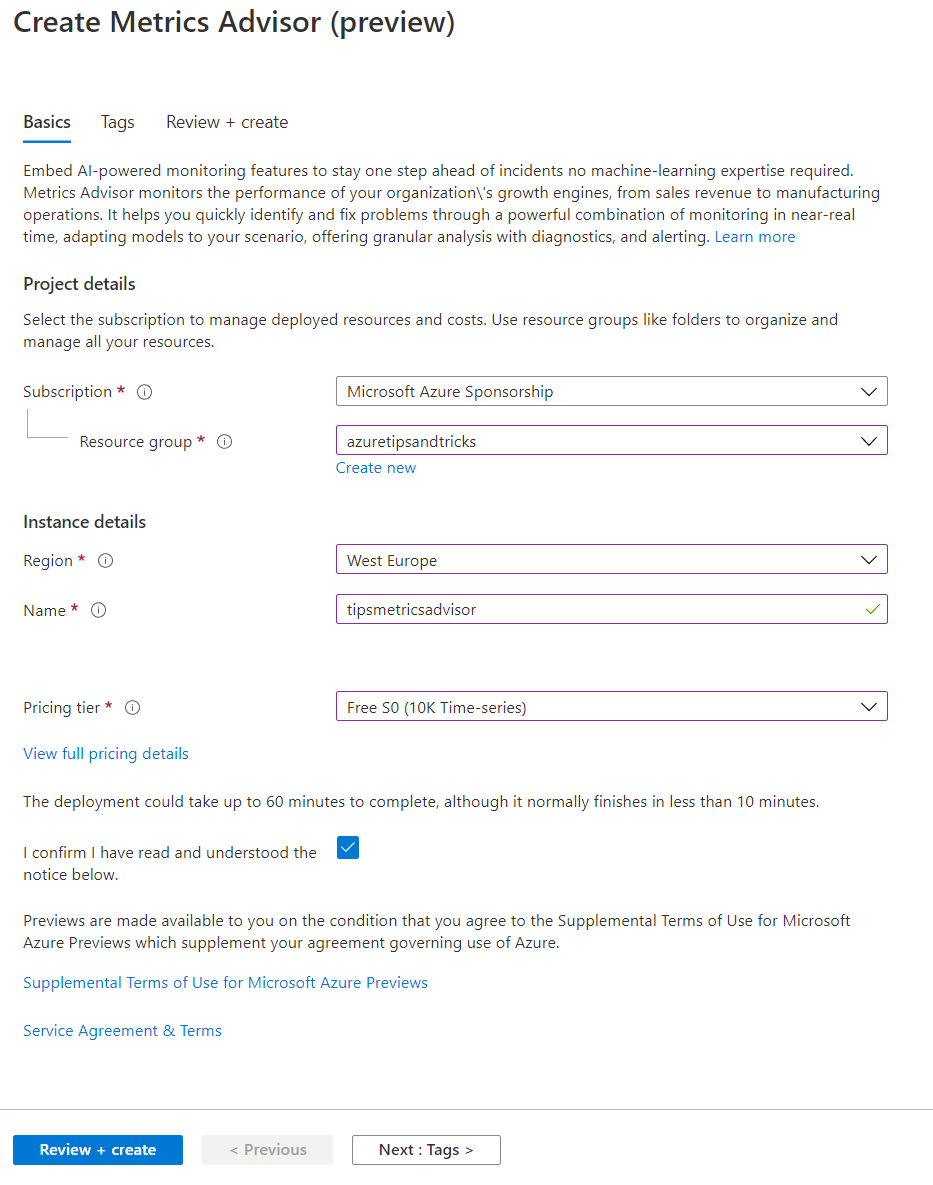
(Create an Azure Metrics Advisor in the Azure portal)
When the Azure Metrics Advisor resource is created, you'll have an Azure Cognitive Service that you can use for the Metrics Advisor service.
- Navigate to the Cognitive Service resource in the Azure portal
- Go to the Quick start blade
- Select the "Go to your workspace" link in Step 1. This opens the Azure Metrics Advisor portal
- In the Metrics Advisor portal:
- Select your Azure Active Directory
- Select your Azure Subscription
- And select the name of the Metrics Advisor Workspace
- Click on Getting started to open the workspace
Metrics Advisor works by ingesting data and analyzing it. So the first thing that we need to do in the Metrics Advisor portal, is to add a data feed that provides data. We'll use the built-in Azure SQL Database example data.
- In the Metrics Advisor portal, click on the Add data feed menu
- Next, click the Start tour button. This guides you through configuring the sample data source
- In the next steps, keep clicking on the Next button, until the data feed is configured and added
- First, you'll be guided through setting up a connection to the sample Azure SQL Database, which includes providing the connection string to it
- The sample data source contains time series data. The tour guides you through inputting a query to retrieve a slice of that data
- The query returns a row of time series data, which the tour shows and configures. This data already adheres to the data schema requirements (opens new window) needed to work with Metrics Advisor
- Finally, the tour will give the data feed a name and submit it for onboarding. Once submitted, Metrics Advisor will ingest and analyze the data, which can take around 10 minutes to complete
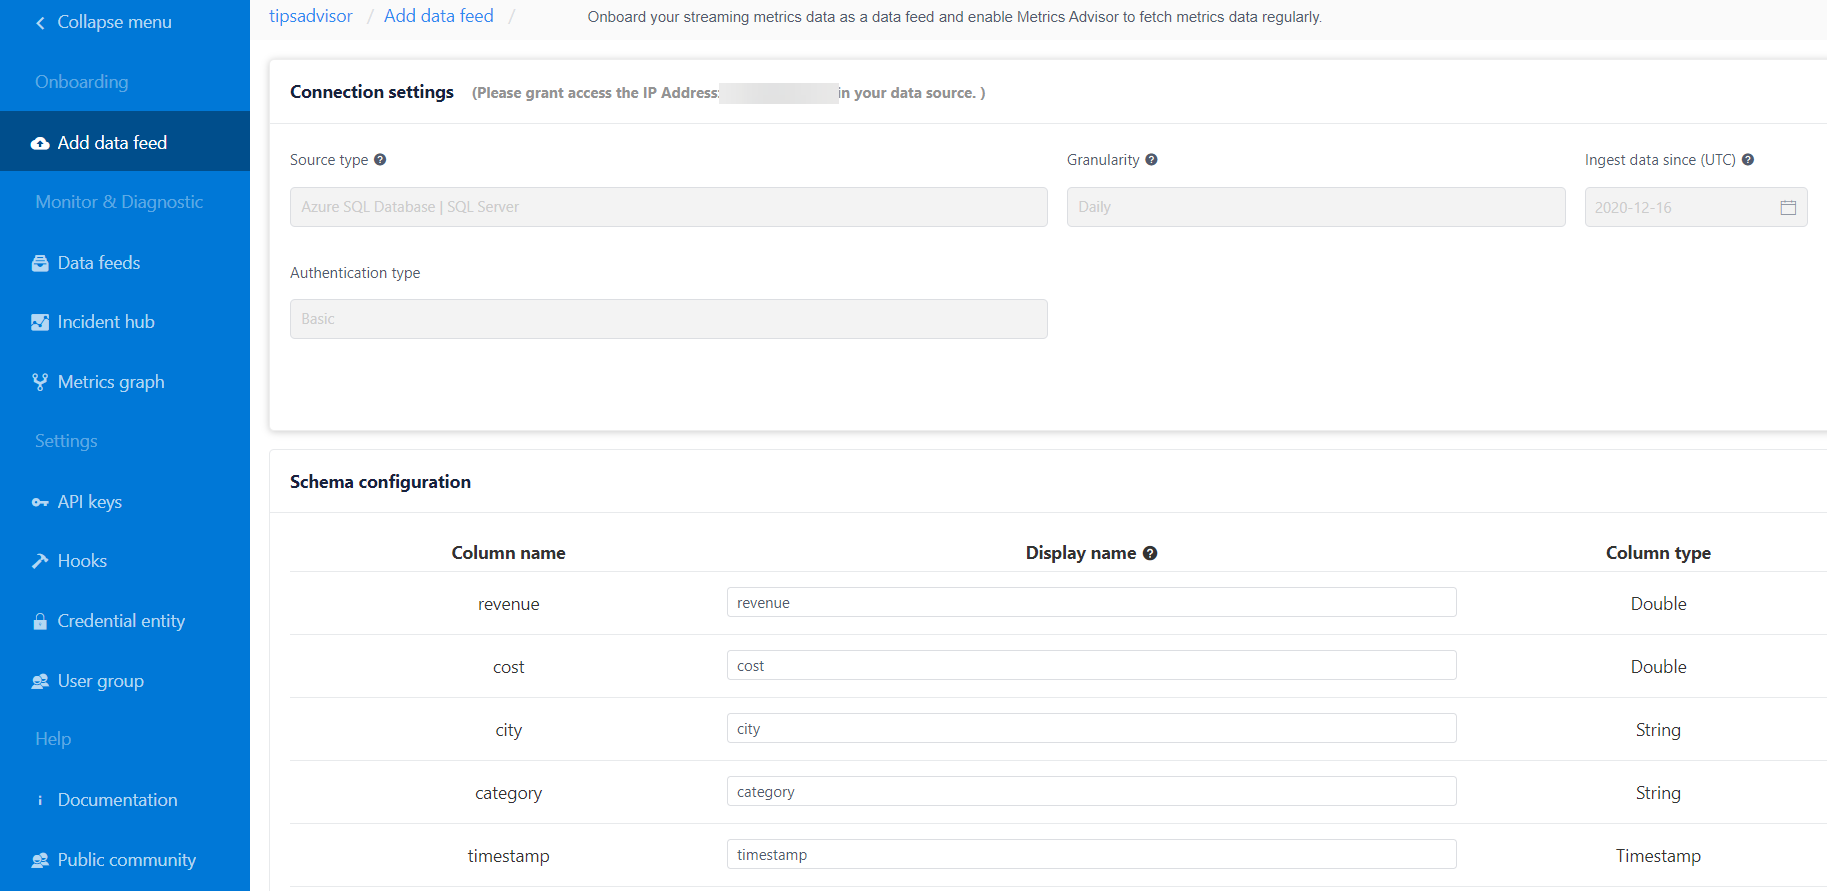
(Add a data feed in the Metrics Advisor portal)
You can see the progress of the data feed onboarding in the Data feeds menu. Once the onboarding is completed, you'll see the metrics in the data source in the data feed details. Click on one of the metrics to fine-tune the anomaly detection algorithm. When you are drilled down into the Detection configuration of a data metric, you can configure the anomaly detection sensitivity or data boundaries, to make sure that incidents that bubble up are valid and are not false positives. You can also configure the anomaly detection on the level of individual time series slices, which Metrics Advisor uses to fine-tune its algorithm.
Also, you can set up real-time alerts for when anomalies are detected. These alerts can be set for a specific metric, or across metrics and can invoke hooks for email, webhooks and Azure DevOps (opens new window).
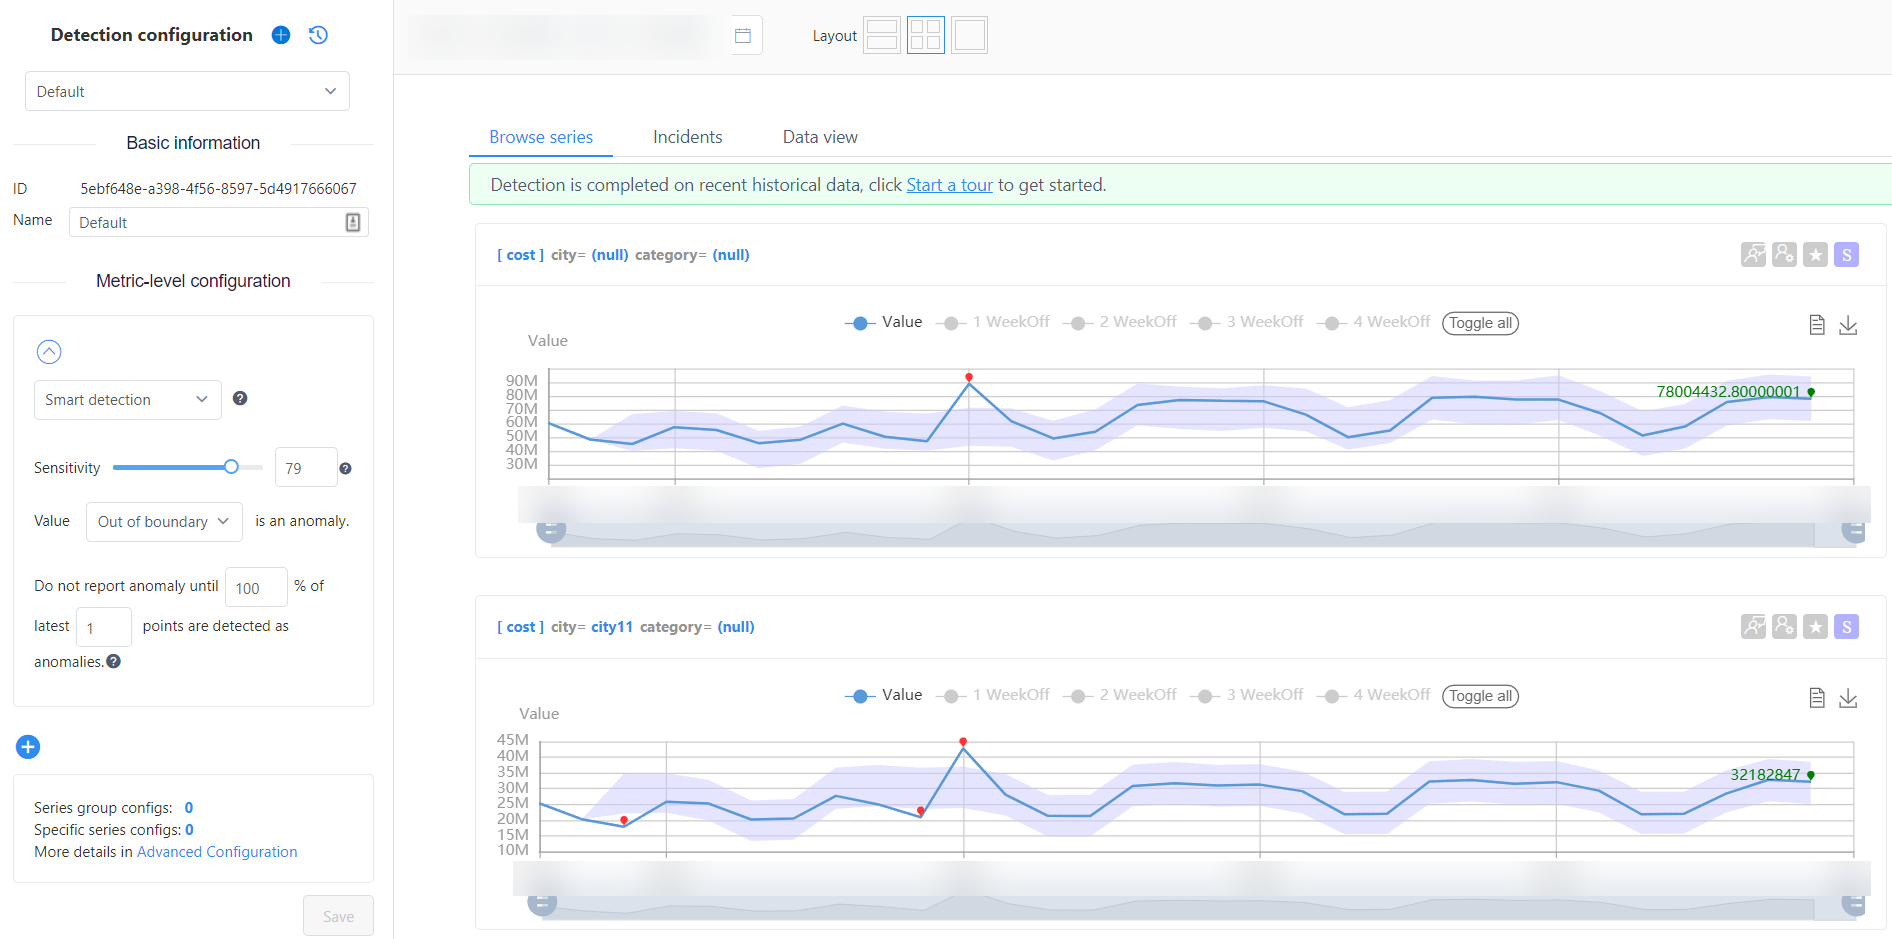
(Metric Detection Configuration in the Metrics Advisor portal)
Once you have fine-tuned anomaly detection, Metrics Advisor will continuously analyze and alert on anomalies in new data in the data feed. Now, you can analyze incidents of anomalies in the Incidents hub. In the Incidents hub, you'll see an overview of incidents that you can drill into and analyze using different viewpoints, tools and graphs.
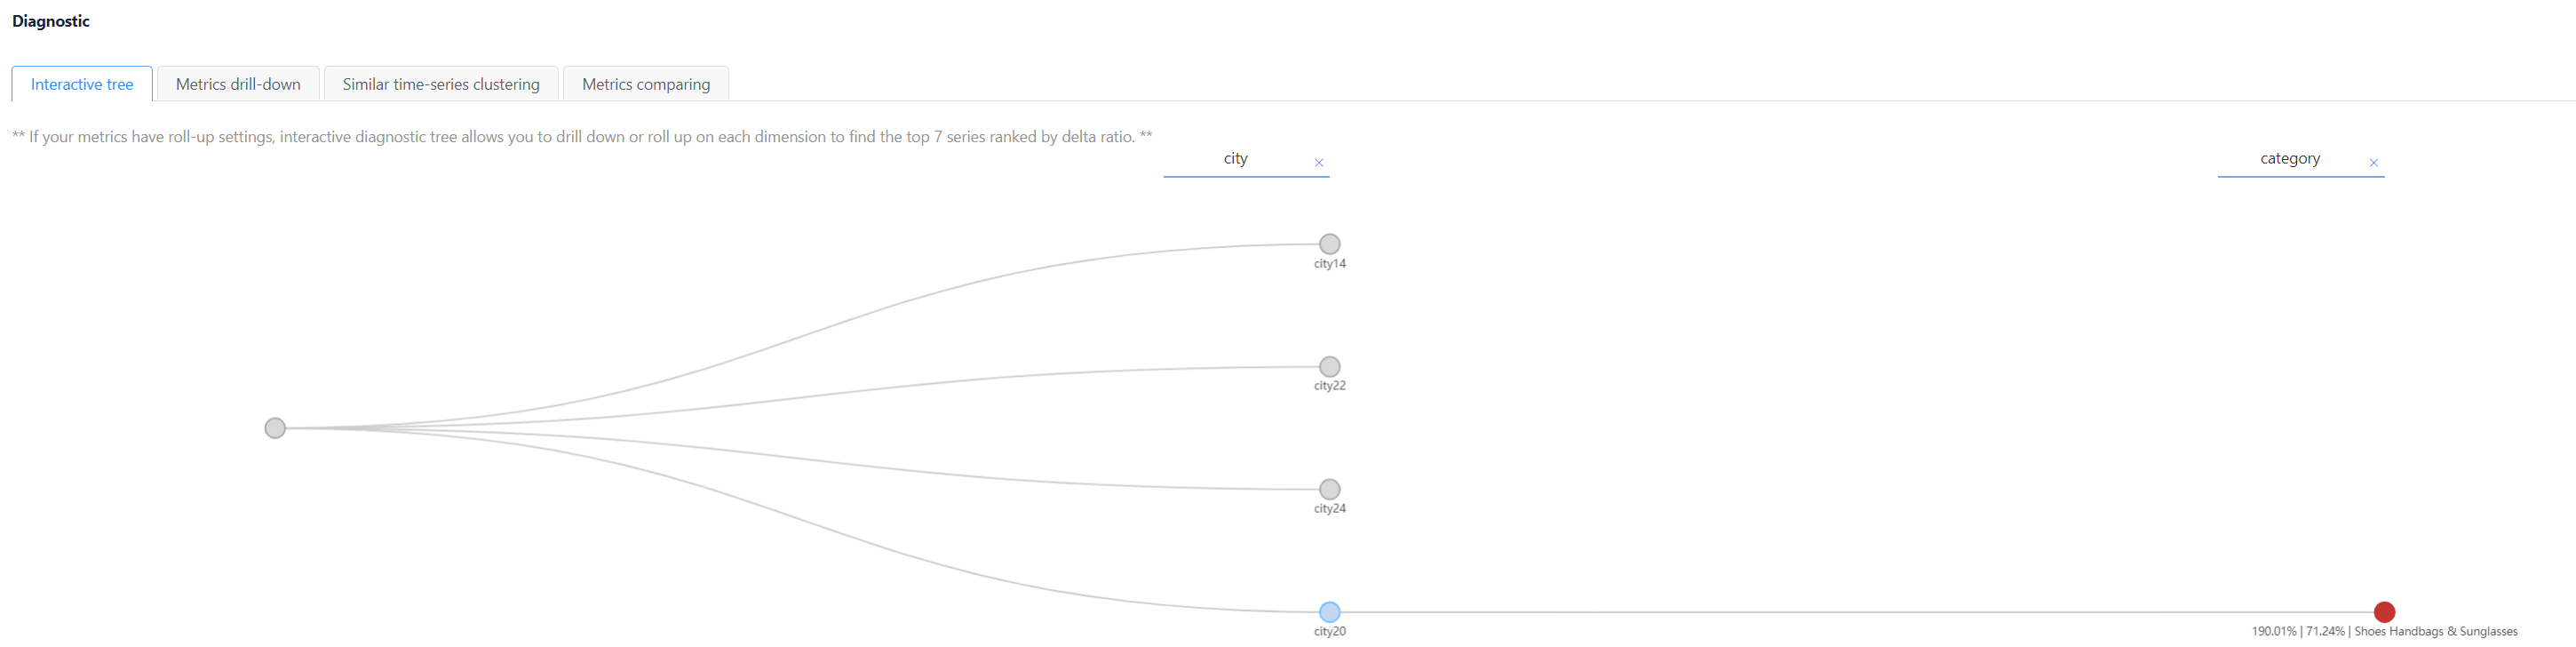
(Analyze an incident in the Metrics Advisor portal)
# Conclusion
Azure Metrics Advisor (opens new window) provides predefined machine learning algorithms that will detect anomalies in your time series data and can help you to diagnose anomalies (opens new window) and get real-time alerts (opens new window) when they happen. Go and check it out!