
TIP
🔥 Make sure you star the repo (opens new window) to keep up to date with new tips and tricks.
💡 Learn more : Cognitive Search - Azure Search with AI (opens new window).
💡 Checkout Azure AI resources for developers (opens new window).
📺 Watch the video : How to make your data searchable with Azure Search and AI (opens new window)
# Make your data searchable with Azure Search and AI
# Searching through data with Azure Search and AI
If your app exposes any data to users, you probably need a search feature. And search is traditionally difficult to implement. Users have high expectations of a search feature and expect it to work the same in your app as it works in Bing or Google. If you would have to build a Bing-like search feature, with autocomplete, filtering, sorting and all the other bells and whistles, you would have to spend a lot of time and effort. Luckily, Azure Search (opens new window) provides an easy way to incorporate a search feature into your app. And Azure Search can be enhanced by Azure Cognitive Services (opens new window) to provide AI capabilities.
In this post, we'll create a simple application with Azure Search that uses AI.
# Prerequisites
If you want to follow along, you'll need the following:
- An Azure subscription (If you don't have an Azure subscription, create a free account (opens new window) before you begin)
# Creating a search index with Azure Search and AI
We'll create an Azure Search instance and a Cognitive Service in Azure that will analyze a sample data source. We will start by creating the Azure Search instance in the Azure portal:
- Go to the Azure portal (opens new window)
- Click the Create a resource button (the plus-sign in the top left corner)
- Search for Azure Search and click on the result to start creating one a. This brings you to the create blade of Azure Search b. Select a Resource Group (or create a new one) c. Fill in a URL for the service d. Select a Location e. Select a Pricing tier f. Click Review + create and click Create
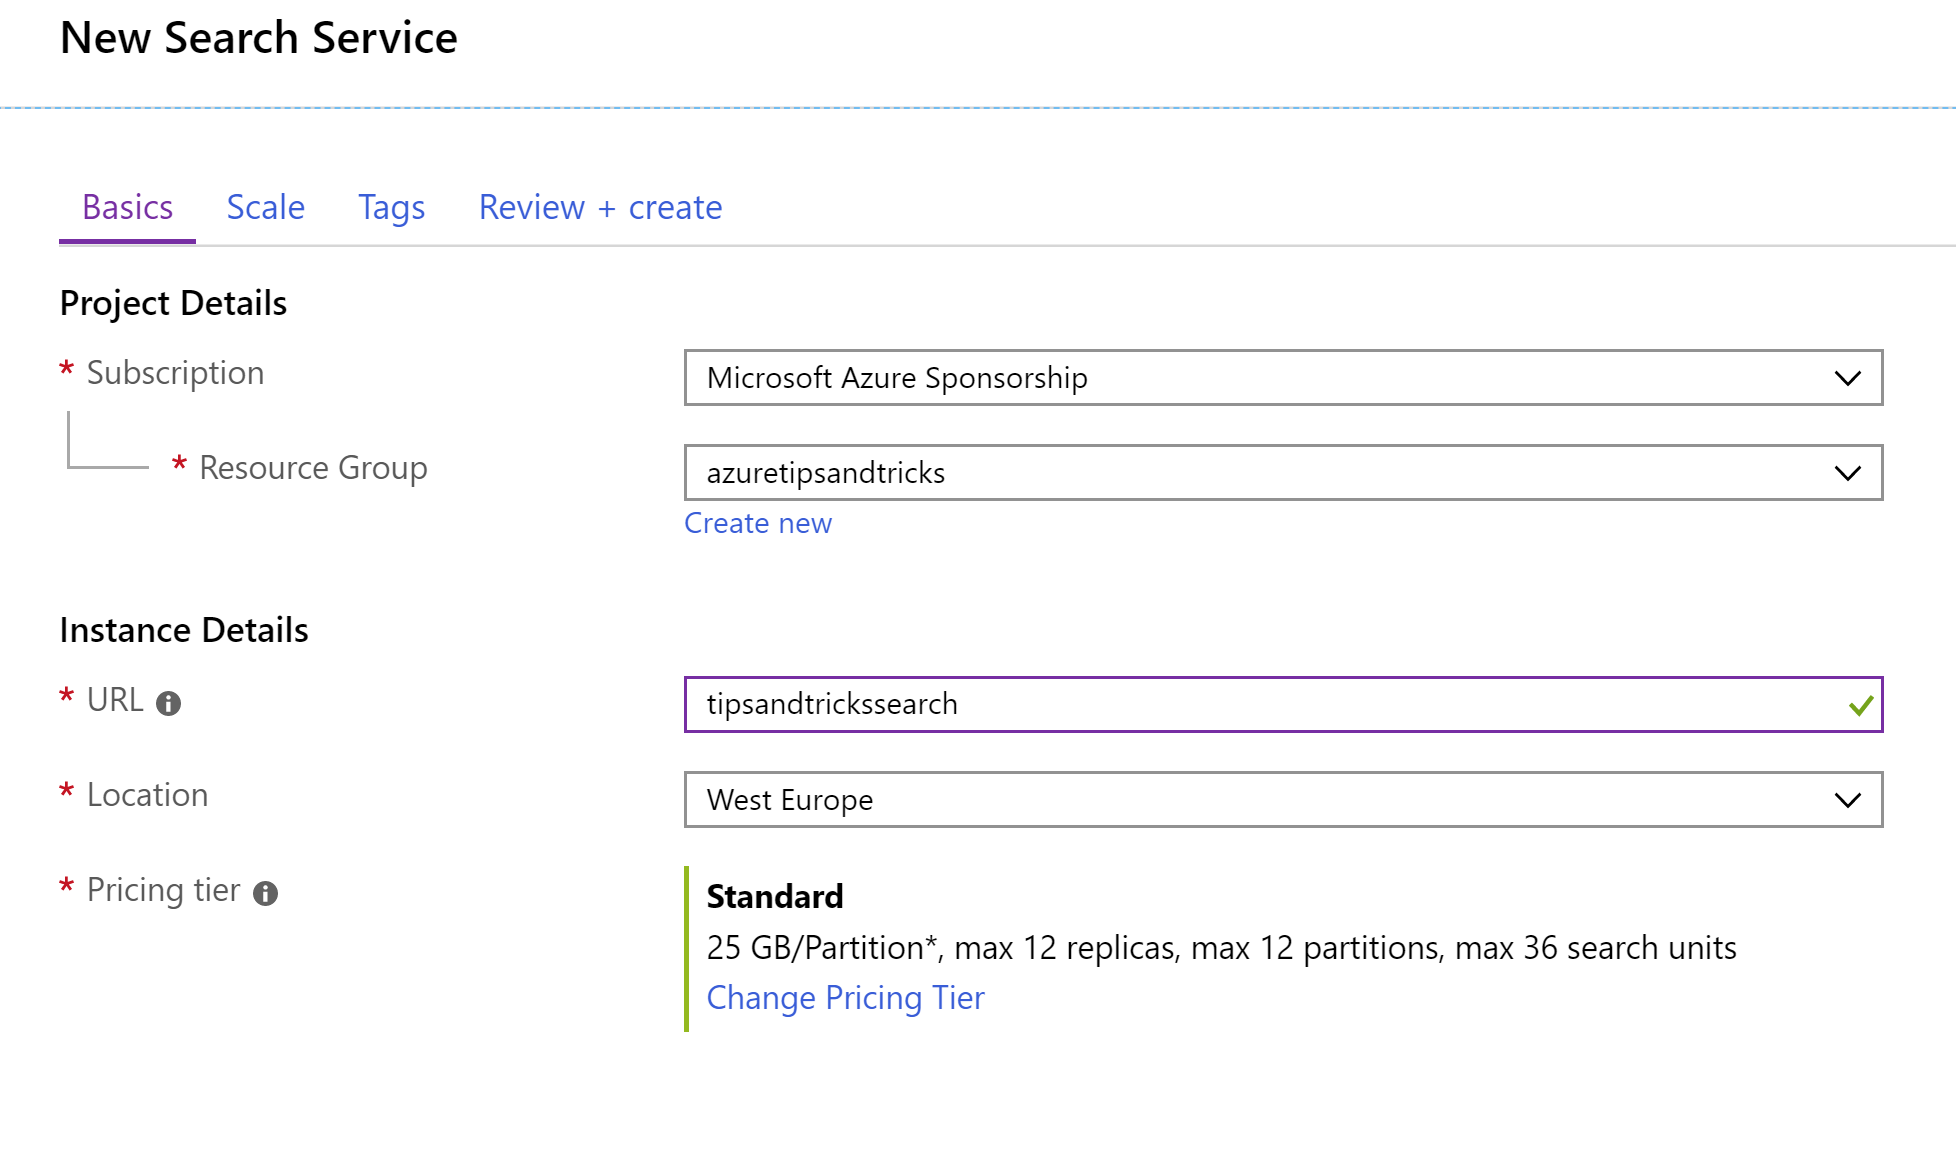
(Create Azure Search blade in the Azure portal)
When the Azure Search instance is created, we can create a search index in it, based on sample data:
- In the Azure portal, in the Azure Search overview blade, click on the Import data button. This will take you through a wizard to create a search index
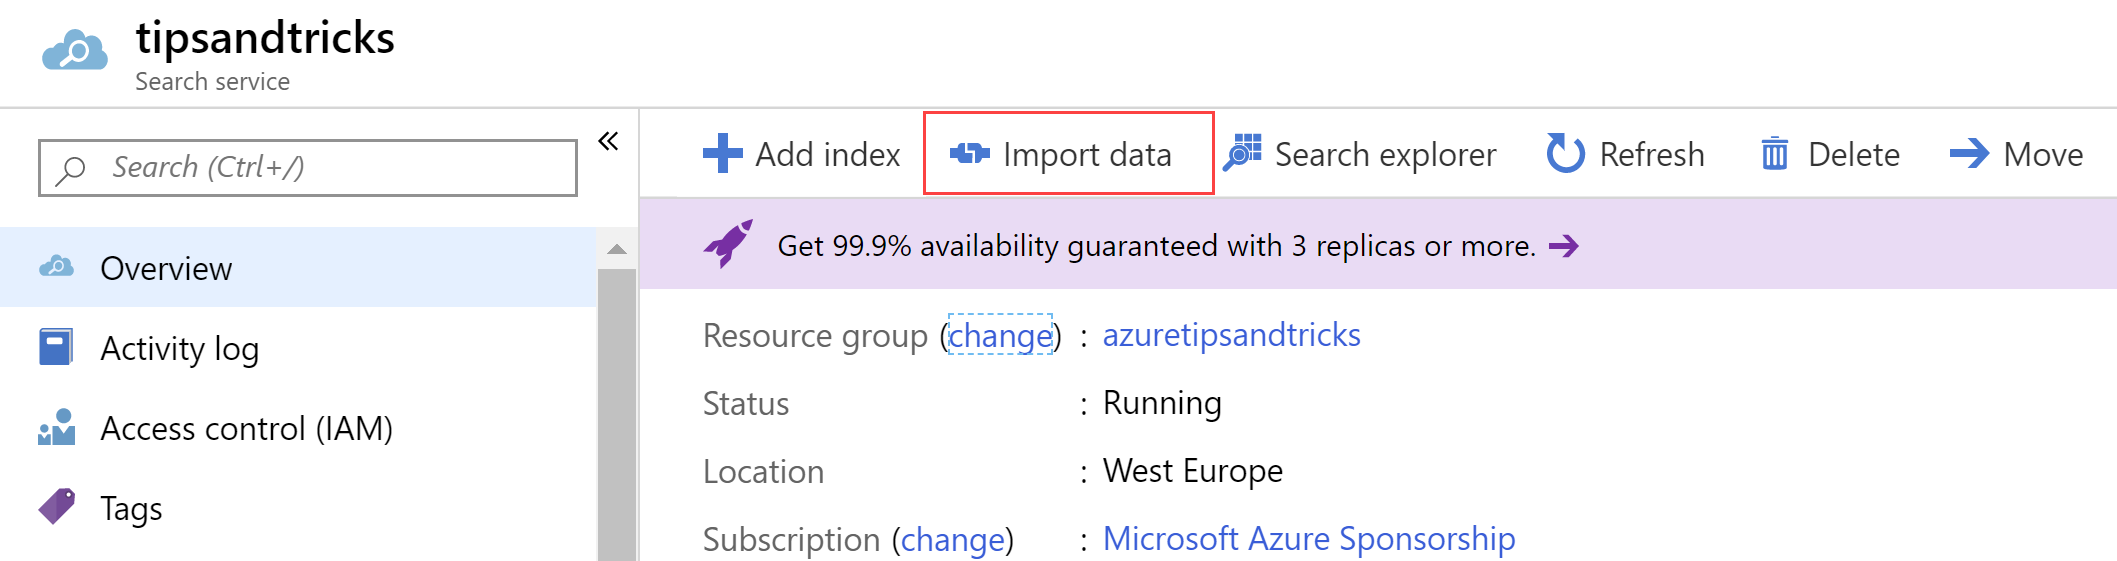
(The import data button in the Azure portal)
The first step of the wizard is to select a data source to perform search on. In the Data Source dropdown box, select Samples and select realestate-us-sample a. This sample data source represents a SQL Database containing example data for real-estate in the United States. Here (opens new window) are some more sample data sources that you can use with Azure Search
Next, we will add cognitive search (opens new window). This enhances Azure Search by adding AI capabilities from Azure Cognitive Services a. First, attach a Cognitive Service by selecting an existing one. If you don't have one yet, click the Create new Cognitive Services resource to create one and click Refresh once you've created it b. In the next step, Add enrichments, we can create a skillset that enhances the search index:
- In the Source data field, select the description field
- Select Sentences for the Enrichment granularity level setting
- Select Extract key phrases, Translate text (to Afrikaans) and Detect sentiment
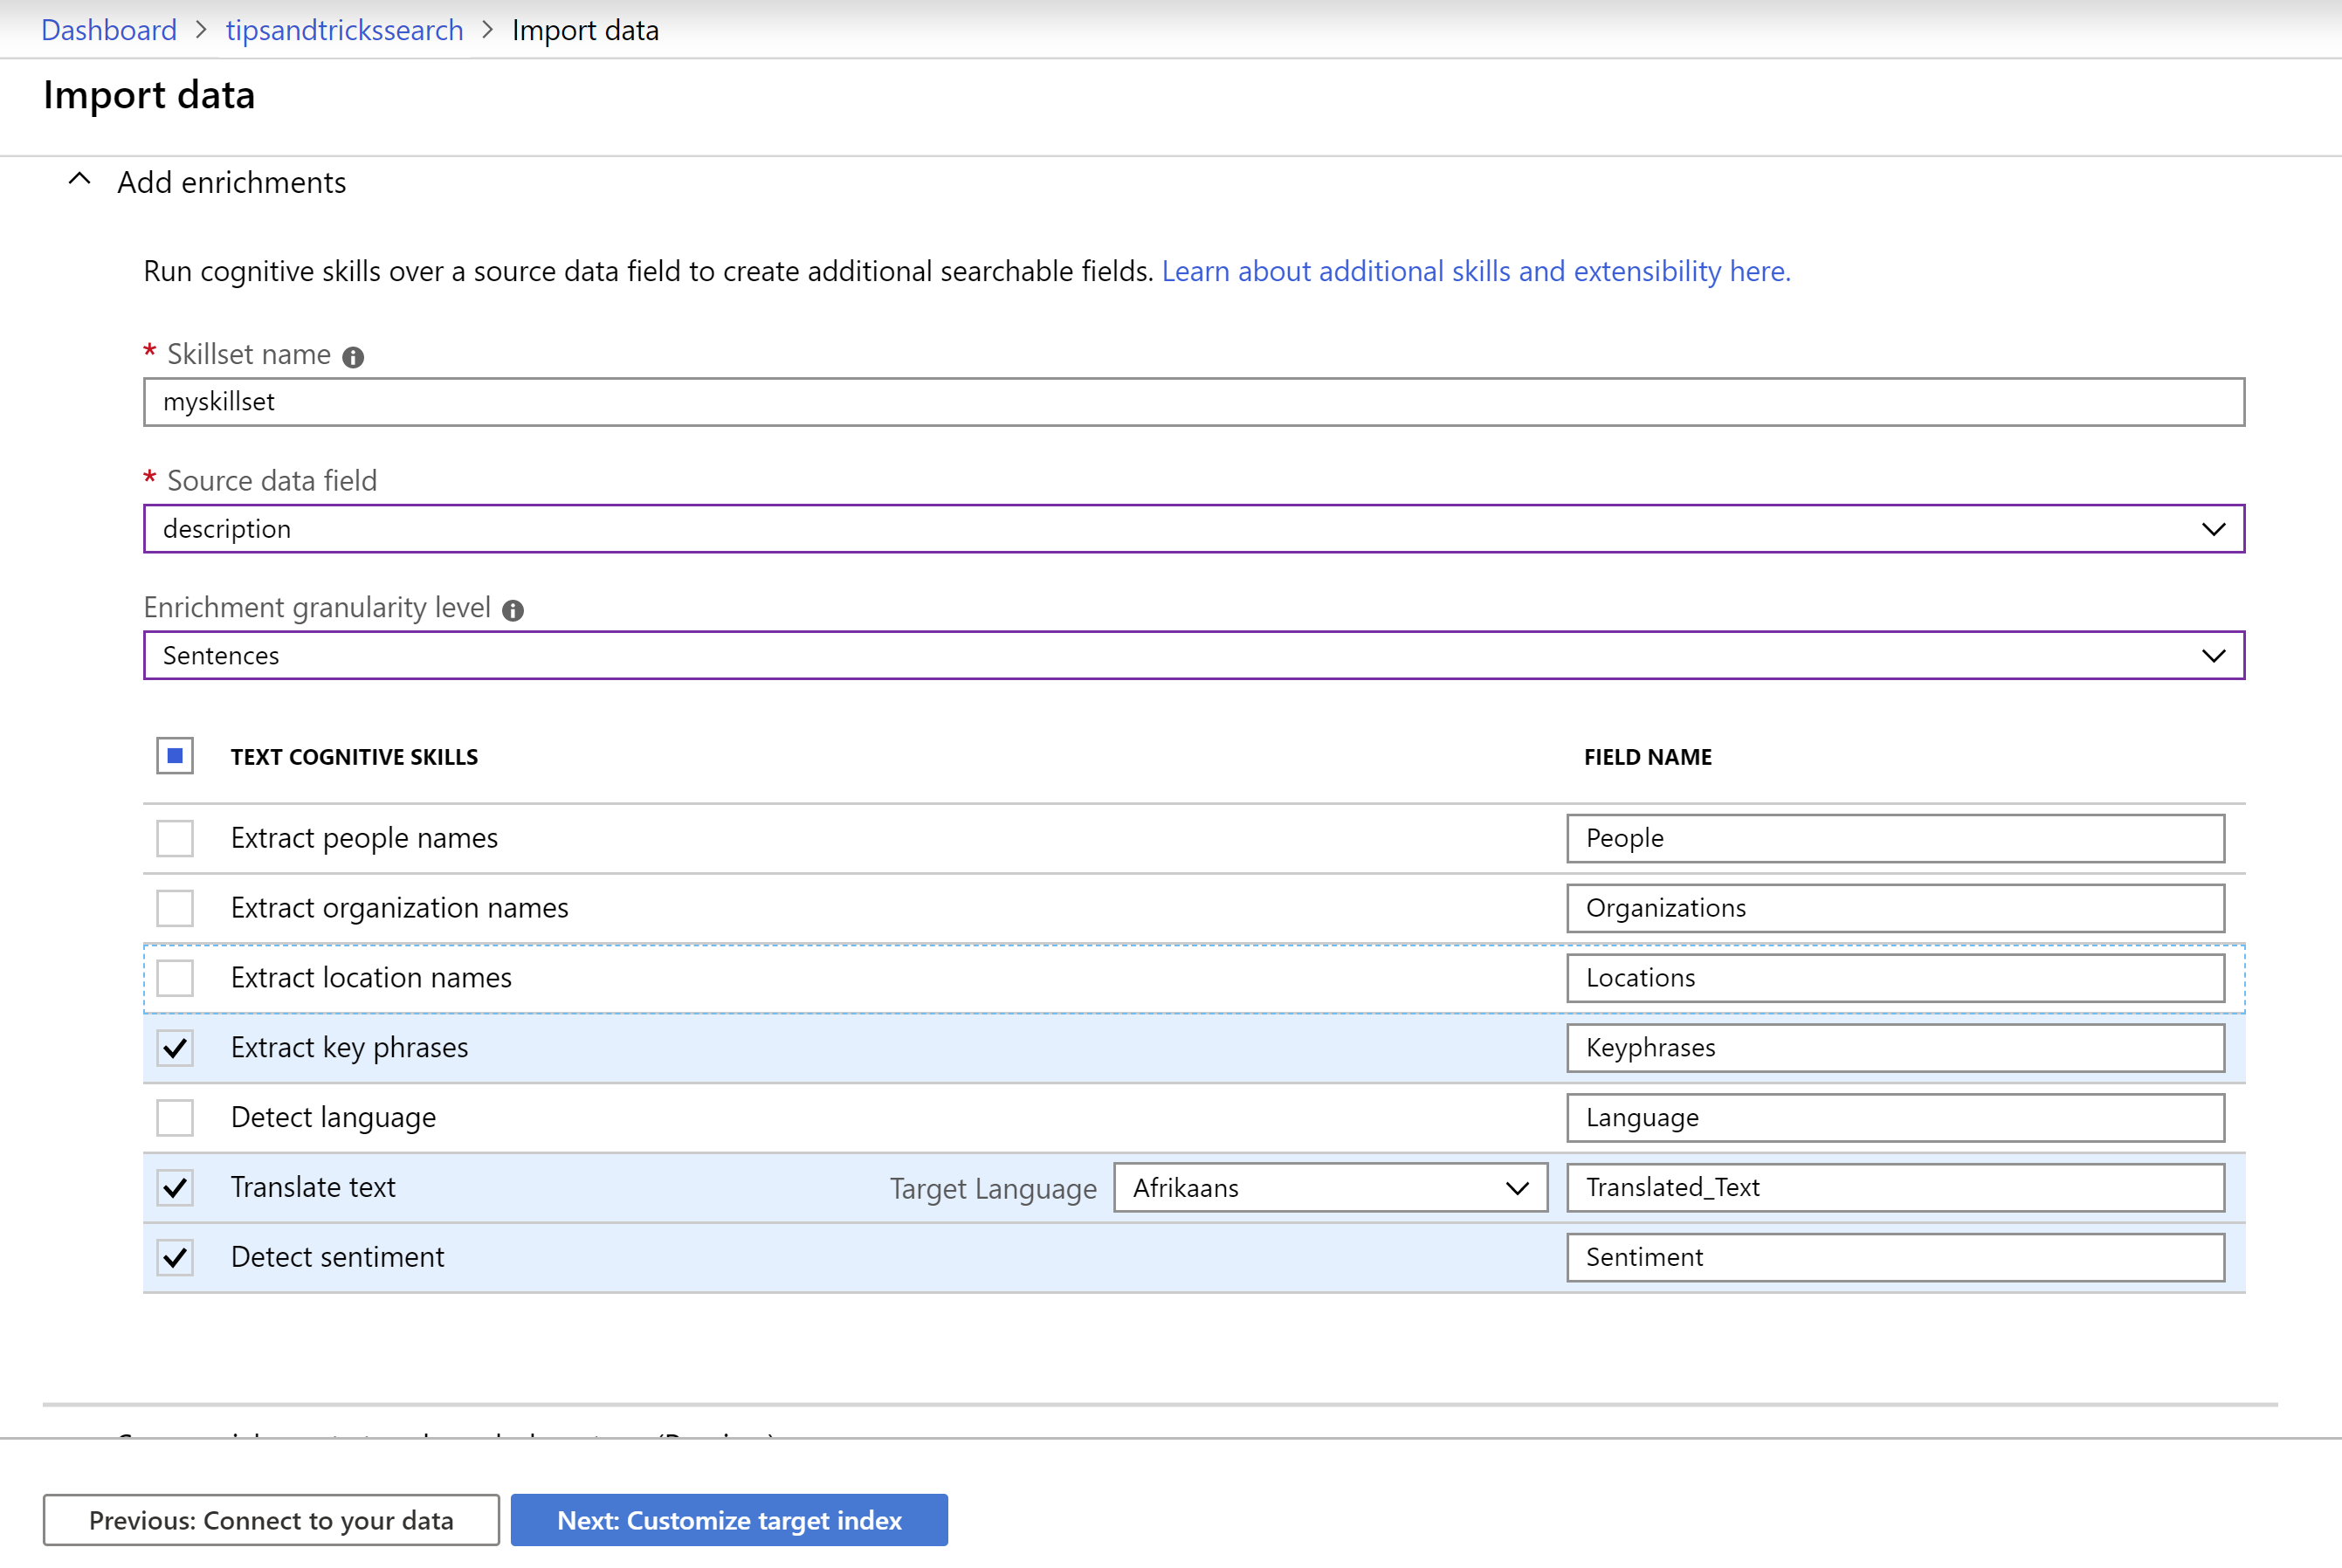
(Configure Cognitive search in the Azure portal)
c. Click Next: Customize target index
In the step to customize the target index, you can tell Azure Search which fields of the data you want to be searchable, which ones you want to sortable, which ones you want to use to filter on and so on. Leave everything as it is and click Next: Create an indexer
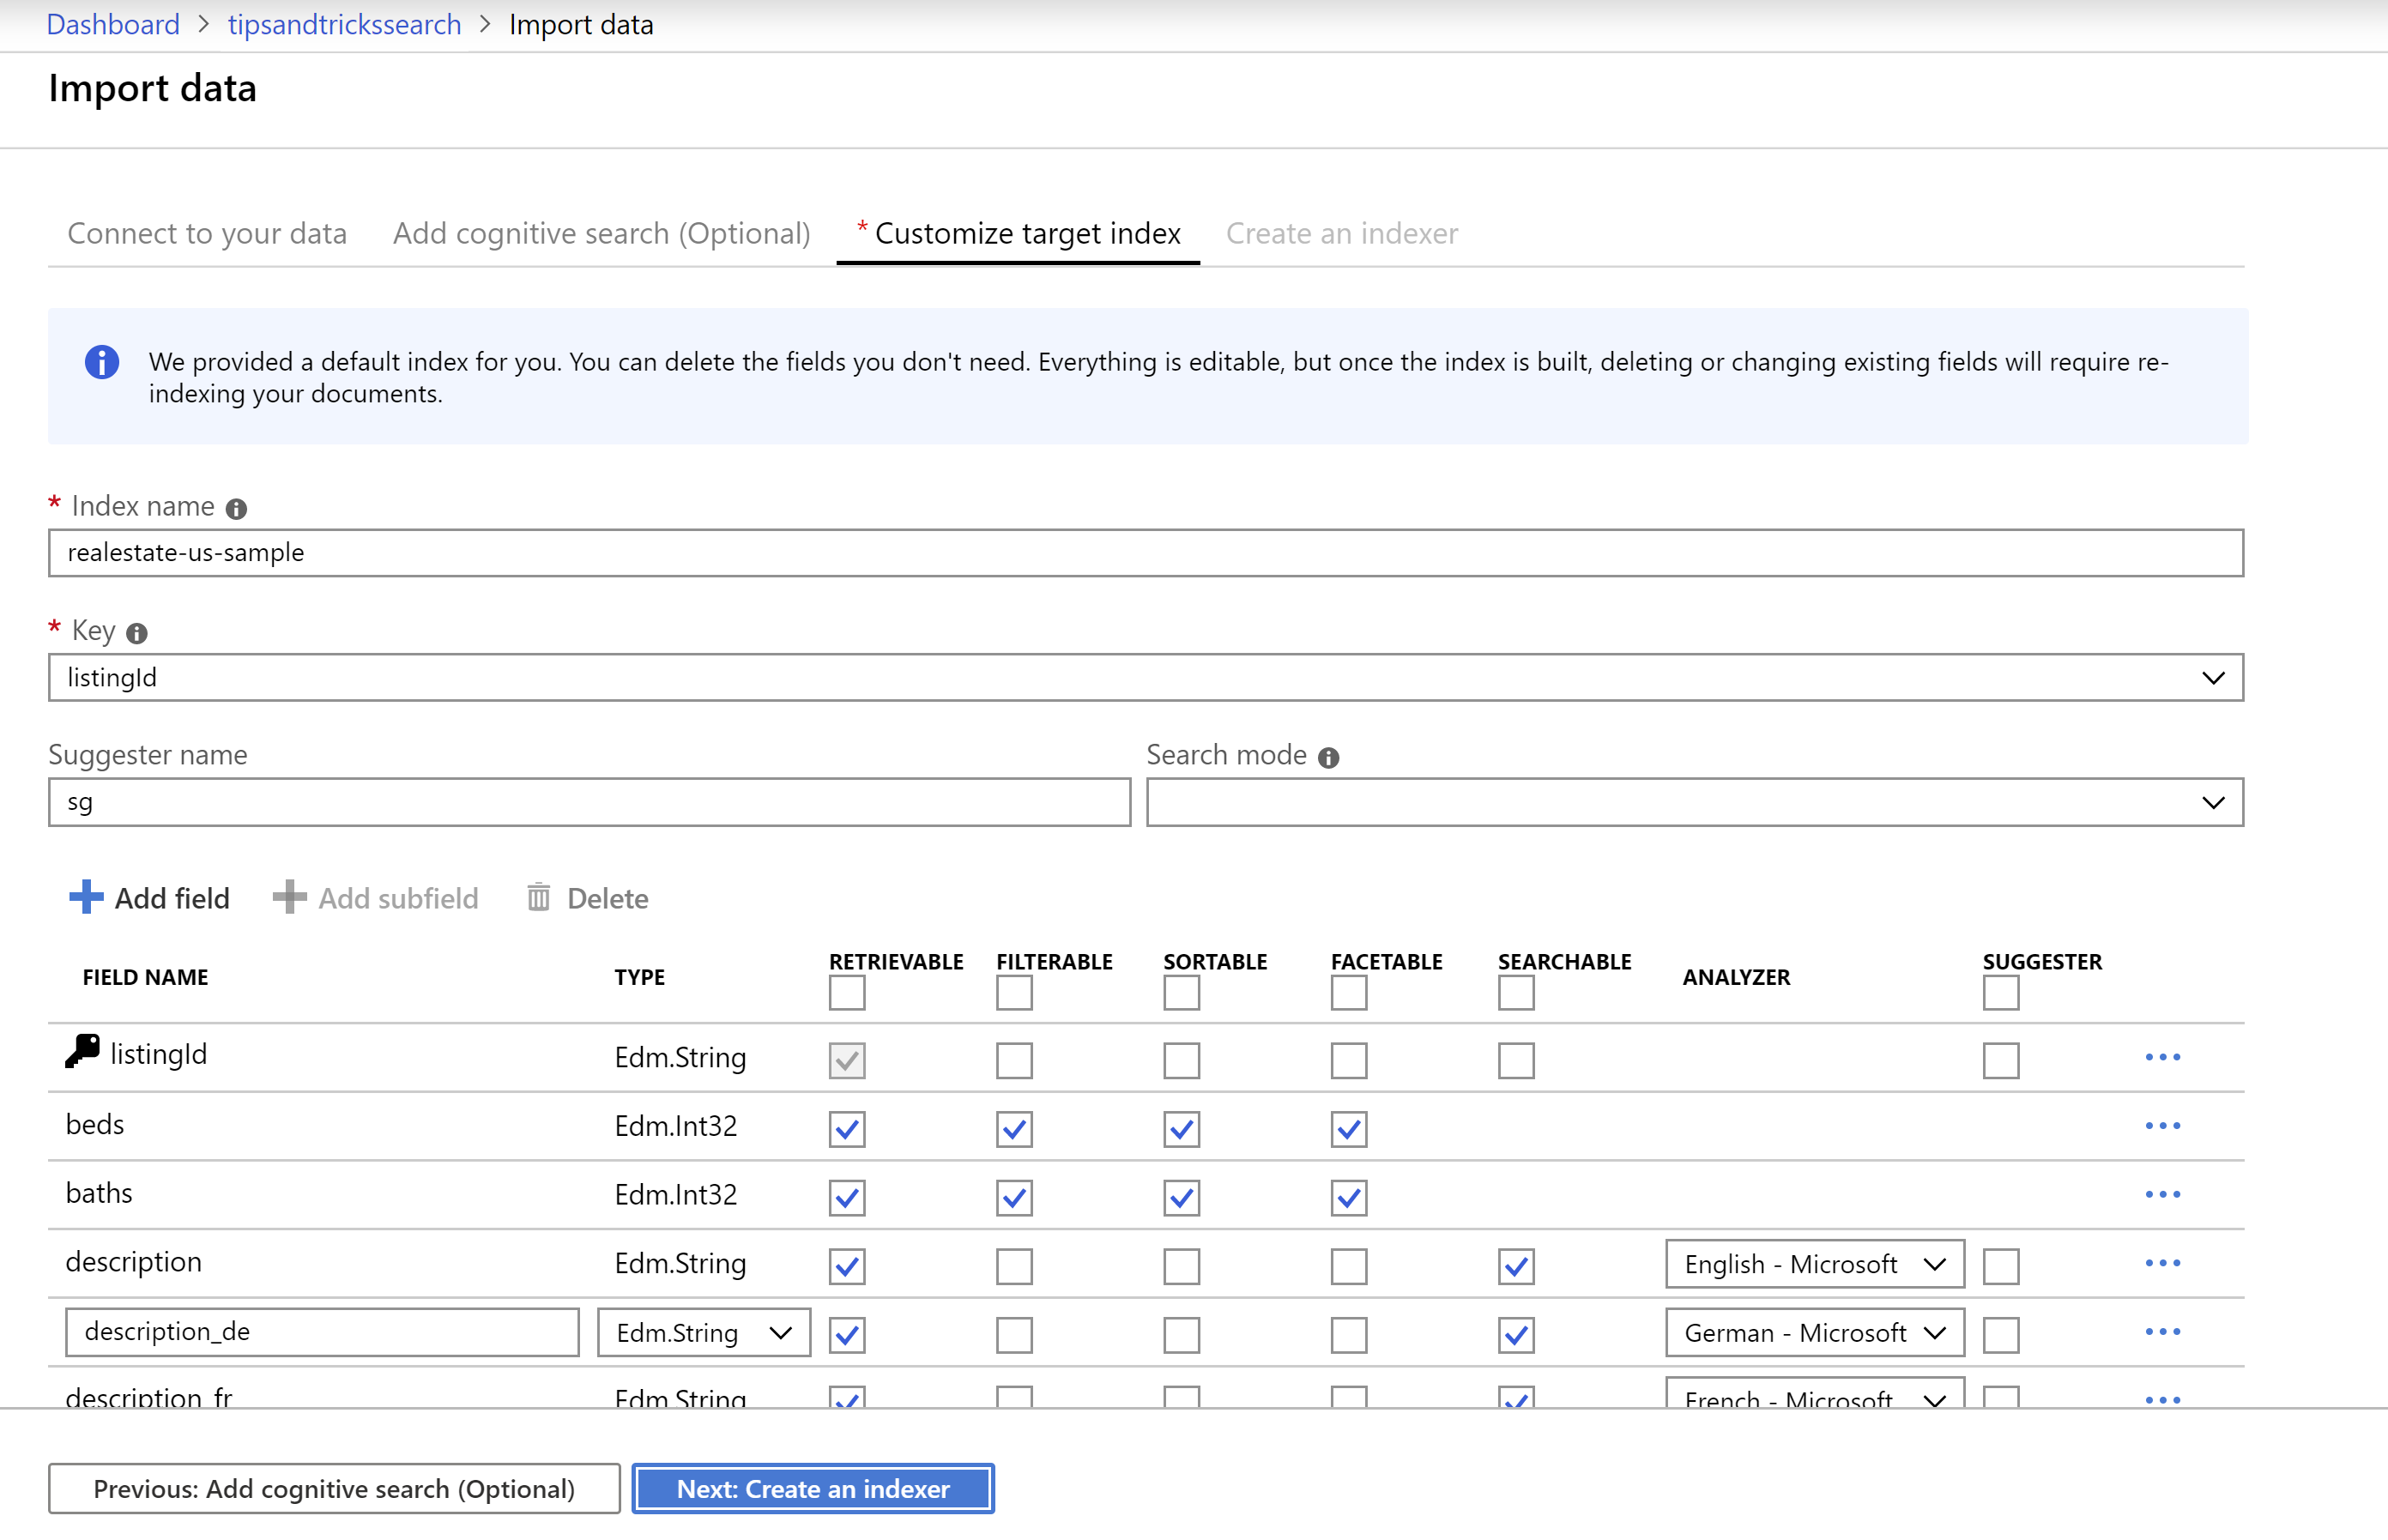
(Customize the search index in the Azure portal)
- The indexer is a mechanism that creates and maintains the search index. Leave everything as it is and click Submit to start creating the index
The index that we've created uses Azure Cognitive Services to analyze the description text of the data. We've chosen to split that data up into sentences, so that the Cognitive Service can deal with it better. This split does mean that it will take 15 minutes or more to create the search index. In a production scenario, this doesn't matter a lot, because Azure Search would run on multiple replicas an you would update the index of just one of them, leaving the rest available to be queried.
When the index is created, we can test it:
- In the Azure portal, in the Azure Search overview blade, click on the Search Explorer button. this takes us to an environment where we can query the search index and see what it returns
- In Search Explorer, search on medina and take a look at the search results. You'll see key phrases that Cognitive Services detected, a translated text in Afrikaans and a sentiment analysis of the sentences of the description. This sentiment in the image below seems to be pretty positive, which is what you would expect from a real-estate listing:
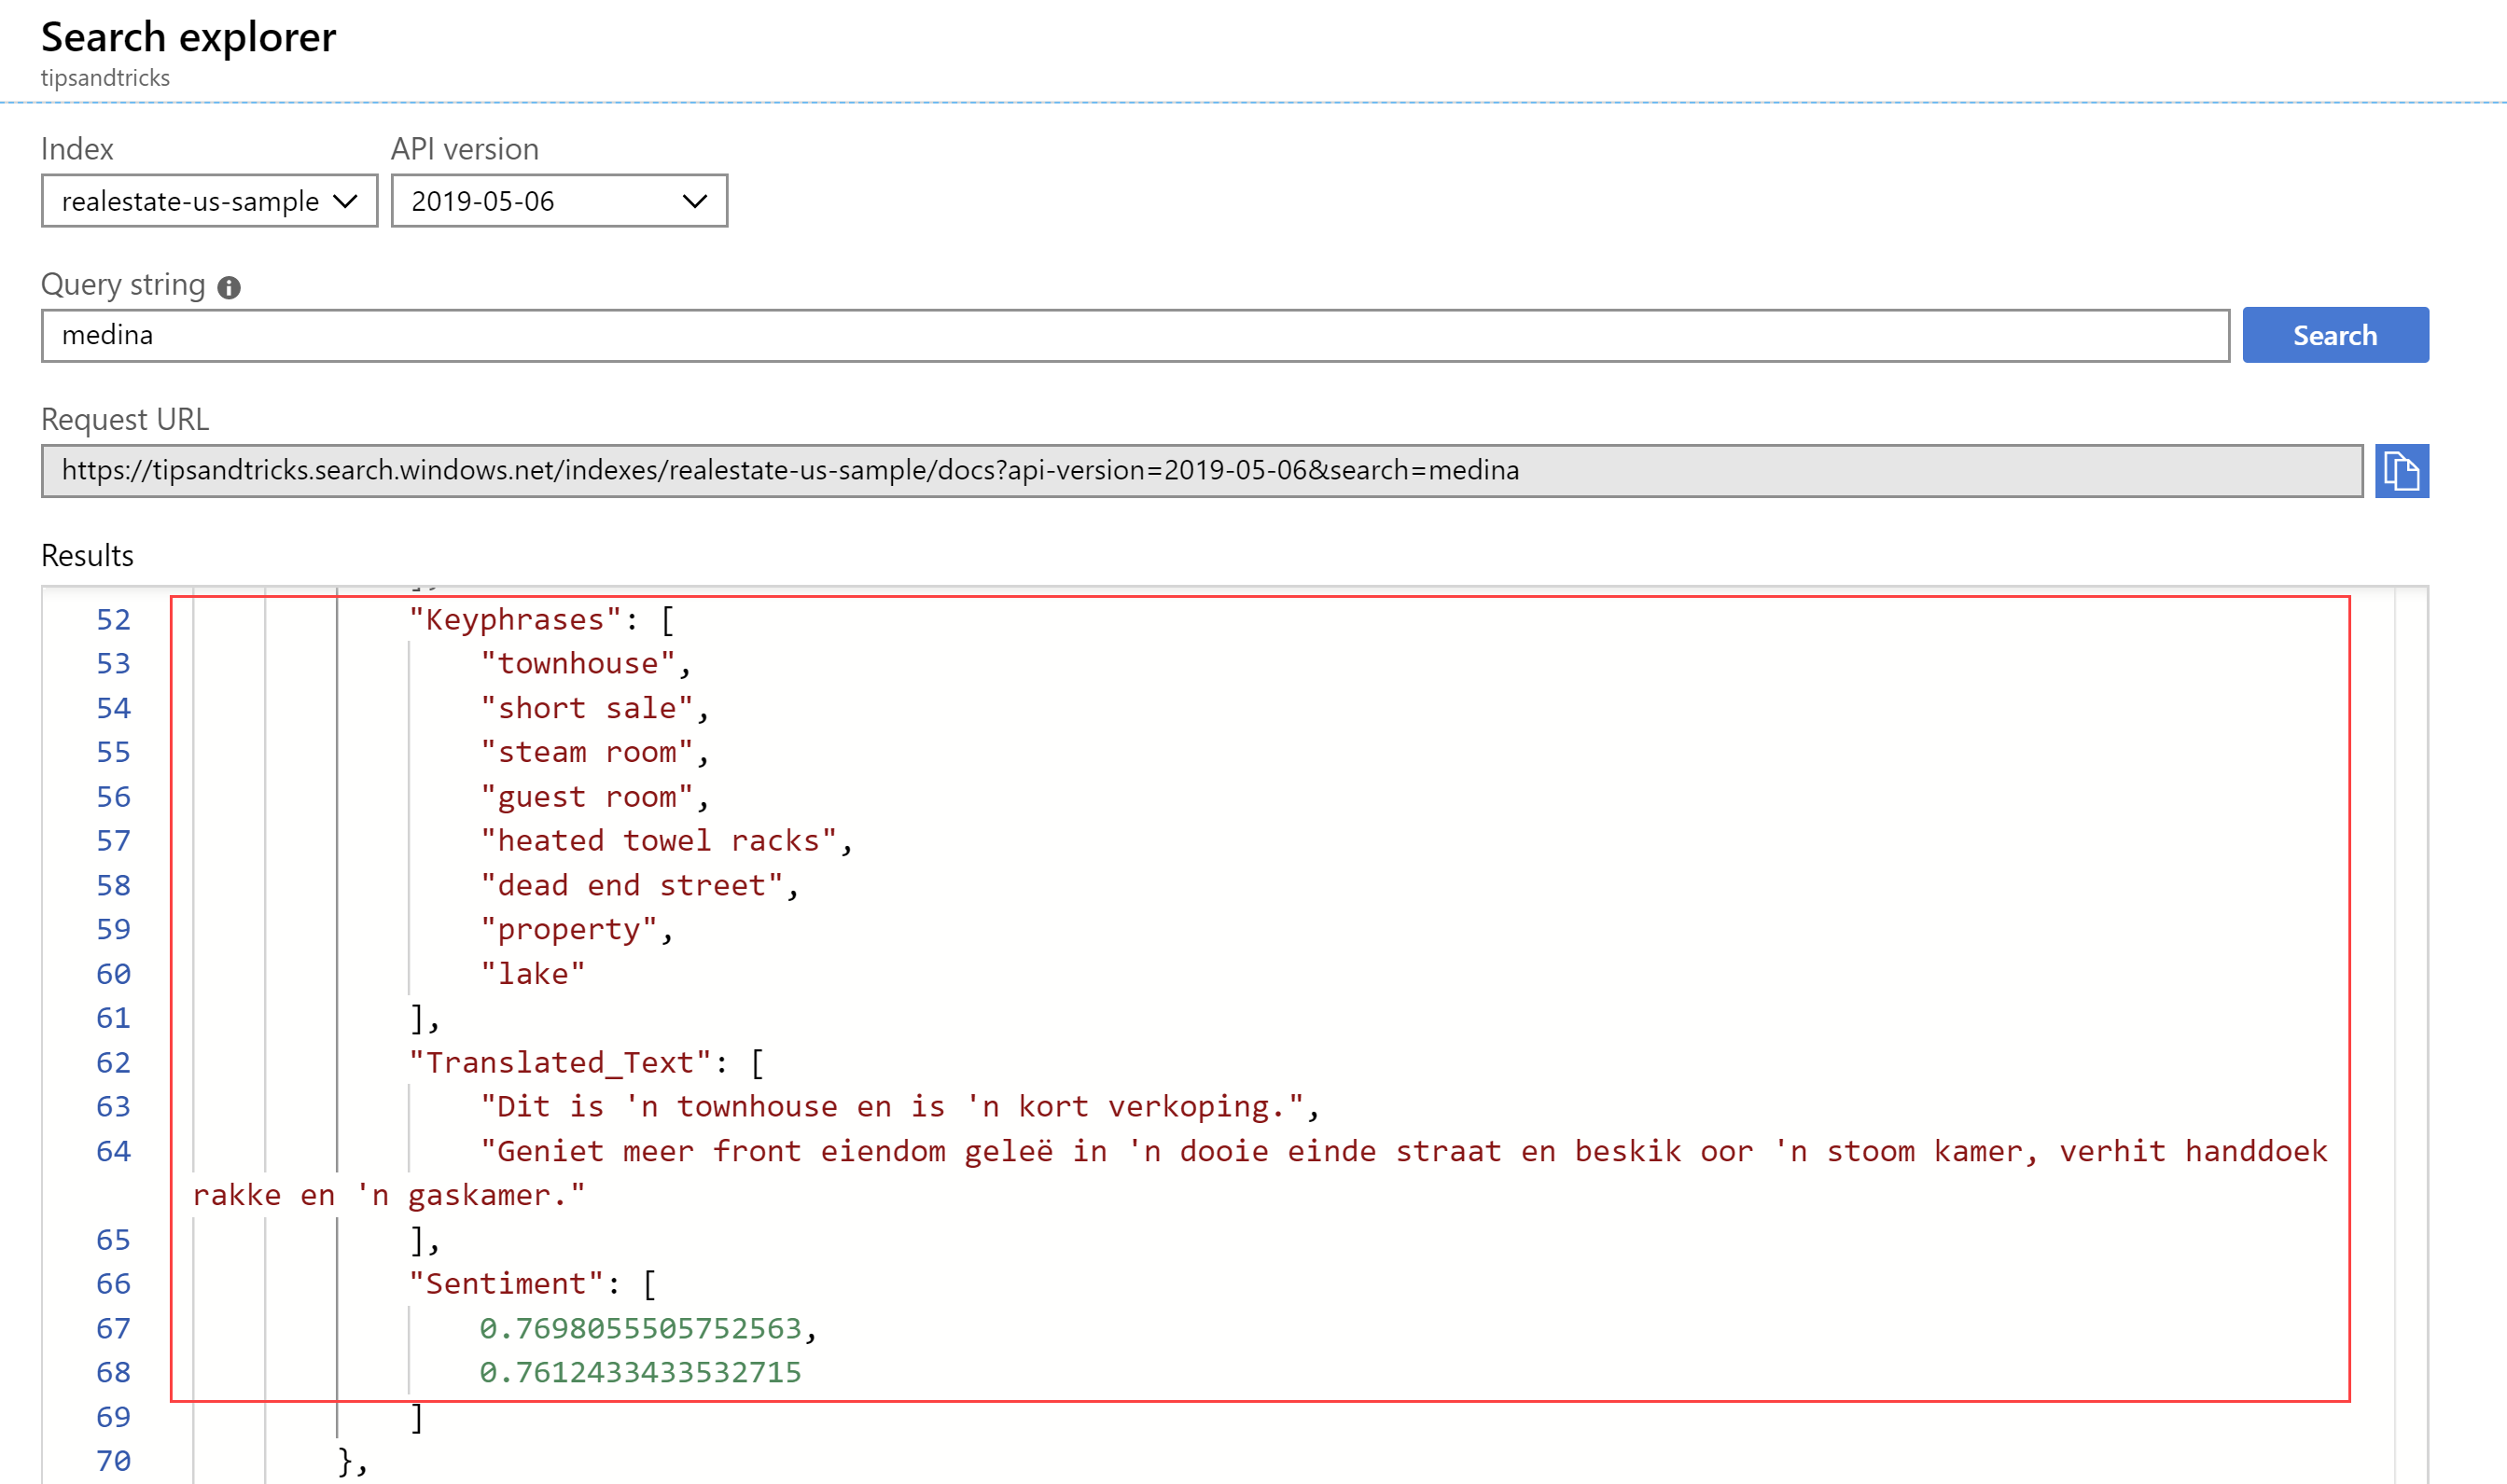
(Search results in the Azure portal)
# Use the search index in an application
Having the search index ready to be queried is great. But we really want an application to call the Azure Search API to use the search index. There are many ways to implement this including the Azure Search SDK for .NET (opens new window) and calling the REST API (opens new window) directly. We can also use helper libraries (opens new window) to generate a search UI for us. Let's try that:
- Go to http://azsearchstore.azurewebsites.net/azsearchgenerator/index.html. This is a helper app that can generate a search UI for us. Eventually, this capability will be available in the Azure portal
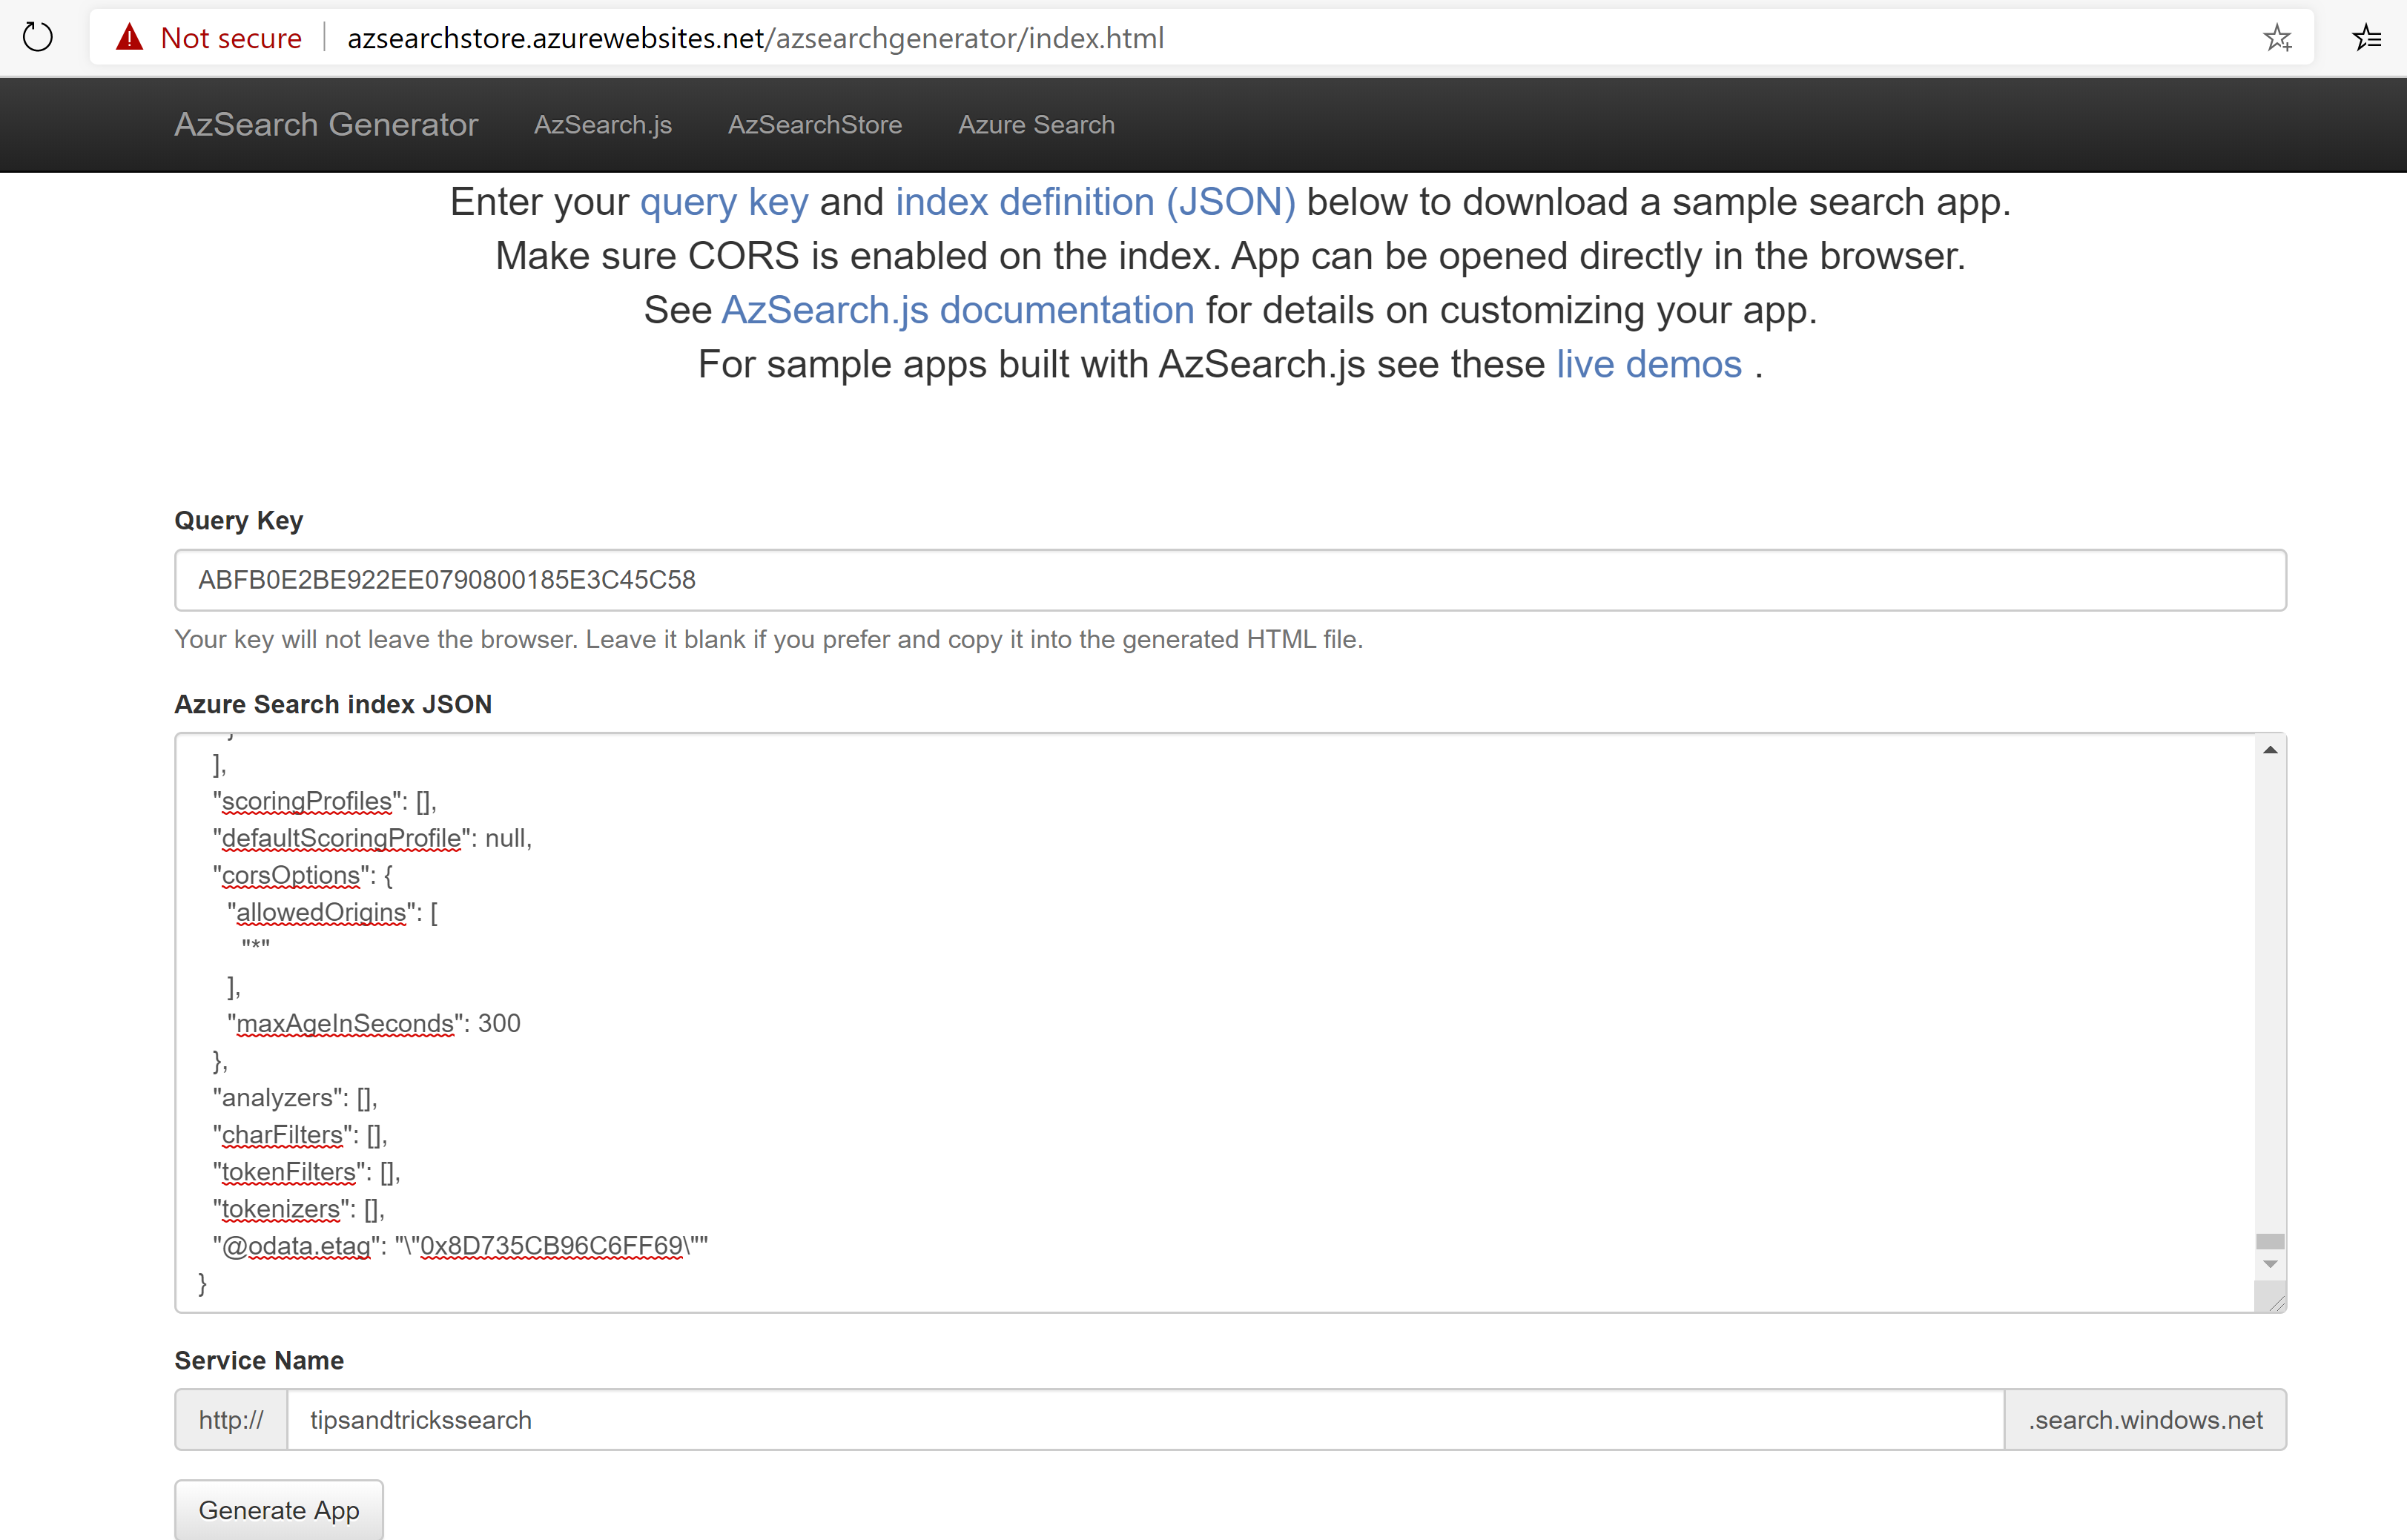
(AzSearch Generator)
Fill in the Query Key value. You can get this by either using a read/write Key or generating a Query-only Key in the Keys menu of the Azure Search instance
Go to the Azure Search instance in the Azure portal and open the search index that we've created earlier. Click on the CORS tab. We need to allow the UI that will be generated to access the search index a. Select All for the Allowed origin type b. Click Save to save the CORS setting
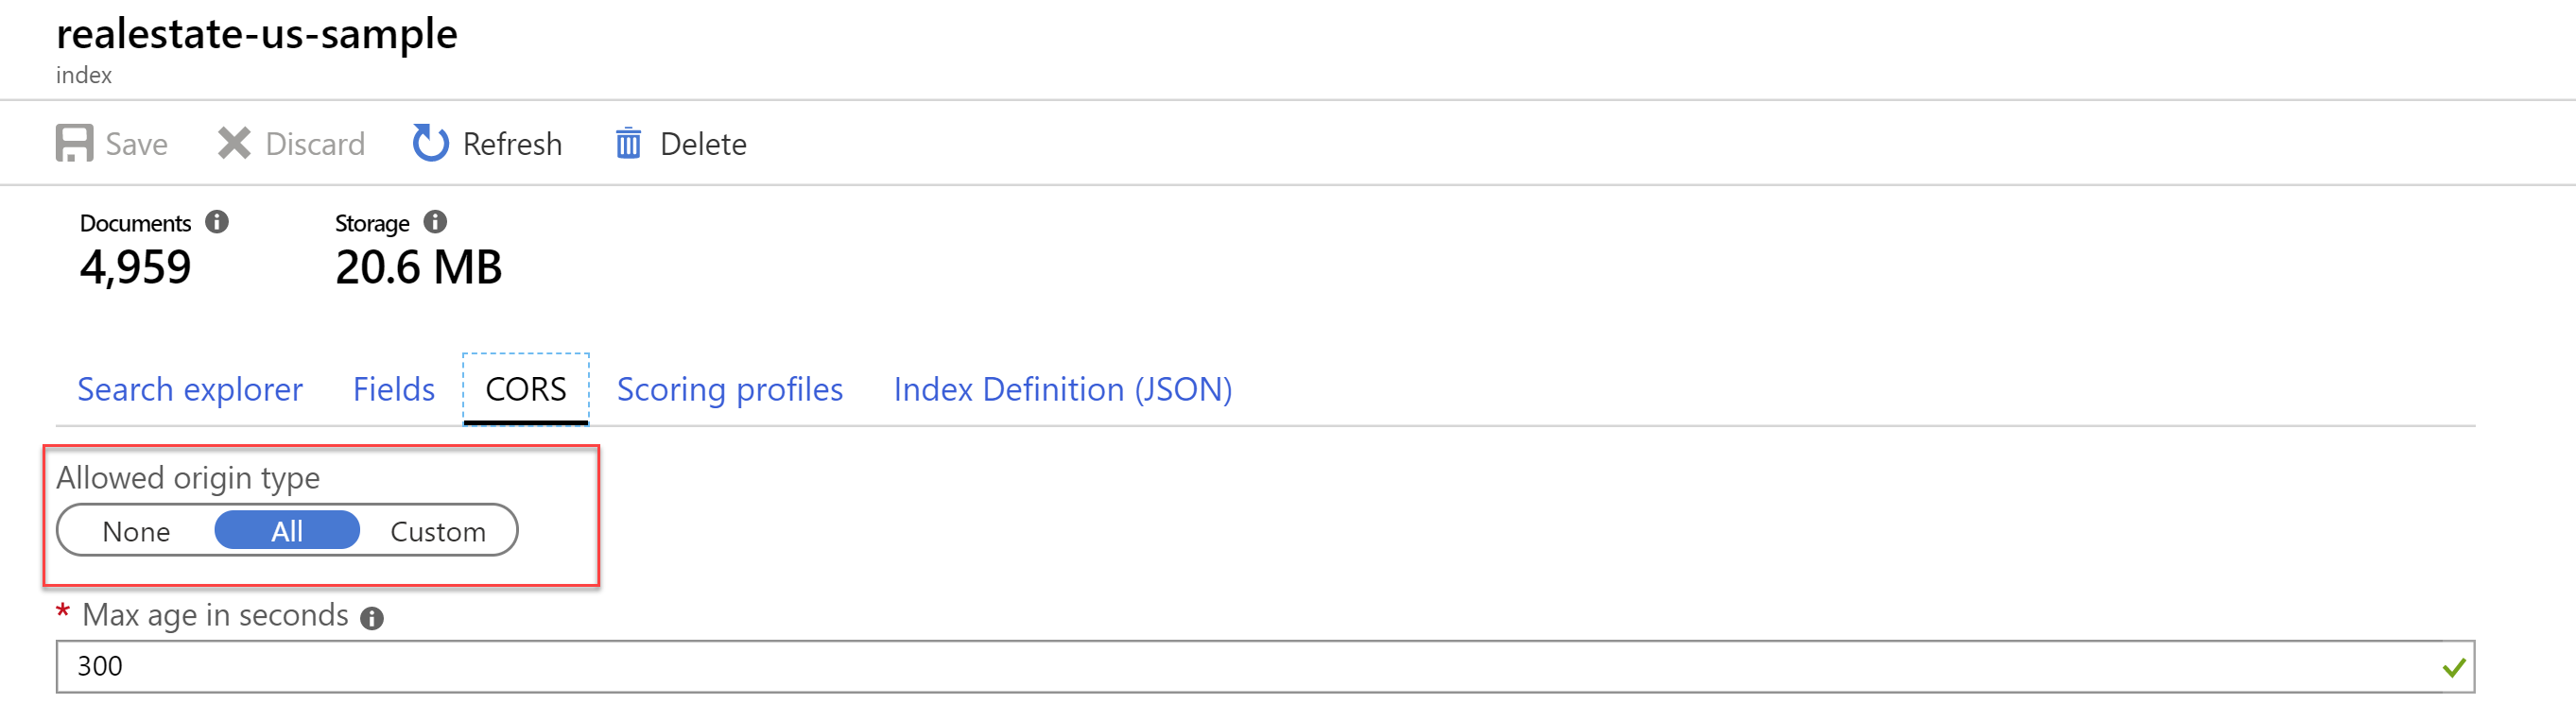
(CORS setting in the Azure portal)
Still in the search index in the Azure portal, click on the Index Definition (JSON) tab a. Copy all the JSON content b. Go to the UI search generator website and paste the JSON content into the Azure Search index JSON field
In the UI search generator website, fill in the name of the Azure Search instance in the Service Name field
Click Generate App. This will generate a HTML file
Open the generated HTML file. This is a UI that talks to your search index and uses common UI elements to enhance your search experience. Search for medina to see how the UI behaves. You can use this HTML file to integrate the search experience into your app. You can also make it a lot more appealing by tweaking it slightly. Take a look at this sample website (opens new window) to see an enhanced example
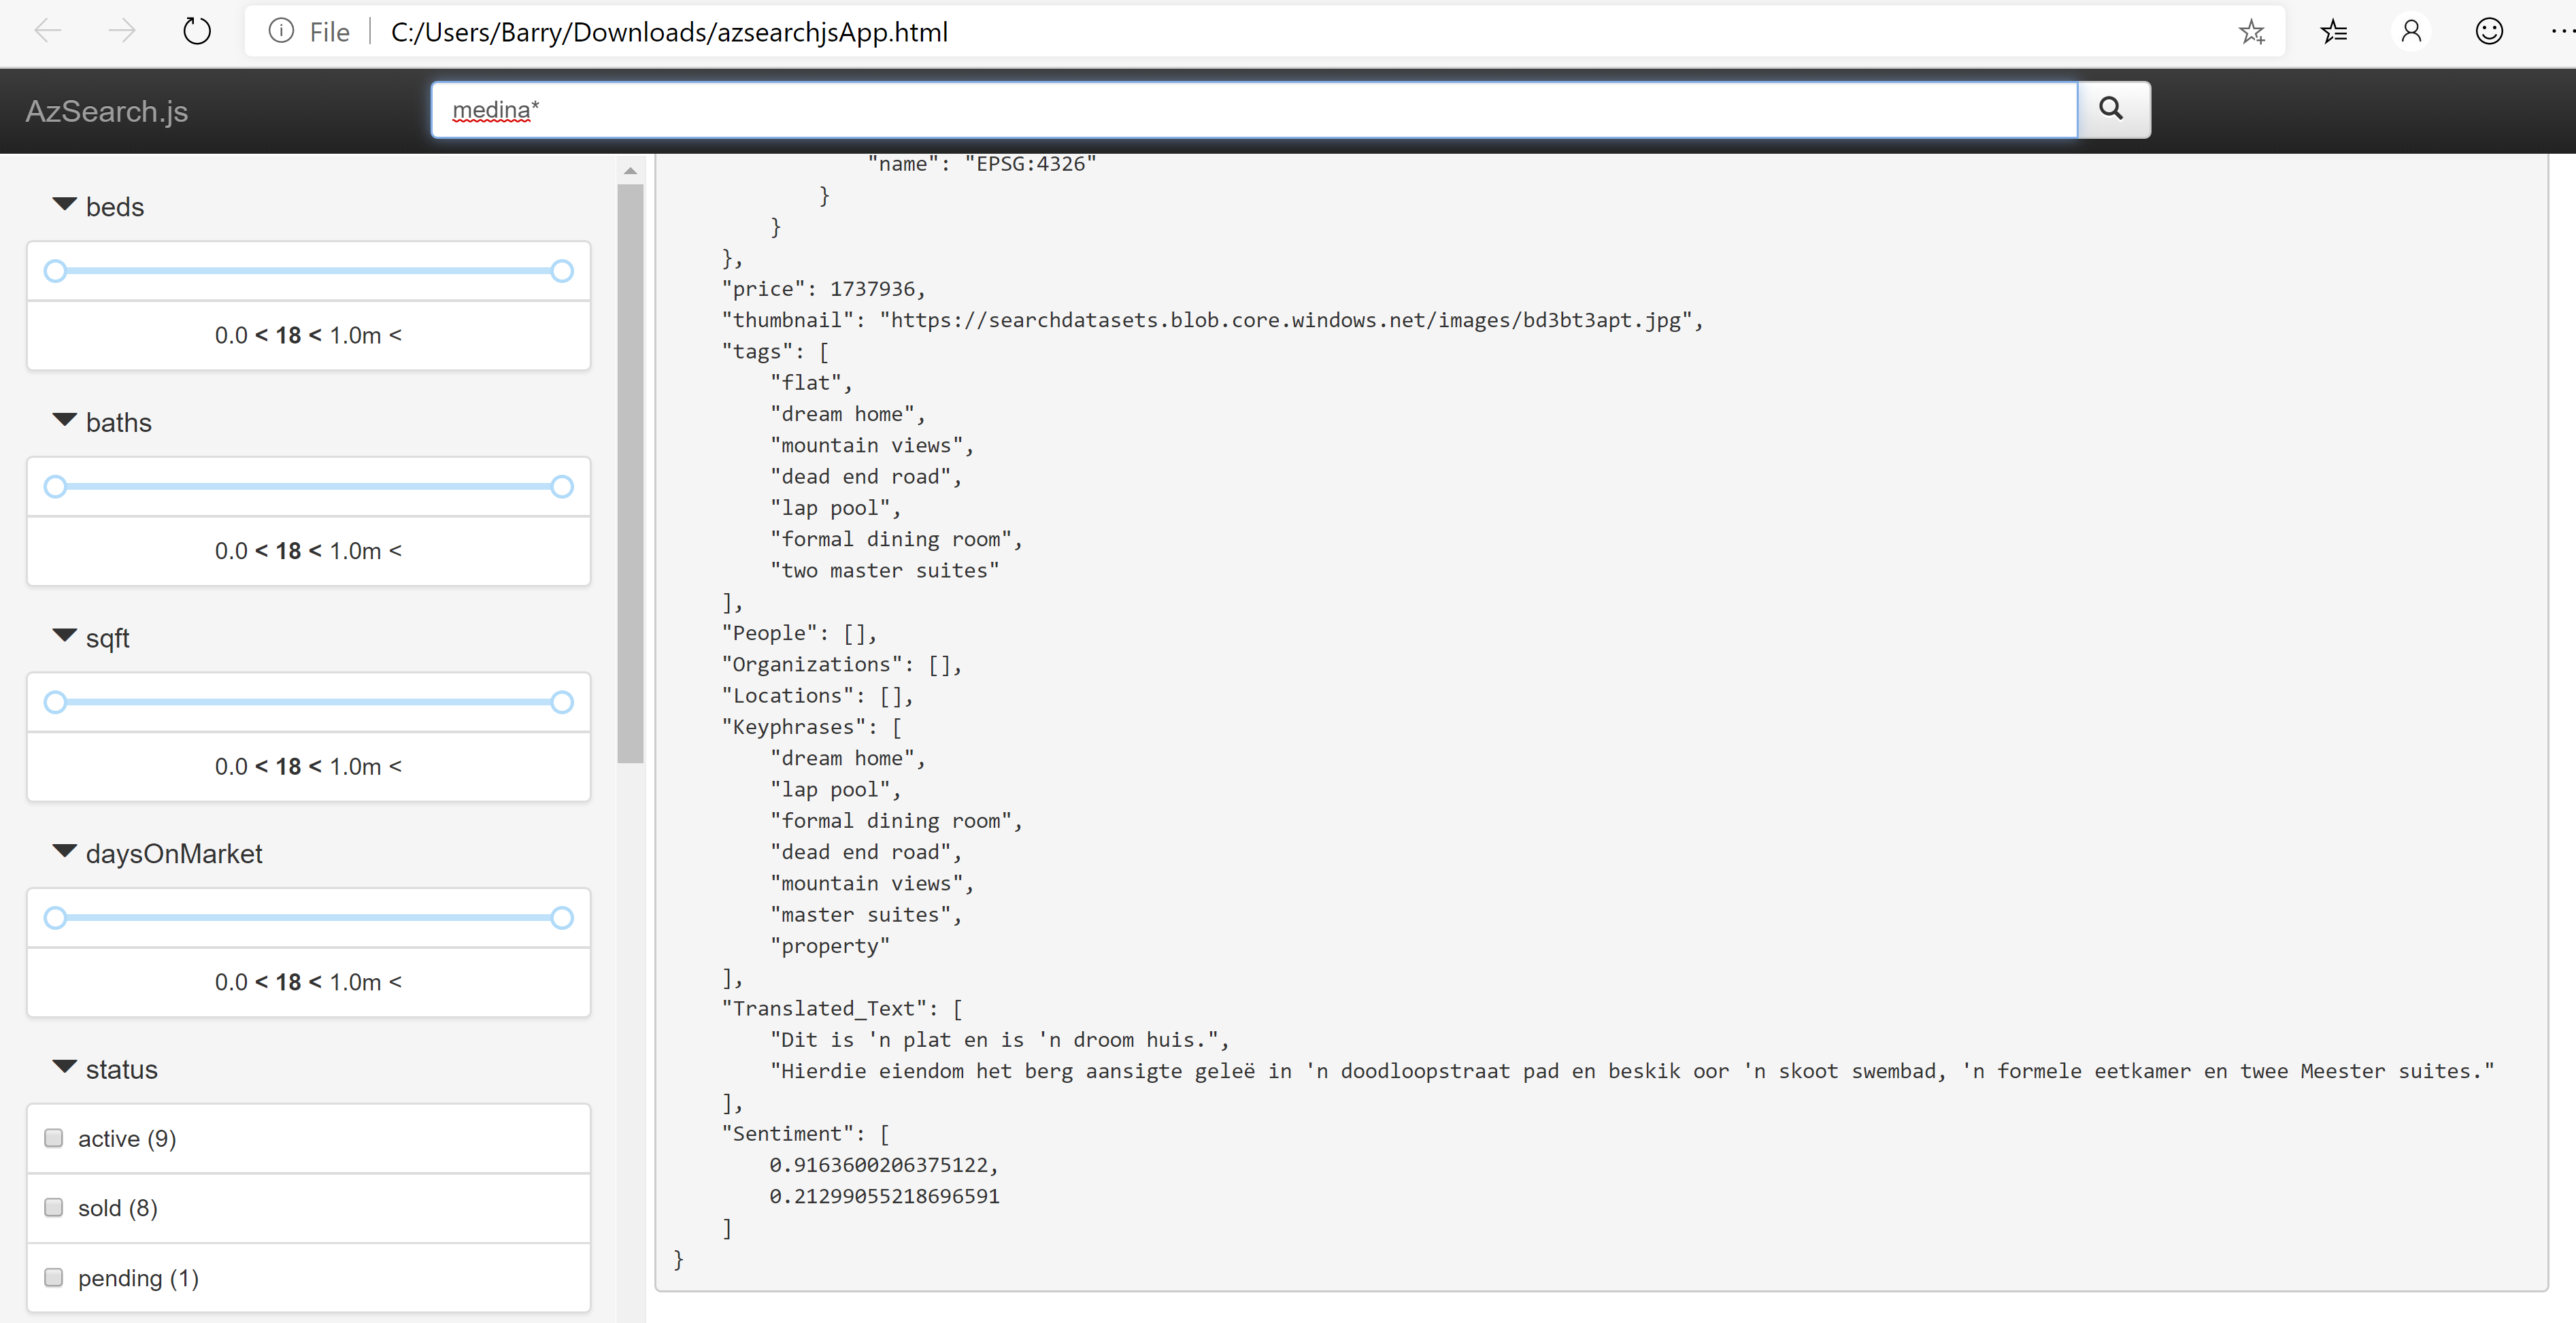
(Search results in the generated HTML file)
# Conclusion
Creating compelling search experiences is hard. Azure Search (opens new window) provides search-as-a-service and makes it easy to let AI analyze your data and enhance your results (opens new window). Go and check it out!