TIP
🔥 Checkout the Azure Developer page at azure.com/developer (opens new window).
💡 Learn more : Azure Form Recognizer overview (opens new window).
📺 Watch the video : How to extract information from receipts with Azure Form Recognizer (opens new window).
# How to extract information from receipts with Azure Form Recognizer
# Automatic document recognition
Processing invoices, receipts and documents is time consuming and prone to errors when humans do it. Automating this process can save companies a lot of time and reduce errors. However, programmatically extracting information from images and documents is complex and requires complex machine learning models. Azure can help with this.
Azure Form Recognizer (opens new window) provides document processing capabilities out of the box. Form Recognizer provides pretrained machine learning models that can recognize invoices, receipts and other documents. It also enables you to create a custom model (opens new window) for specific use cases.
In this post, we'll use Azure Form Recognizer to analyze the information from a receipt.
# Prerequisites
If you want to follow along, you'll need the following:
- An Azure subscription (If you don't have an Azure subscription, create a free account (opens new window) before you begin)
# Analyze a receipt with Azure Form Recognizer
We'll get started by creating an Azure Form Recognizer resource in the Azure portal.
- Go to the Azure portal (opens new window)
- Click the Create a resource button (the plus-sign in the top left corner)
- Search for form recognizer, select the "Form Recognizer" result and click Create
- Select a Resource Group
- Pick a Region
- Fill in a Name
- Select a Pricing Tier. The free tier is fine
- Click Review + create and then Create
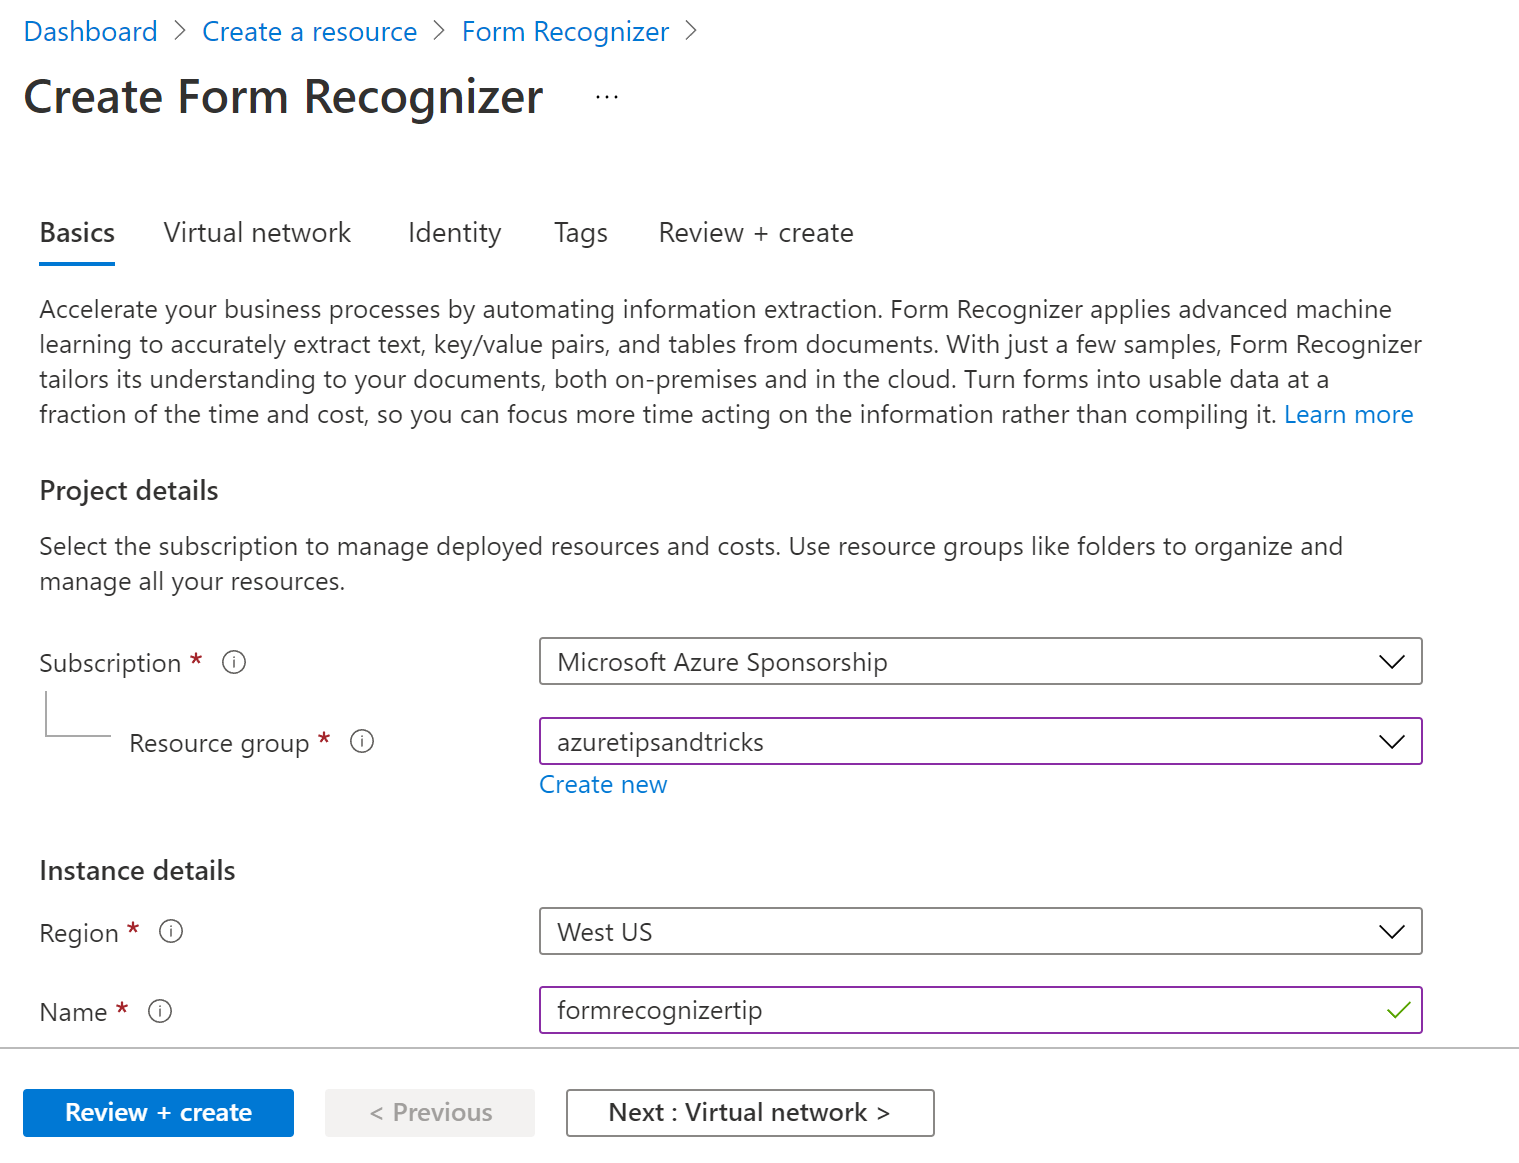
(Create an Azure Form Recognizer)
When the Form Recognizer is created, we need to copy its connection details.
- Navigate to the Form Recognizer resource in the Azure portal
- Click on the Keys and Endpoint menu
- Copy the Key and Endpoint. We'll need those later
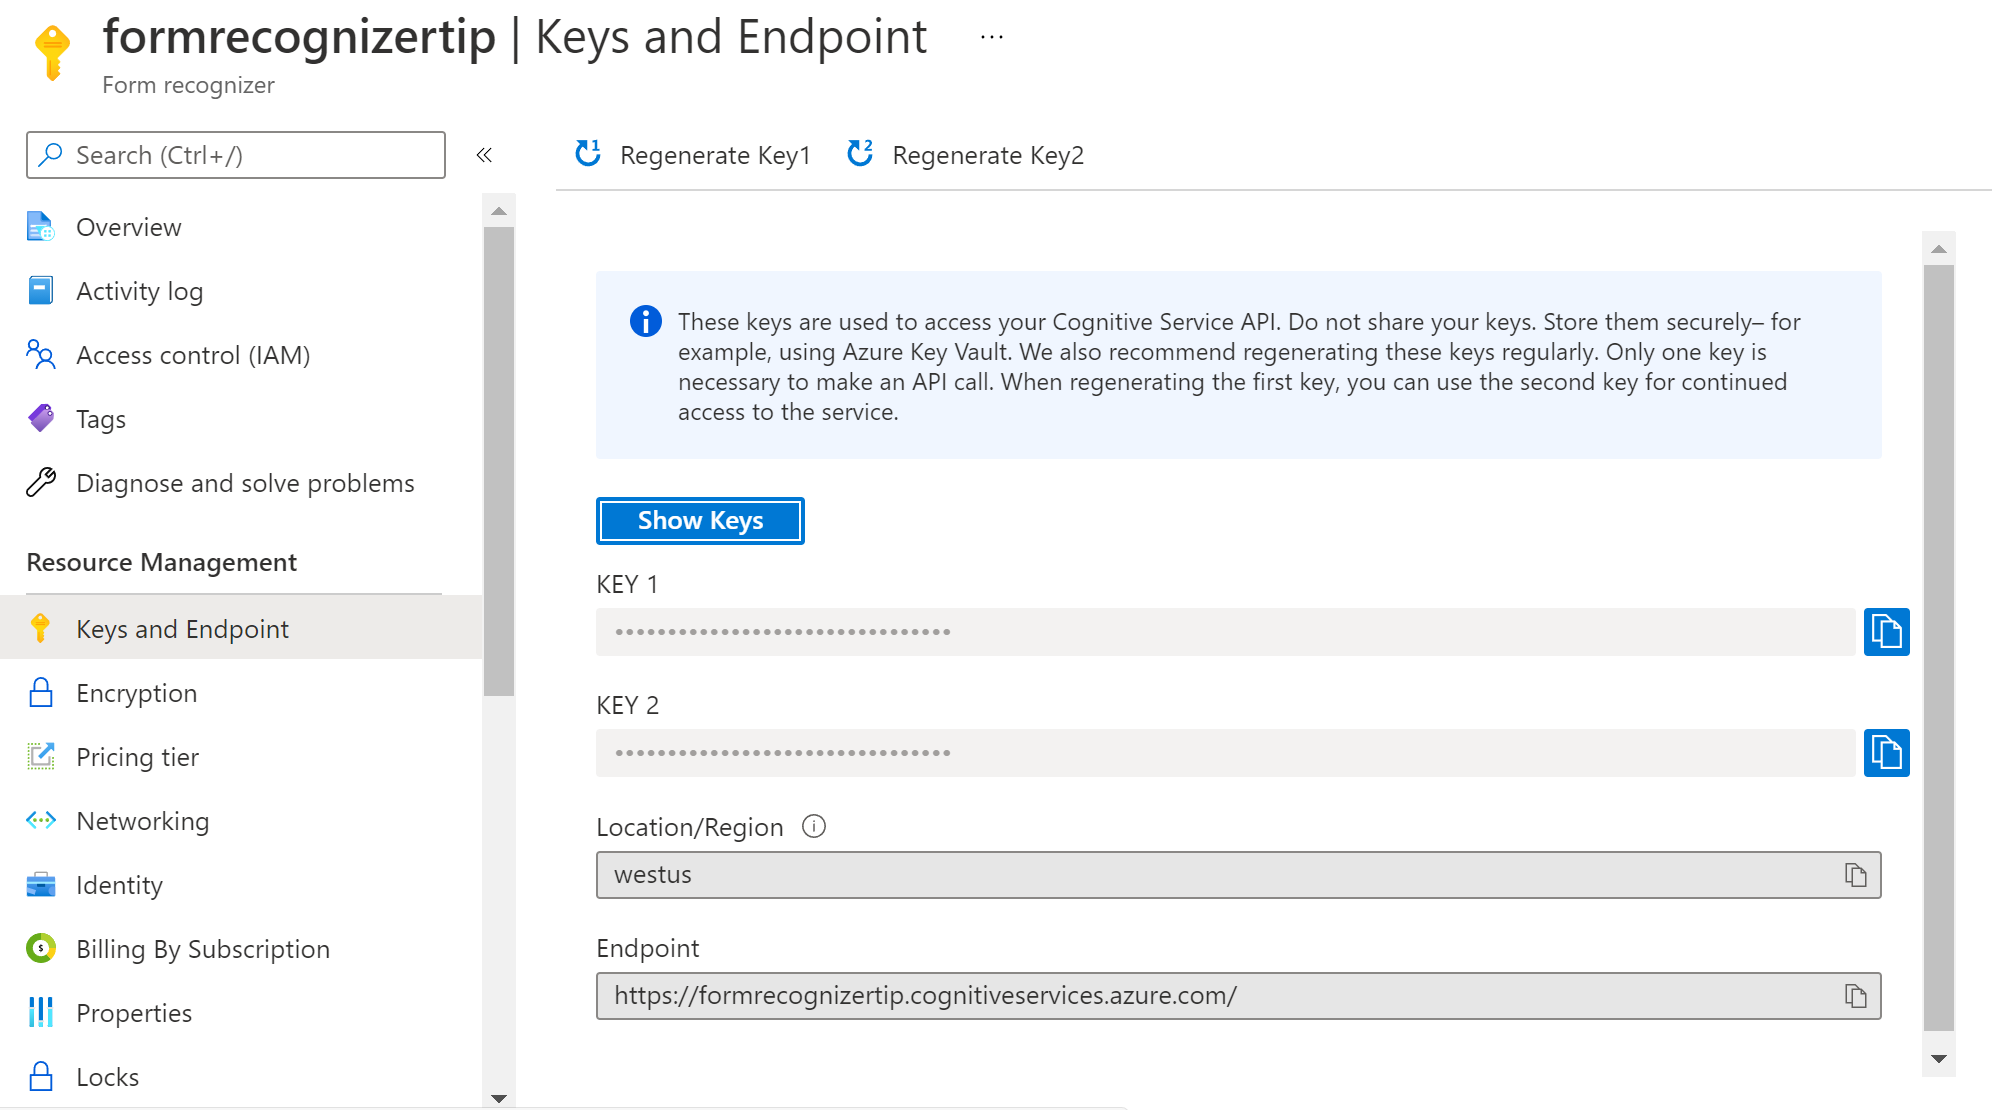
(Form Recognizer Keys and Endpoint in the Azure portal)
Let's use the Form Recognizer. We do that with the Form Recognizer Sample Tool (opens new window). This is a website that helps us test the Form Recognizer without building an application.
- Go to the Form Recognizer Sample Tool (opens new window)
- Form Recognizer can use a prebuilt machine learning model. And you can also train it yourself with a completely custom model, or by using the Layout service. We'll use the option "use layout to get text, tables and selection marks"
- This opens a configuration blade
- For Source, select URL and fill in this URL that points to an image of a sample receipt (opens new window).
- Click the Fetch button. The receipt image should now appear
- Fill in the Form Recognizer service endpoint
- Paste in the API Key
- For Form Type, select Receipt
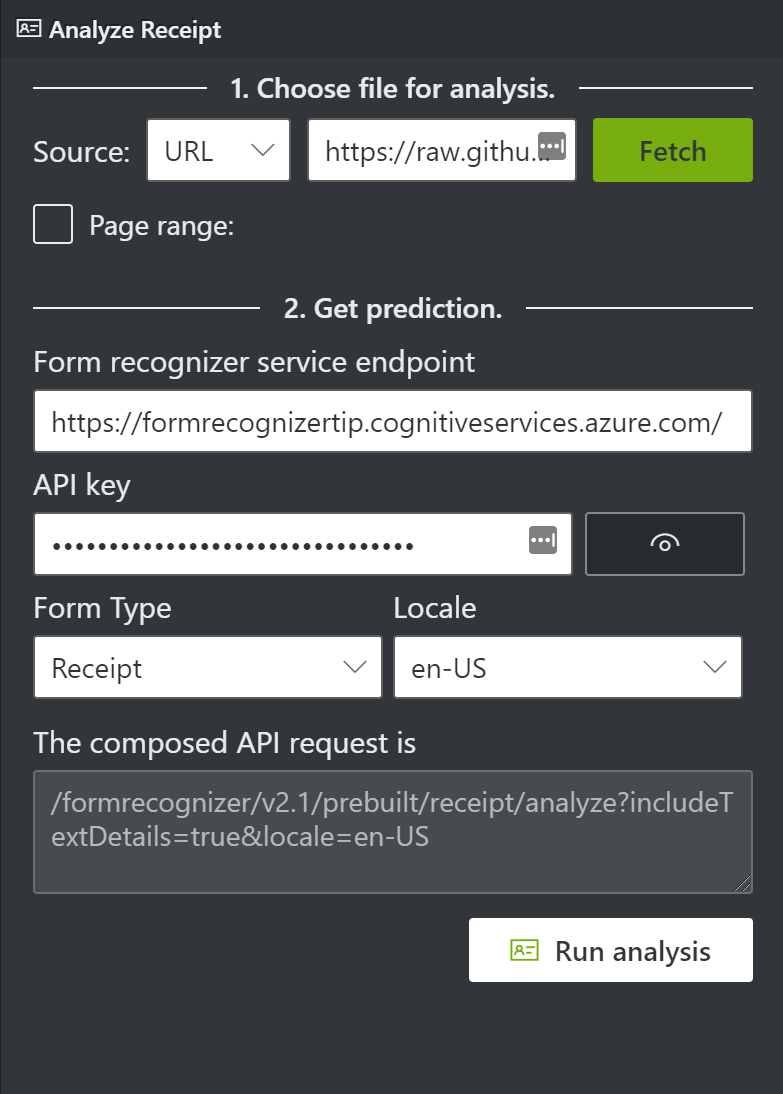
(Configure the sample tool)
- Click Run analysis
The receipt image is now analyzed by the Form Recognizer and will now look like this:
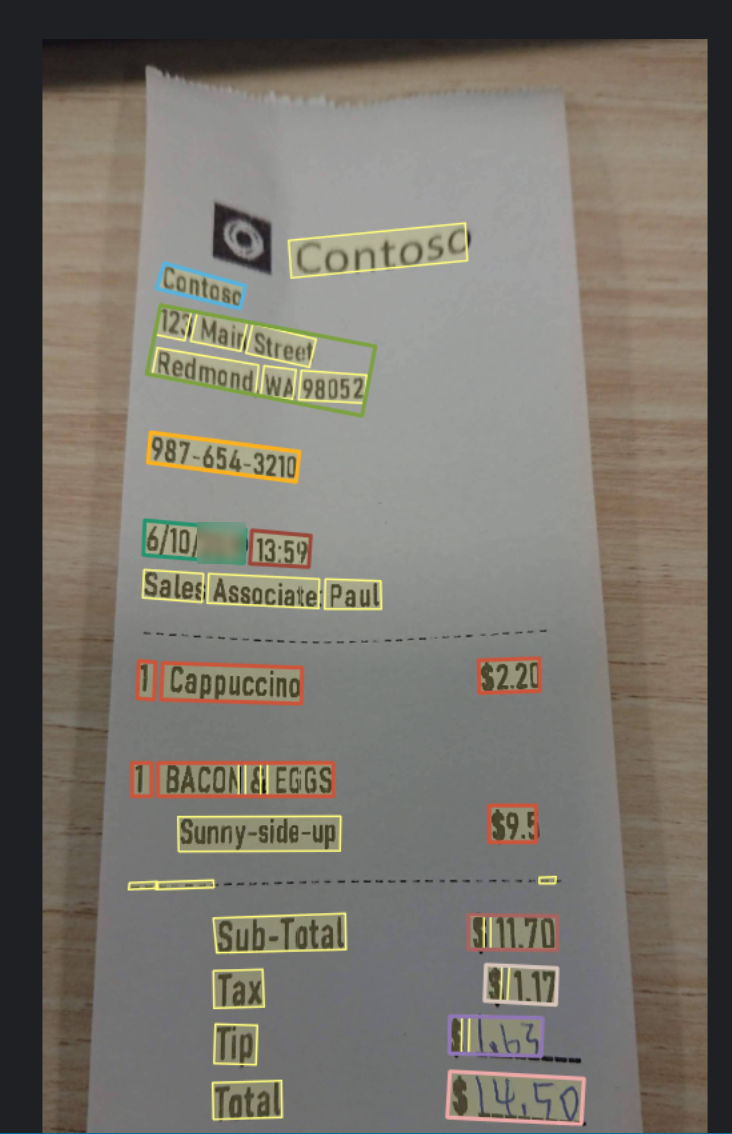
(Sample receipt analyzed by Form Recognizer)
The detailed results are now available. This includes details like the MerchantName, item details like Cappuccino, their quantity, price, and more. You'll also see that Form Recognizer attached a confidence percentage to the recognized items. This indicates how sure Form Recognizer is that it discovered the right key/value pair. When you use Form Recognizer for an application, you'll receive these details in JSON format.
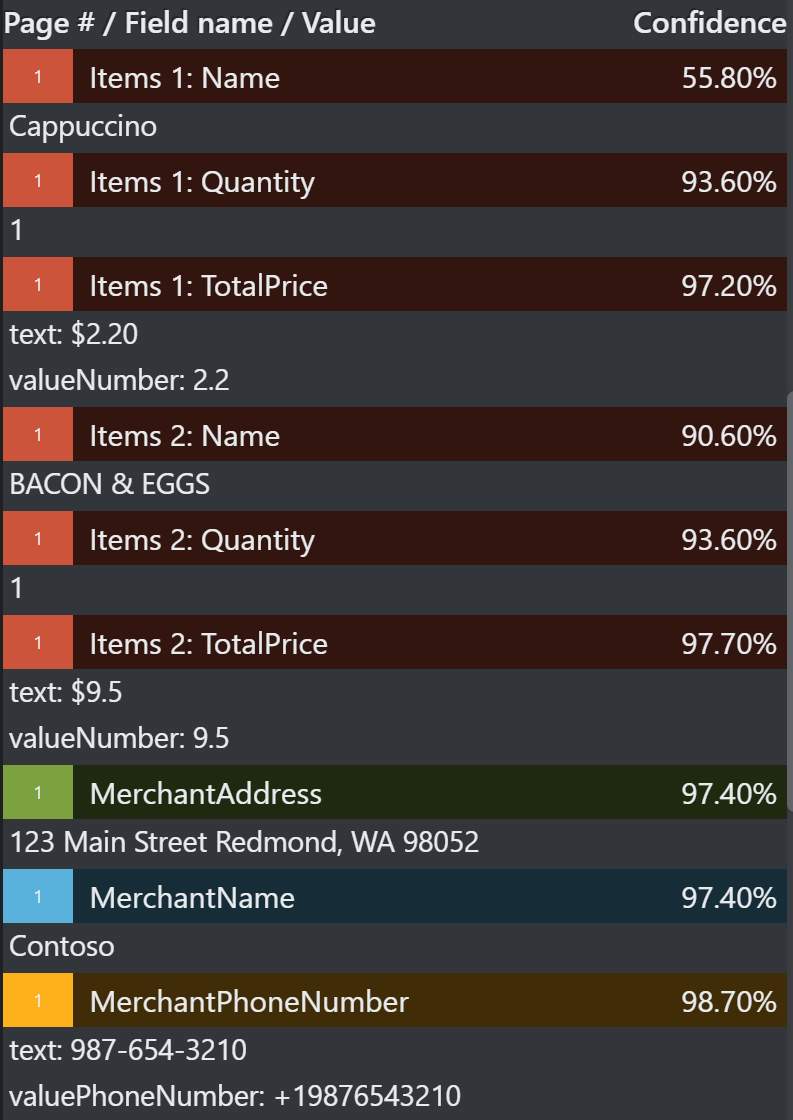
(Sample receipt analyzed by Form Recognizer)
# Conclusion
Azure Form Recognizer removes the complexity of automatically analyzing and recognizing documents, receipts and invoices. You can use it as a REST API, and with SDKs for several languages (opens new window). Go and check it out!
