
TIP
💡 Learn more : Azure Cognitive Services (opens new window).
💡 Checkout Azure AI resources for developers (opens new window).
# Using OCR to extract text from images from the Azure Portal
I recently needed the ability to extract text from an image. I was very cautious as several free alternatives that exist on the web said they may keep the image (and or text). So I did what any developer would do and just rolled my own. But instead of creating an application, I took it upon myself to use the power of the Azure Portal to accomplish this.
1.) Open the Azure Portal and select Cloud Shell from the top menu. Now change the scripting language from BASH to PowerShell.
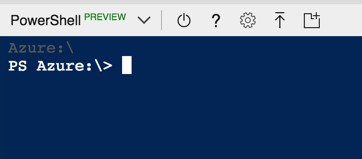
2.) We now need to install the PowerShell Cognitive Services module. You can do so by typing Install-Module PSCognitiveservice -Verbose -Force. Sample output is below:
PS Azure:\> Install-Module PSCognitiveservice -Verbose -Force
VERBOSE: Using the provider 'PowerShellGet' for searching packages.
VERBOSE: The -Repository parameter was not specified.  PowerShellGet will use all of the registered repositories.
VERBOSE: Getting the provider object for the PackageManagement Provider 'NuGet'.
VERBOSE: The specified Location is 'https://www.powershellgallery.com/api/v2/' and PackageManagementProvider is 'NuGet'.
VERBOSE: Searching repository 'https://www.powershellgallery.com/api/v2/FindPackagesById()?id='PSCognitiveservice'' for ''.
...
VERBOSE: Module 'pscognitiveservice' was installed successfully to path 'C:\Users\ContainerAdministrator\Documents\WindowsPowerShell\Modules\pscognitiveservice\0.3.5'.
Azure:\
PS Azure:\>
2
3
4
5
6
7
8
9
10
3.) Import the module by typing Import-Module PSCognitiveservice -V Sample output is below:
PS Azure:\> Import-Module PSCognitiveservice -Verbose
VERBOSE: Loading module from path 'C:\Users\ContainerAdministrator\Documents\WindowsPowerShell\Modules\PSCognitiveservice\0.3.5\PSCognitiveservice.psd1'.
VERBOSE: Populating RepositorySourceLocation property for module PSCognitiveservice.
VERBOSE: Loading module from path 'C:\Users\ContainerAdministrator\Documents\WindowsPowerShell\Modules\PSCognitiveservice\0.3.5\PSCognitiveService.psm1'.
VERBOSE: Importing function 'ConvertTo-Thumbnail'.
VERBOSE: Importing function 'Get-Face'.
VERBOSE: Importing function 'Get-ImageAnalysis'.
...
VERBOSE: Importing alias 'analyze'.
VERBOSE: Importing alias 'bing'.
...
VERBOSE: Importing alias 'ocr'.
VERBOSE: Importing alias 'sentiment'.
VERBOSE: Importing alias 'tag'.
VERBOSE: Importing alias 'thumbnail'.
Azure:\
2
3
4
5
6
7
8
9
10
11
12
13
14
15
16
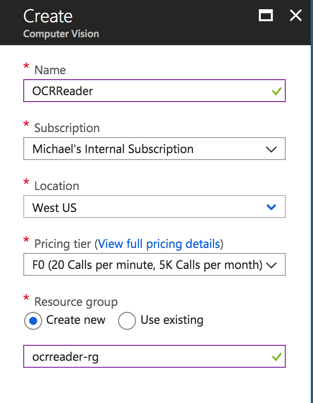
4.) Now you'll need to create a cognitive services account. You can do either in the portal (you may already have one) or by typing New-CognitiveServiceAccount AccountType ComputerVision -Verbose
Just make sure you select Free.
5.) Load the configuration into your environment variables with lcfg -fromAzure -Verbose Sample output is below:
PS Azure:\> lcfg -fromAzure -Verbose
VERBOSE: Testing Azure login
VERBOSE: Logged in.
VERBOSE: Fetching AzureRM Cognitive Service accounts
VERBOSE: 1 Service found in AzureRM [ComputerVision]
VERBOSE: Setting $env:API_SubscriptionKey_ComputerVision for Cognitive Service: ComputerVision
VERBOSE: Setting $env:API_Location_ComputerVision for Cognitive Service: ComputerVision


Name                           Value
----                           -----
ServiceName                    ComputerVision
Location                       westus
SubscriptionKey                yourkey
EndPoint                       https://westus.api.cognitive.microsoft.com/vision/v1.0
2
3
4
5
6
7
8
9
10
11
12
13
14
15
6.) Type the following line and just replace the url
ocr -URL https://s3-us-west-2.amazonaws.com/i.cdpn.io/10994.zekgx.4df25d8a-eb50-4007-a0df-6ae0aaf87974.png -Verbose | ForEach-Object {$_.regions.lines} | ForEach-Object { $_.words.text -join ' '}
And you now have your text!