TIP
🦄 Follow me on Twitter (opens new window) for daily software updates and a chance to get FREE Azure sticker set shipped anywhere!
📺 Watch the video : How to create custom bindings for Azure Functions (opens new window).
💡 Learn more : Creating custom bindings for Azure Functions (opens new window).
# Creating custom bindings for Azure Functions
# Azure Functions Bindings
Azure Functions (opens new window) are great. You can run them serverless and they provide a robust and quick way to run whatever code you want, without worrying about infrastructure or plumbing code. One of the most powerful features of Azure Functions are bindings. Bindings in Azure Functions (opens new window) allow you to easily get data from external services (Blob Storage (opens new window), Service Bus Queues (opens new window), Cosmos DB (opens new window) and so on) and output data to services, without you needing to create the plumbing code to connect to these services. This makes working with Azure Functions so productive.
There are a lot of Azure Functions bindings that you can use out-of-the-box (opens new window). And you can also create custom bindings for your own, specific, scenario.
In this post, we'll create a custom binding that reads text from files.
# Prerequisites
If you want to follow along, you'll need the following:
- An Azure subscription (If you don't have an Azure subscription, create a free account (opens new window) before you begin)
- The latest version of Visual Studio or Visual Studio Code (opens new window). The example is done in Visual Studio, but you can also use Visual Studio Code to follow along
# Creating a custom binding for Azure Functions
Let's create a custom binding. We'll do everything on our local machine.
- Open Visual Studio
- Create a new project by clicking File > New Project
- Select the Azure Functions project template and create a new Azure Function
- Once the Azure Function project is created, add a new project by right-clicking the solution file and clicking Add > New Project
- Select the Class Library (.NET Standard) project template and create a new class library
It's time to build the custom binding. We'll create a binding that can read the contents of files in the file system.
- In the class library, add a new class and call it MyFileReaderBindingAttribute. Paste in the following code:
using Microsoft.Azure.WebJobs.Description;
using System;

namespace CustomBinding
{
    [Binding]
    [AttributeUsage(AttributeTargets.Parameter | AttributeTargets.ReturnValue)]
    public class MyFileReaderBindingAttribute : Attribute
    {
        [AutoResolve]
        public string Location { get; set; }
    }
}
2
3
4
5
6
7
8
9
10
11
12
13
This creates the MyFileReaderBindingAttribute that we'll use to provide parameters to the binding. In this case, we have one parameter called Location. It has the AutoResolve attribute on it, which tells it to automatically try to get a value from the configuration system. So in our case, the AutoResolve attribute will try and get the Location value from the local.settings.json file of the Azure Function that uses the binding.
- Create another new class and call it MyFileReaderModel. Paste the following code into the class:
namespace CustomBinding
{
    public class MyFileReaderModel
    {
        public string FullFilePath { get; set; }
        public string Content { get; set; }
    }
}
2
3
4
5
6
7
8
We use this simple model to store the file path and the file content.
- Now we will create the binding. Add a class and call it MyFileReaderBinding. Paste in the following code:
using System.IO;
using Microsoft.Azure.WebJobs.Description;
using Microsoft.Azure.WebJobs.Host.Config;

namespace CustomBinding
{
    [Extension("MyFileReaderBinding")]
    public class MyFileReaderBinding : IExtensionConfigProvider
    {
        public void Initialize(ExtensionConfigContext context)
        {
            var rule = context.AddBindingRule<MyFileReaderBindingAttribute>();
            rule.BindToInput<MyFileReaderModel>(BuildItemFromAttribute);
        }

        private MyFileReaderModel BuildItemFromAttribute(MyFileReaderBindingAttribute arg)
        {
            string content = string.Empty;
            if (File.Exists(arg.Location))
            {
                content = File.ReadAllText(arg.Location);
            }

            return new MyFileReaderModel
            {
                FullFilePath = arg.Location,
                Content = content
            };
        }
    }
}
2
3
4
5
6
7
8
9
10
11
12
13
14
15
16
17
18
19
20
21
22
23
24
25
26
27
28
29
30
31
This creates the binding as an extension by using the IExtensionConfigProvider interface. In the Initialize method, it adds a rule that binds the MyFileReaderModel to the input of the binding. It also performs the actual work in the BuildItemFromAttribute method. In this case, it tries to access the file in the location that is in the args and reads the text from that file and returns it.
- The binding is created. Now, we need to initialize it. Before we do that, let's create a new class and call it MyFileReaderBindingExtension and paste the following code in:
using Microsoft.Azure.WebJobs;
using System;

namespace CustomBinding
{
    public static class MyFileReaderBindingExtension
    {
        public static IWebJobsBuilder AddMyFileReaderBinding(this IWebJobsBuilder builder)
        {
            if (builder == null)
            {
                throw new ArgumentNullException(nameof(builder));
            }

            builder.AddExtension<MyFileReaderBinding>();
            return builder;
        }
    }
}
2
3
4
5
6
7
8
9
10
11
12
13
14
15
16
17
18
19
This creates an extension method that we can use in the next step to initialize the binding.
- Create a class and call it MyFileReaderBindingStartup. Paste in the following code:
using CustomBinding;
using Microsoft.Azure.WebJobs;
using Microsoft.Azure.WebJobs.Hosting;


[assembly: WebJobsStartup(typeof(MyFileReaderBindingStartup))]
namespace CustomBinding
{
    public class MyFileReaderBindingStartup : IWebJobsStartup
    {
        public void Configure(IWebJobsBuilder builder)
        {
            builder.AddMyFileReaderBinding();
        }
    }
}
2
3
4
5
6
7
8
9
10
11
12
13
14
15
16
This code initializes the binding with the extension method from the previous step.
- Now go to the Azure Function project and open the file of the Azure Function. Make sure that the Function looks like this:
        [FunctionName("MyFunction")]
        public static IActionResult Run(
            [HttpTrigger(AuthorizationLevel.Anonymous, "get", "post", Route = "custombinding/{name}")]
            HttpRequest req,
            ILogger log,
            string name,
            [MyFileReaderBinding(Location = "%filepath%\\{name}")]
            MyFileReaderModel fileReaderModel)
        {
            return (ActionResult)new OkObjectResult(fileReaderModel.Content);
        }
2
3
4
5
6
7
8
9
10
11
This uses the MyFileReaderBinding. It passes a location and a routing parameter (name), which is defined in the Route parameter of the HttpTrigger. When it succeeds, it returns the Content object of the fileReaderModel, which should contain the text of the file that we are reading.
- Almost there. Remember the AutoResolve attribute on the Location property of the MyFileReaderBindingAttribute? We need to give it a value. Open the local.settings.json file of the Azure Function and add the following line:
"filepath": "C:\\Test\\"
This sets the filepath to C:\Test. Make sure that this folder exists and that it has some text files in it that we can read.
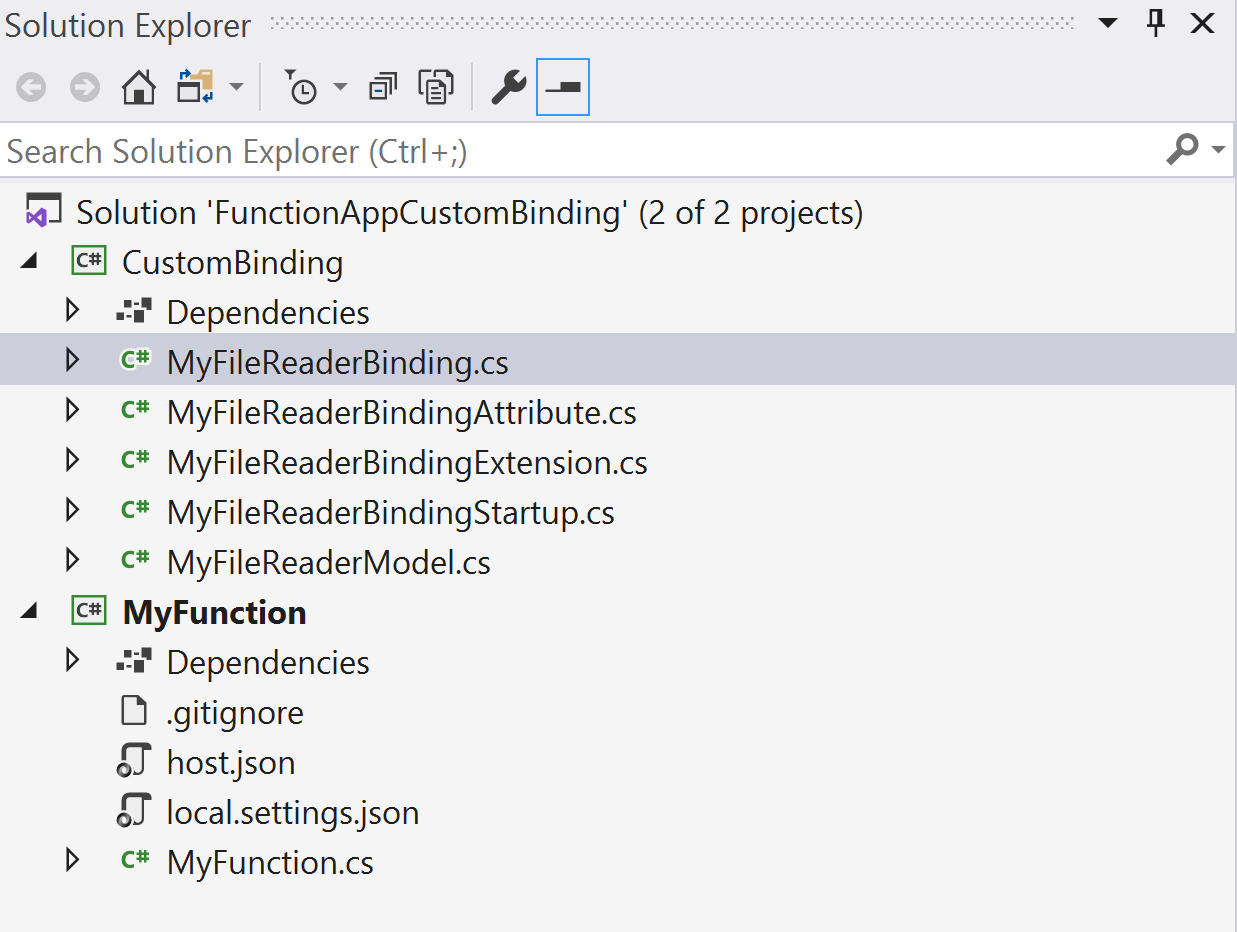
That's it. The solution should now look like this:

(The solution with the custom binding)
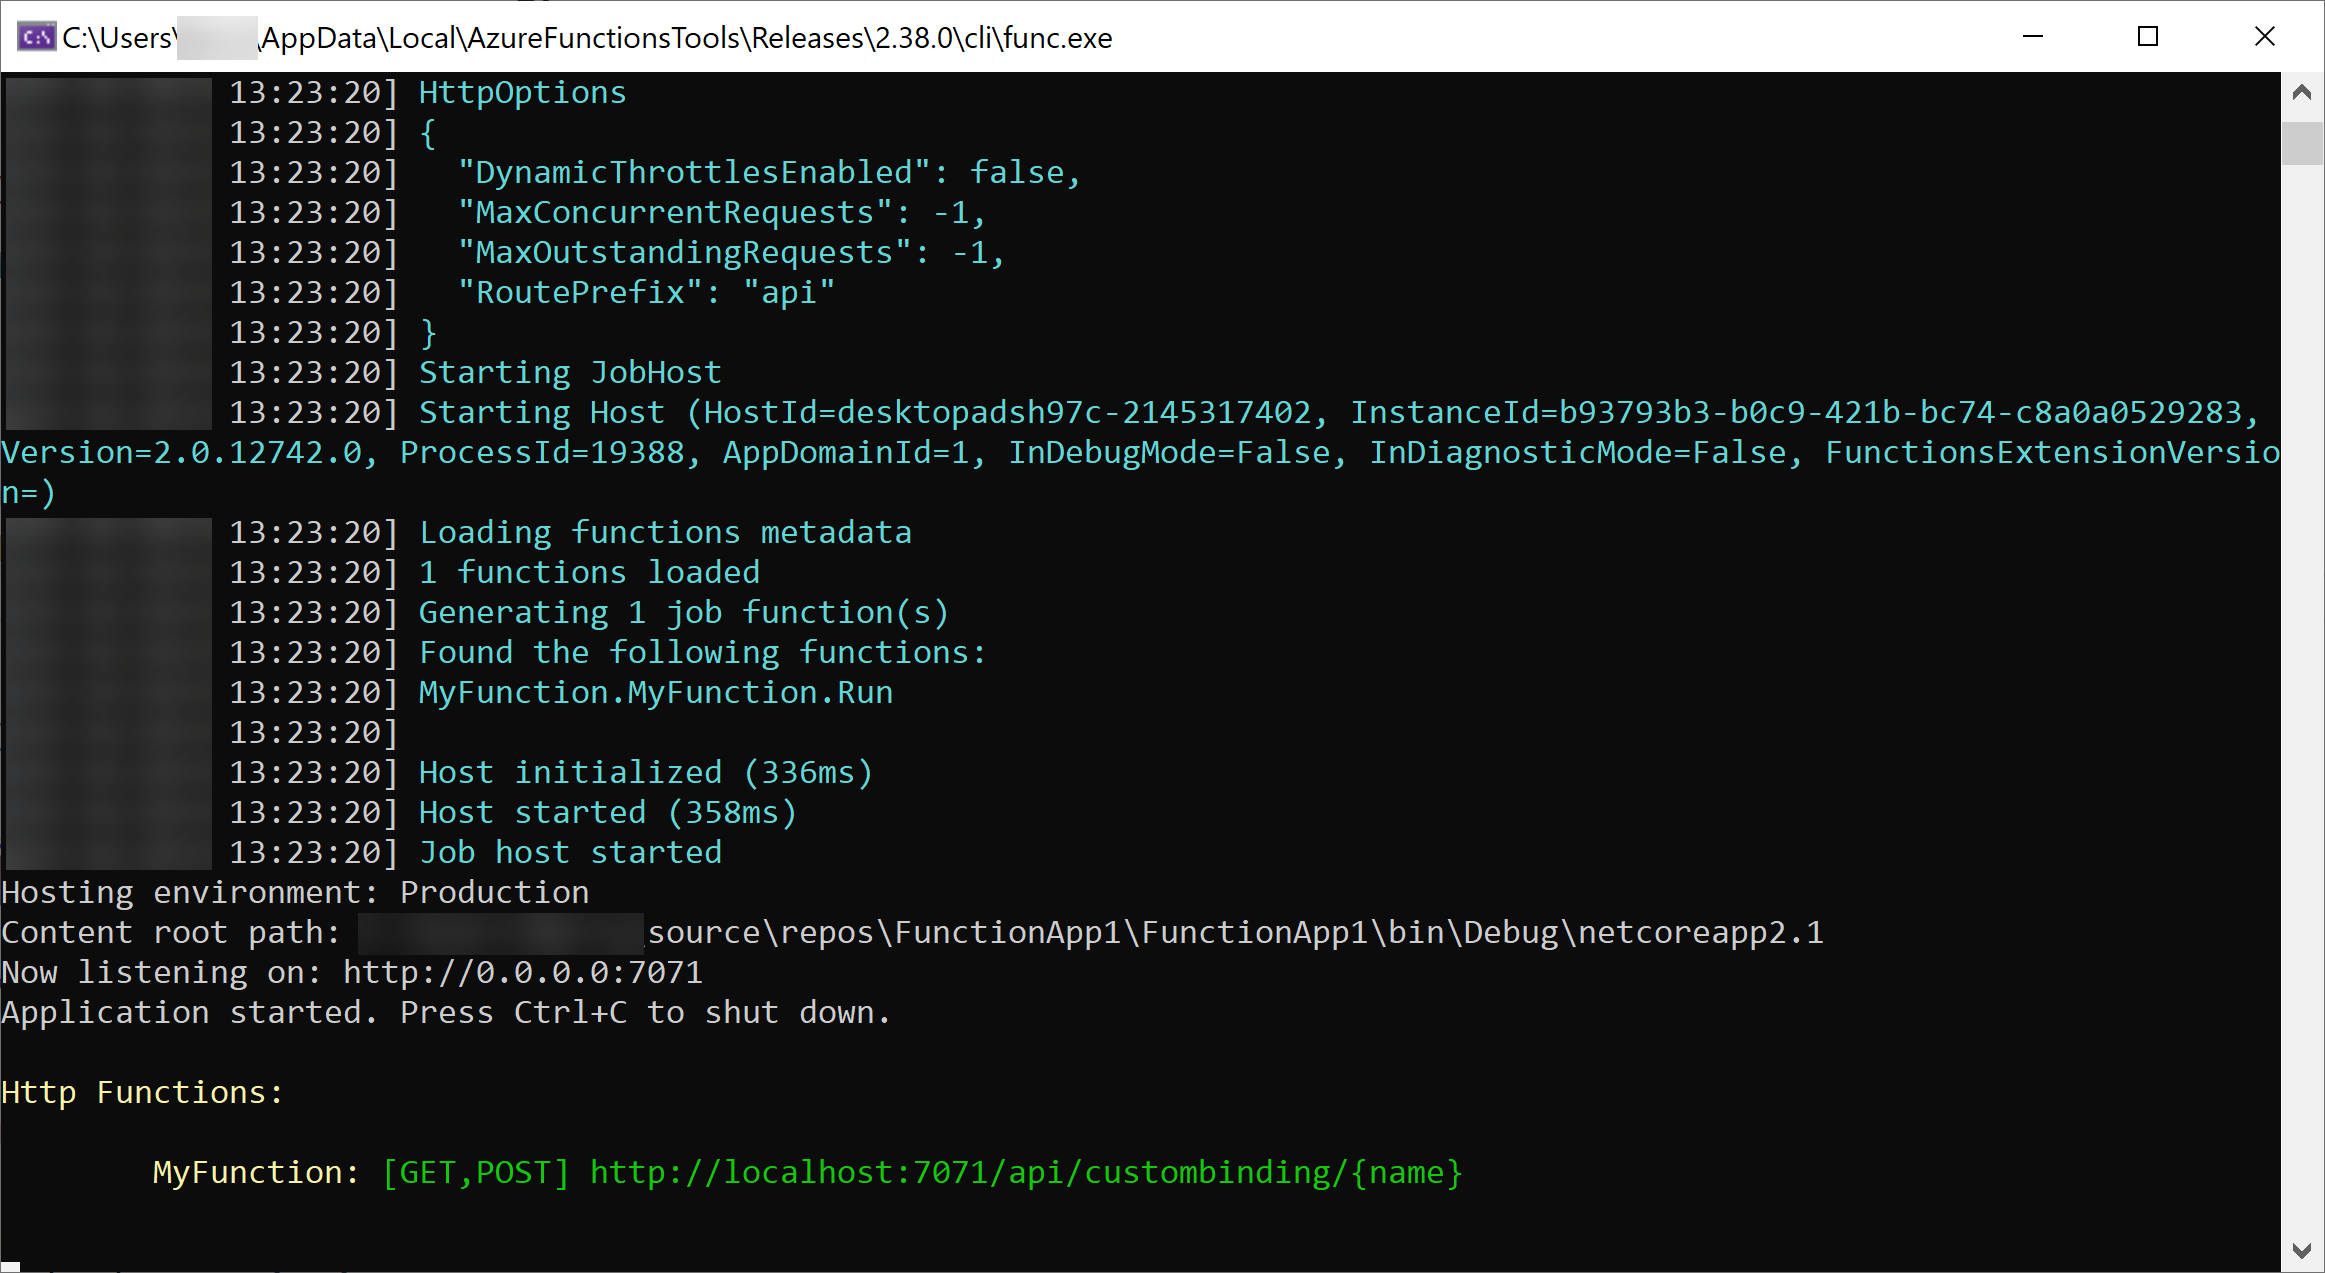
Let's try it out to see if it works. Press F5 to start the Function and debug it. This will open a console and show the output of the Function.

(Console showing the Azure Function running)
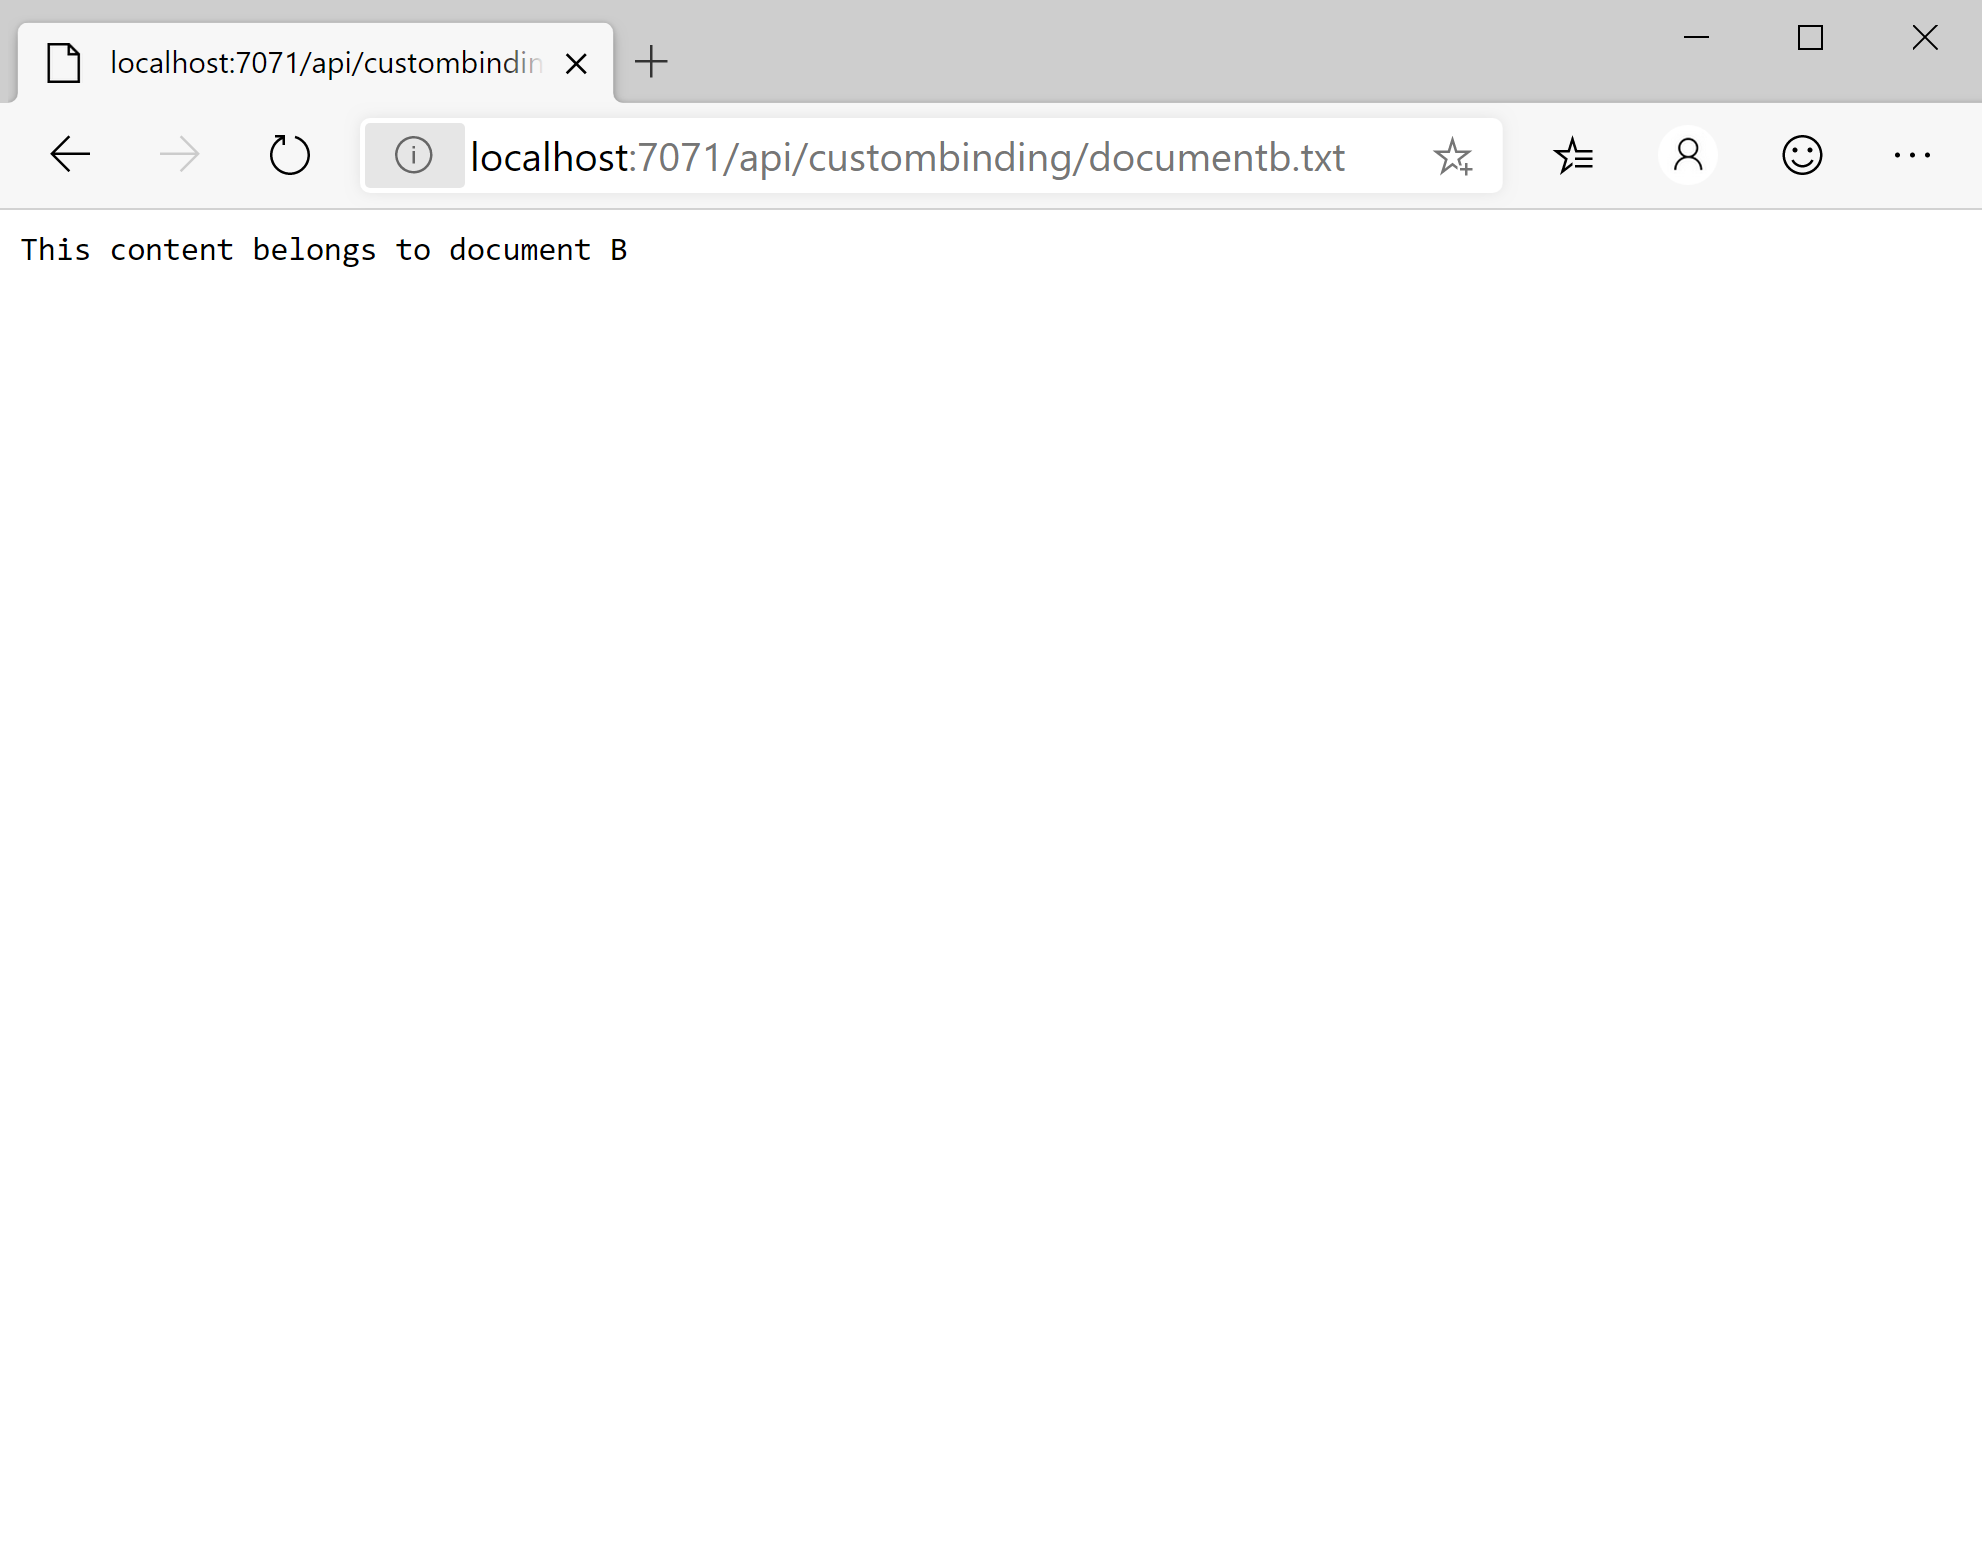
Now open a browser and navigate to the Function URL. Add the name of the document that you want to read to the end of the URL, like http://localhost:7071/api/custombinding/documenta.txt. This will return the content of the document to the browser.

(Call the Azure Function in a browser)
# Conclusion
Azure Functions bindings (opens new window) are a very powerful feature. And you can extend that power by creating your own, custom bindings for Azure Functions. This allows you to make Azure Functions work for your specific scenario. Go and check it out!
