
TIP
🔥 Help shape the future of Azure Tips and Tricks by telling what you'd like for us to write about here (opens new window).
💡 Learn more : about Azure Functions (opens new window).
📺 Watch the video : How to build serverless APIs with Azure Functions (opens new window).
# How to build serverless APIs with Azure Functions
# Build serverless APIs
Azure Functions (opens new window) are great for running small pieces of code. They come with many types of triggers and bindings (opens new window), which take care of connecting input and output data and make development easy. You can host Azure Functions in a consumption plan (opens new window), which is a serverless plan that scales automatically and that you only pay for when your Function runs.
You can easily create an API with serverless Functions. Each API call is executed by a Function that spins up and scales automatically. By using Functions for your API, you don't have to worry about scaling and you only pay for what you use.
In this post, we'll take a look at how you can create a serverless API with Azure Functions (opens new window).
# Prerequisites
If you want to follow along, you'll need the following:
- An Azure subscription (If you don't have an Azure subscription, create a free account (opens new window) before you begin)
# Build a serverless API
Let's create an Azure Function in the Azure portal and turn that into an API.
- Click the Create a resource button (the plus-sign in the top left corner)
- Search for Functions, select the "Function App" result and click Create
- This brings you to the Create Function App blade
- Select a Resource Group
- Fill in a Name for the service
- Select the Runtime stack, which in this demo will be .NET
- Choose the Region for the service
- Click Next: hosting
- Check that the Plan type is set to Consumption (Serverless)
- Click Next: Monitoring
- Select No for Enable Application Insights
- Click Review + create and Create after that to create the Function App
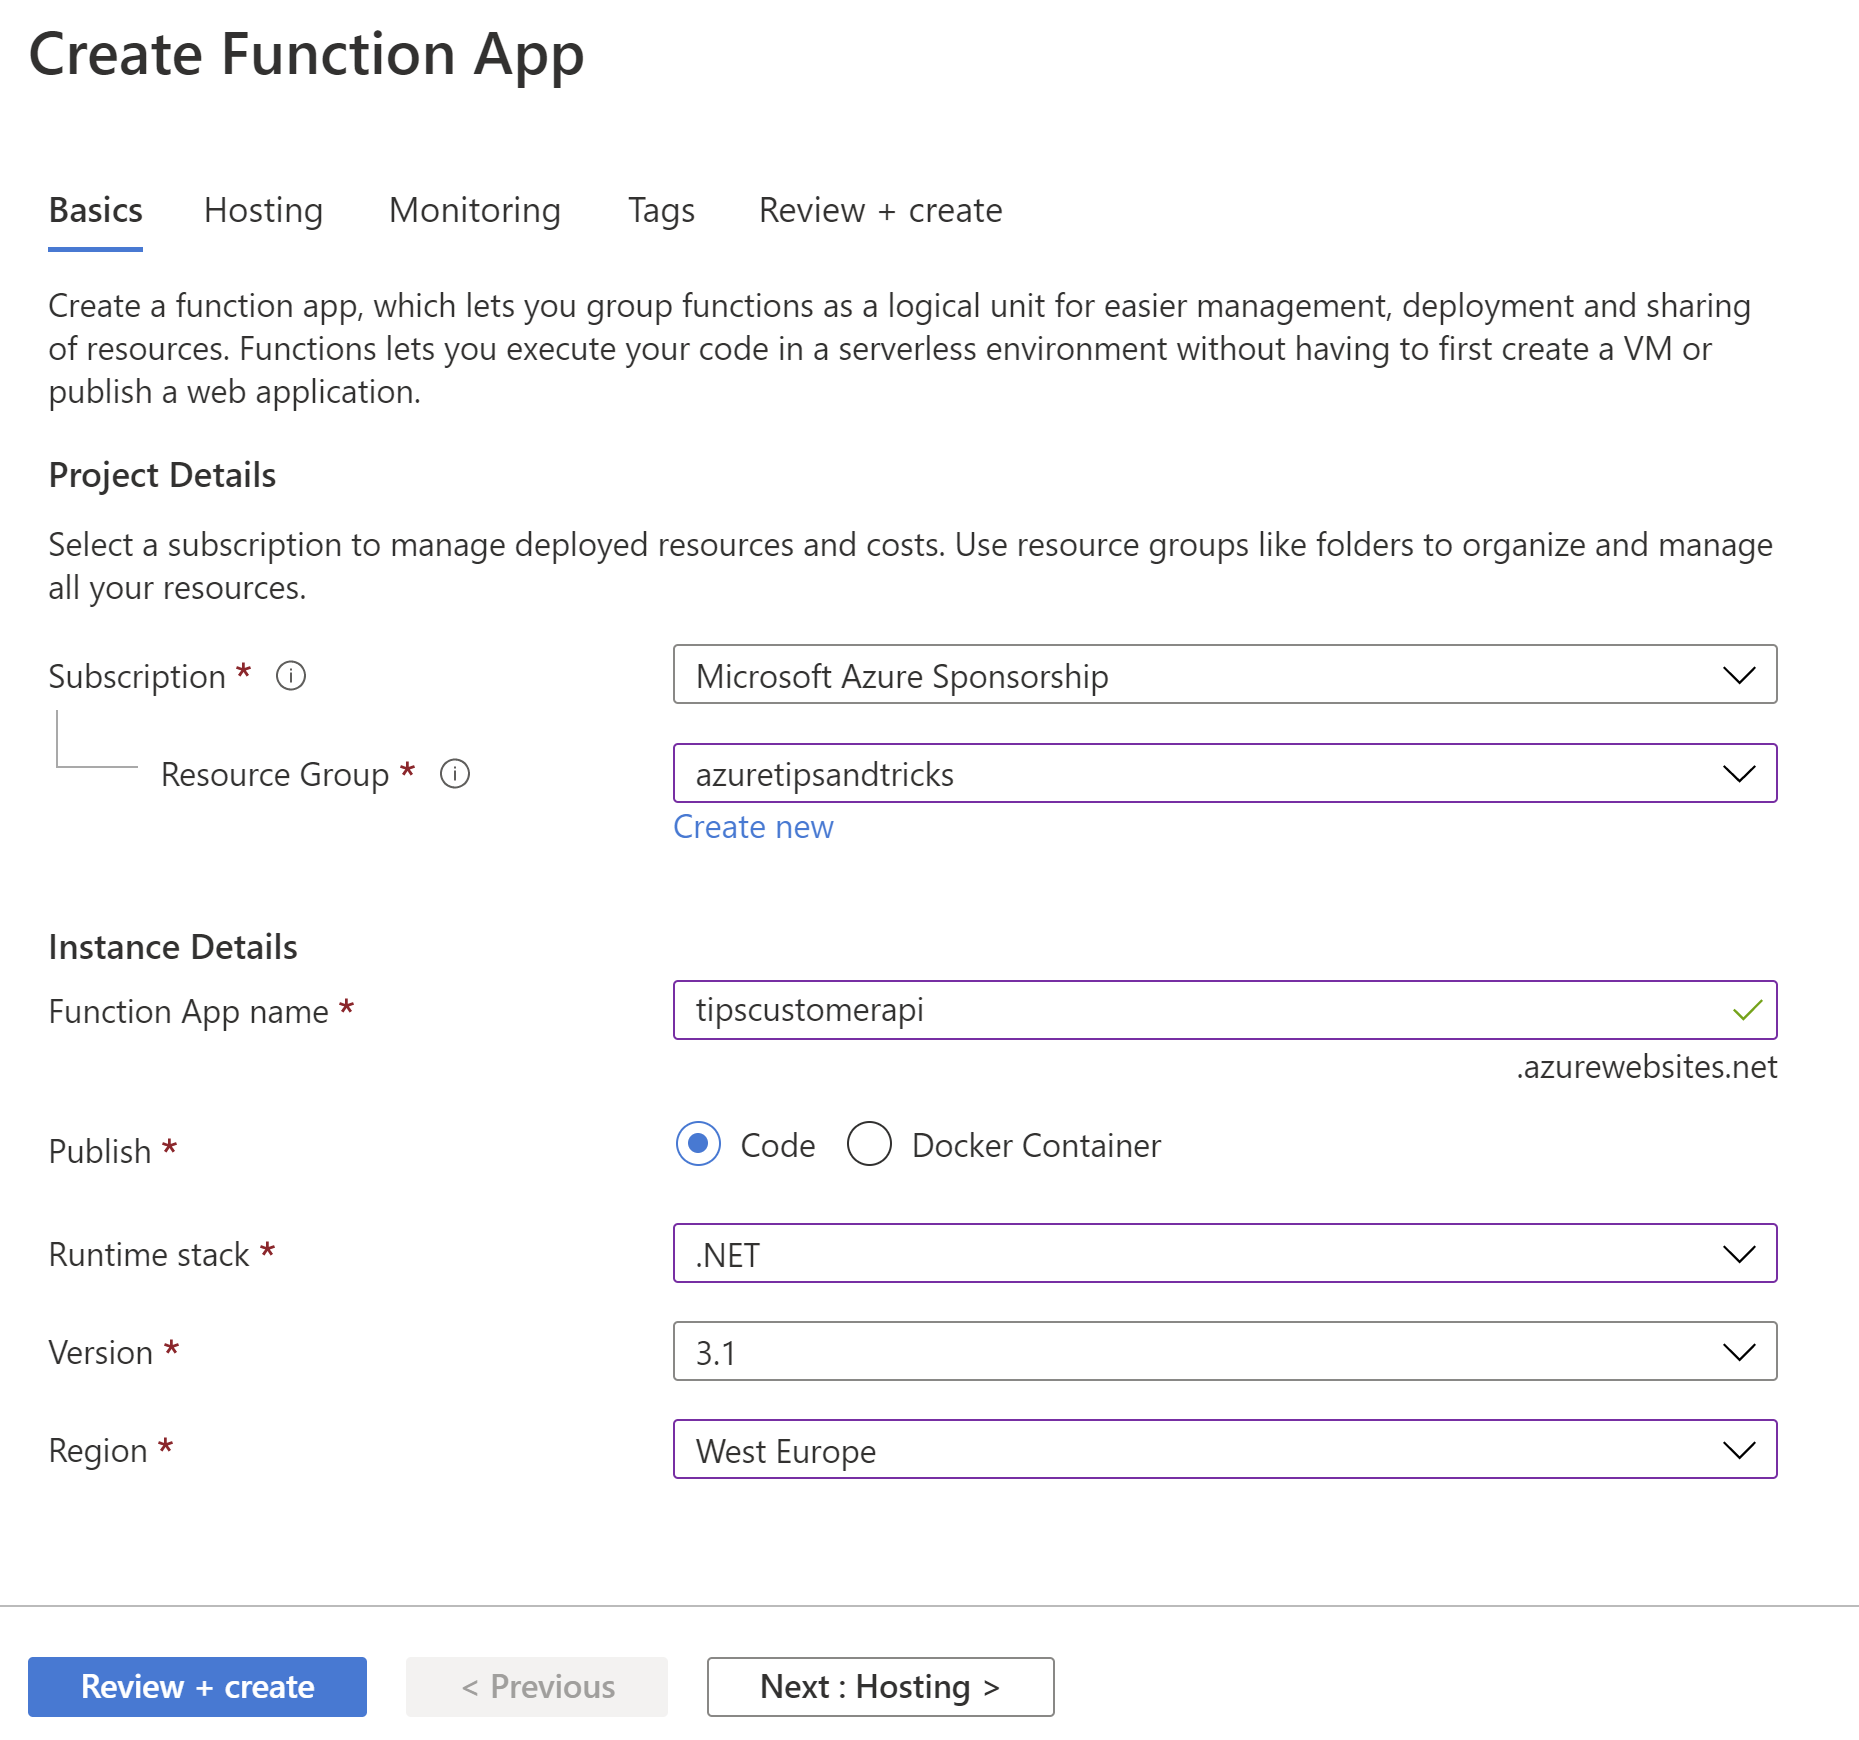
(Create an Azure Function in the Azure portal)
When the Function App is created, navigate to it in the Azure portal. Function Apps contain one or more Functions. Let's create a new Function.
- In the Function App, in the Azure portal, navigate to the Functions blade
- Click Add to start adding a Function. This opens the Add function blade
- Select Develop in portal for the Development environment setting
- Pick HTTP trigger as the Template
- Give the Function a Name
- Select Anonymous for the Authorization level
- Click Add to create the Function
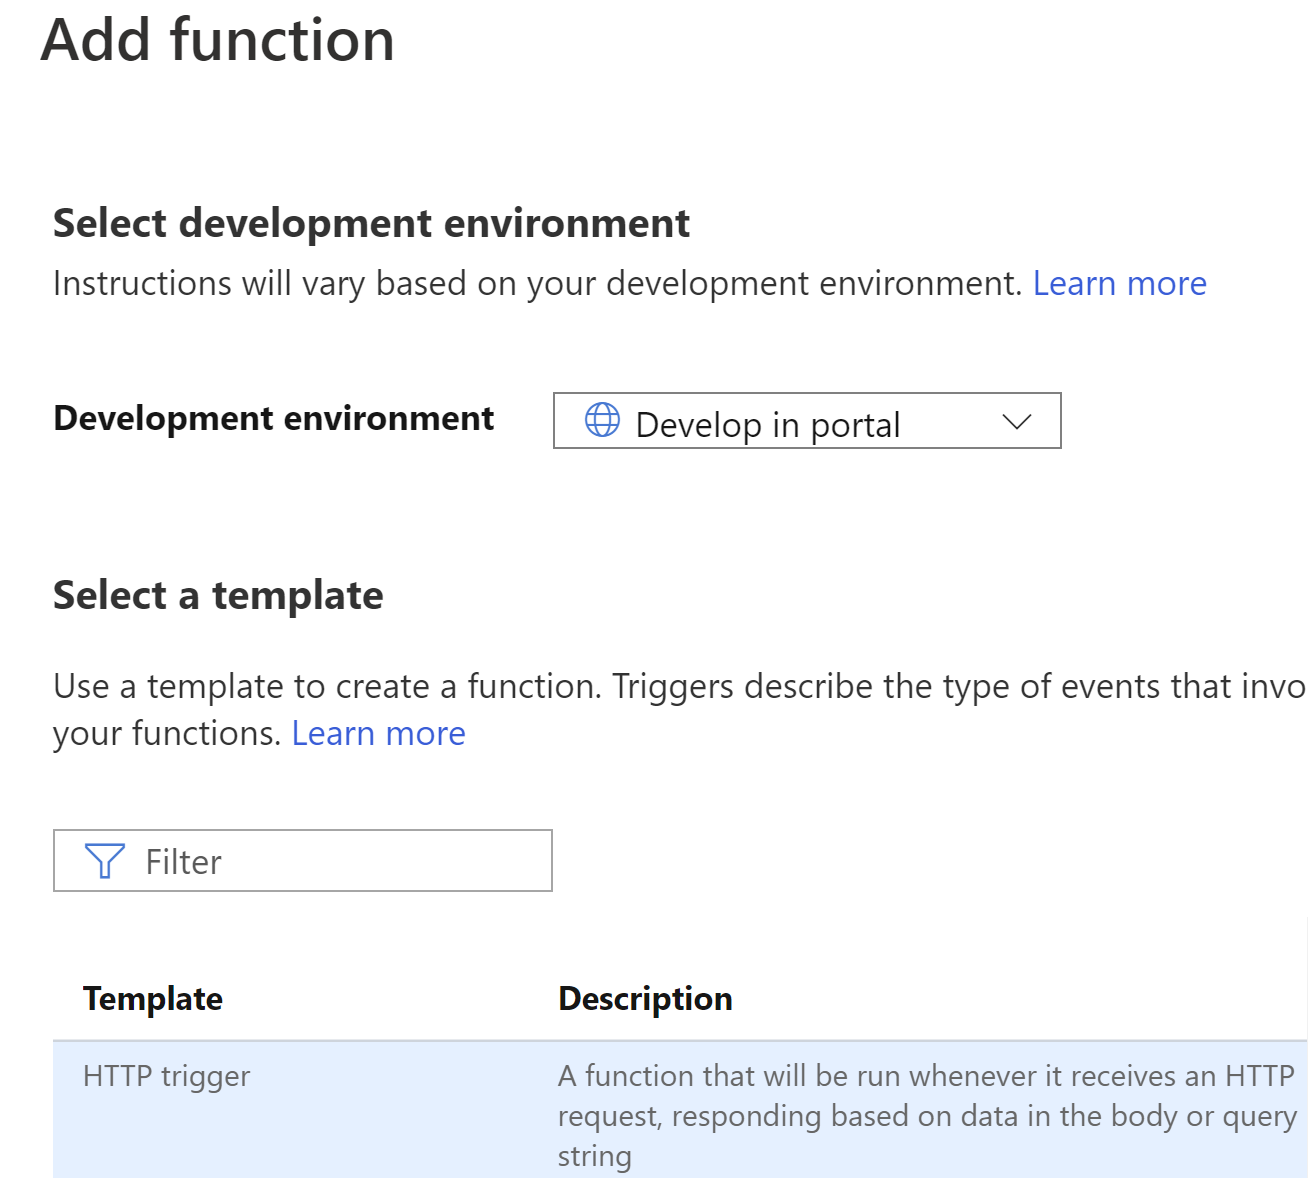
(Add a Function in the Azure portal)
When the Function is created, it will open in the portal. We'll turn it into an API and try it out.
- In the Function in the portal, click on the Integration menu. This will show the trigger, inputs and outputs for the Function
- The trigger for the Function is the HTTP trigger. Click on HTTP (req), to edit the trigger
- By default, you would trigger the Function by navigating to its endpoint and performing an HTTP operation, like a GET or POST against it. That is the behavior of most APIs. However, you might want to change the way you fire HTTP requests at the Function, to make it more of a REST API.
- Add a Route template to the Function. Type "customer/{customerName}". This will expose the HTTP trigger as functionurl/api/customer
- Click Save to save the changes
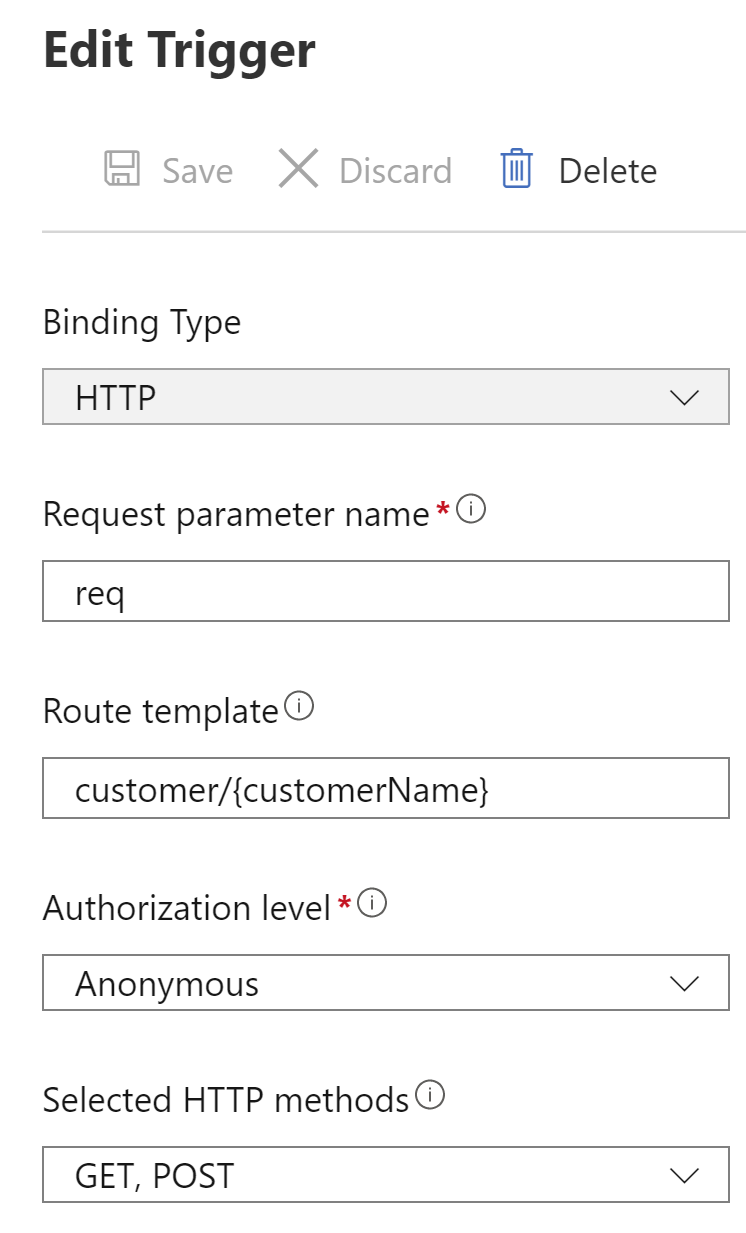
(Edit the HTTP trigger in the Azure portal)
- Next, we'll edit the code of the Function. Click on the Code + Test menu. This opens the code editor
- The Function code comes from the standard HTTP trigger template. You need to change it into the code below, which contains two changes:
- The Run method now contains a string customerName, which catches the customerName parameter of the API route
- string name now comes from the customerName parameter
#r "Newtonsoft.Json"

using System.Net;
using Microsoft.AspNetCore.Mvc;
using Microsoft.Extensions.Primitives;
using Newtonsoft.Json;

public static async Task<IActionResult> Run(HttpRequest req, string customerName, ILogger log)
{
    log.LogInformation("C# HTTP trigger function processed a request.");

    string name = customerName;

    string requestBody = await new StreamReader(req.Body).ReadToEndAsync();
    dynamic data = JsonConvert.DeserializeObject(requestBody);
    name = name ?? data?.name;

    string responseMessage = string.IsNullOrEmpty(name)
        ? "This HTTP triggered function executed successfully. Pass a name in the query string or in the request body for a personalized response."
                : $"Hello, {name}. You are a customer.";

            return new OkObjectResult(responseMessage);
}
2
3
4
5
6
7
8
9
10
11
12
13
14
15
16
17
18
19
20
21
22
23
- Click Save to save the changes and compile the code
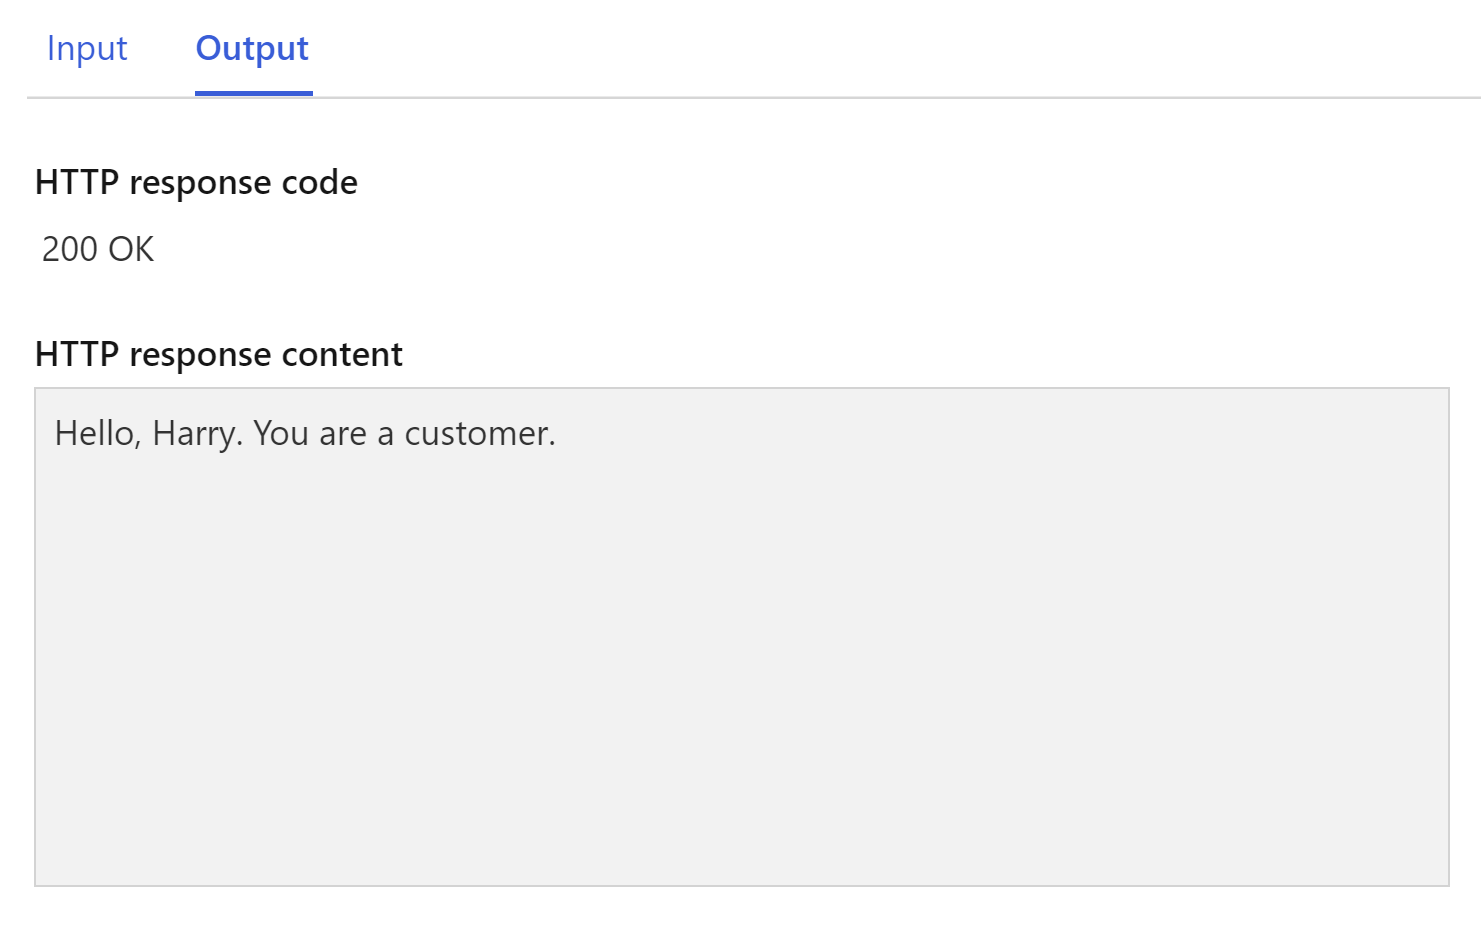
- Select Test/Run to open the test window
- Fill in a value for the customerName Query parameter
- Next, click Run to try out the code
- If the call succeeded, you should see the value that you entered in the Output tab
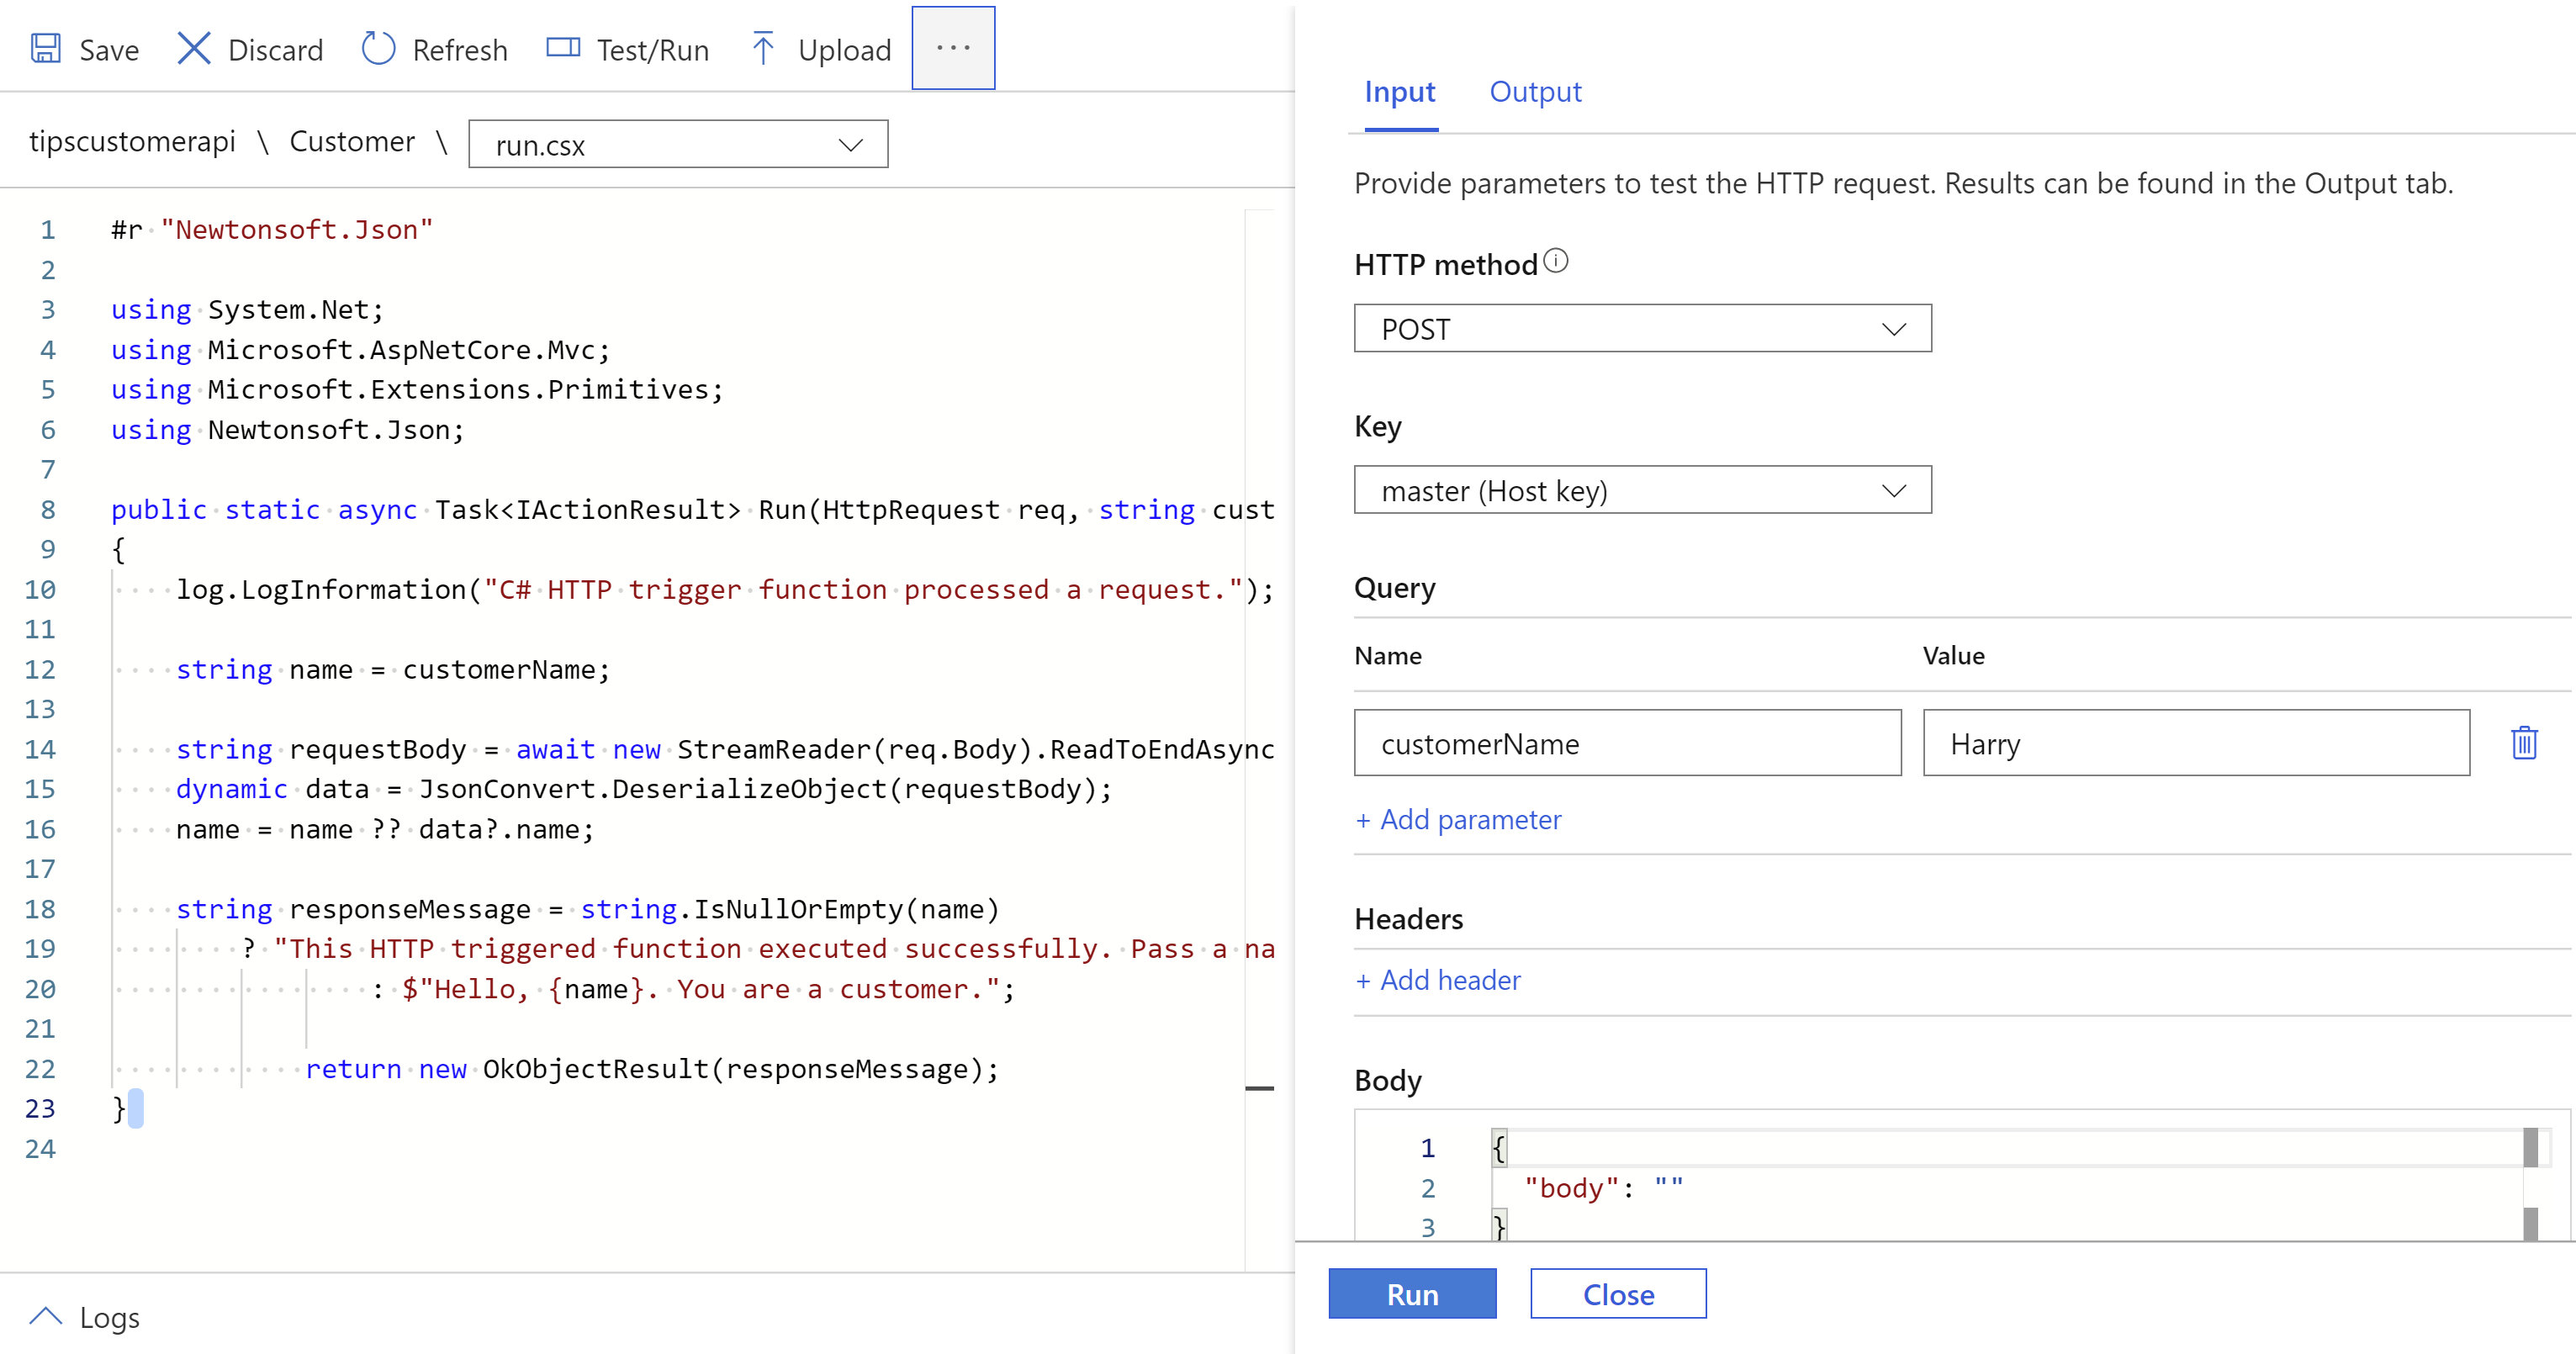
(Code and Test in the Azure portal)
- Let's see if we can call the Function like an API. Click on the Get Function URL button and copy the URL
- Paste the URL in a new browser window and replace the {customerName} at the end of the URL with a value. The URL would look something like https://functionappname.azurewebsites.net/api/customer/mynewcustomer
- When you submit the URL, you should see the value of the customer parameter in the result
(Calling a Function like an API)
We have just created an API endpoint using a serverless Azure Function. To create a complete API, you can create multiple Functions that each have their own purpose and are exposed through other URL endpoints.
# Conclusion
Azure Functions (opens new window) are extremely well suited to run APIs at scale, because they can be triggered by HTTP requests, and because they scale automatically. Also, when you run them serverless, you only pay for them when they run. Go and check it out!