
TIP
🔥 If you'd like to learn more Azure Tips and Tricks, then follow me on twitter (opens new window) or stay tuned to this blog!.
📺 Watch the video : How to work with Azure Blueprints (opens new window).
💡 Learn more : Azure Blueprints (opens new window)
# Working with Azure Blueprints
It is important to have a repeatable process to create and update your Azure resources. For instance, you should create code, like Azure resource Manager (ARM) Templates, to create and update your environment with. When you have this, you can easily create and destroy an environment, like a development environment, that has all sorts of resources in it, like a Cosmos DB and a couple of Web Apps. Using templates like these, you ensure that your environments are always the same and that they can be created and destroyed quickly, because they don't require manual work. In addition to ARM templates, you should also automate the granting and revoking of access rights and applying compliance policies on resources.
All of this can be managed with Azure Blueprints (opens new window). Azure Blueprints provides a mechanism that allows you to create and update artifacts (like policies and ARM templates) and assign them to environments and version them. Using this, you can store these artifacts and manage their versions and relate them to environments. For instance, you can see that version 1.1 of the dev environment blueprint is deployed to the xyz-subscription.
Let's take a look at how to create and assign an Azure Blueprint.
# 1. Create a new Azure Blueprint
We'll create a new Azure Blueprint and its artifacts in the Azure portal.
- You can find Azure Blueprint under the Policy service. In the Azure portal, go to All resources and search for Blueprint. You should find the Blueprint service. Click on it
- In the Azure Blueprint blade, the Getting started blade opens automatically. Click on the Create button
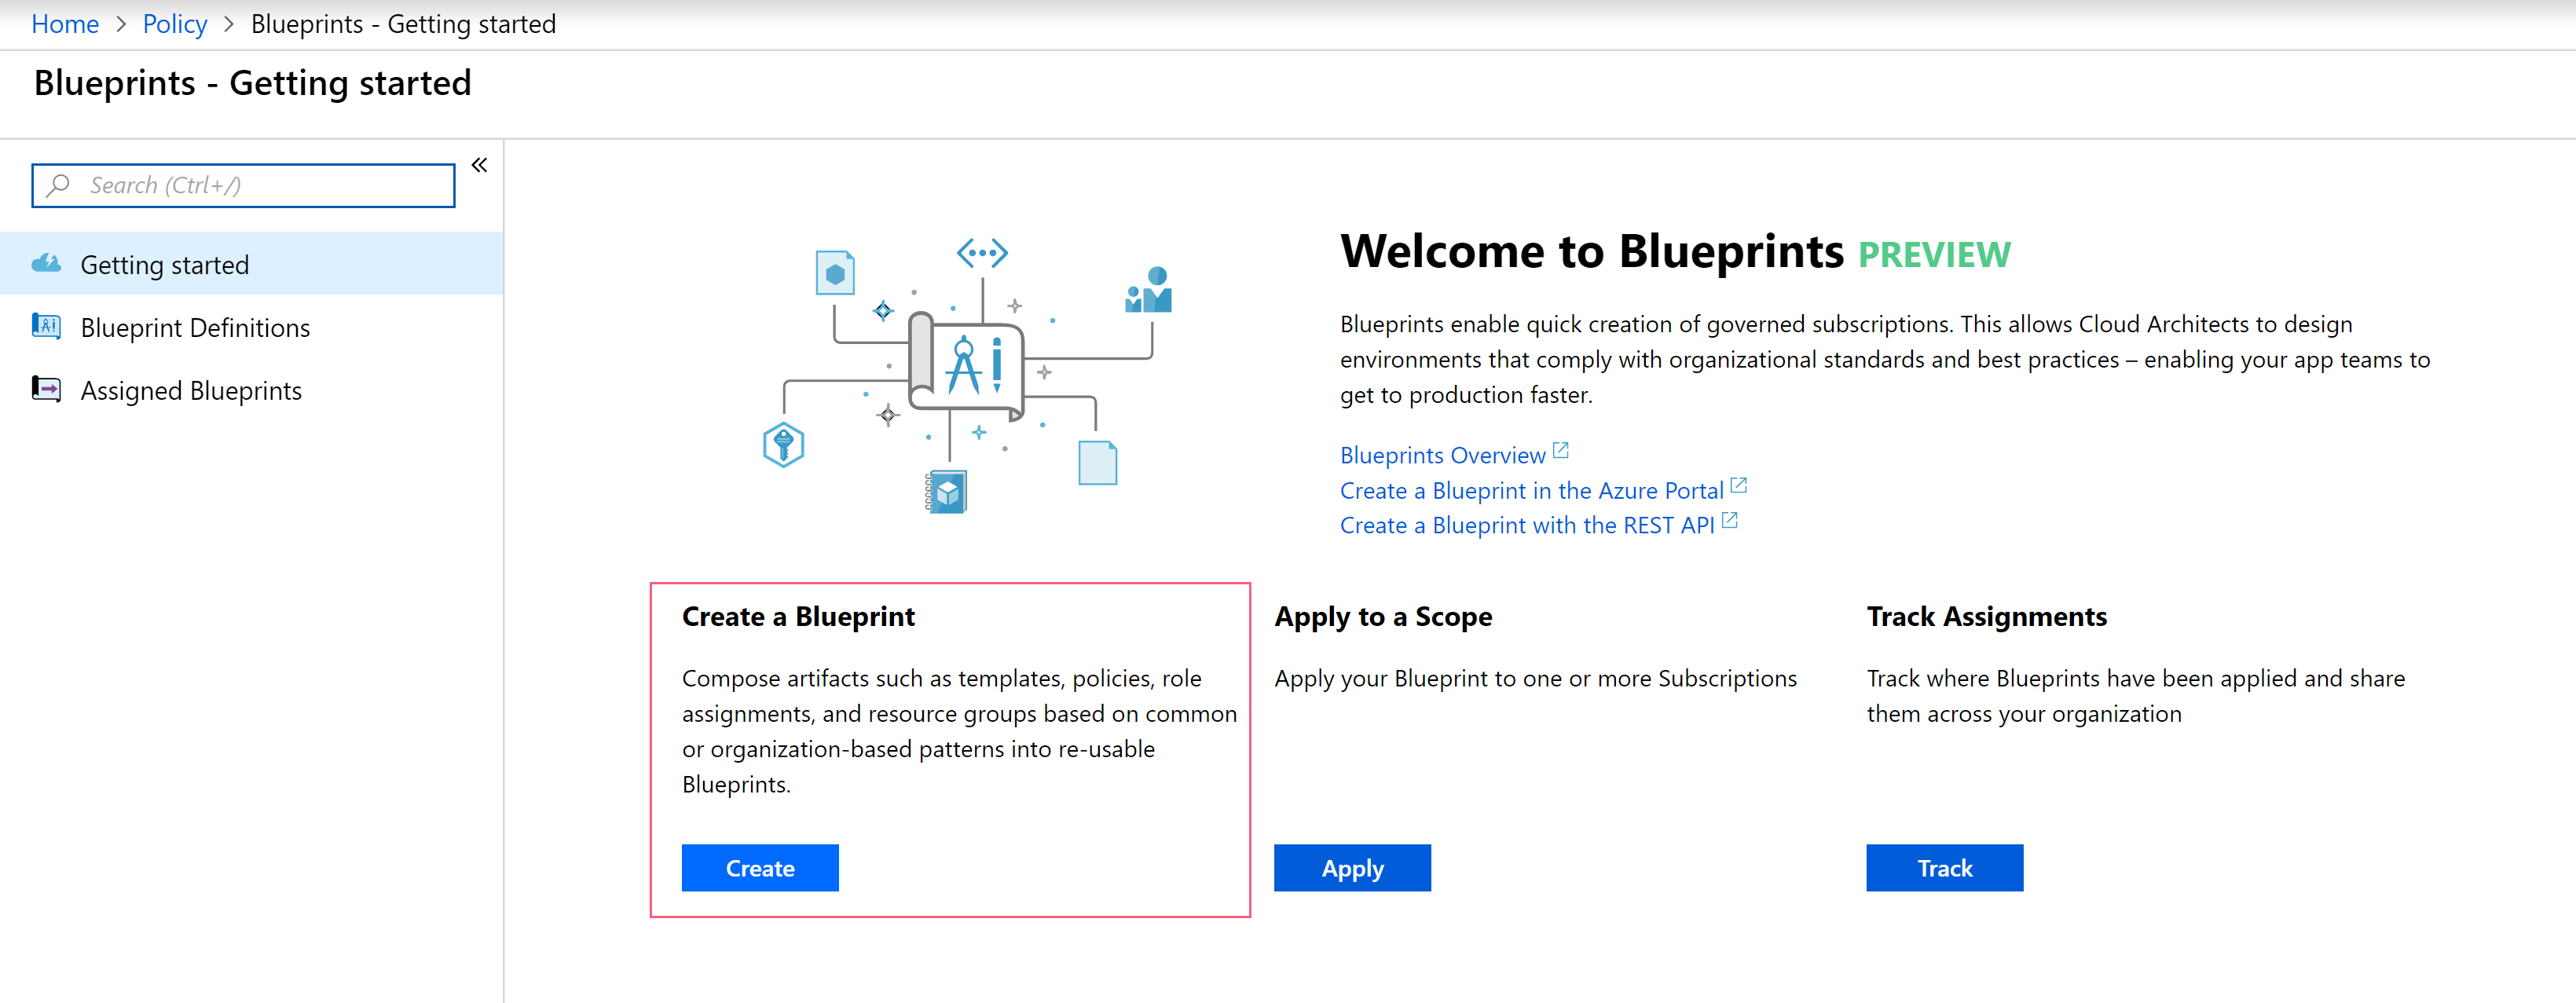
(Create a Blueprint in the Azure portal)
- Fill in a Name for the Blueprint
- Select the Blueprint definition location. This is where the Blueprint will be stored. The location is an Azure Management Group. If you don't have one yet, you need to create one. You can do that by searching for Management Group in the All Resources tab in the Azure portal and creating one from there. You should make sure to move at least one subscription under that Management group, so that the subscription has that Management Group as parent. You can also create different hierarchies, which determine the scope of your Blueprint. You can learn more about that here (opens new window)
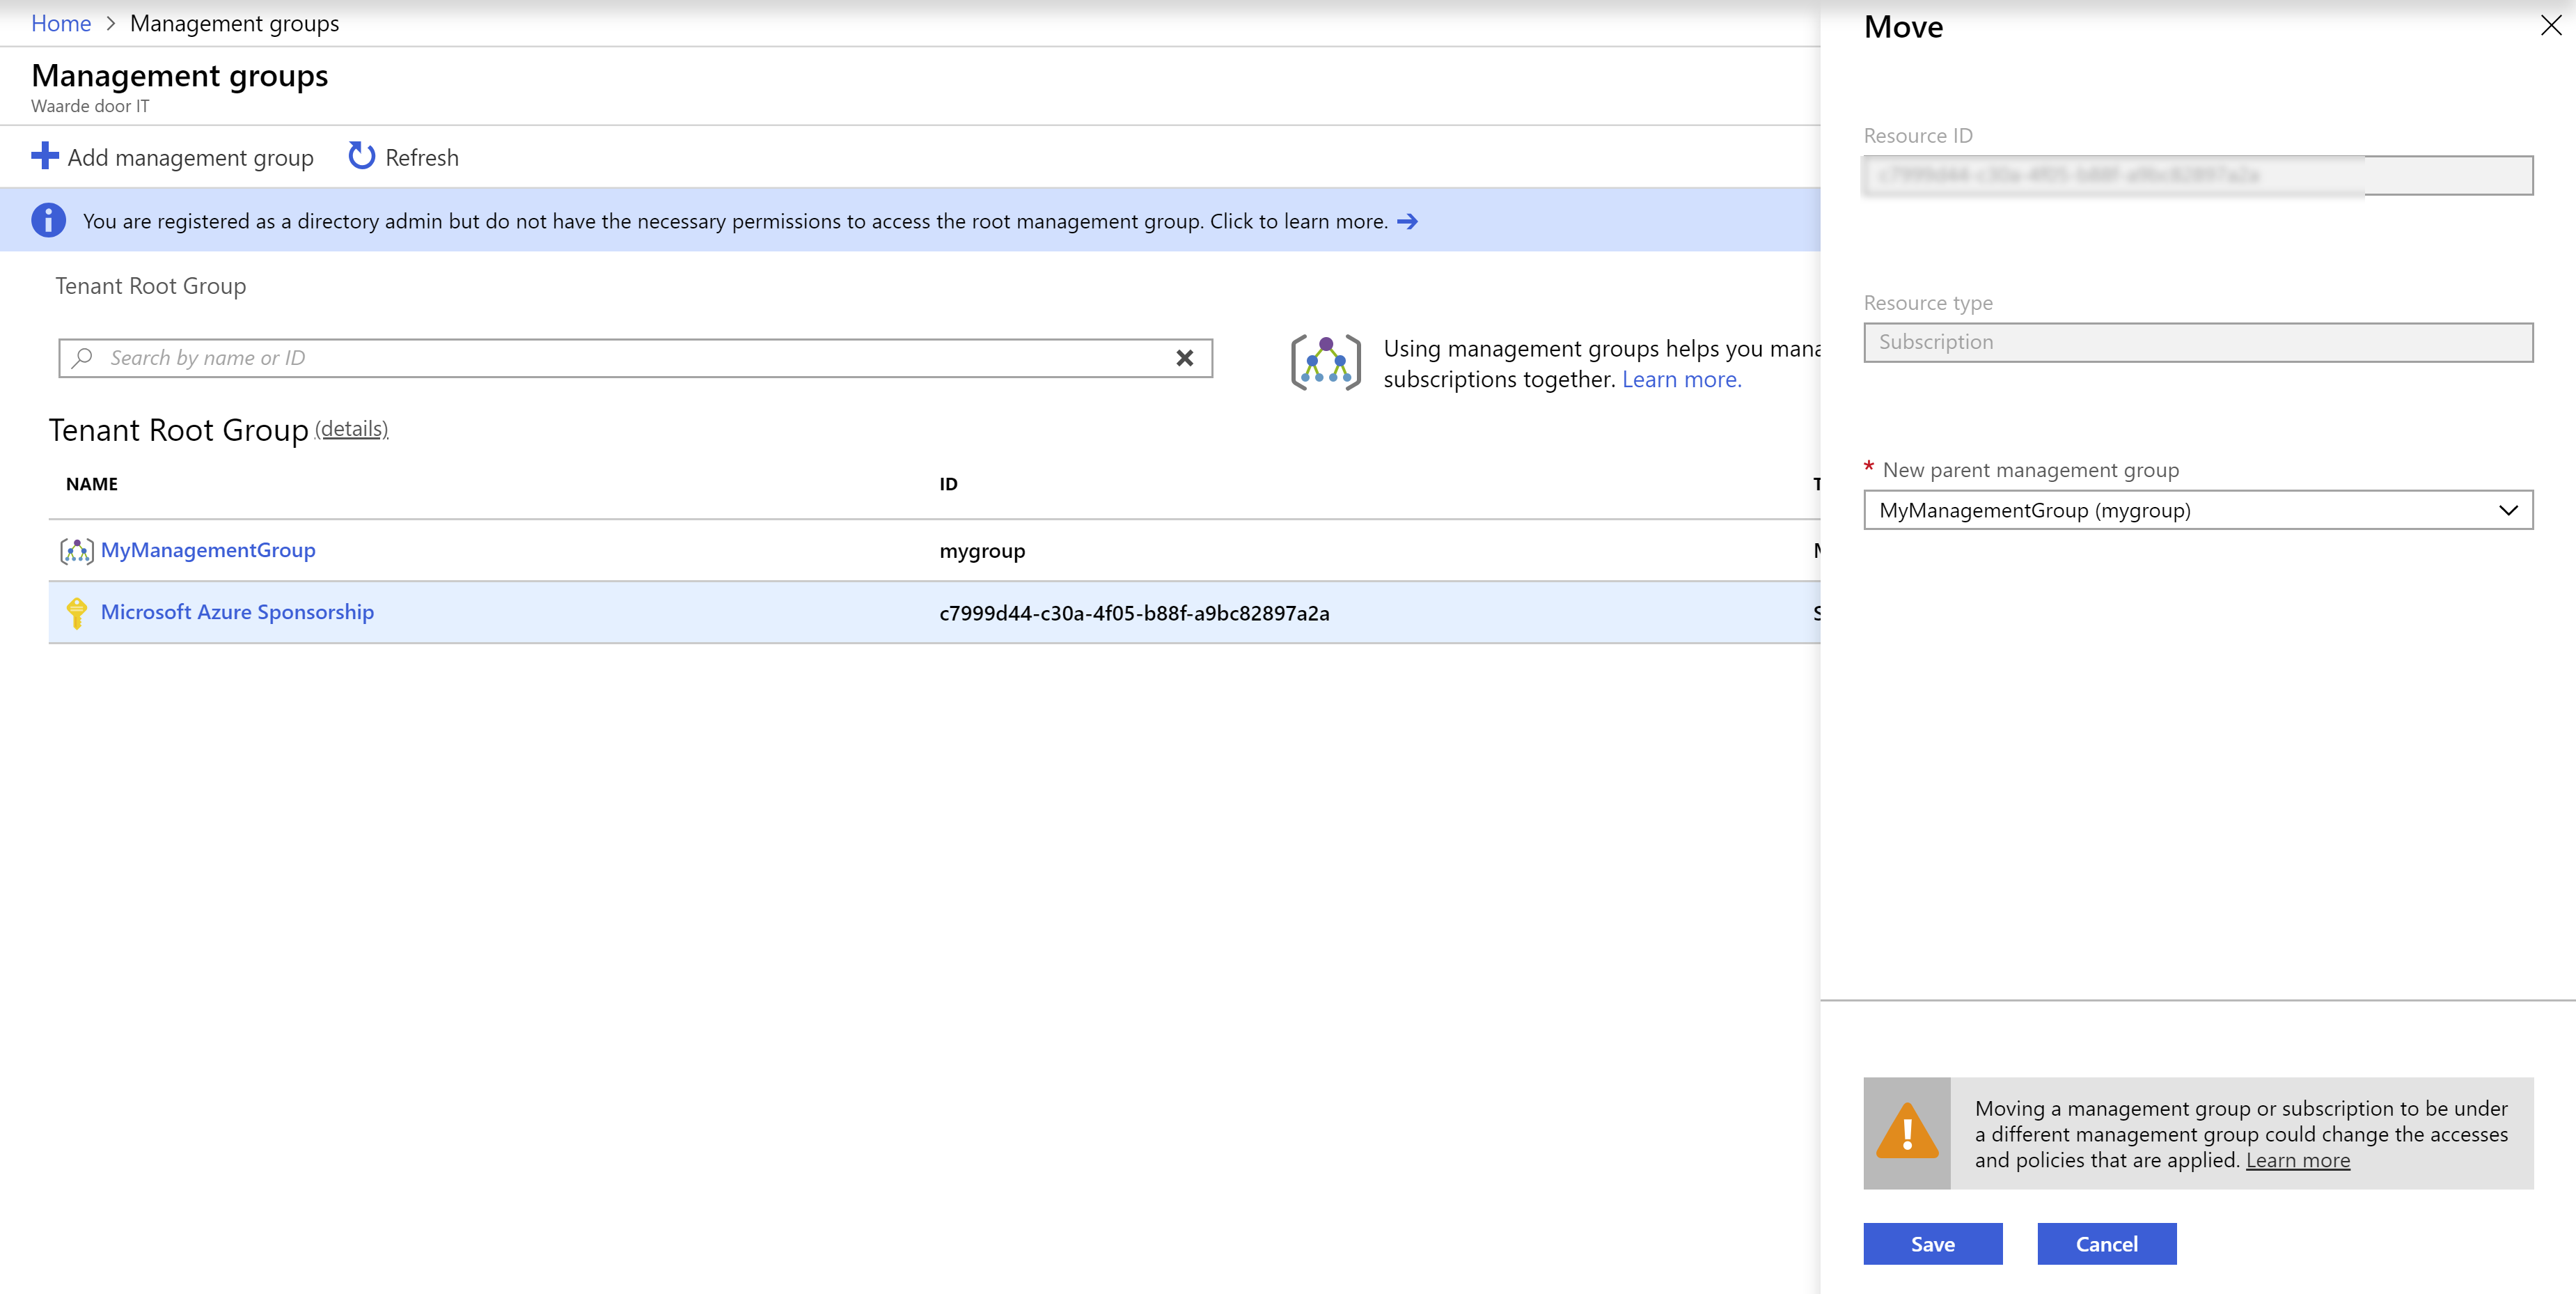
(Make sure that the subscription has a parent Management Group)
- Once you've filled in all of the Blueprint definition details, click on Next: Artifacts
- You can now create the contents of the Blueprint. You can add things like Role assignments, ARM templates and Policies

(Add Blueprint artifacts)
- Add some artifacts and add at least one that creates a resource group
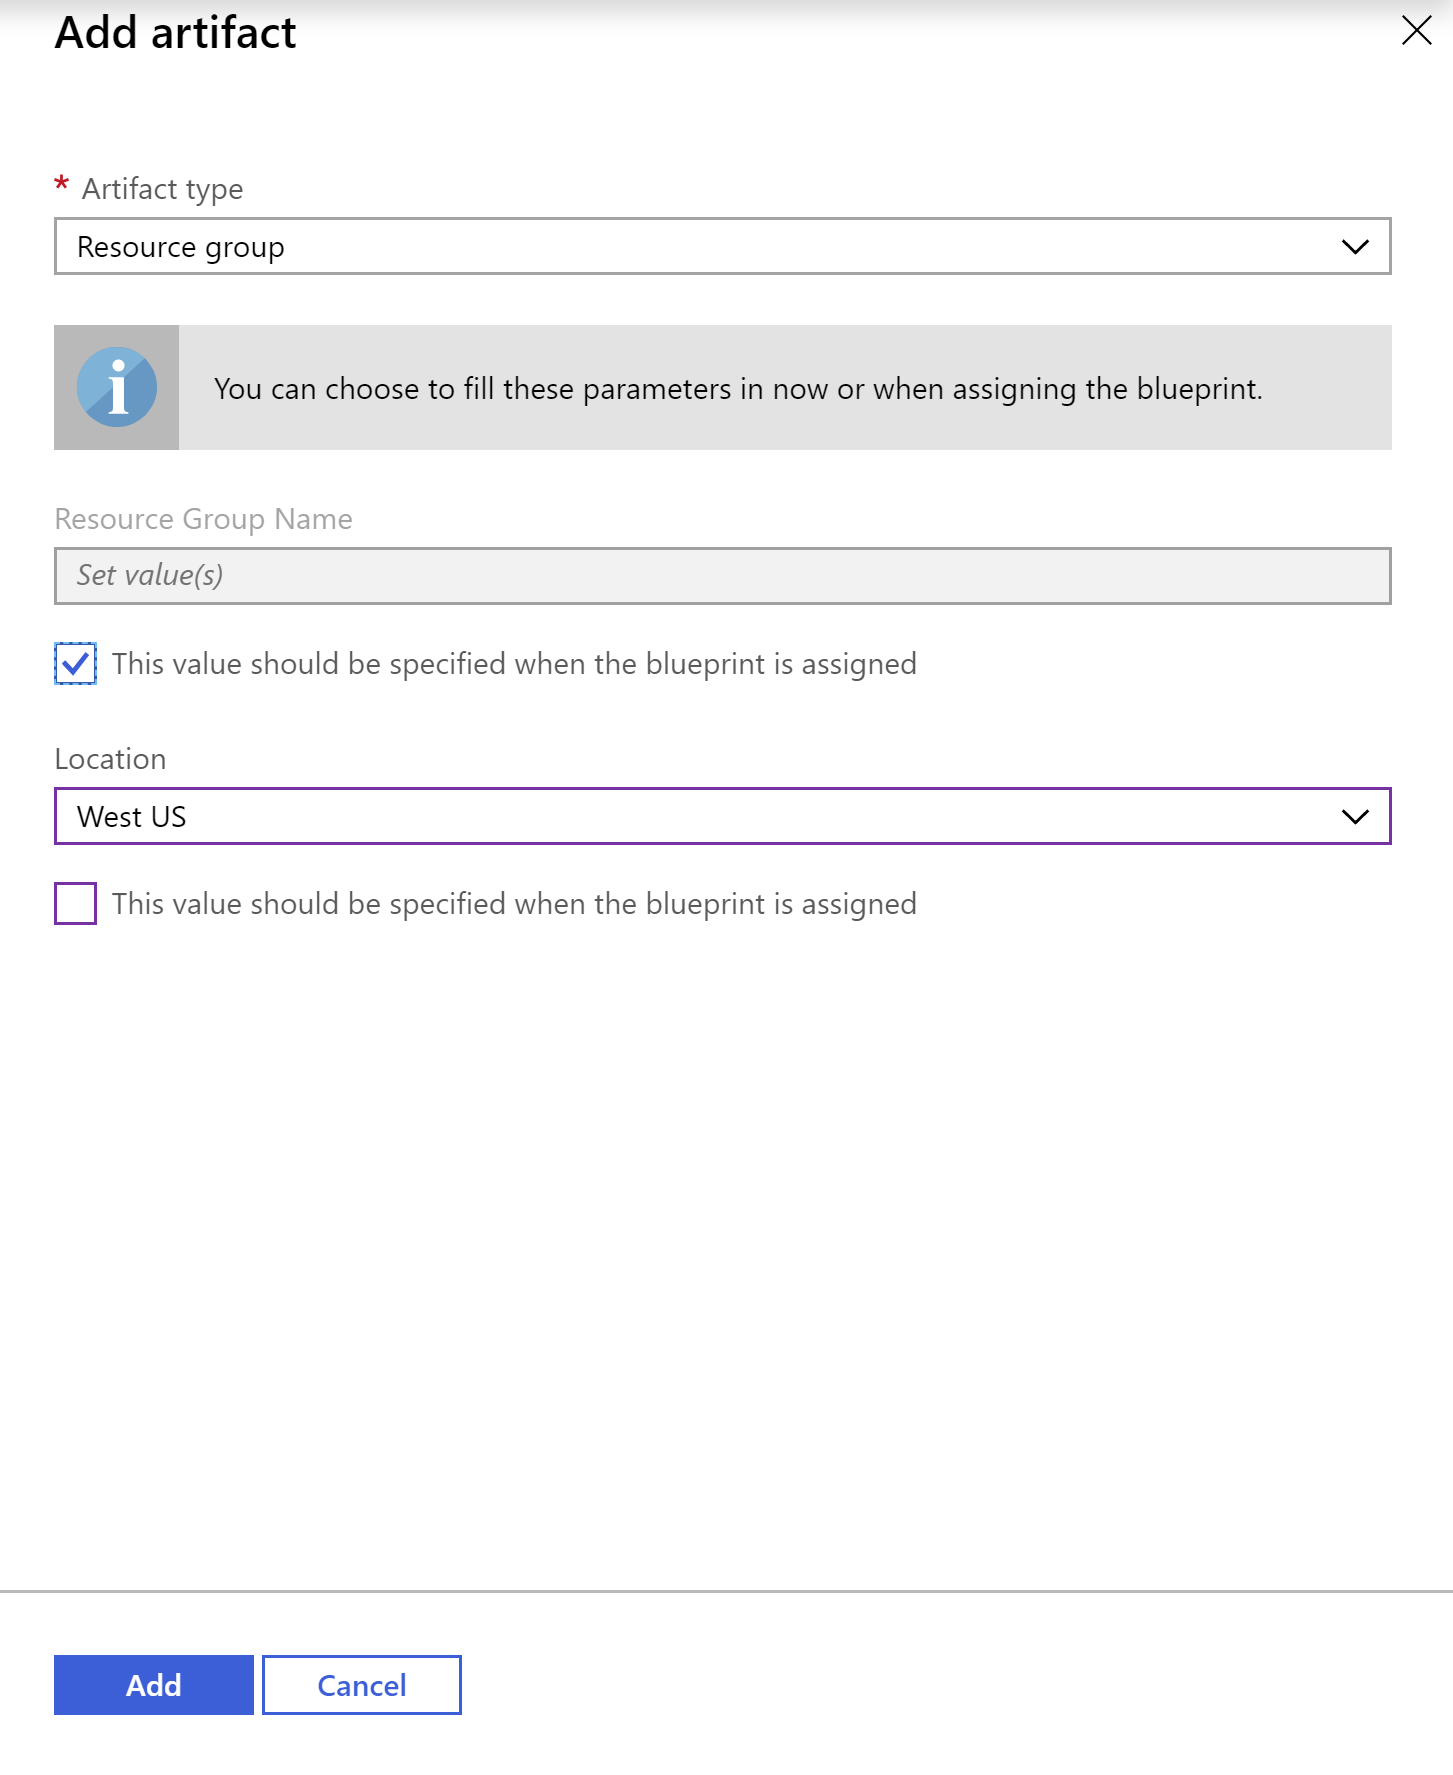
(Add Blueprint a Resource Group artifact)
- Click Save draft to save the Blueprint. It will now be saved but it won't be deployed yet
# 2. Publish and assign the Azure Blueprint
The Blueprint is now saved as a draft. You can now publish it and assign it to a subscription to deploy it.
- First, we need to publish the blueprint. This takes it out of the draft status, which means that you can't make any changes to this version of the blueprint anymore. In the Blueprints Definitions menu, find and navigate to your blueprint
- Now click Publish Blueprint and assign a version number to it
- Click Publish to mark the Blueprint as published and ready to assign
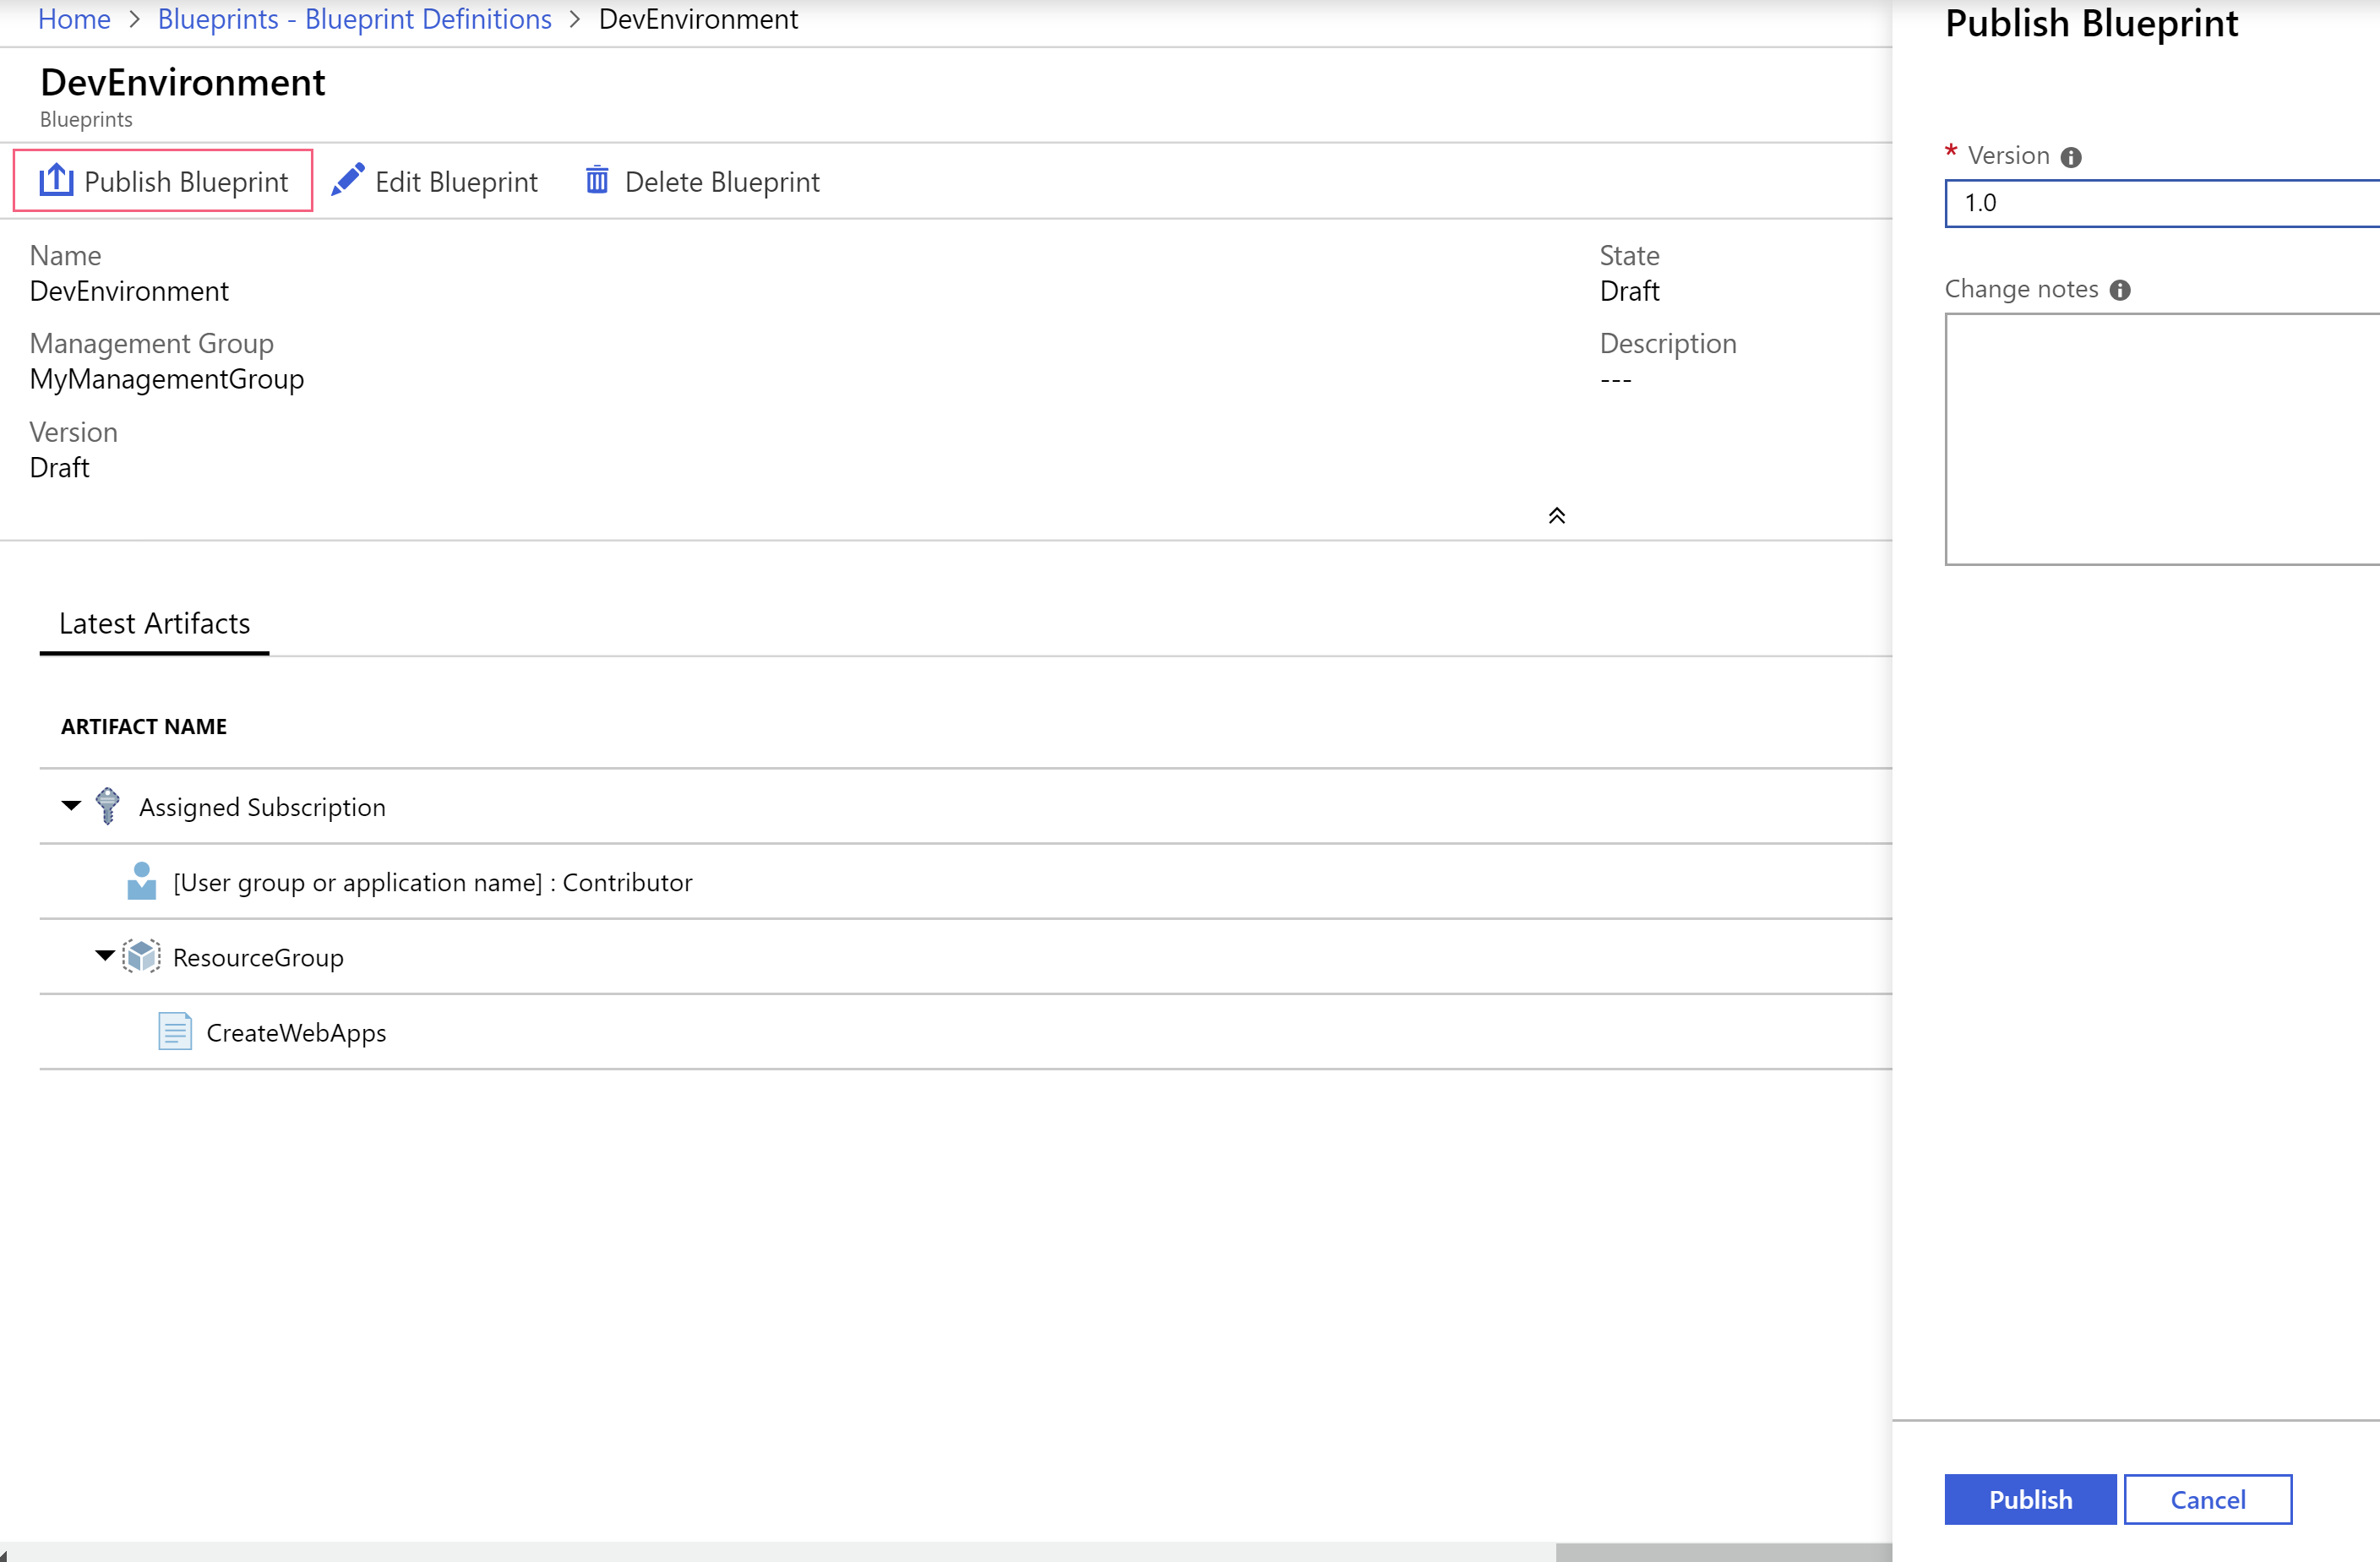
(Publish Blueprint in the Azure portal)
- We can now assign the published blueprint to a subscription. Again, navigate to the blueprint from the Blueprint Definitions menu
- Right-click on the blueprint (or left-click on the ellipsis) and select Assign Blueprint
- Pick the subscription that you want to assign the blueprint to (all of the artifacts in the blueprint will be deployed to this subscription)
- Fill in a Name for the assignment
- Select a location that will be used to deploy the managed identity in that will be used to deploy your blueprint
- Select the publication version of the blueprint that you want to assign
- Leave the Lock setting to Don't Lock
- Now fill in the parameter values for the artifacts. Some of them need values from you, like the identity of a user assignment or a name for a resource group
- Click Assign to assign the blueprint and make it start deploying the artifacts to the subscription
(Assign Blueprint in the Azure portal)
Now that the blueprint has been assigned, you can see its status in the Assigned Blueprints menu. From there, you can view details about the assignment (like how the deployment is doing) and update or un-assign the blueprint.
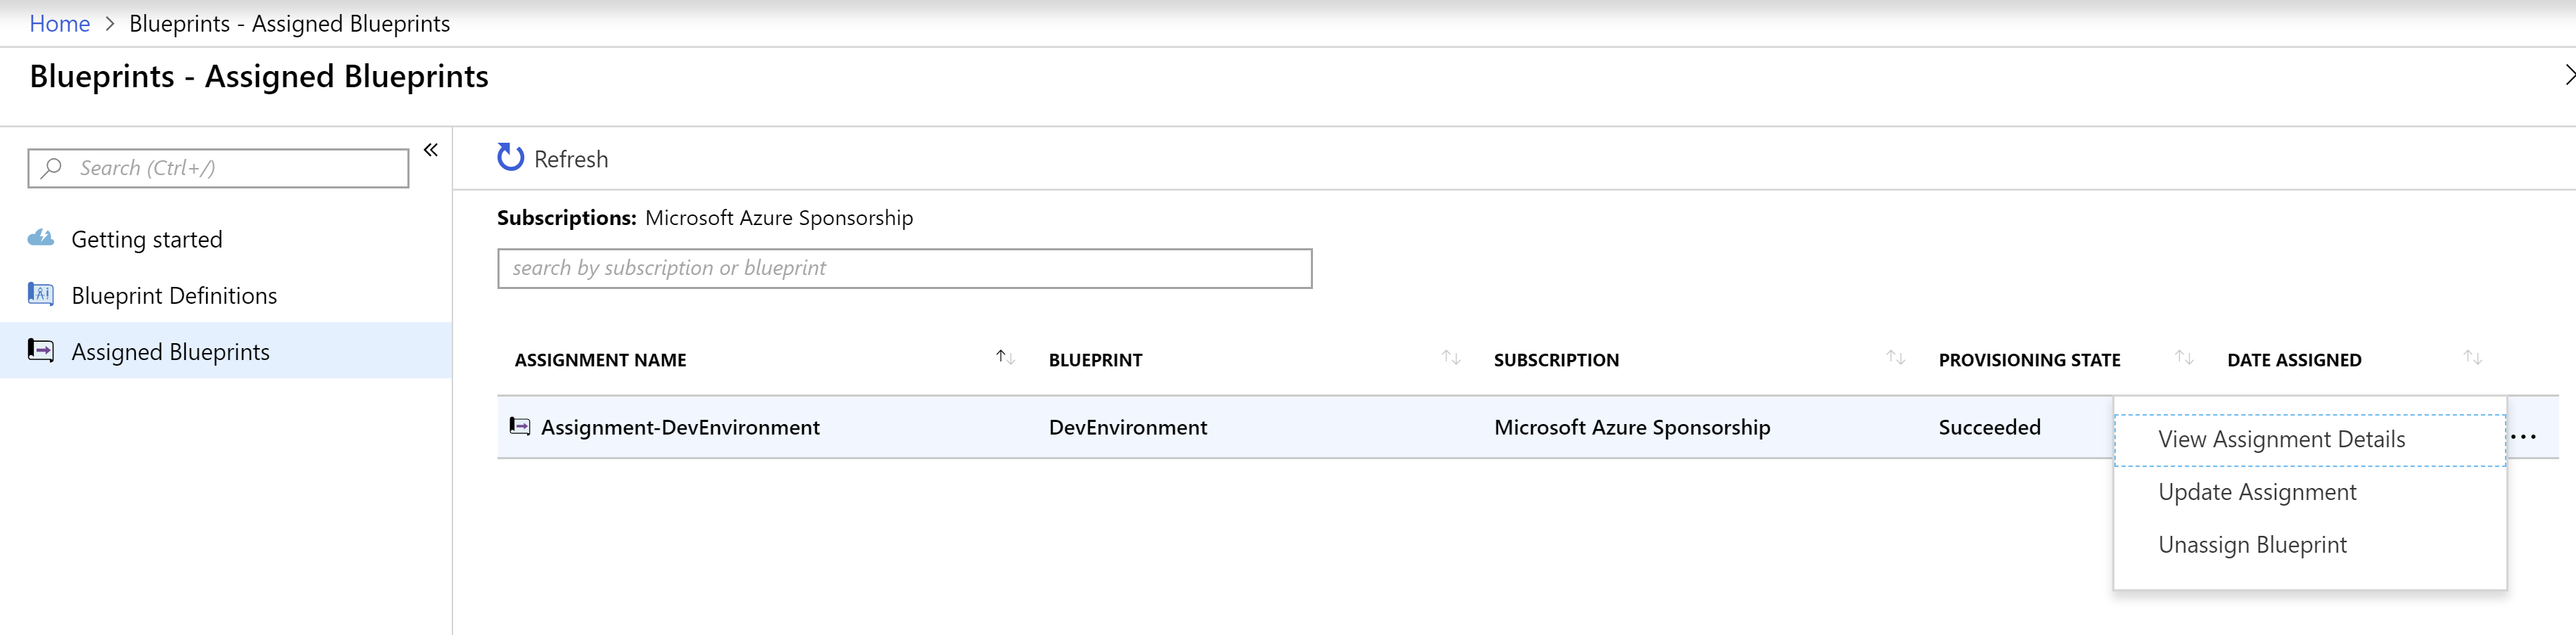
(Assigned Blueprints in the Azure portal)
Finally, the deployment will be finished and the resources will be deployed. In my case, I've deployed a Web App, that gets a simple website from a Git repository. All of which, is described in the ARM template in the blueprint. This results in a fully deployed and running application.
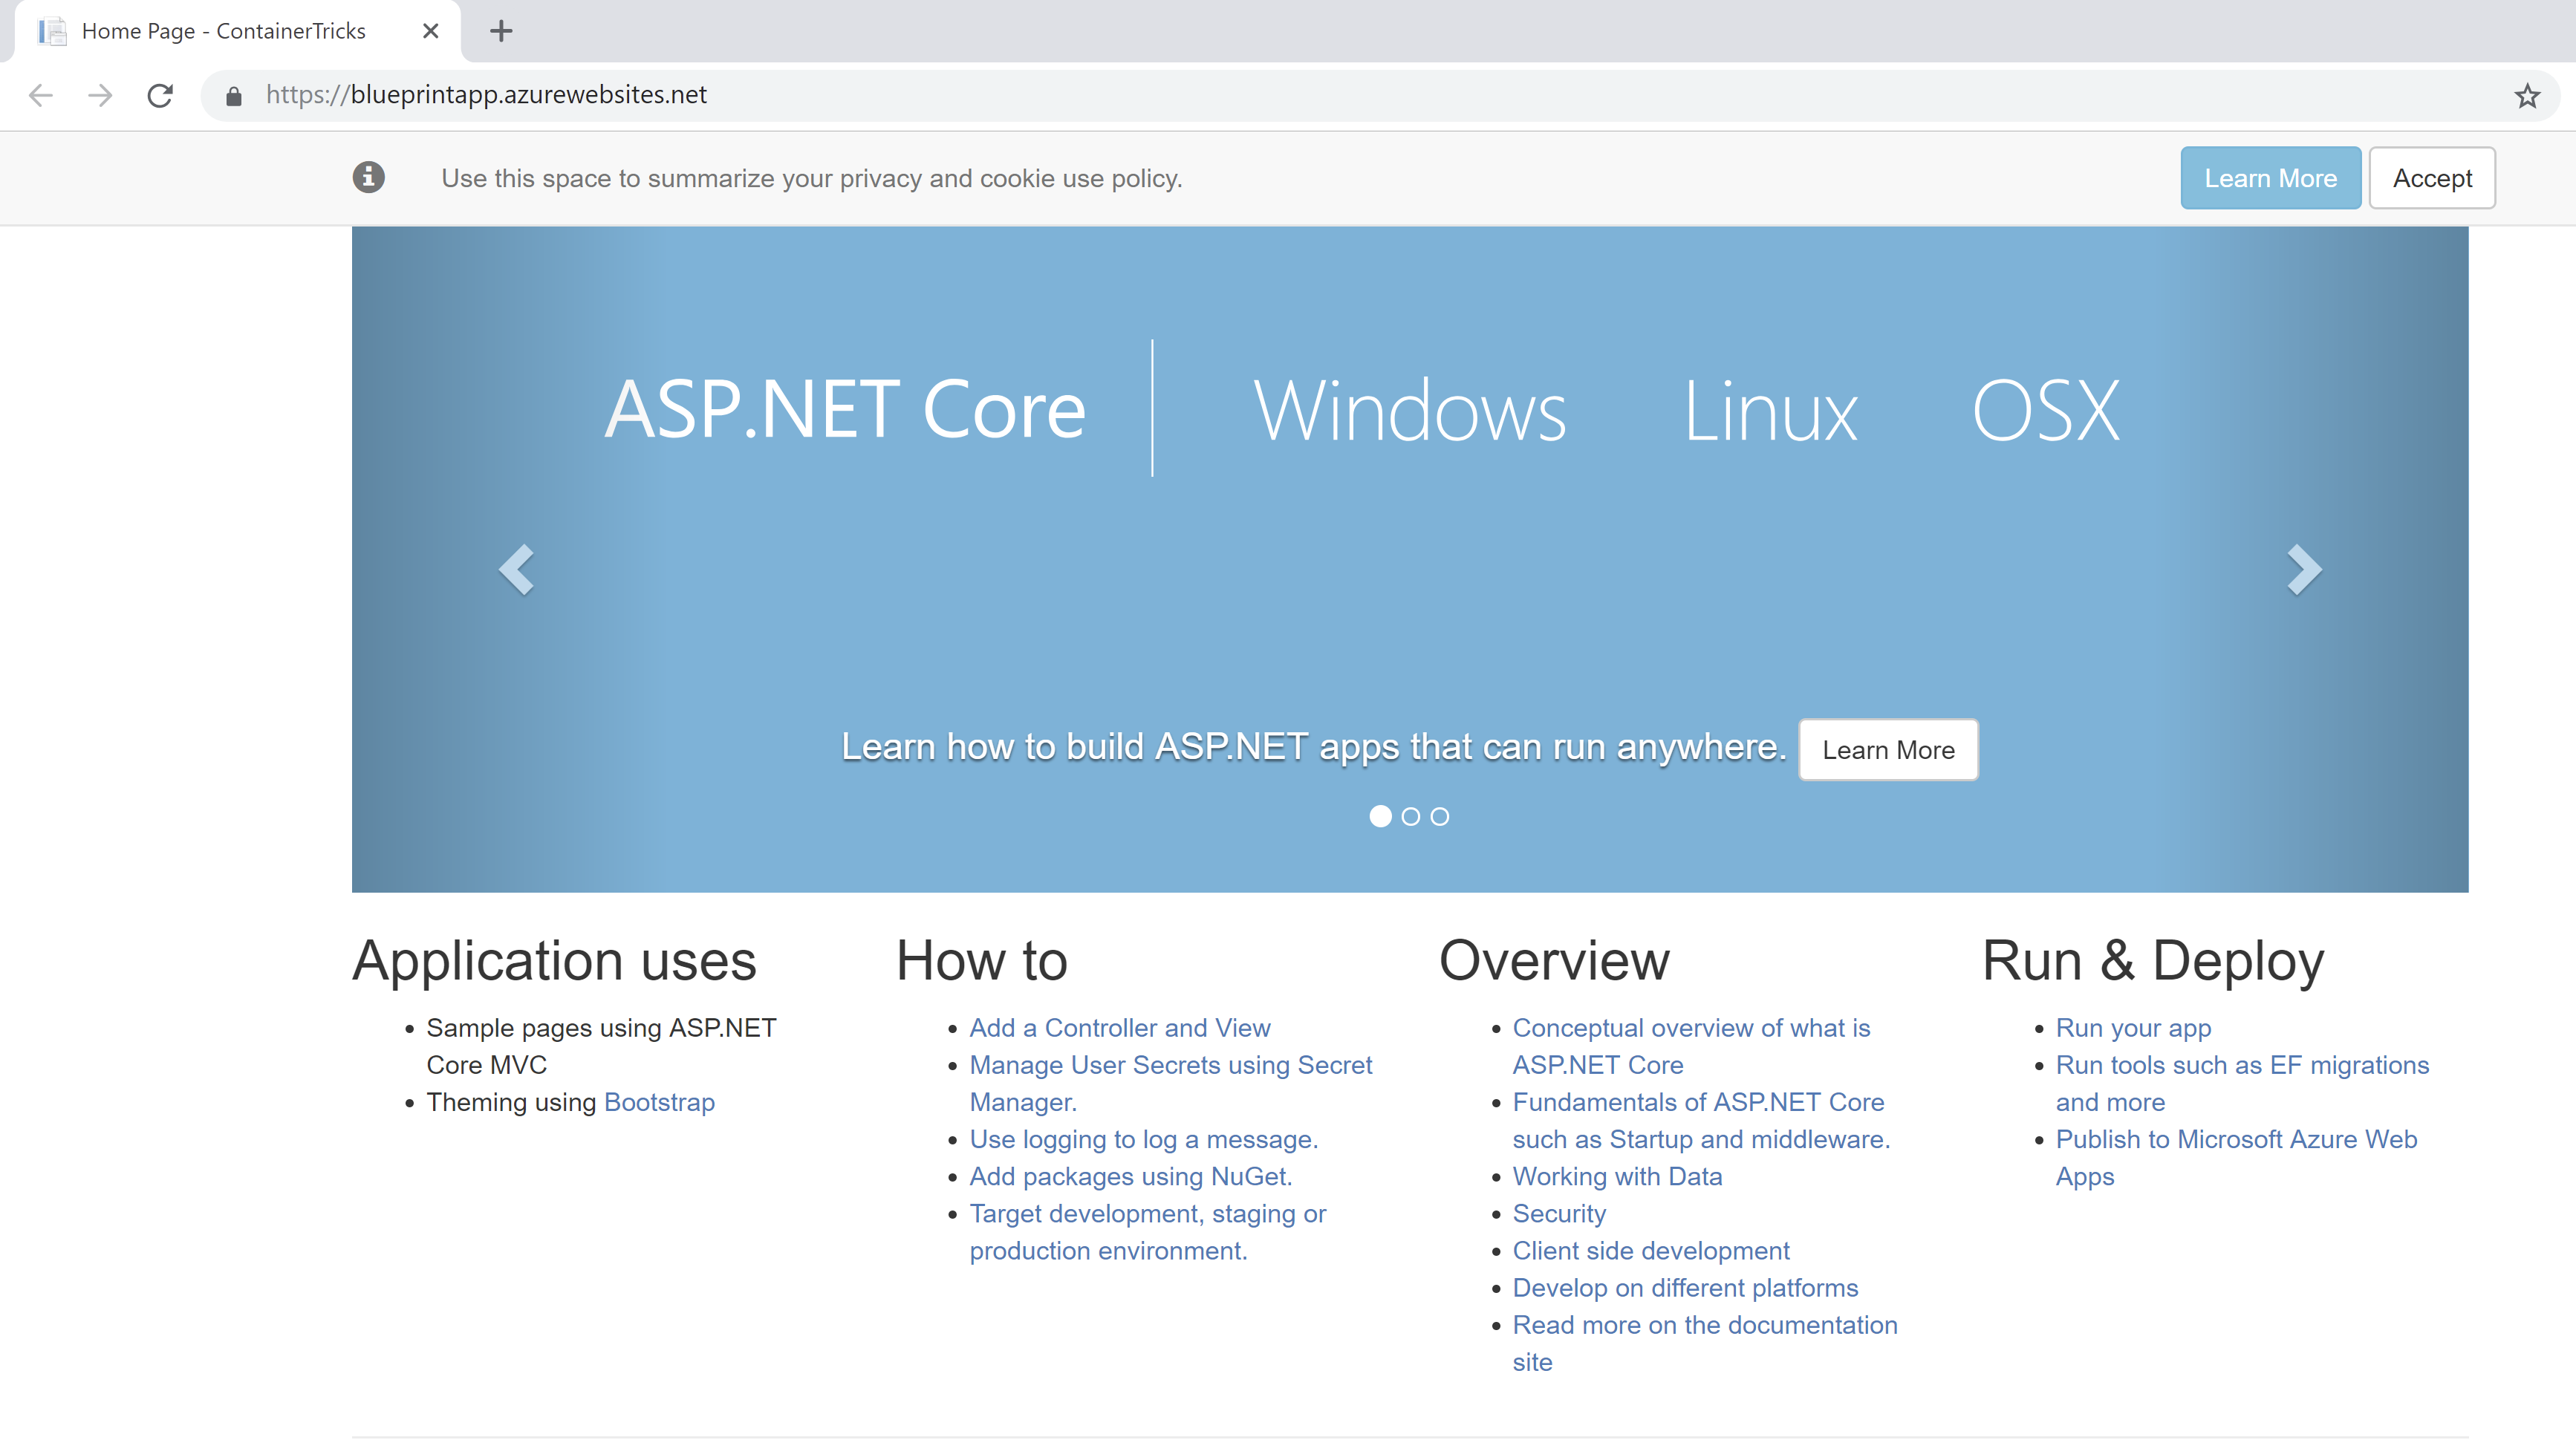
(Simple website running in a Web App deployed by the Azure Blueprint)
# Conclusion
Azure Blueprints is a great way to link deployments to deployment artifacts. This way, you can keep track of what is deployed, what version of the deployment scripts (artifacts) was used and manage the deployment and artifact lifecycle effectively. In the example above, we did all of that manually. You can also automate this process using tools like Azure DevOps. Go and check it out!