
TIP
🔥 Make sure you star the repo (opens new window) to keep up to date with new tips and tricks.
💡 Learn more : Azure Arc overview (opens new window).
📺 Watch the video : How to get started with Azure Arc - Part 1 (opens new window).
# How to get started with Azure Arc - Part 1
# Extend Azure to any computer
Hybrid computing is here to stay. Almost every company has on-premises resources, or computers in other clouds that they need to manage. Azure Arc (opens new window) makes this easy by making any computer part of Azure, no matter where it runs. This enables you to onboard computers to Azure Arc and manage their security, updates, configuration, health, and more.
This post is the first of a series of three. This first post will explore Azure Arc-enabled servers (opens new window), by connecting a computer to Azure Arc.
# Prerequisites
If you want to follow along, you'll need the following:
- An Azure subscription (If you don't have an Azure subscription, create a free account (opens new window) before you begin)
- A computer that you can connect to Azure Arc. This can be your local computer, or a computer in a cloud
# Onboard a computer to Azure Arc
I will onboard my local Windows computer to Azure Arc. This involves opening network ports, and running a script to download, install, and configure a local agent. First, we'll generate the onboarding script:
- Go to the Azure portal (opens new window)
- Click the Create a resource button (the plus-sign in the top left corner)
- Search for arc, select the "Servers - Azure Arc" result and click Create
- In the next screen, select Generate script on the Add a single server option
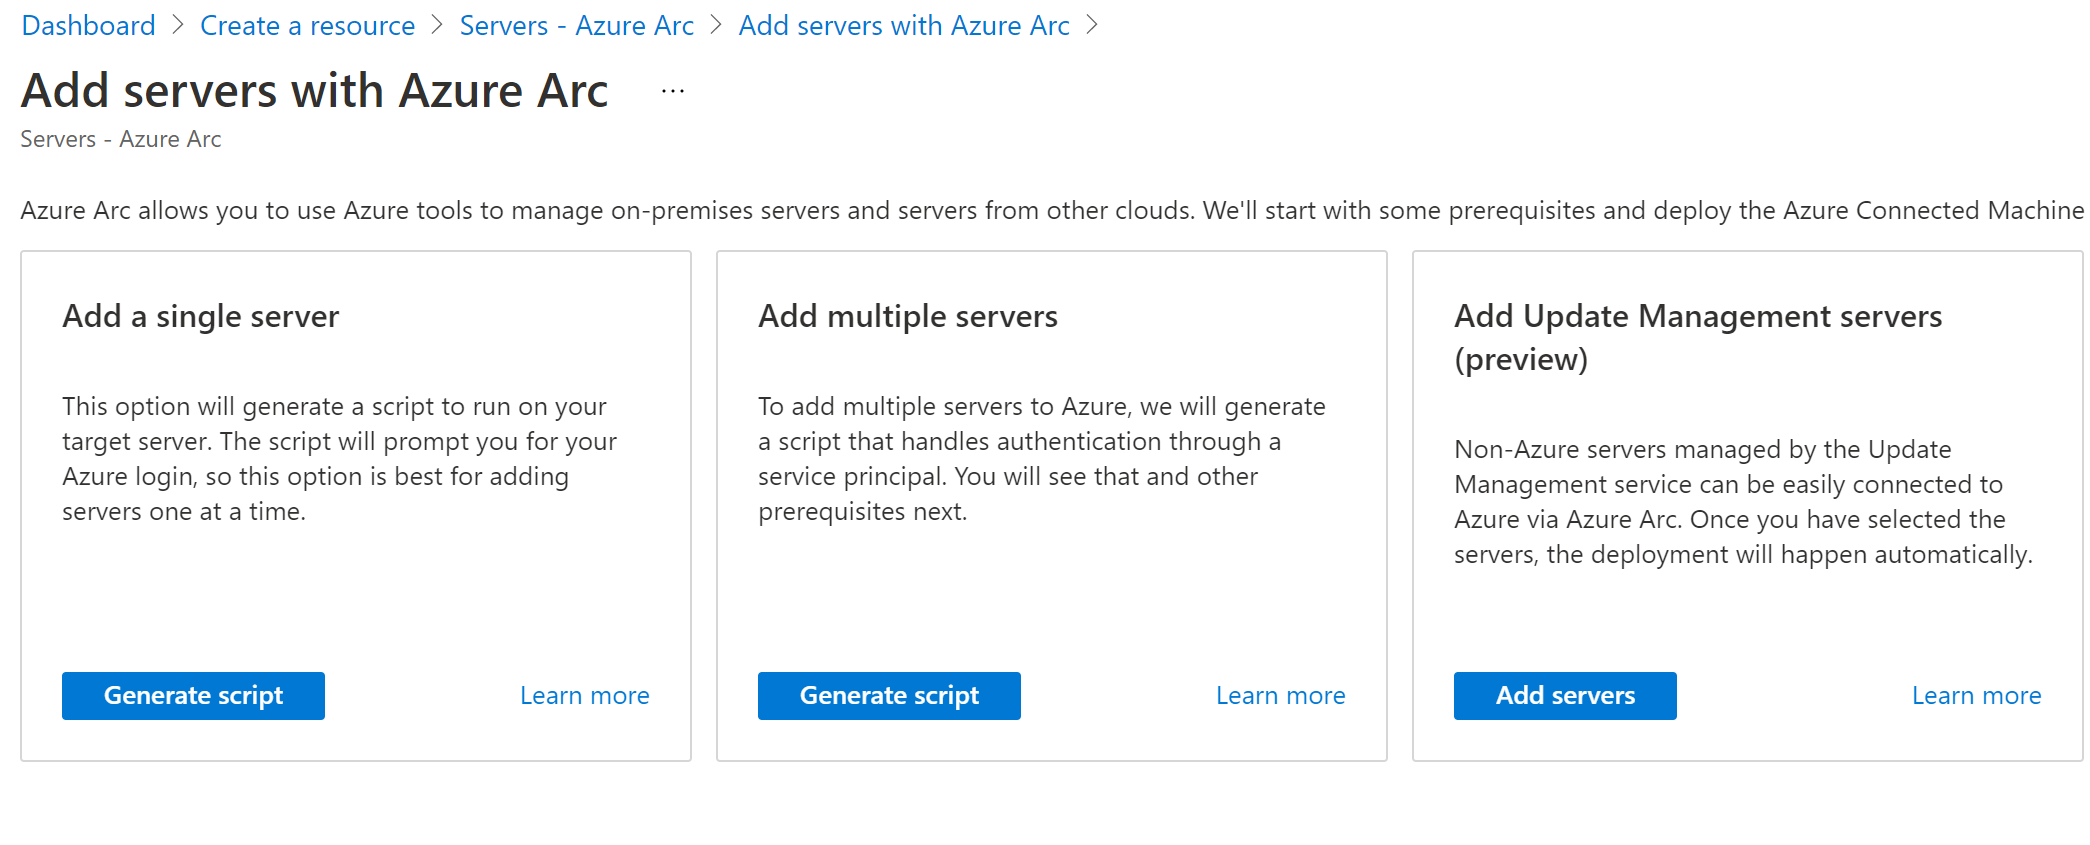
(Choose "Add a single server")
- Review the requirements and click Next: Resource details
- In the Resource details blade:
- Select a Resource Group
- Pick East US for the region of the server
- Leave the Operating system to Windows
- Set the Connectivity method to Public endpoint
- Click Next:Tags
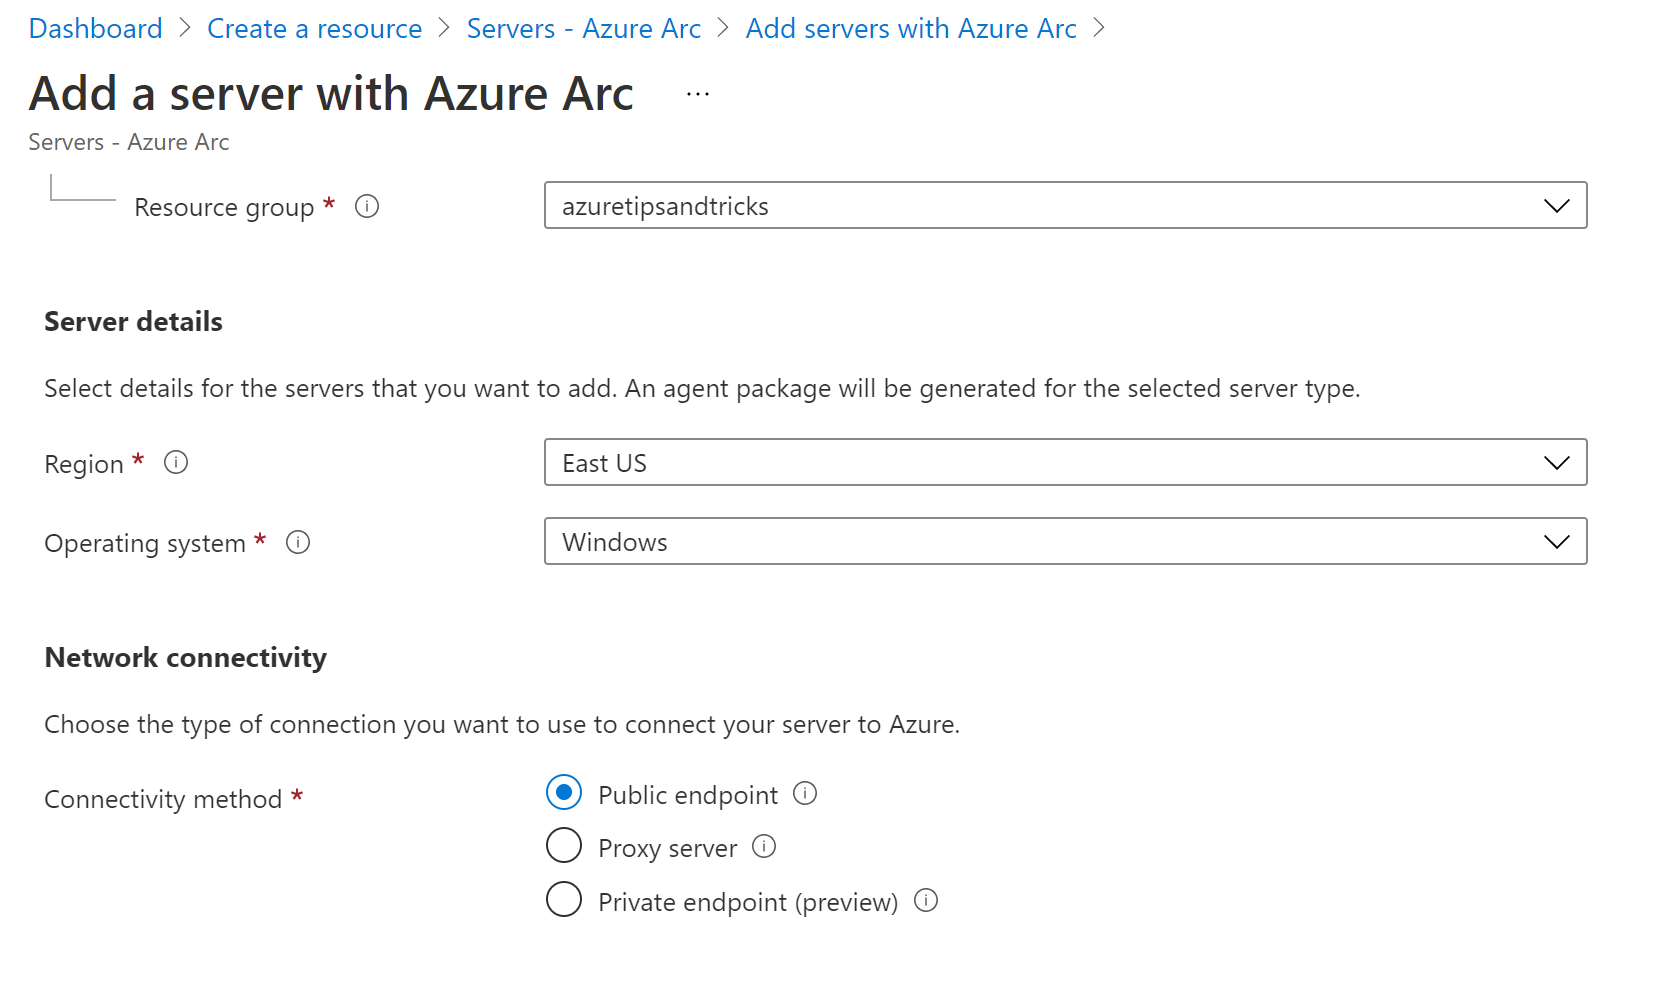
(Configure the Azure Arc resource details)
- Click Next: Download and run script
- Copy the script
Go to the computer that you want to onboard to Azure Arc.
- Make sure that the computer adheres to all the requirements (opens new window) that the Azure Arc agent needs
- Open an elevated PowerShell prompt
- Run the script
- The script will prompt you to open a browser and log in to Azure. When that is done, and the script continues successfully, the computer has been onboarded
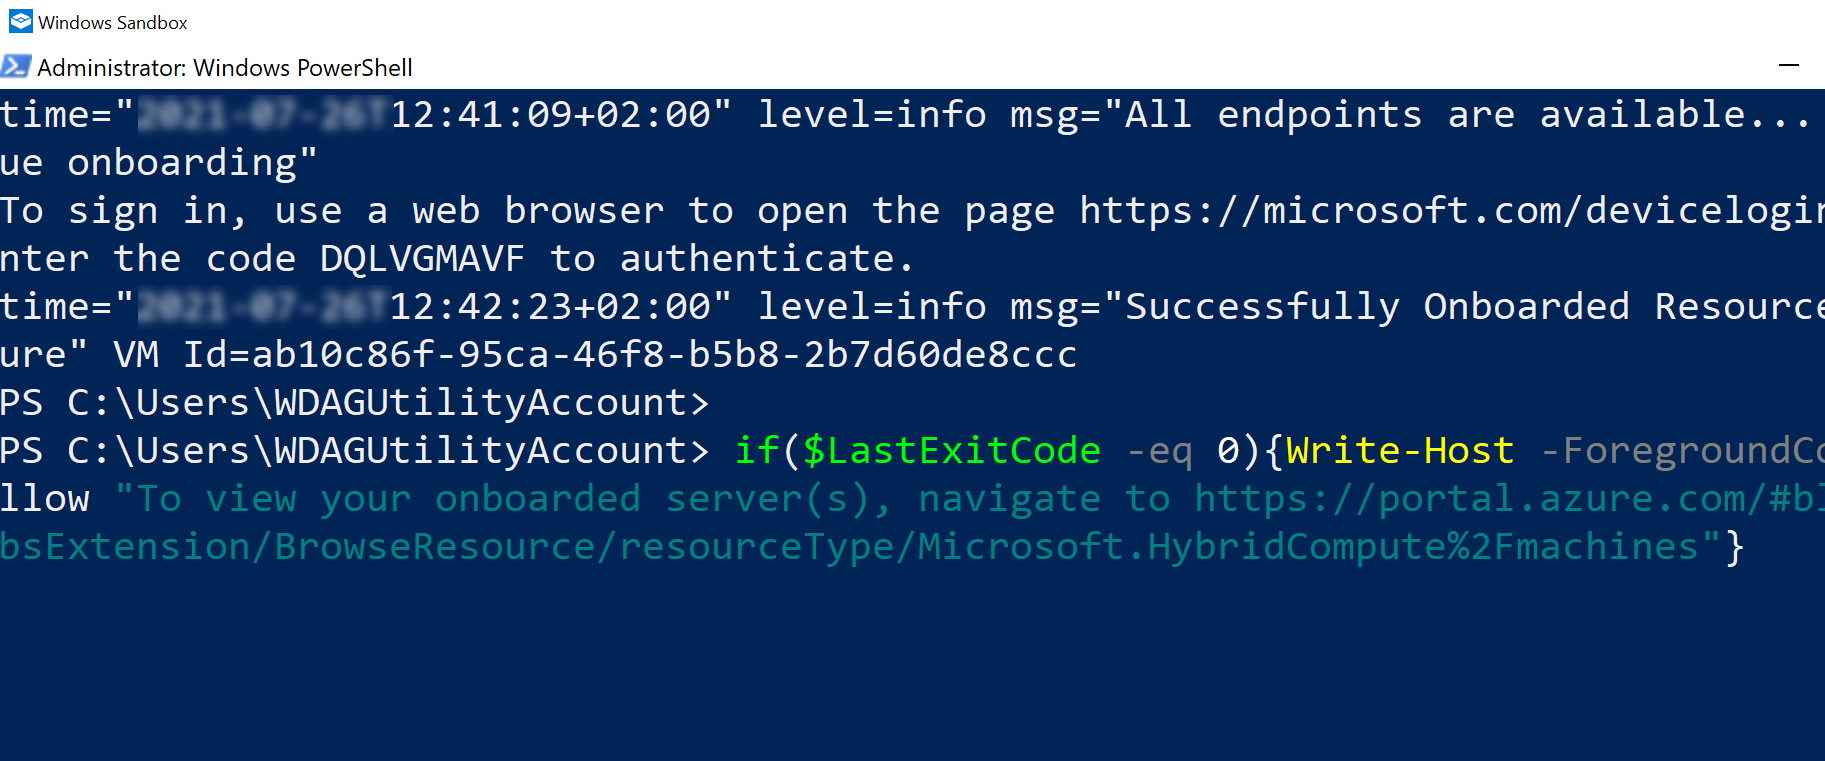
(Run the script in PowerShell)
That's it! The computer is now part of Azure, and you can manage it through Azure Arc.
- Go to the Azure portal
- Search for Azure Arc, and open it. This opens the Azure Arc overview
- Click on the All Azure Arc Resources menu, or the Servers menu, to see the computer
- Select the onboarded computer to see what you can do with it from Azure Arc

(Security recommendations for the Azure Arc-enabled computer)
You can now manage the computer through Azure Arc. It will show you security recommendations for the machine, and you can manage updates and configurations for it, once you've set that up using Azure Automation (opens new window). You can also create policies to govern the computer, and monitor its performance and health.
# Conclusion
Azure Arc (opens new window) extends Azure to wherever your machines are. Once a machine is Arc-enabled (opens new window), it becomes part of Azure, and can be managed just like any VM in Azure. Go and check it out!