
TIP
💡 Learn more : An introduction to Azure Automation (opens new window).
📺 Watch the video : How to use Azure Automation with PowerShell (opens new window).
# Azure Automation with Windows Machine with PowerShell
As a developer, when I do something more than once, I want to automate it. Azure Automation (opens new window) makes this very easy for most common IT tasks, like scaling Azure SQL DBs up and down and starting and stopping VMs on a schedule.
Azure Automation is a very mature service in Azure that let's you do anything that you can think of in Azure and also on-premises in hybrid scenarios. Basically, Azure Automation is serverless. You don't have to worry about how it runs and works, you just tell it what to do and use it. And you only pay for it (opens new window) when it does something.
Azure Automation provides lots of features out-of-the-box, which range from tracking changes in the configuration of VMs, to managing VM Operating System updates to starting and stopping VMs on a schedule.
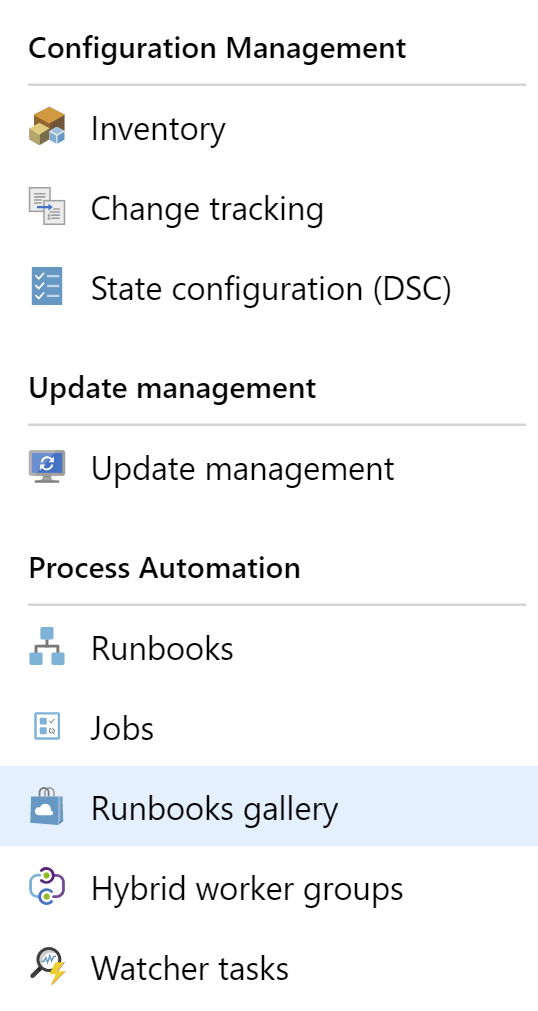
(Azure Automation features in the Azure portal menu)
You can also customize the job that you want Azure Automation to do for you. To do that, you can create a Runbook. You can create one from scratch or pick one from the Runbook gallery (opens new window). Runbooks can contain PowerShell Modules that make up the functionality in the runbook. As with runbooks, you can create modules yourself or select them from the PowerShell gallery (opens new window)">. Runbooks can also contain Python code and Python packages instead of PowerShell modules.
All of this runs in an Azure Automation account. So the hierarchy of components looks like this:
- Azure Automation account
- Runbook
- Module 1
- Module 2
- Module 3
- Runbook
# Scaling Azure VMs using a custom Runbook
Let's create a custom runbook that allows us to scale the VMs in our Azure subscription.
We'll start by making sure that we have an Azure Automation Account.
- In the Azure portal, find Azure Automation. You can do this by searching for it in the searchbar at the top of the portal
- If you don't have an Azure Automation Account yet, you need to create one by clicking on the button that's in the image below:
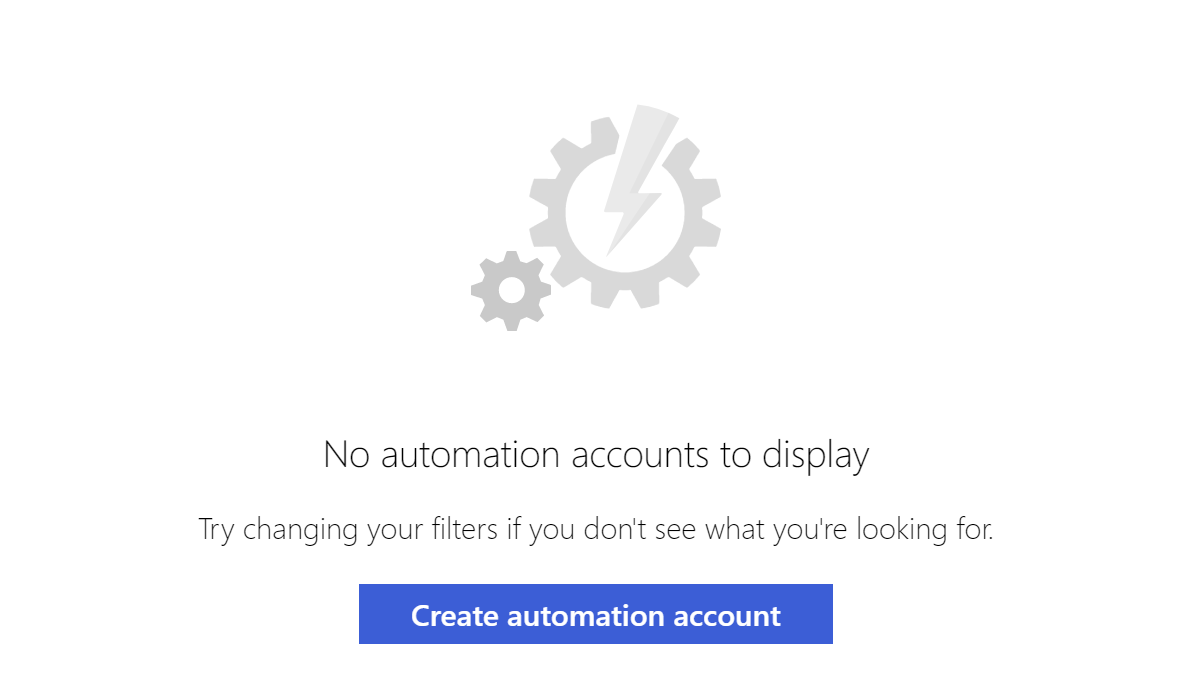
(Create an Azure Automation Account in the Azure portal)
- Now, fill out the creation wizard and create the account.
- In the menu of the Azure Automation account, we are going to make sure that we are running the latest version of the PowerShell commandlets. Click on the Modules menu item. And now, click on Update Azure Modules. Updating the modules can take a while, but this ensures that we are running the latest versions of the PowerShell commands

(Update PowerShell modules in the Azure portal)
- Now to create the runbook that will contain PowerShell. Click on the Runbooks menu item and click on Add a runbook. This opens up the runbook creation blade
- Pick a Name for the runbook and select PowerShell as the runbook type and click Create
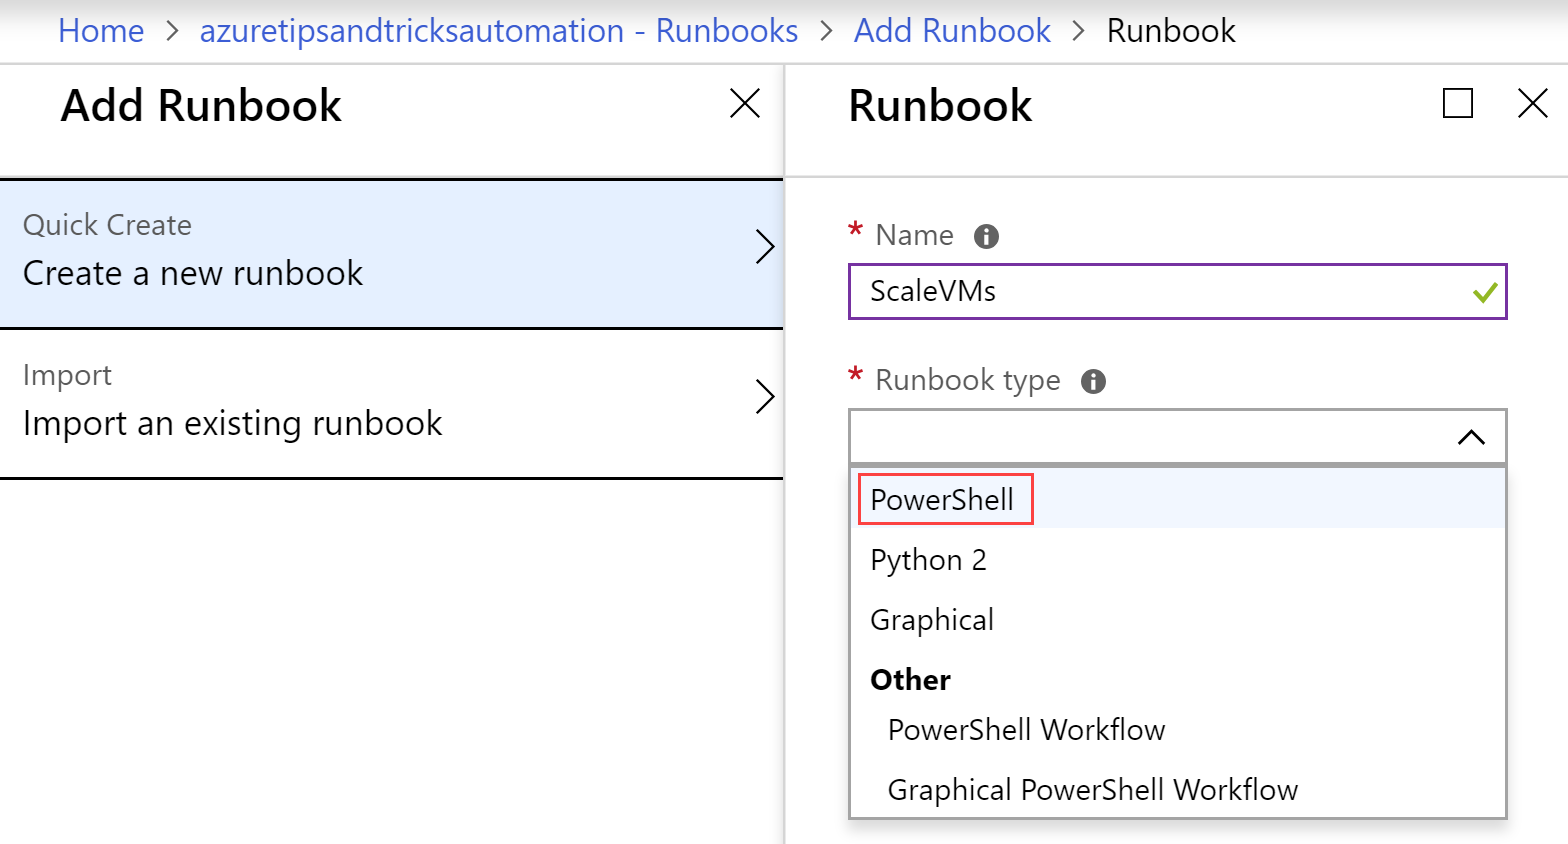
(Create a runbook in the Azure portal)
- We will now create the PowerShell that does the actual work. We'll start by declaring some variables
param(
    [parameter(Mandatory=$false)]
    [bool]$scaleUp = $false,

    [parameter(Mandatory=$false)]
    [string]$ScaleUpSize = "Standard_D2_V2",

    [parameter(Mandatory=$false)]
    [string]$ScaleDownSize = "Standard_B1ms"
)
2
3
4
5
6
7
8
9
10
The first one is going to determine if we scale up or down. The second and third variables indicate to which tier we should scale up or down. For instance to "Standard_D2_V2".
- Next, we add PowerShell script to log into Azure. We do that using the AzureRunAsConnection that Azure Automation has created for us automatically
try
{
    "Logging in to Azure..."
    $runAsConnectionProfile = Get-AutomationConnection `
    -Name "AzureRunAsConnection"
    Add-AzureRmAccount -ServicePrincipal `
    -TenantId $runAsConnectionProfile.TenantId `
    -ApplicationId $runAsConnectionProfile.ApplicationId `
    -CertificateThumbprint ` $runAsConnectionProfile.CertificateThumbprint | Out-Null
    Write-Output "Authenticated with Automation Run As Account."
}
2
3
4
5
6
7
8
9
10
11
- Once we are successfully logged in, we can set variables that determine the tier that we scale to. When $ScaleUp is true, we use the $ScaleUpSize parameter. And when it is false, we use the $ScaleDownSize parameter
if($scaleUp){
    $ScaleSize= $ScaleUpSize
}
else{
    $ScaleSize= $ScaleDownSize
}
2
3
4
5
6
- Now, for the meat of the script. In the script below, the following happens a. First, we get all of the resource groups and loop through them b. In each resource group, we find all of the VMs and loop through them c. Next, we get the current size of the VM (so the pricing tier) and compare that against the size that we want to scale to. If the VM is already the same size, we don't scale it d. Next, we check if the VM is running and stop it if it is running e. Finally, we update the VM with the new size
Function Start-VMAutoScaling{
    # a. First, we get all of the resource groups and loop through them
    $RGs = Get-AzureRMResourceGroup
    foreach($RG in $RGs){
        $RGN = $RG.ResourceGroupName
        $VMs = Get-AzureRmVM -ResourceGroupName $RGN
            foreach ($VM in $VMs){
                # b. In each resource group, we find all of the VMs and loop through them
                $VMName = $VM.Name
                $VMDetail = Get-AzureRmVM -ResourceGroupName $RGN -Name $VMName
                $VMSize = $VMDetail.HardwareProfile.VmSize
                if(($VMSize -ne $ScaleSize) -and ($ScaleSize)){
                    # c. Next, we get the current size of the VM (so the pricing tier) and compare that against the size that we want to scale to.
                    Write-Output "Resource Group: $RGN", ("VM Name: " + $VMName), "Current VM Size: $VMSize", "$scaleTagSwitch : $ScaleSize"
                    $VMStatus = Get-AzureRmVM -ResourceGroupName $RGN -Name $VMName -Status

                    # d. Next, we check if the VM is running and stop it if it is running
                    if($VMStatus.Statuses[1].DisplayStatus -eq "VM running"){
                        Write-Output "Stopping VM '$VMName'"
                        Stop-AzureRmVM -ResourceGroupName $RGN -Name $VMName -Force | Out-Null
                    }

                    # e. Finally, we update the VM with the new size
                    $VM.HardwareProfile.VmSize = $ScaleSize
                    Update-AzureRmVM -VM $VM -ResourceGroupName $RGN
                    Write-Output "Resized VM '$VMName'" `n
                }
                else{
                    Write-Output "VM '$VMName' is exempted from scaling (Currrent VM size matches scaling size)"
                }
            }
    }
}
2
3
4
5
6
7
8
9
10
11
12
13
14
15
16
17
18
19
20
21
22
23
24
25
26
27
28
29
30
31
32
33
- Finally, we call the Start-VMAutoscaling function
############################ Start autoscaling function ####################

Start-VMAutoScaling
Write-Output "VM Scaling Completed"
2
3
4
The script is now ready. Click Save and click on Test pane to test it.
In the test pane, leave all the parameters as they are and click Start. This will look for VMs in your subscription and scale them down as that is the default setting. This will only work if you have VMs in your subscription. After a while, it will succeed and show that in the output of the Test Pane

(Test completed in the Azure portal)
Go back to the runbook edit blade (you can use the breadcrumb menu in the top to navigate back to it) and click Publish. This pushes the runbook to 'production', which means that you can now use it and schedule it.
You should be in the blade of the runbook. If not, navigate to it. Here, you can click Schedule to set up a schedule to run this workbook on. You can, for instance, schedule the runbook to scale up every morning and scale down every evening. This will save you costs if you don't need to run powerful machines during the night
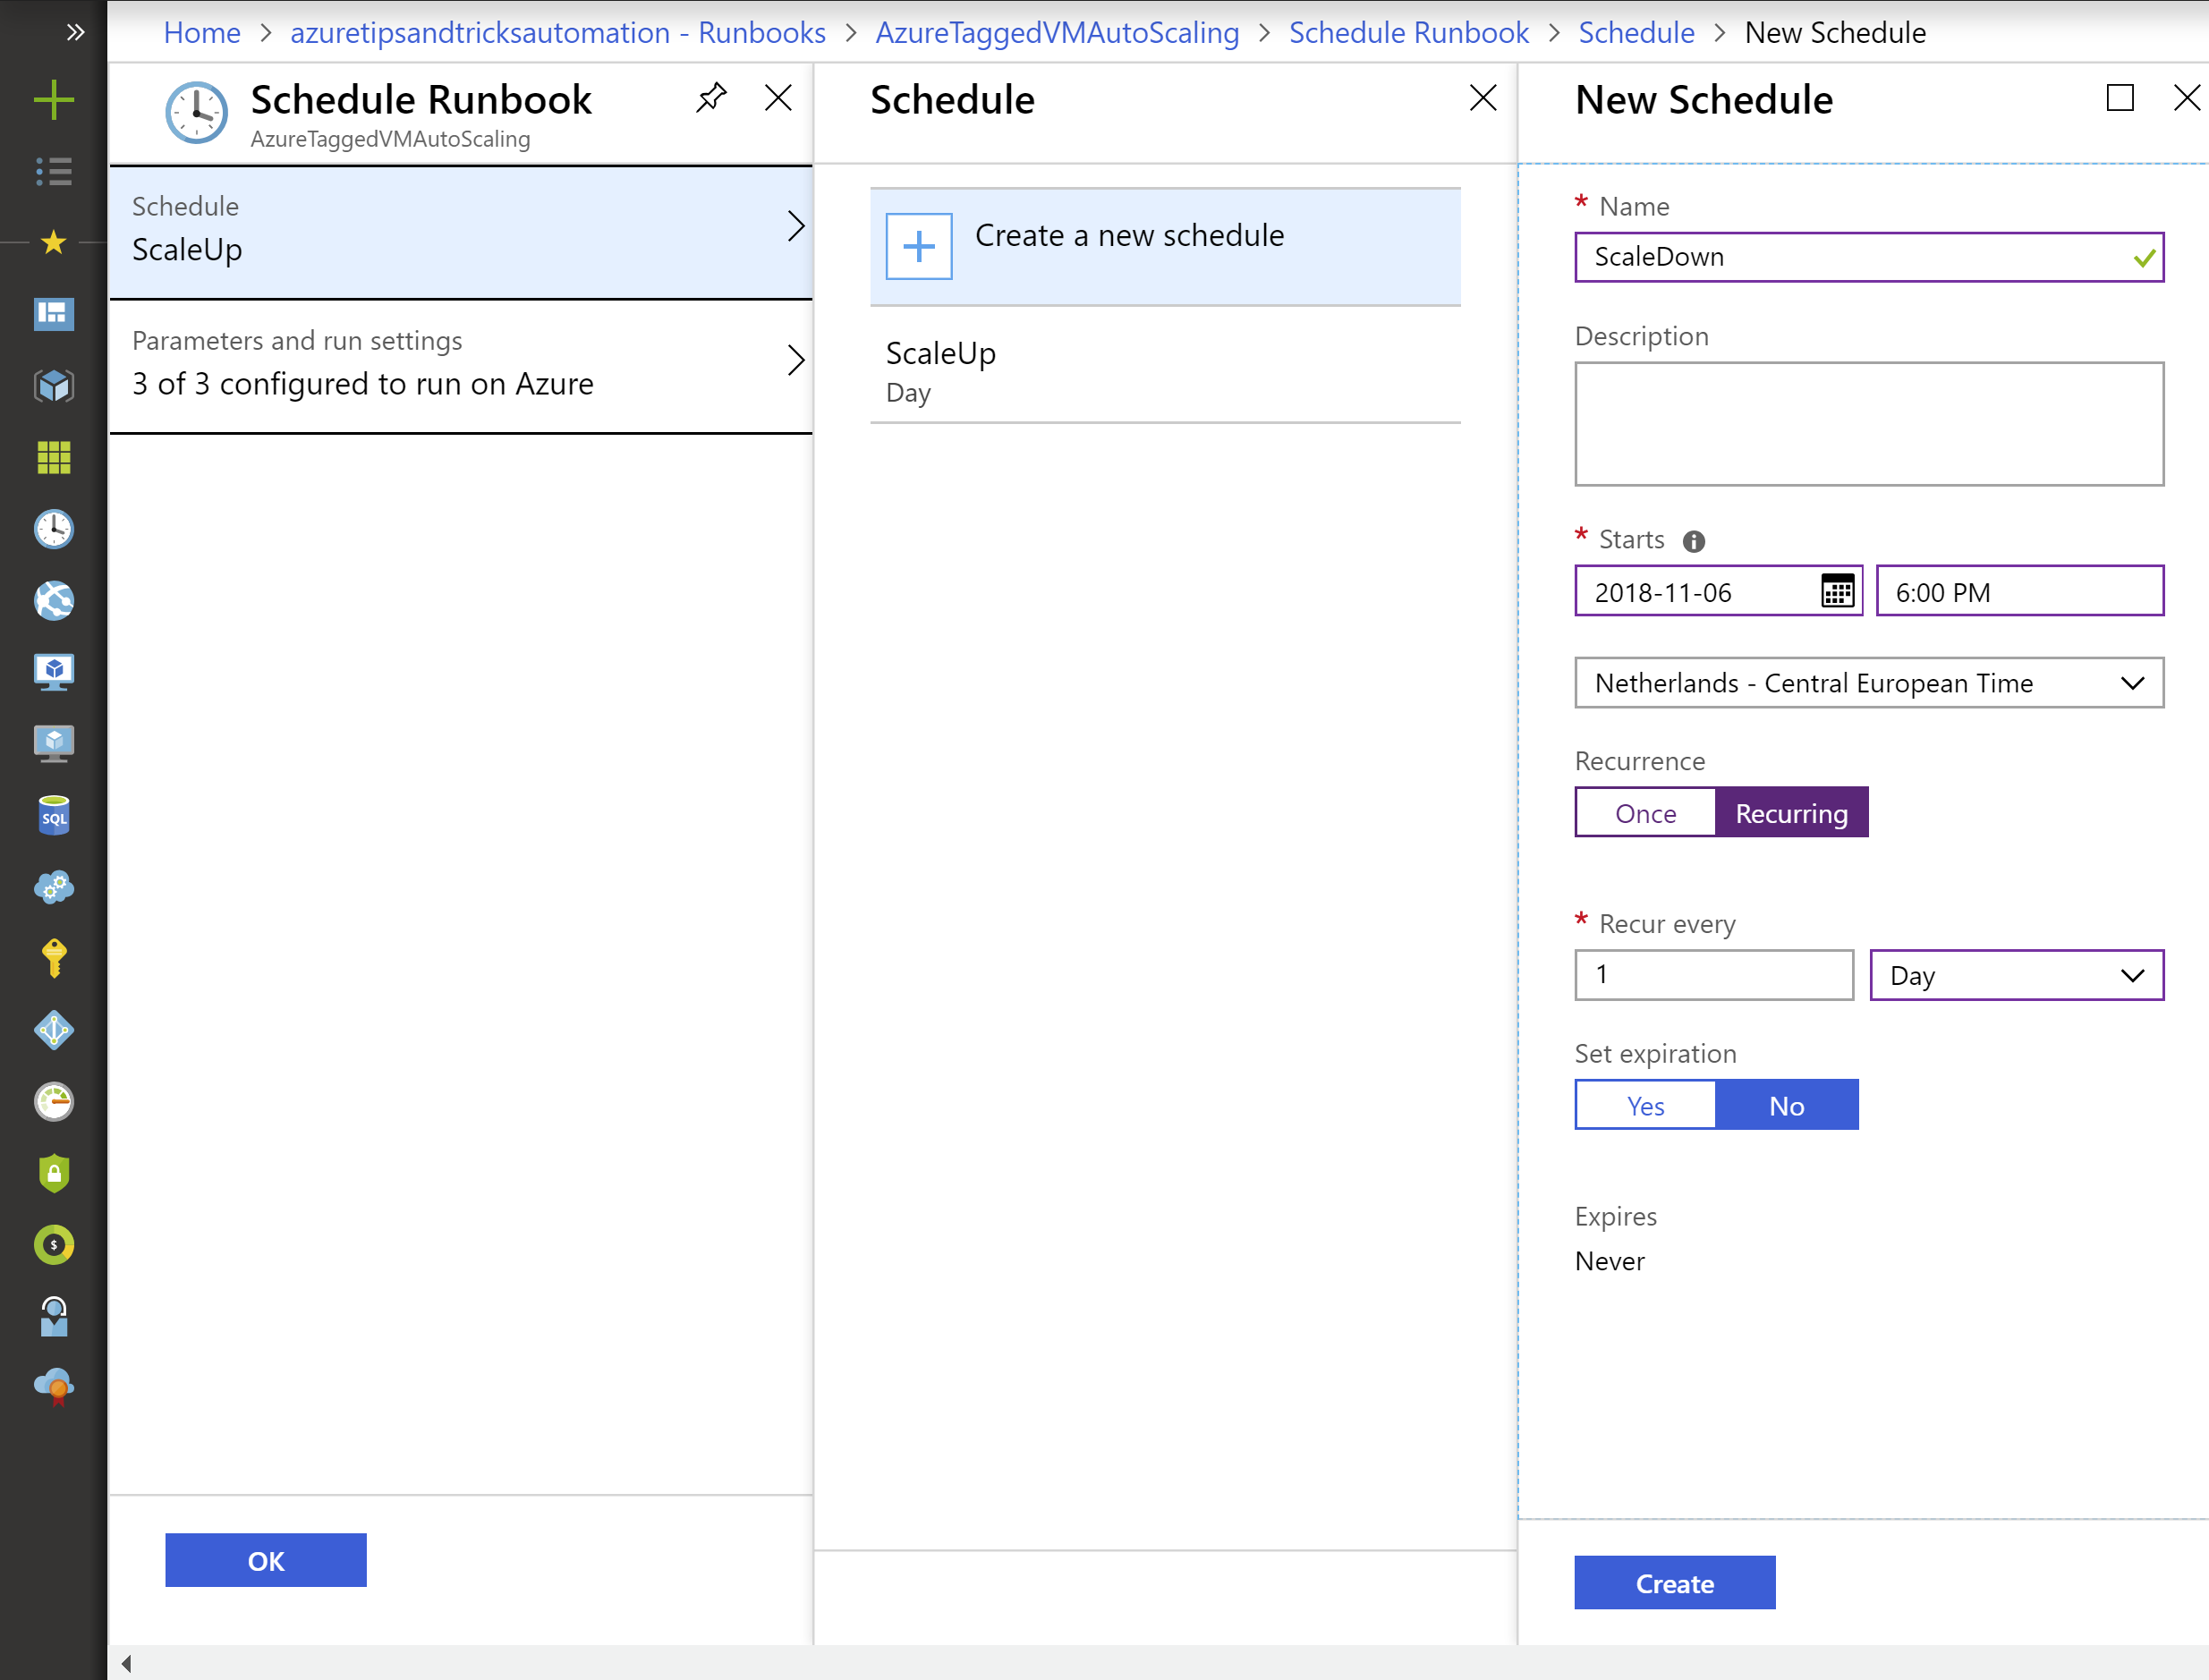
(Create a schedule for the runbook in the Azure portal)
# Conclusion
That's it! Now, we have automated an important task using an Azure Automation PowerShell Runbook that runs on a schedule. Sure, this script should be more sophisticated as it should maybe have more checks and balances and it should be configurable to only scale certain VMs in your subscription. But that's okay as I just wanted to show you how you can go about creating functionality like this. And remember, there are already many pre-made Azure Automation solutions available in the Runbook gallery (opens new window).