
TIP
🔥 Help shape the future of Azure Tips and Tricks by telling what you'd like us to write about here (opens new window).
💡 Learn more : Azure App Configuration (opens new window).
📺 Watch the video : Adding Azure Feature Flags to Angular projects (opens new window).
# How to Add Azure Feature Flags to Angular projects
# Feature Flags are your friends
When you are working on a big feature, you need to make sure that your code still works with all the other code and doesn't break anything. The easiest way to do that, is to get the code of your big feature in the main code branch to see if it works. The problem with this approach is that you end up with unfinished features in your main code. Feature flags allow you to hide features until they are done and switch them on or off dynamically, without changing code. This is great for unfinished features and also for experimenting with features. You can switch them on to see if and how they are used and off again when you need to.
A feature flag is a boolean value that you set in an external system. The value is read by your application and determines if a feature is shown or activated. In Azure, you can use the Feature Manager (opens new window) of the Azure App Configuration Service (opens new window) to manage feature flags. In this post, we'll see how to use these in an Angular application.
# Prerequisites
If you want to follow along, you'll need the following:
- An Azure subscription (If you don't have an Azure subscription, create a free account (opens new window) before you begin)
- You'll need the latest version of Visual Studio (opens new window)
# Using Feature Flags in an Angular application
We'll create an Azure App Configuration service and add a feature flag to it, so that we can use that in an Angular application. Let's start by creating the App Configuration in the Azure portal:
- Go to the Azure portal (opens new window)
- Click the Create a resource button (the plus-sign in the top left corner)
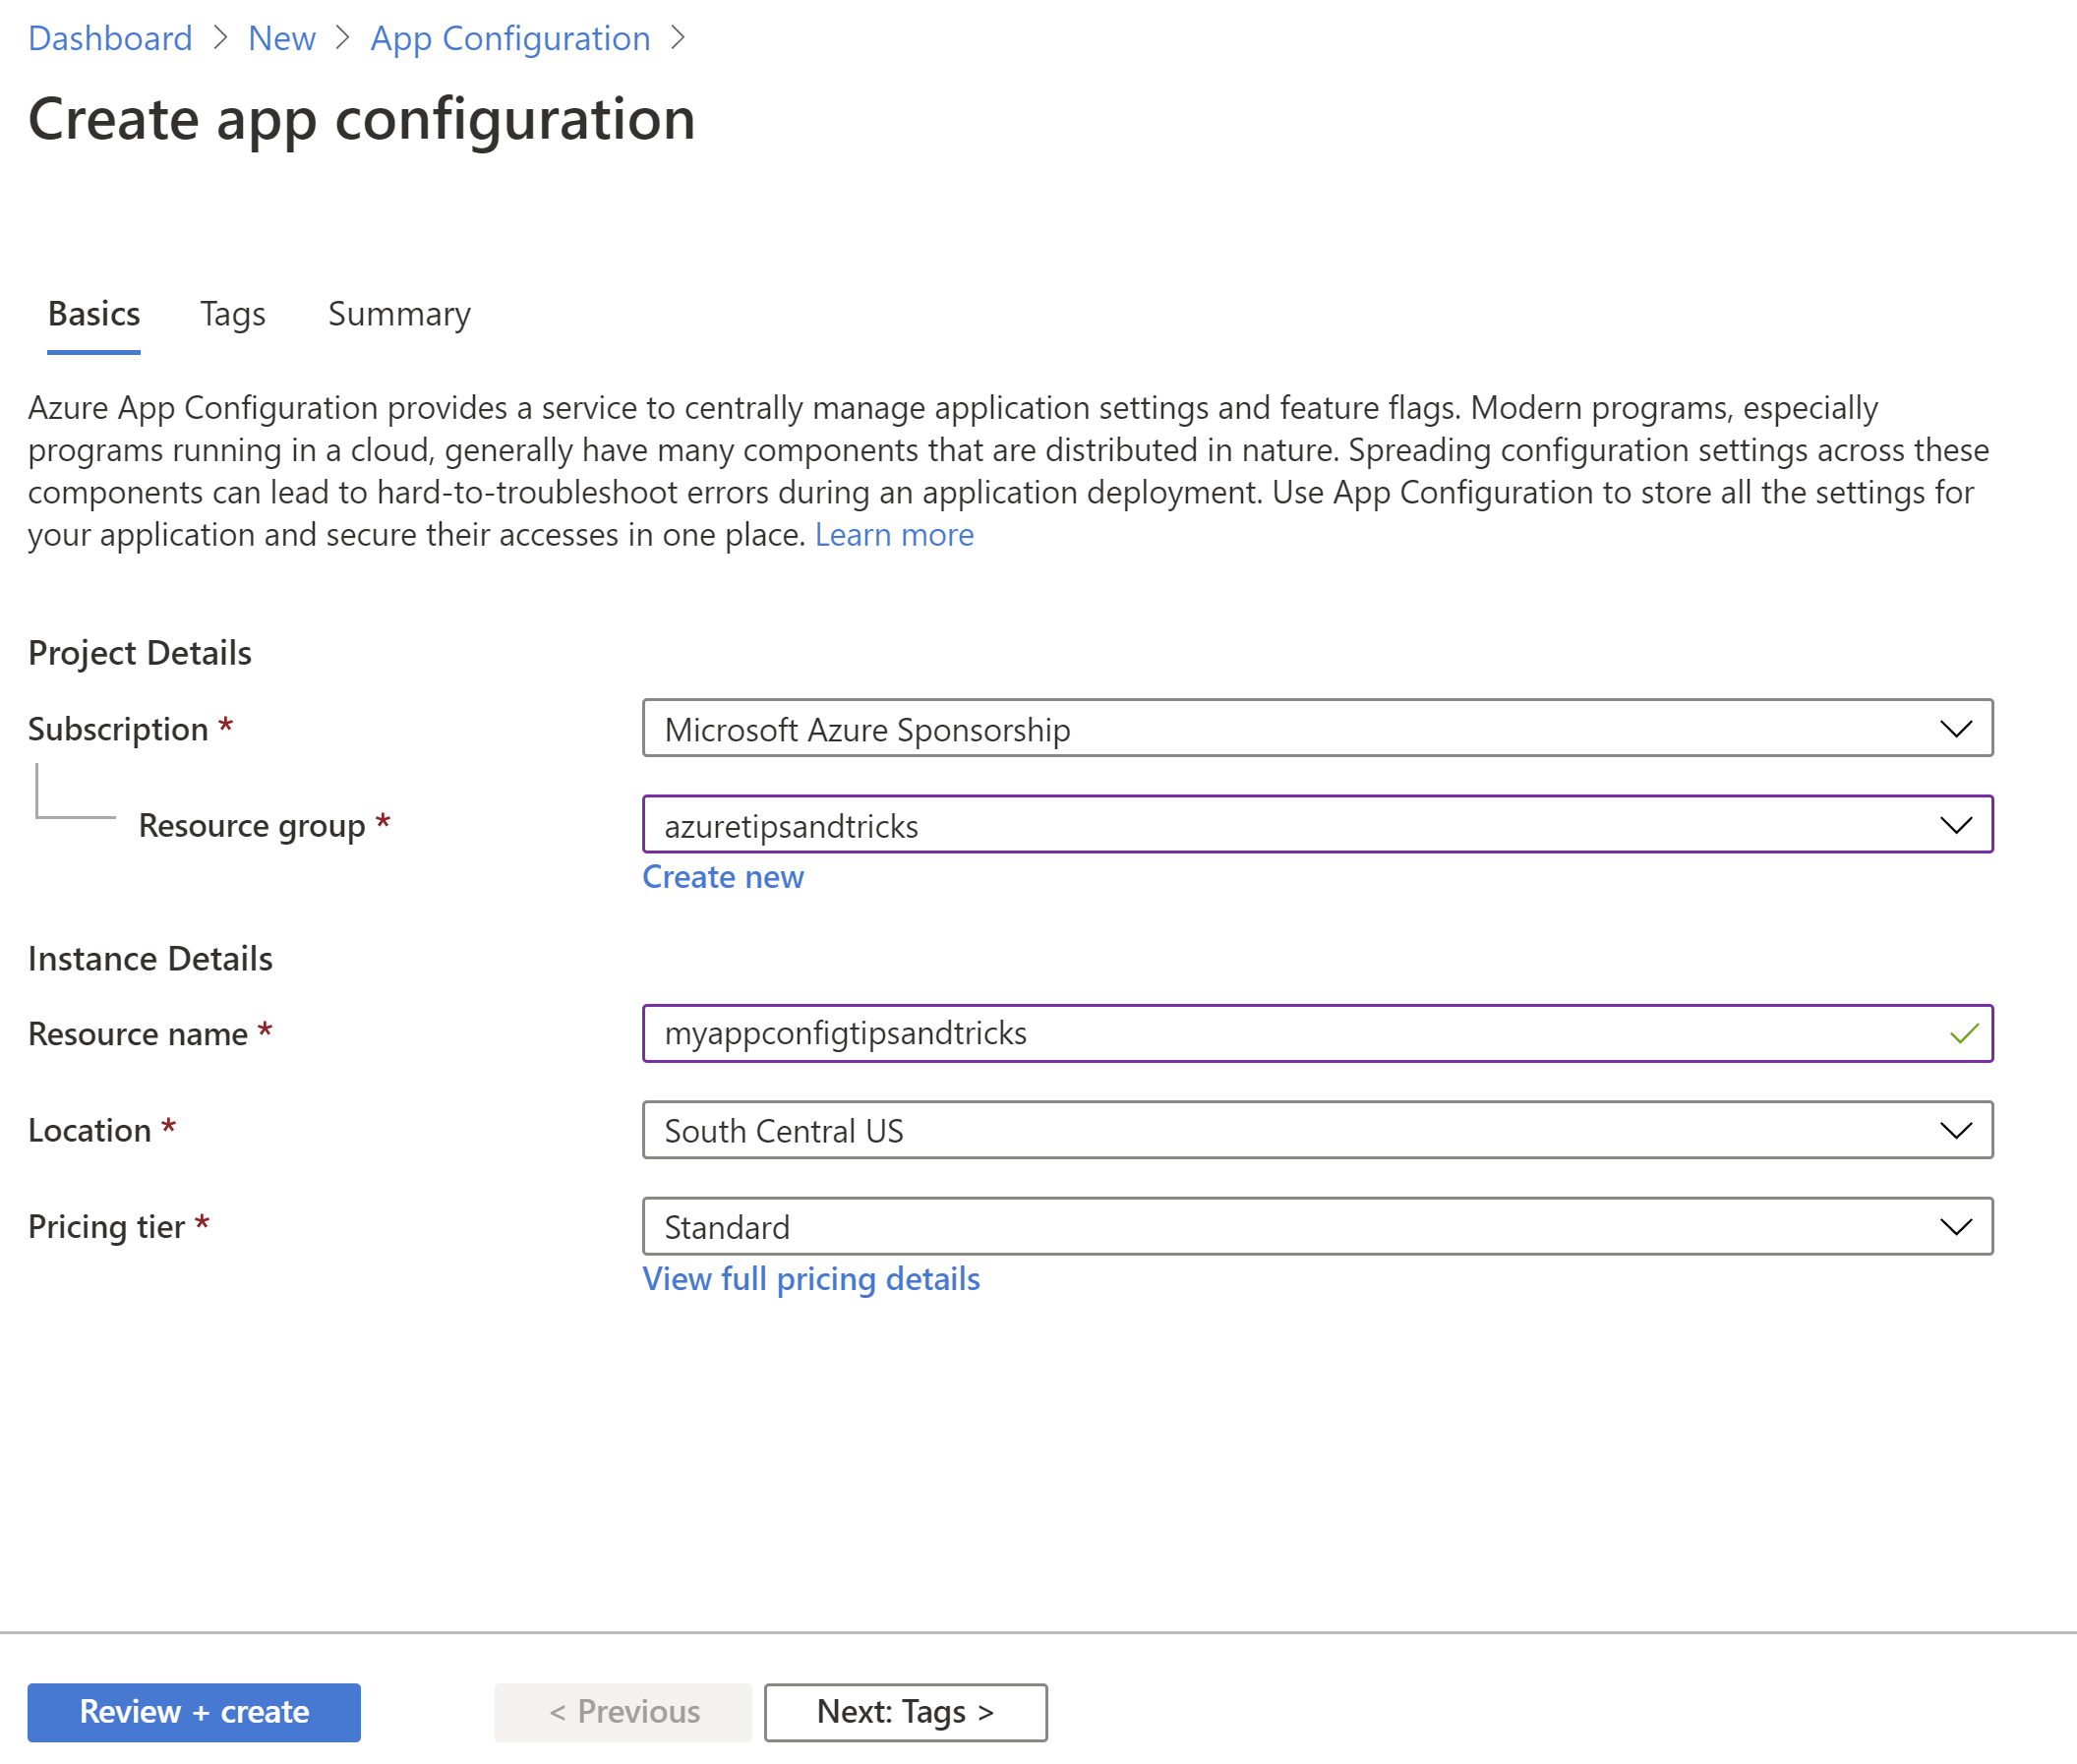
(Create an App Configuration in the Azure portal)
- Search for App Configuration and select the result. This opens the Create App Configuration blade
- Select a Resource Group
- Fill in a Name
- Select a Location
- Select a Pricing Tier. The free tier is fine for this example
- Select Review + create and Create after that. This creates the App Configuration Service
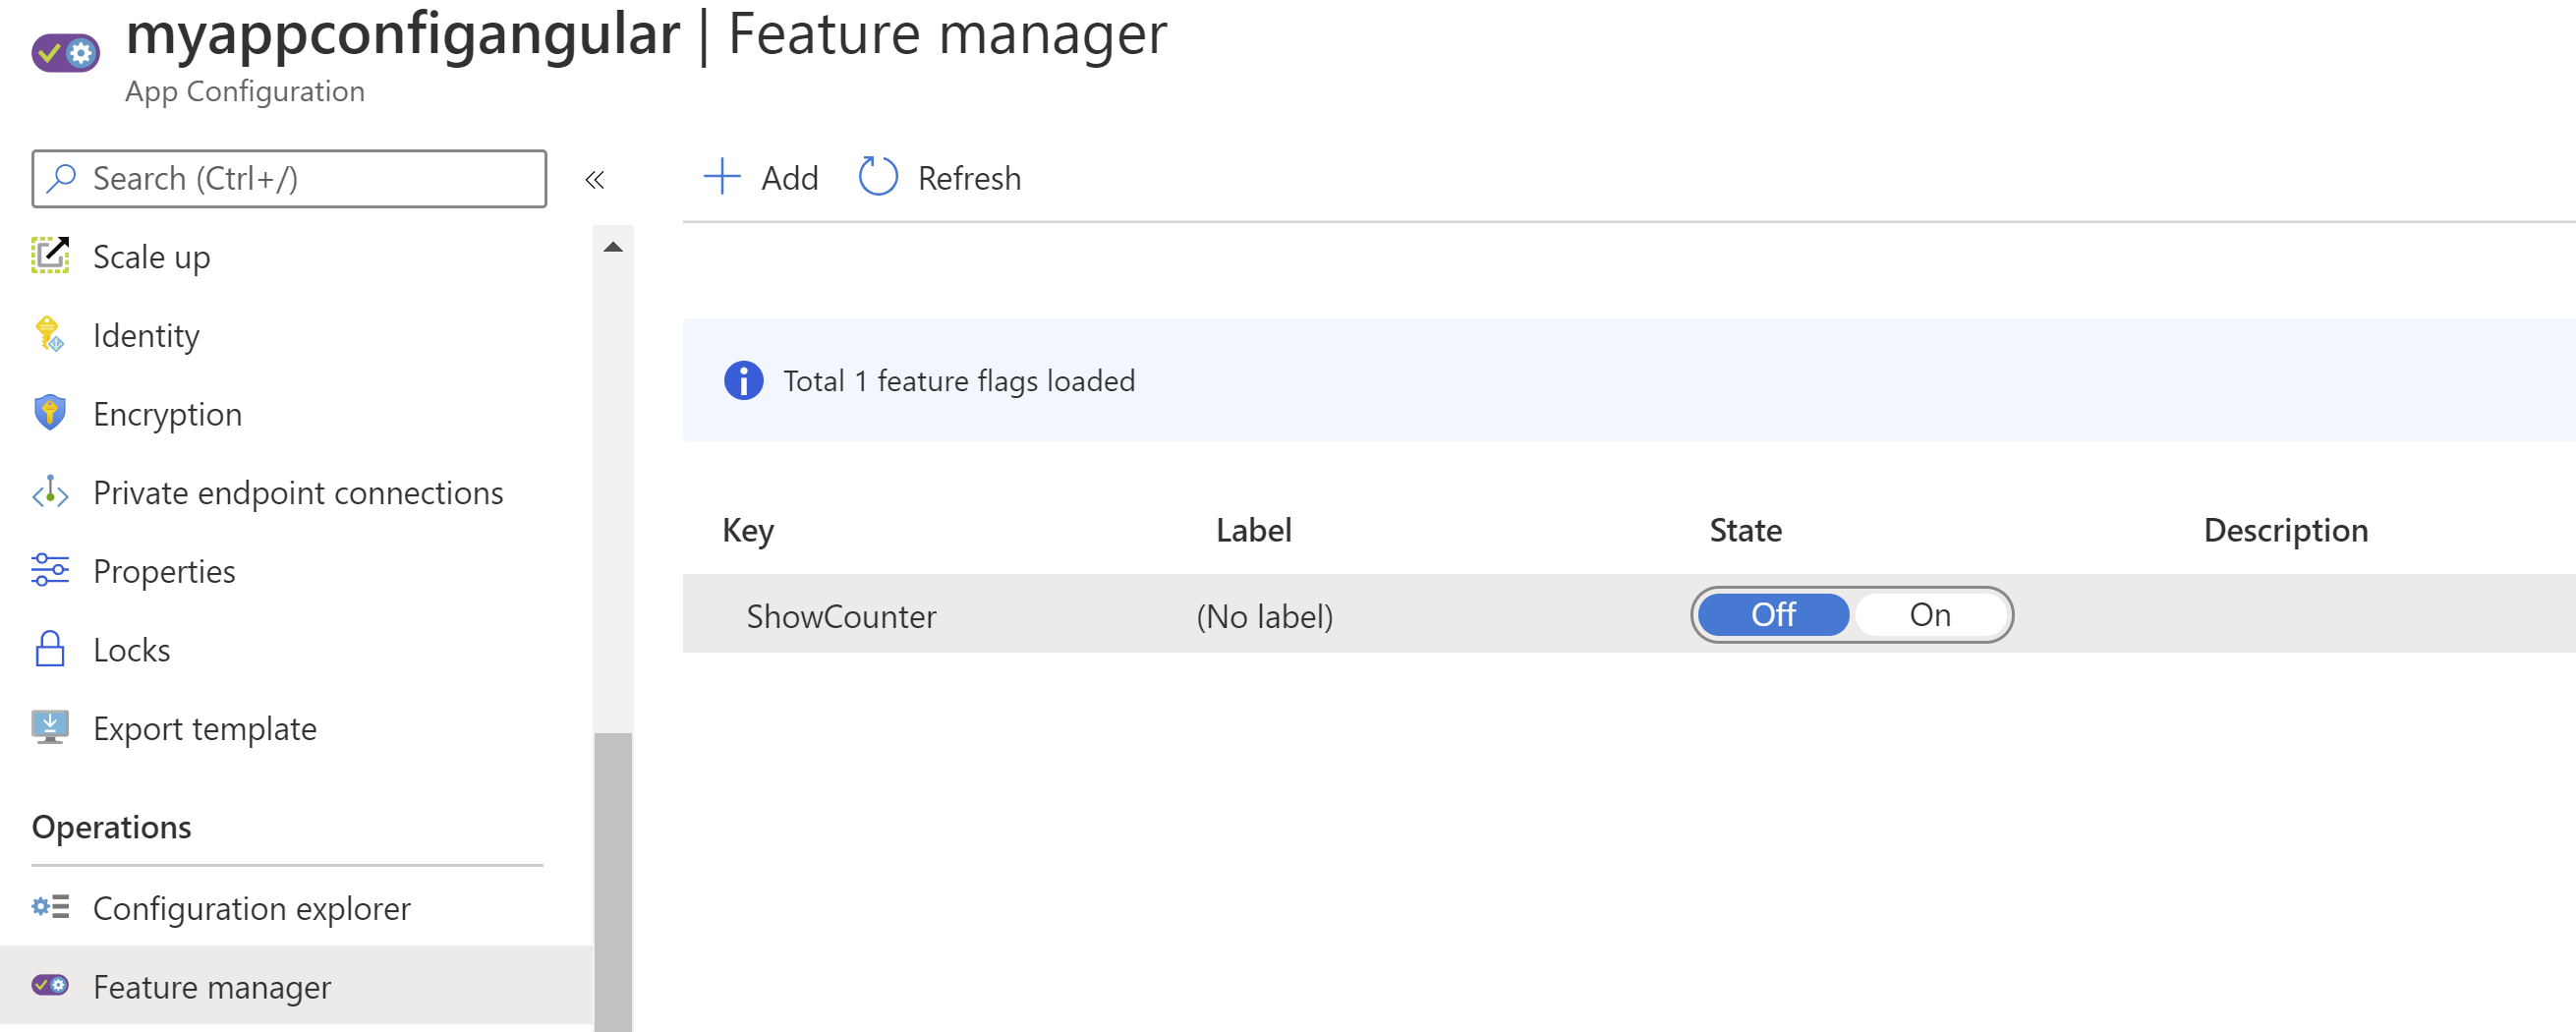
Once the App Configuration is created, we need to create a feature flag in it.
- Go to the App Configuration service in the Azure portal
- Select the Feature manager menu
- Select Add to add a new feature flag
- Type in a Key name. Let's use "ShowCounter"
- Leave the rest as it is and select Apply to add the feature flag. That's it
(Add Feature Flag in the Azure portal)
- Also, still in the App Configuration in the Azure portal, navigate to the Access Keys menu
- Select Read-only keys
- Copy the connection string. We'll need this later
We now have a configured App Configuration with a feature flag in it. Let's create the Angular app and read the flag from there.
- Open Visual Studio
- Select Create a new project
- Select ASP.NET Core Web Application and select Next
- Pick a name and location for the application and select Create
- In the dialog that pos up, select Angular and select Create. This creates an ASP.NET Core application with an Angular front-end
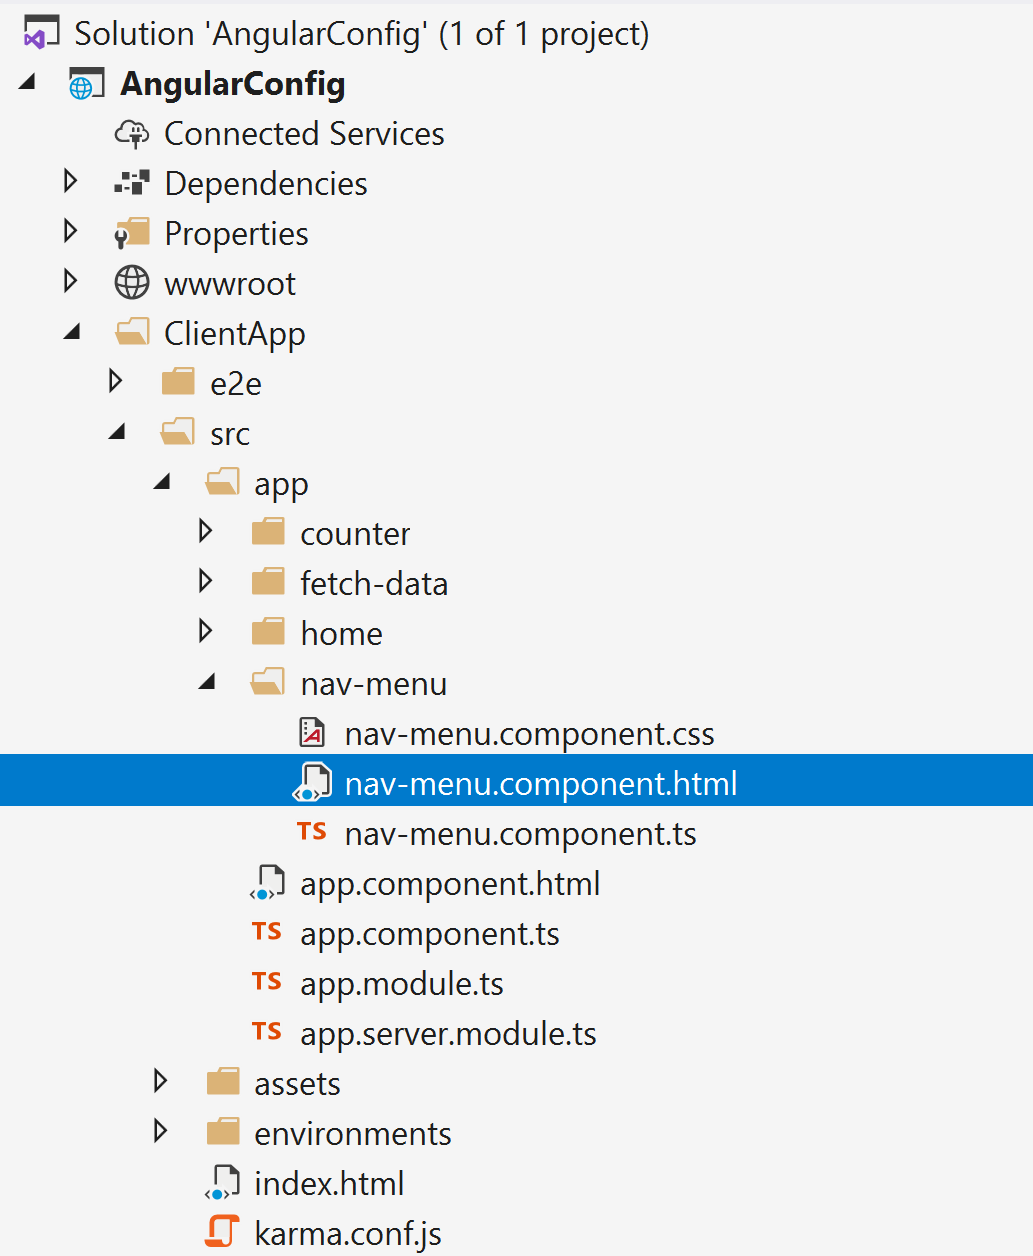
(ASP.NET Core application with Angular front-end in Visual Studio)
Let's change the Angular part of the application so that it connects to the App Configuration and retrieves the feature flag. As this is an ASP.NET Core application, we could connect to App Configuration on the server, but I want to show you how to do all of this client-side. The goal is to show and hide the counter menu item with a feature flag.
- To connect to the App Configuration from Angular, we need to add two packages to the Angular app. We can do this by adding them in the package.json file, which you can find in the ClientApp folder, with the rest of the Angular application. Open package.json
- Insert the following lines of code into the dependencies section:
    "@azure/app-configuration": "^1.1.0",
    "@azure/identity": "^1.0.3",
2
- Open ClientApp/src/app/nav-menu/nav-menu.components.ts. This is the class responsible for the navigation menu. Change the class to look like the code below. This code imports the App Configuration Client from the package and creates a new parameter called counterFeature. It gets the value for the counterFeature from the ShowCounter method that connects to App Configuration and retrieves the feature flag. You need to insert the read-only connection string to App Config in the conn const. It should be the read-only connection string, because this string will be published to the client and therefore you should assume that anybody can access it.
import { Component } from '@angular/core';
import { AppConfigurationClient } from "@azure/app-configuration";

@Component({
  selector: 'app-nav-menu',
  templateUrl: './nav-menu.component.html',
  styleUrls: ['./nav-menu.component.css']
})
export class NavMenuComponent {
  isExpanded = false;

  collapse() {
    this.isExpanded = false;
  }

  toggle() {
    this.isExpanded = !this.isExpanded;
  }

  counterFeature = this.ShowCounter();

  async ShowCounter() {
    const conn = 'Insert App Configuration Read-Only Connection String';
    const client = new AppConfigurationClient(conn);

    var val = await client.getConfigurationSetting({ key: ".appconfig.featureflag/ShowCounter" });

    return JSON.parse(val.value).enabled;
  }
}
2
3
4
5
6
7
8
9
10
11
12
13
14
15
16
17
18
19
20
21
22
23
24
25
26
27
28
29
30
31
- Open ClientApp/src/app/nav-menu/nav-menu.components.html. This contains the HTML for the navigation menu. Find the list item for the counter and replace its code with the code below. This reads the counterFeature parameter and toggles the visibility attribute based on that. I use the async keyword for it, because we retrieve the counterFeature using the async method ShowCounter.
          <li  [style.visibility]="(counterFeature | async) ? 'visible' : 'hidden'" class="nav-item" [routerLinkActive]="['link-active']">
            <a class="nav-link text-dark" [routerLink]="['/counter']">Counter</a>
          </li>
2
3
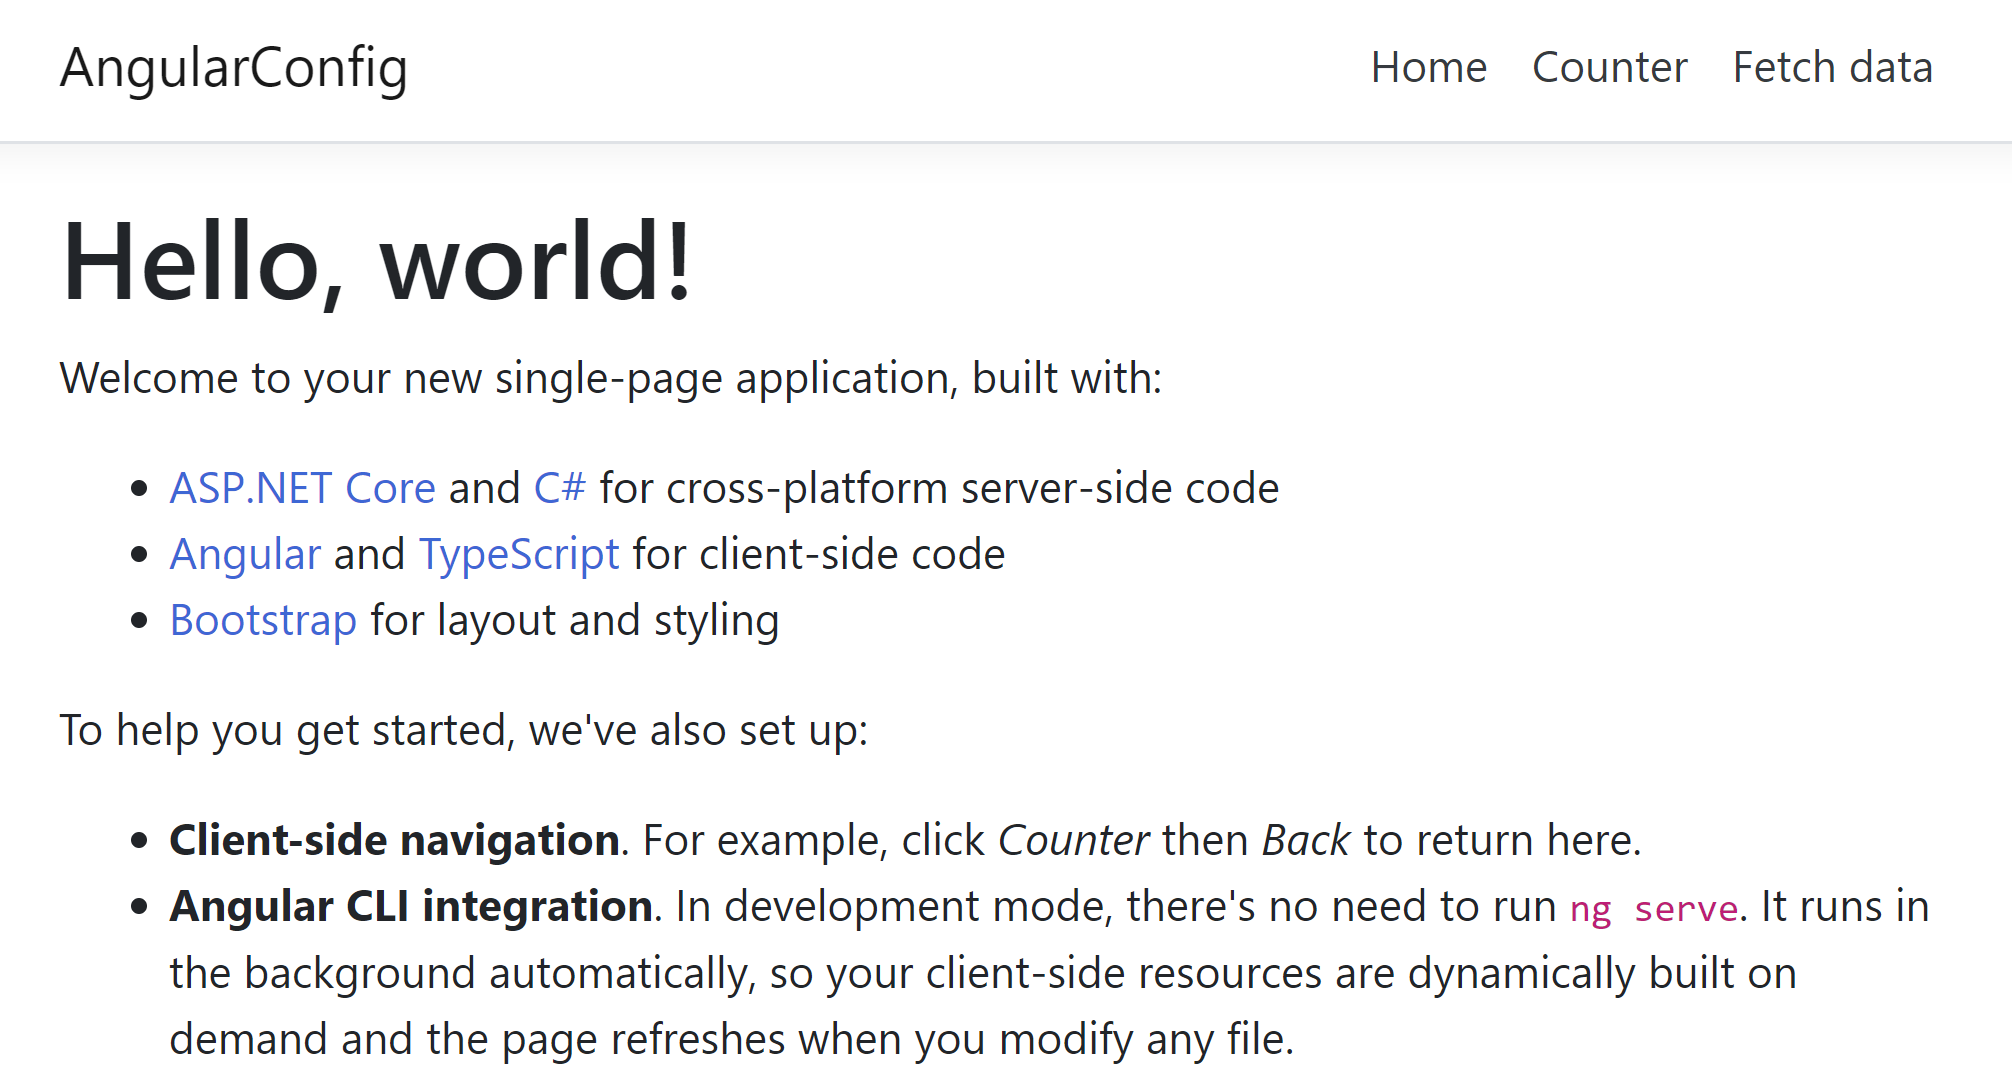
That's it! Now run the application and see what happens. When the application opens, you should see something like the image below, with the counter menu item missing. That is because, by default, the feature flag that we've added is disabled.
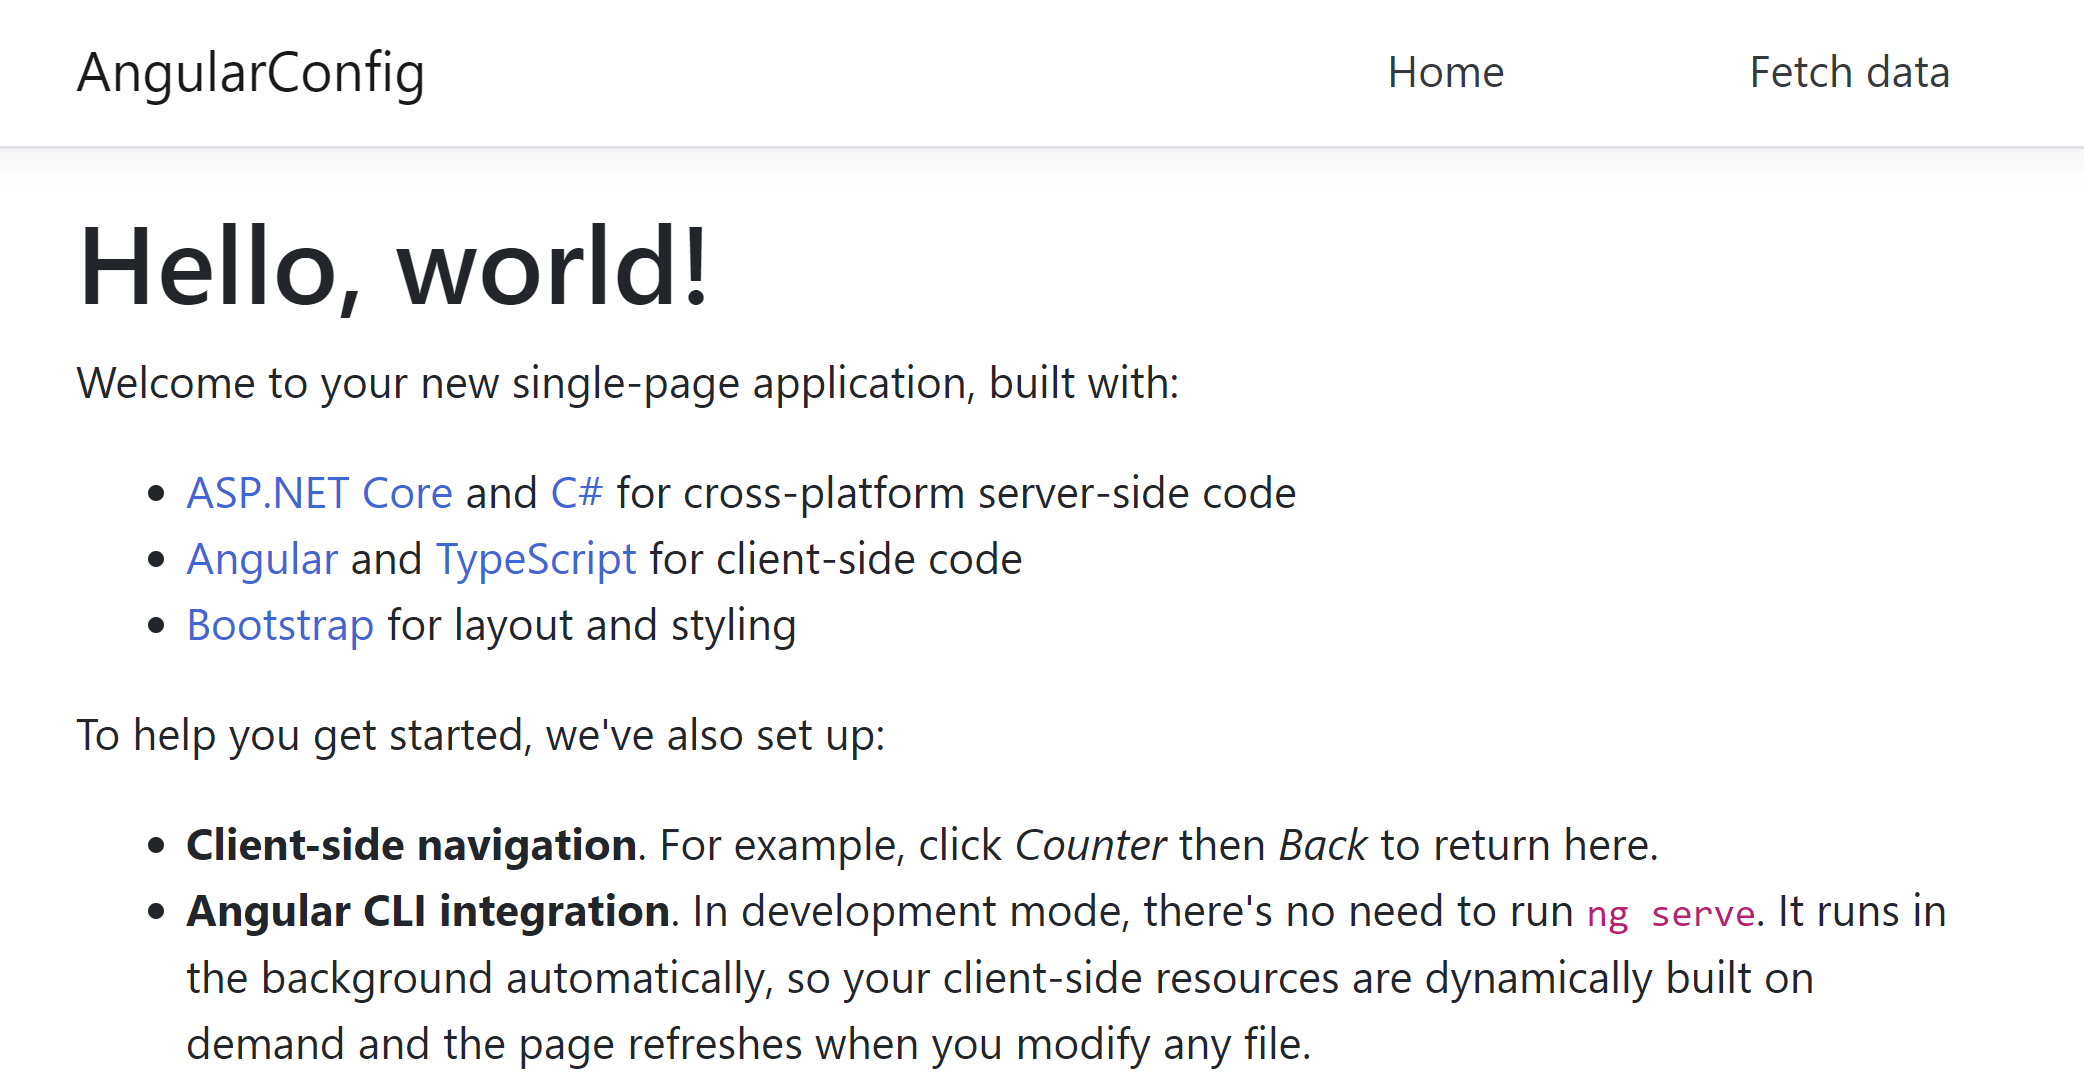
(Counter menu invisible)
Now go back to the Azure portal and to the feature flag and toggle its state to On by clicking on On. Now go back to the application and refresh the screen.
(Counter menu visible after feature flag was toggled)
The counter menu is now visible, without changing code or redeploying the application.
# Conclusion
Azure App Configuration Service (opens new window) enables you to create feature flags that can dynamically show or hide features in your application, without changing code or redeploying your app. Go and check it out!