
TIP
🔥 Checkout our new Azure Developer page at azure.com/developer (opens new window).
💡 Learn more : Static website hosting in Azure Storage (opens new window).
📺 Watch the video : Use Blazor and C# to host a static website in Azure Storage (opens new window).
# Use Blazor and C# to host a static website in Azure Storage
# Host a client-side Blazor app as a static website in Azure Storage
Blazor (opens new window) is a cool, new feature of ASP.NET that allows you to build interactive web UIs using C# instead of JavaScript. And you can run your client-side C# code directly in the browser, using WebAssembly (opens new window), which is a standard that is supported by all modern, major browsers.
In this article, we'll create a client-side Blazor web application and host it in Azure Storage (opens new window) using the Static Websites (opens new window) feature.
# Creating the Blazor app
We will first create the Blazor application. I'm going to use Visual Studio 2019 to do that. To follow along, you'll need the following:
- .NET Core 3.0 SDK (latest version) (opens new window)
- Get the Blazor templates by executing the following command on the command line:
dotnet new -i Microsoft.AspNetCore.Blazor.Templates1 - Visual Studio 2019 (opens new window) with the ASP.NET and web development workload selected as well as the latest Blazor (opens new window) extension from the Visual Studio Marketplace
- An Azure subscription (If you don't have an Azure subscription, create a free account (opens new window) before you begin)
Let's create the Blazor app:
- Open Visual Studio 2019
- Create a new project
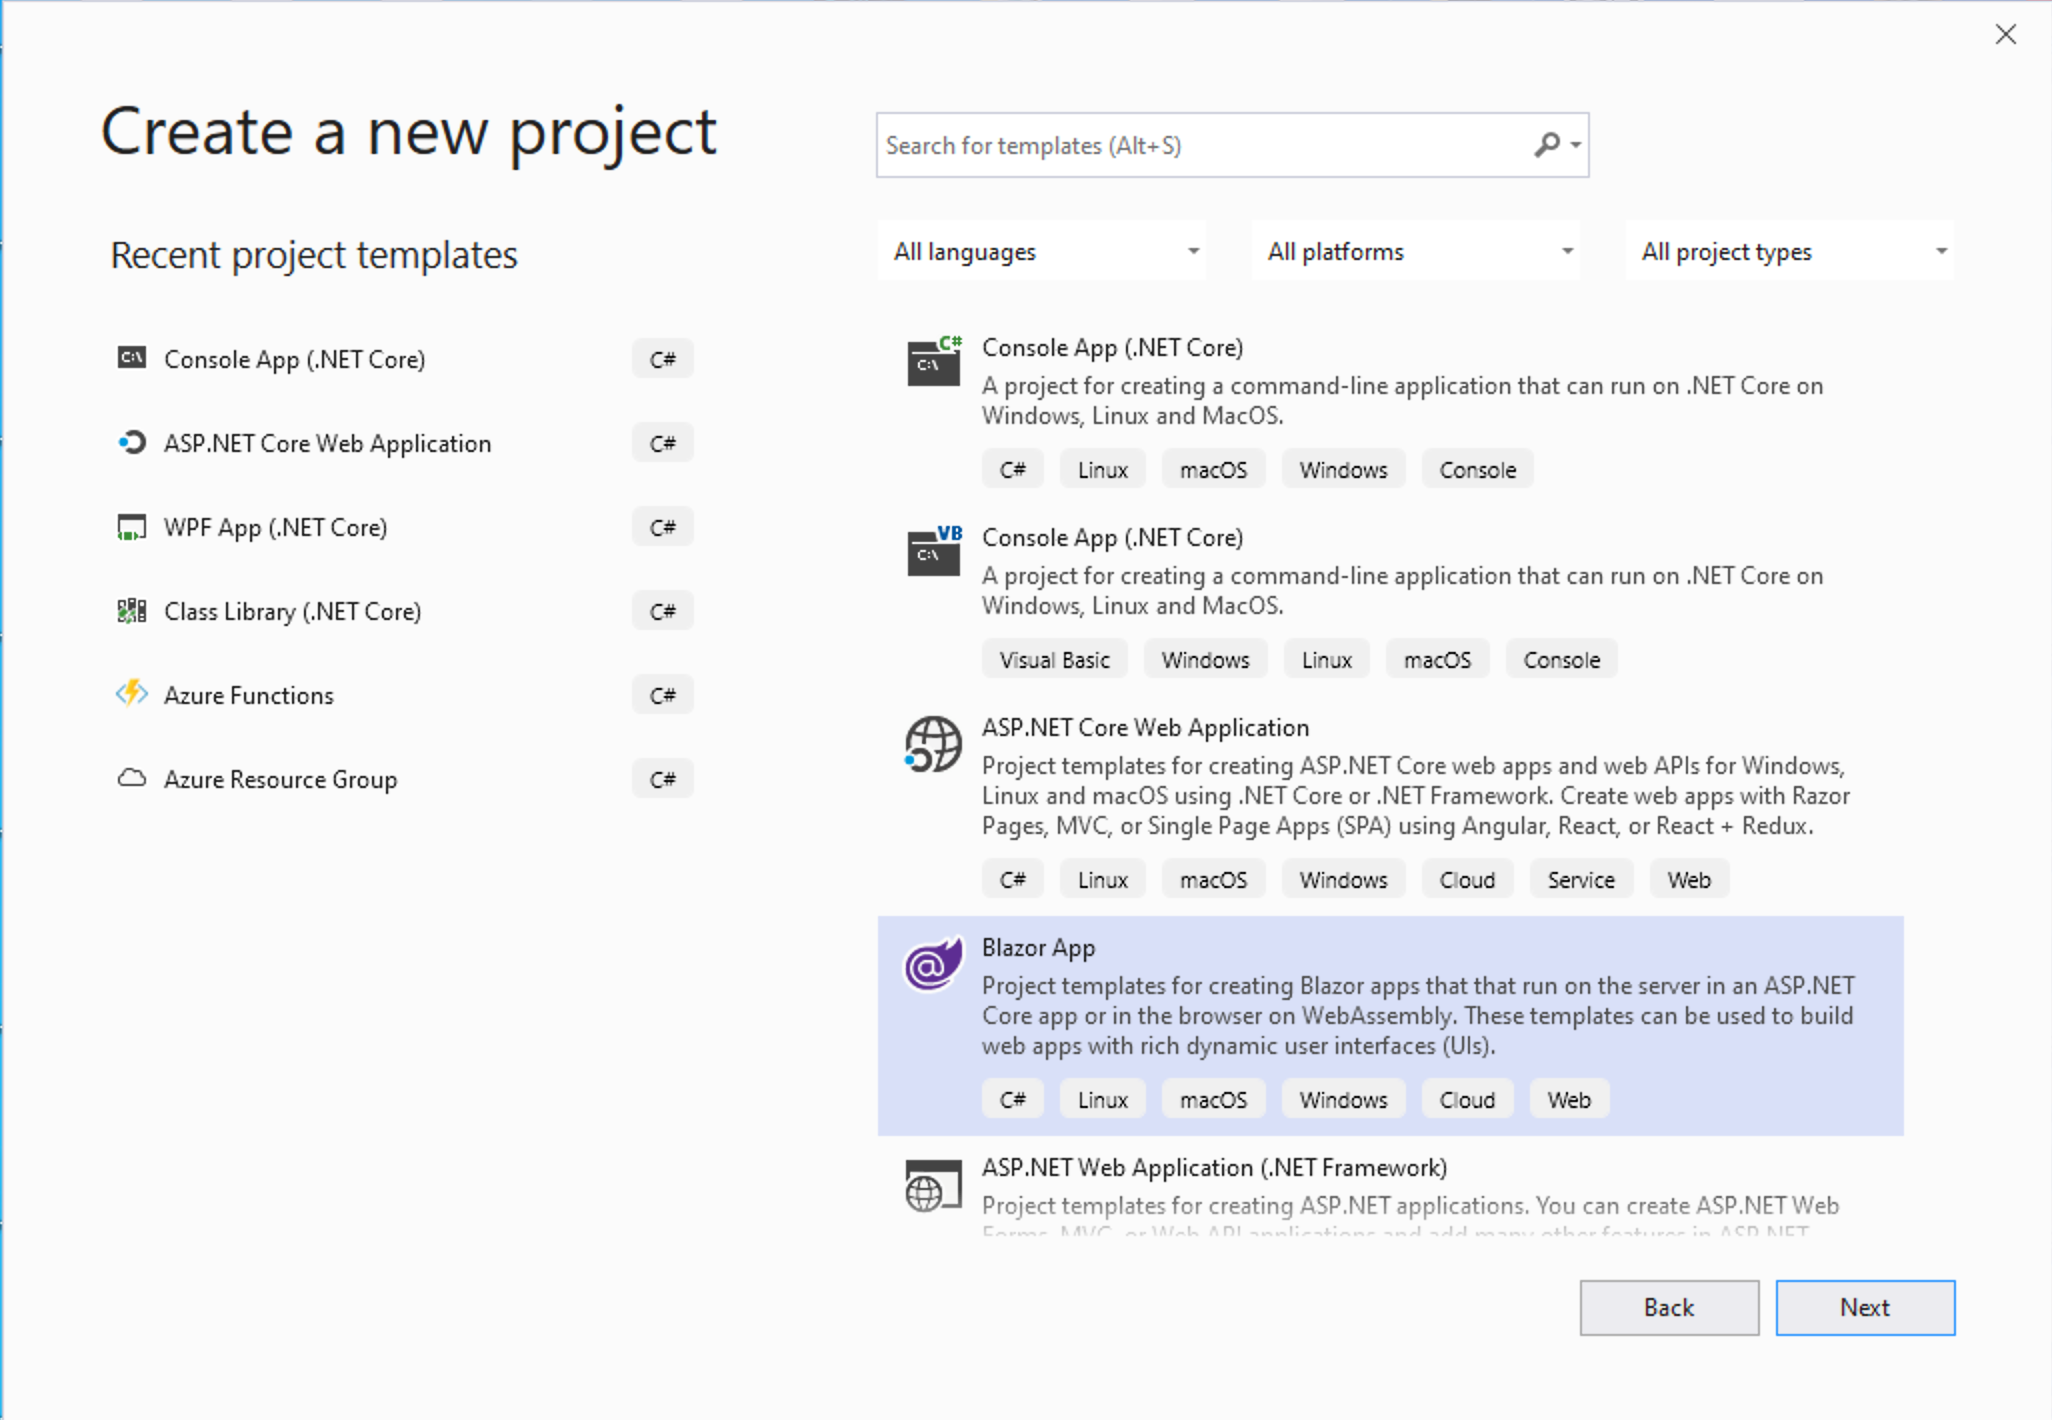
- Choose ASP.NET Core Web Application
- Give it a name
- Choose the template Blazor (client-side), as in the image below:
(Create a new client-side Blazor app in Visual Studio)
- Click Create
You should now have a client-side Blazor application. Take a look at it in the solution explorer. It will look like this:
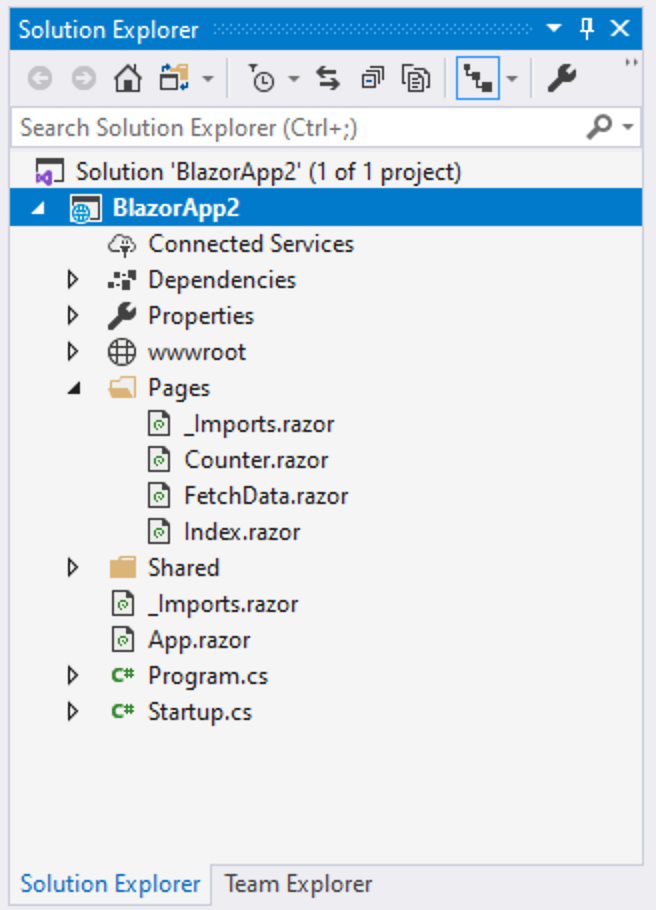
(The folder structure of a default client-side Blazor app)
If you open the page Counter.razor, you'll see an example of how you can use Blazor to work with the UI. Cool right? You can have the UI trigger C# methods and do whatever you want, like increment an int.
@page "/counter"

<h1>Counter</h1>

<p>Current count: @currentCount</p>

<button class="btn btn-primary" @onclick="@IncrementCount">Click me</button>

@code {
    int currentCount = 0;

    void IncrementCount()
    {
        currentCount++;
    }
}
2
3
4
5
6
7
8
9
10
11
12
13
14
15
16
Run the application locally by pressing F5. You'll notice that is fast. You can also debug the C# code by putting a breakpoint in it.
# Publish the Blazor app
To be able to host the Blazor app, we need to publish the files that we need to run it. That's easy in Visual Studio.
- Right-click the Blazor project and click Publish
- Choose Folder as the publish target
- Click Publish to publish the files
- Navigate to the published files. Navigate to the dist folder. We need the contents of that folder to run the website. It should look like this:

(The result of publishing a client-side Blazor app)
# Create an Azure Storage Account and enable the Static website feature
Now that we have a working static web app, we can run it in Azure. We are going to run it as a static website (opens new window) in Azure Storage (opens new window). Running the app in there is very inexpensive, reliable and performant.
Let's start by creating a new Azure Storage account.
- Go to the Azure portal (opens new window)
- Click the Create a resource button (the plus-sign in the top left corner)
- Search for or select Storage account. This will open the Create storage account blade
- Select an Azure subscription
- Select or create a Resource group
- Fill in a name
- Make sure that the account is a StorageV2 account
- Click Review + create
- Click Create
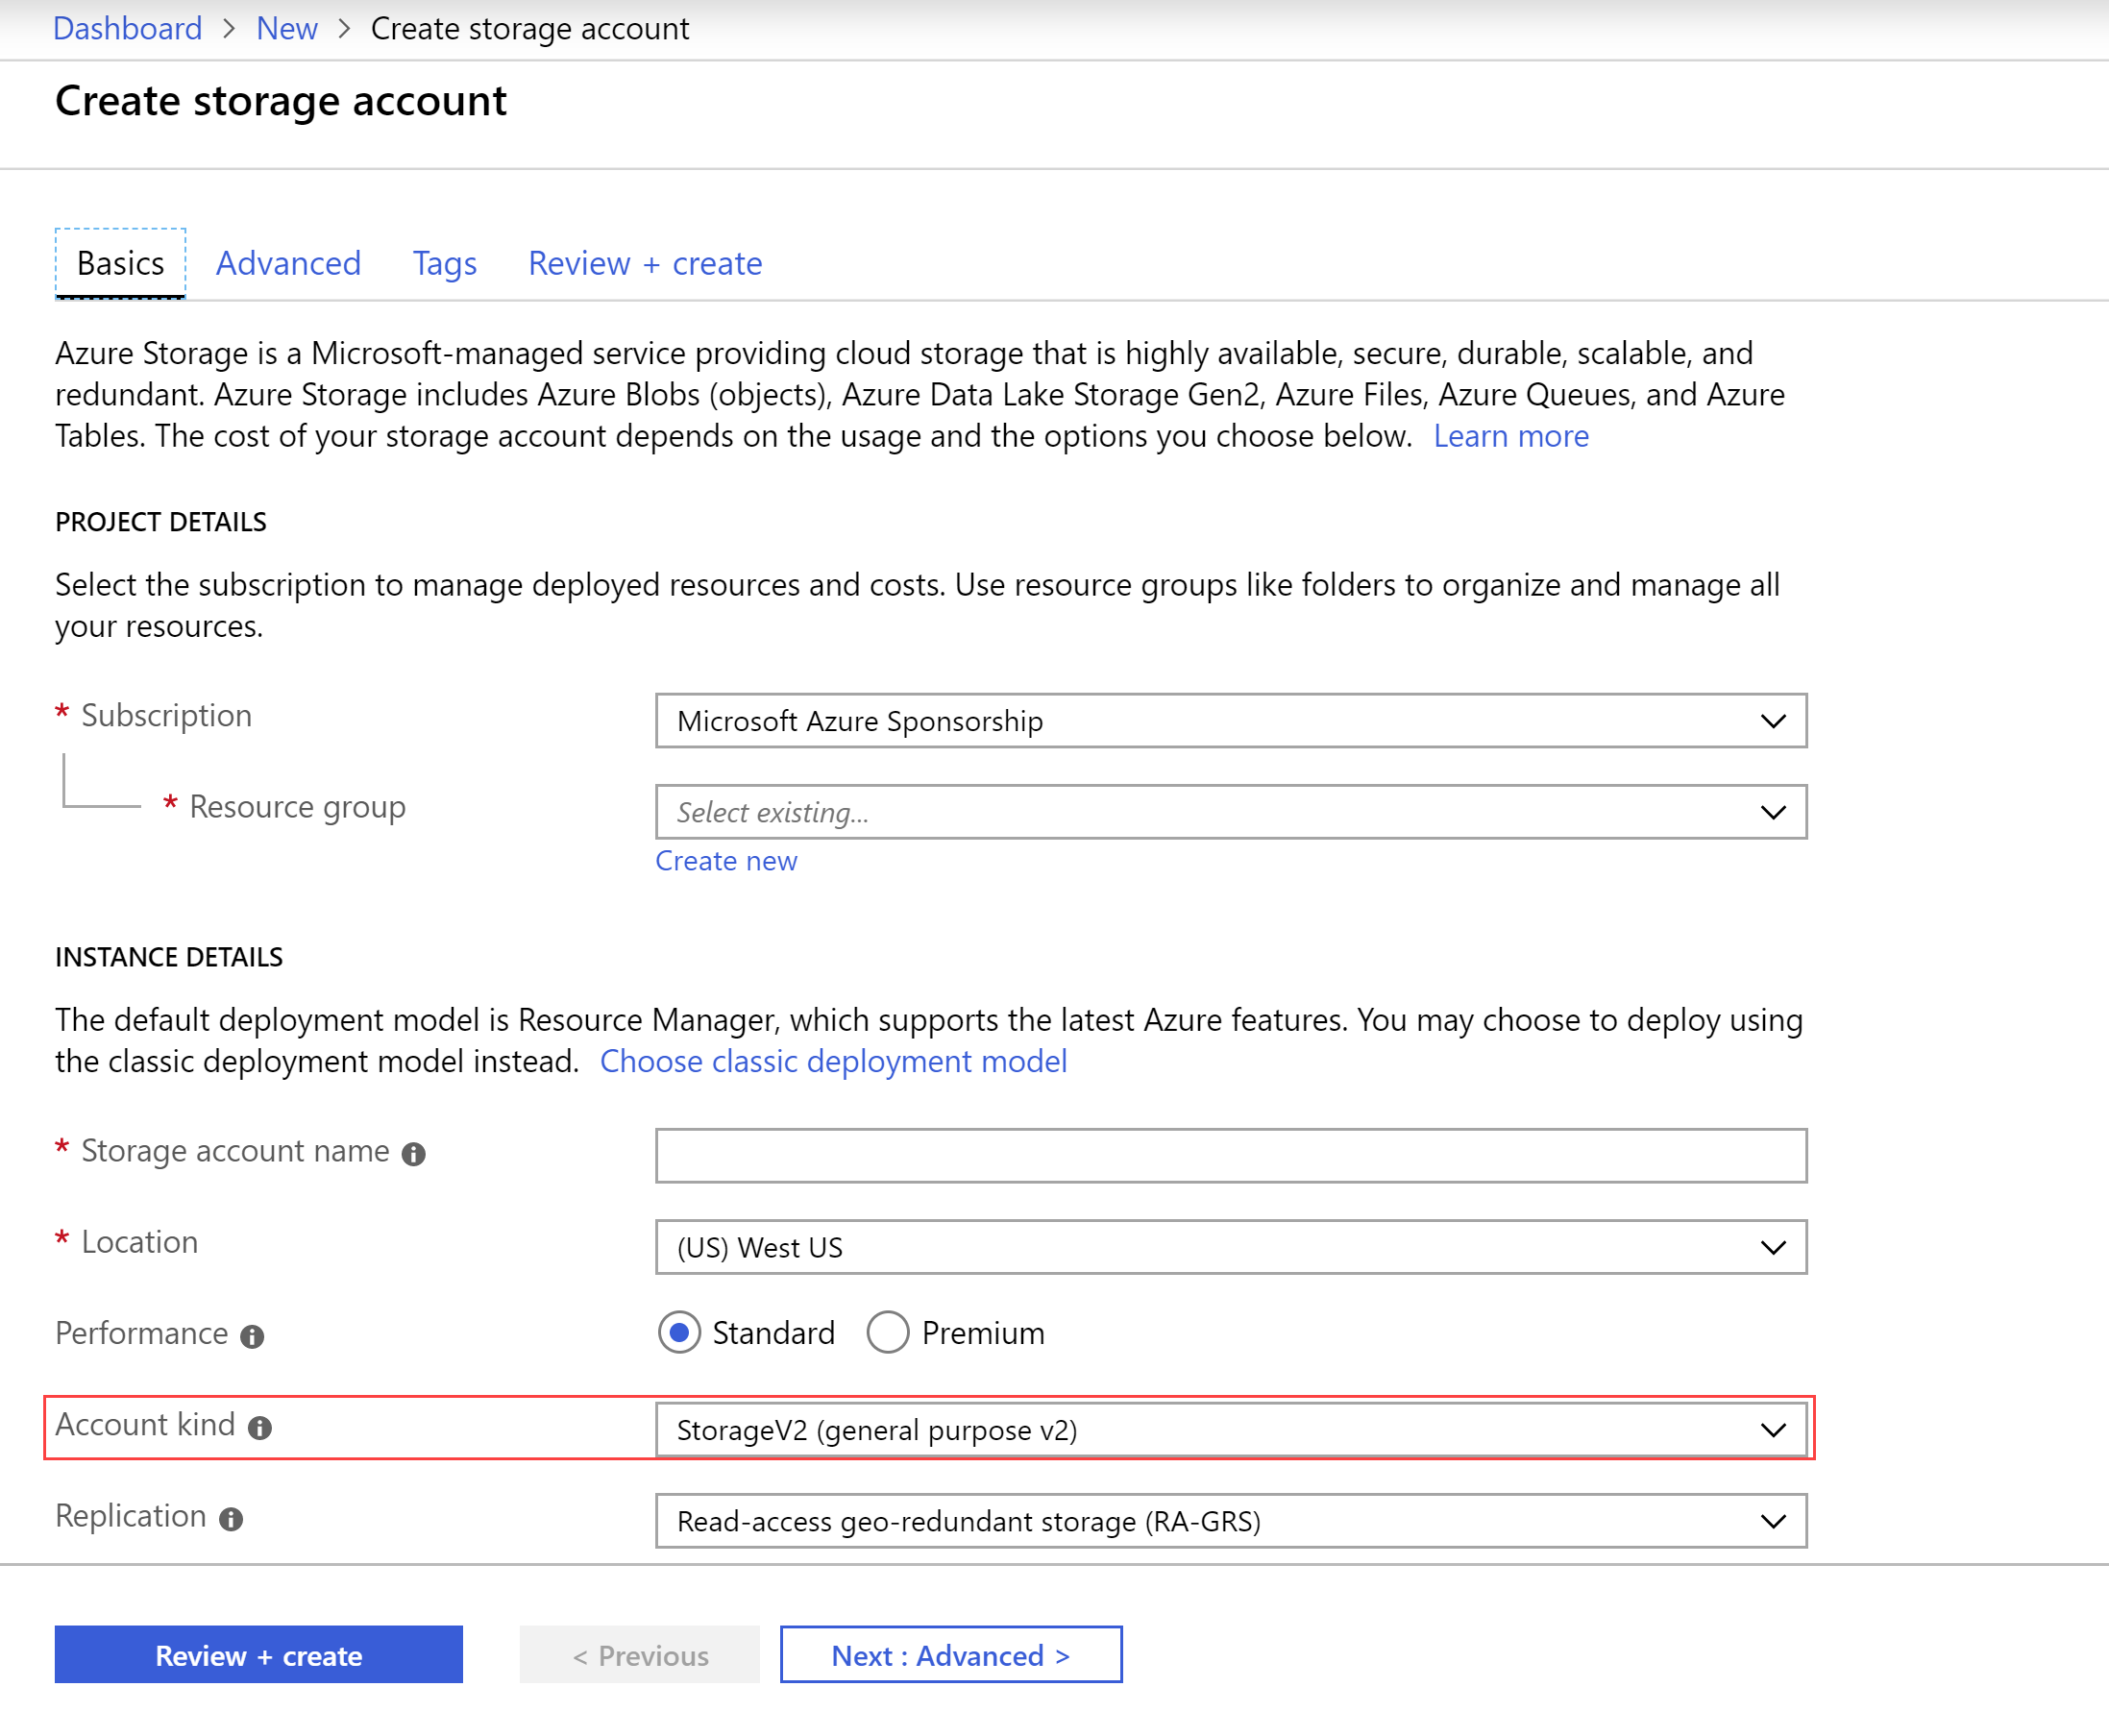
(Create a new Azure Storage account)
When the storage account is created, we can enable its static website feature.
- Go to the Azure storage account in the Azure portal
- Click on the static website menu-item
- Click enable
- Fill in index.html as the index document name. This will be the default file that is used when we navigate to the website
- Click Save to enable the setting
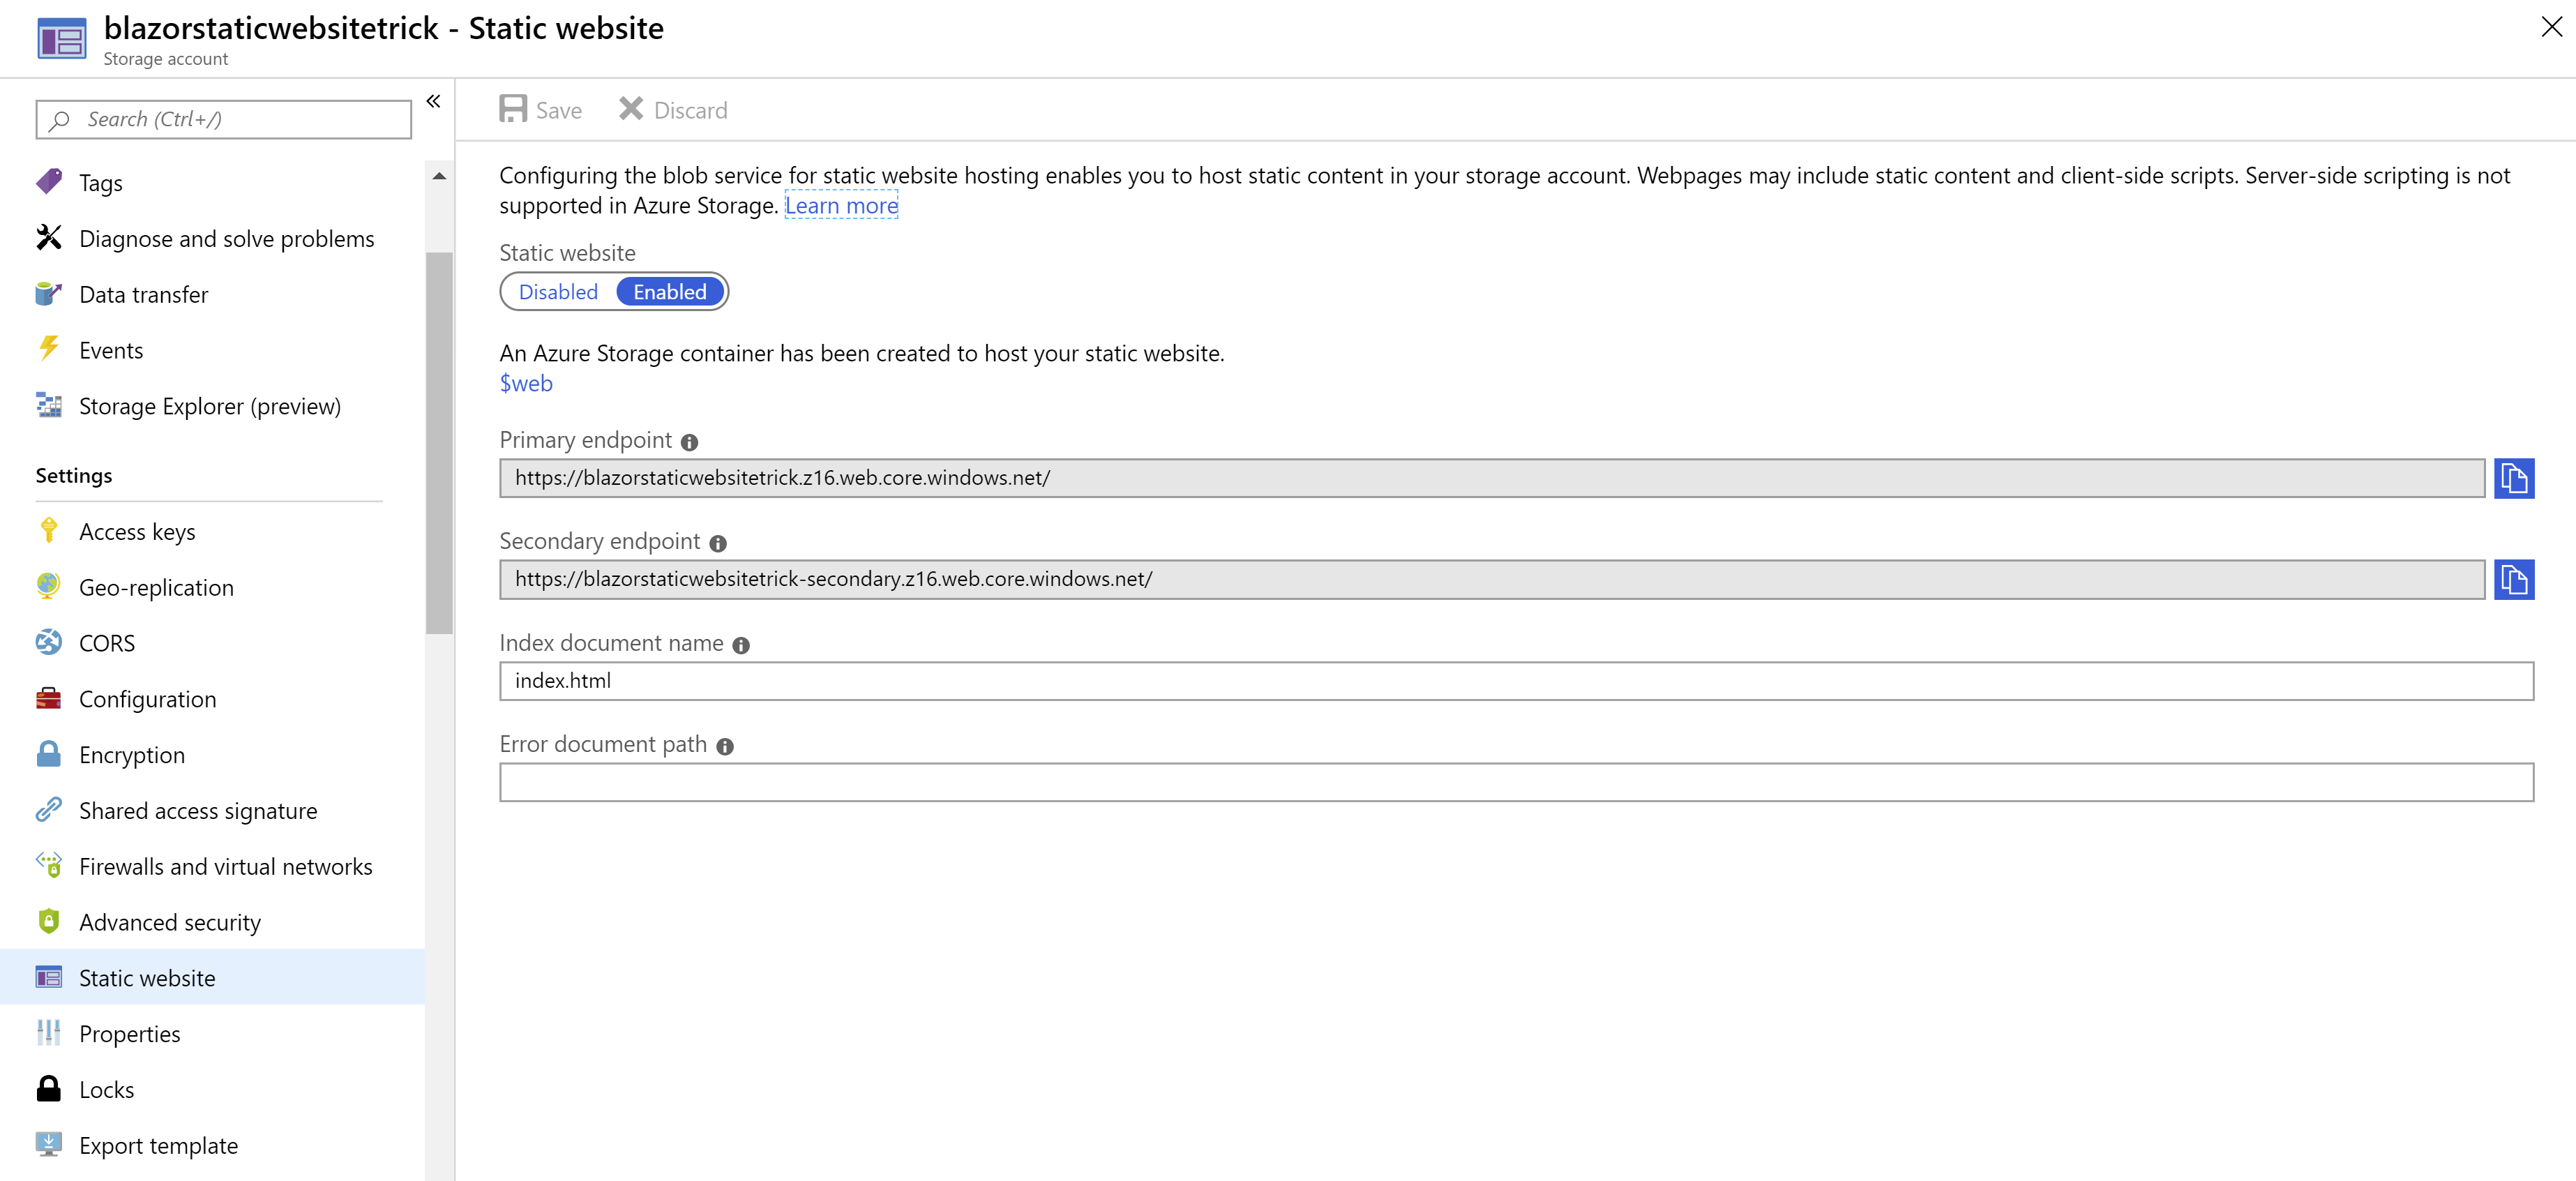
(The static website feature in Azure Storage)
This Azure Storage Account can now host a static website. Notice the Primary endpoint URL and copy it. That is the URL that we use to reach the website.
# Copy the Blazor app into Azure Storage and test the website
There is only one more thing to do: copy the files of the Blazor application into the Azure Storage Account. We will do that using the Azure Storage Explorer (opens new window), which is a free tool that you can use to manage Azure Storage.
- Open the Azure Storage Explorer and make sure that you are signed into your Azure account
- Navigate to the Azure storage account that we've created
- Drill down into Blob Storage
- The static website feature looks for files in the $web container that it created. Click on the $web container
- Now open an explorer window to the dist folder of the published Blazor app. Select the contents of the dist folder and drag that onto the storage explorer. It will automatically upload the files into the $web container
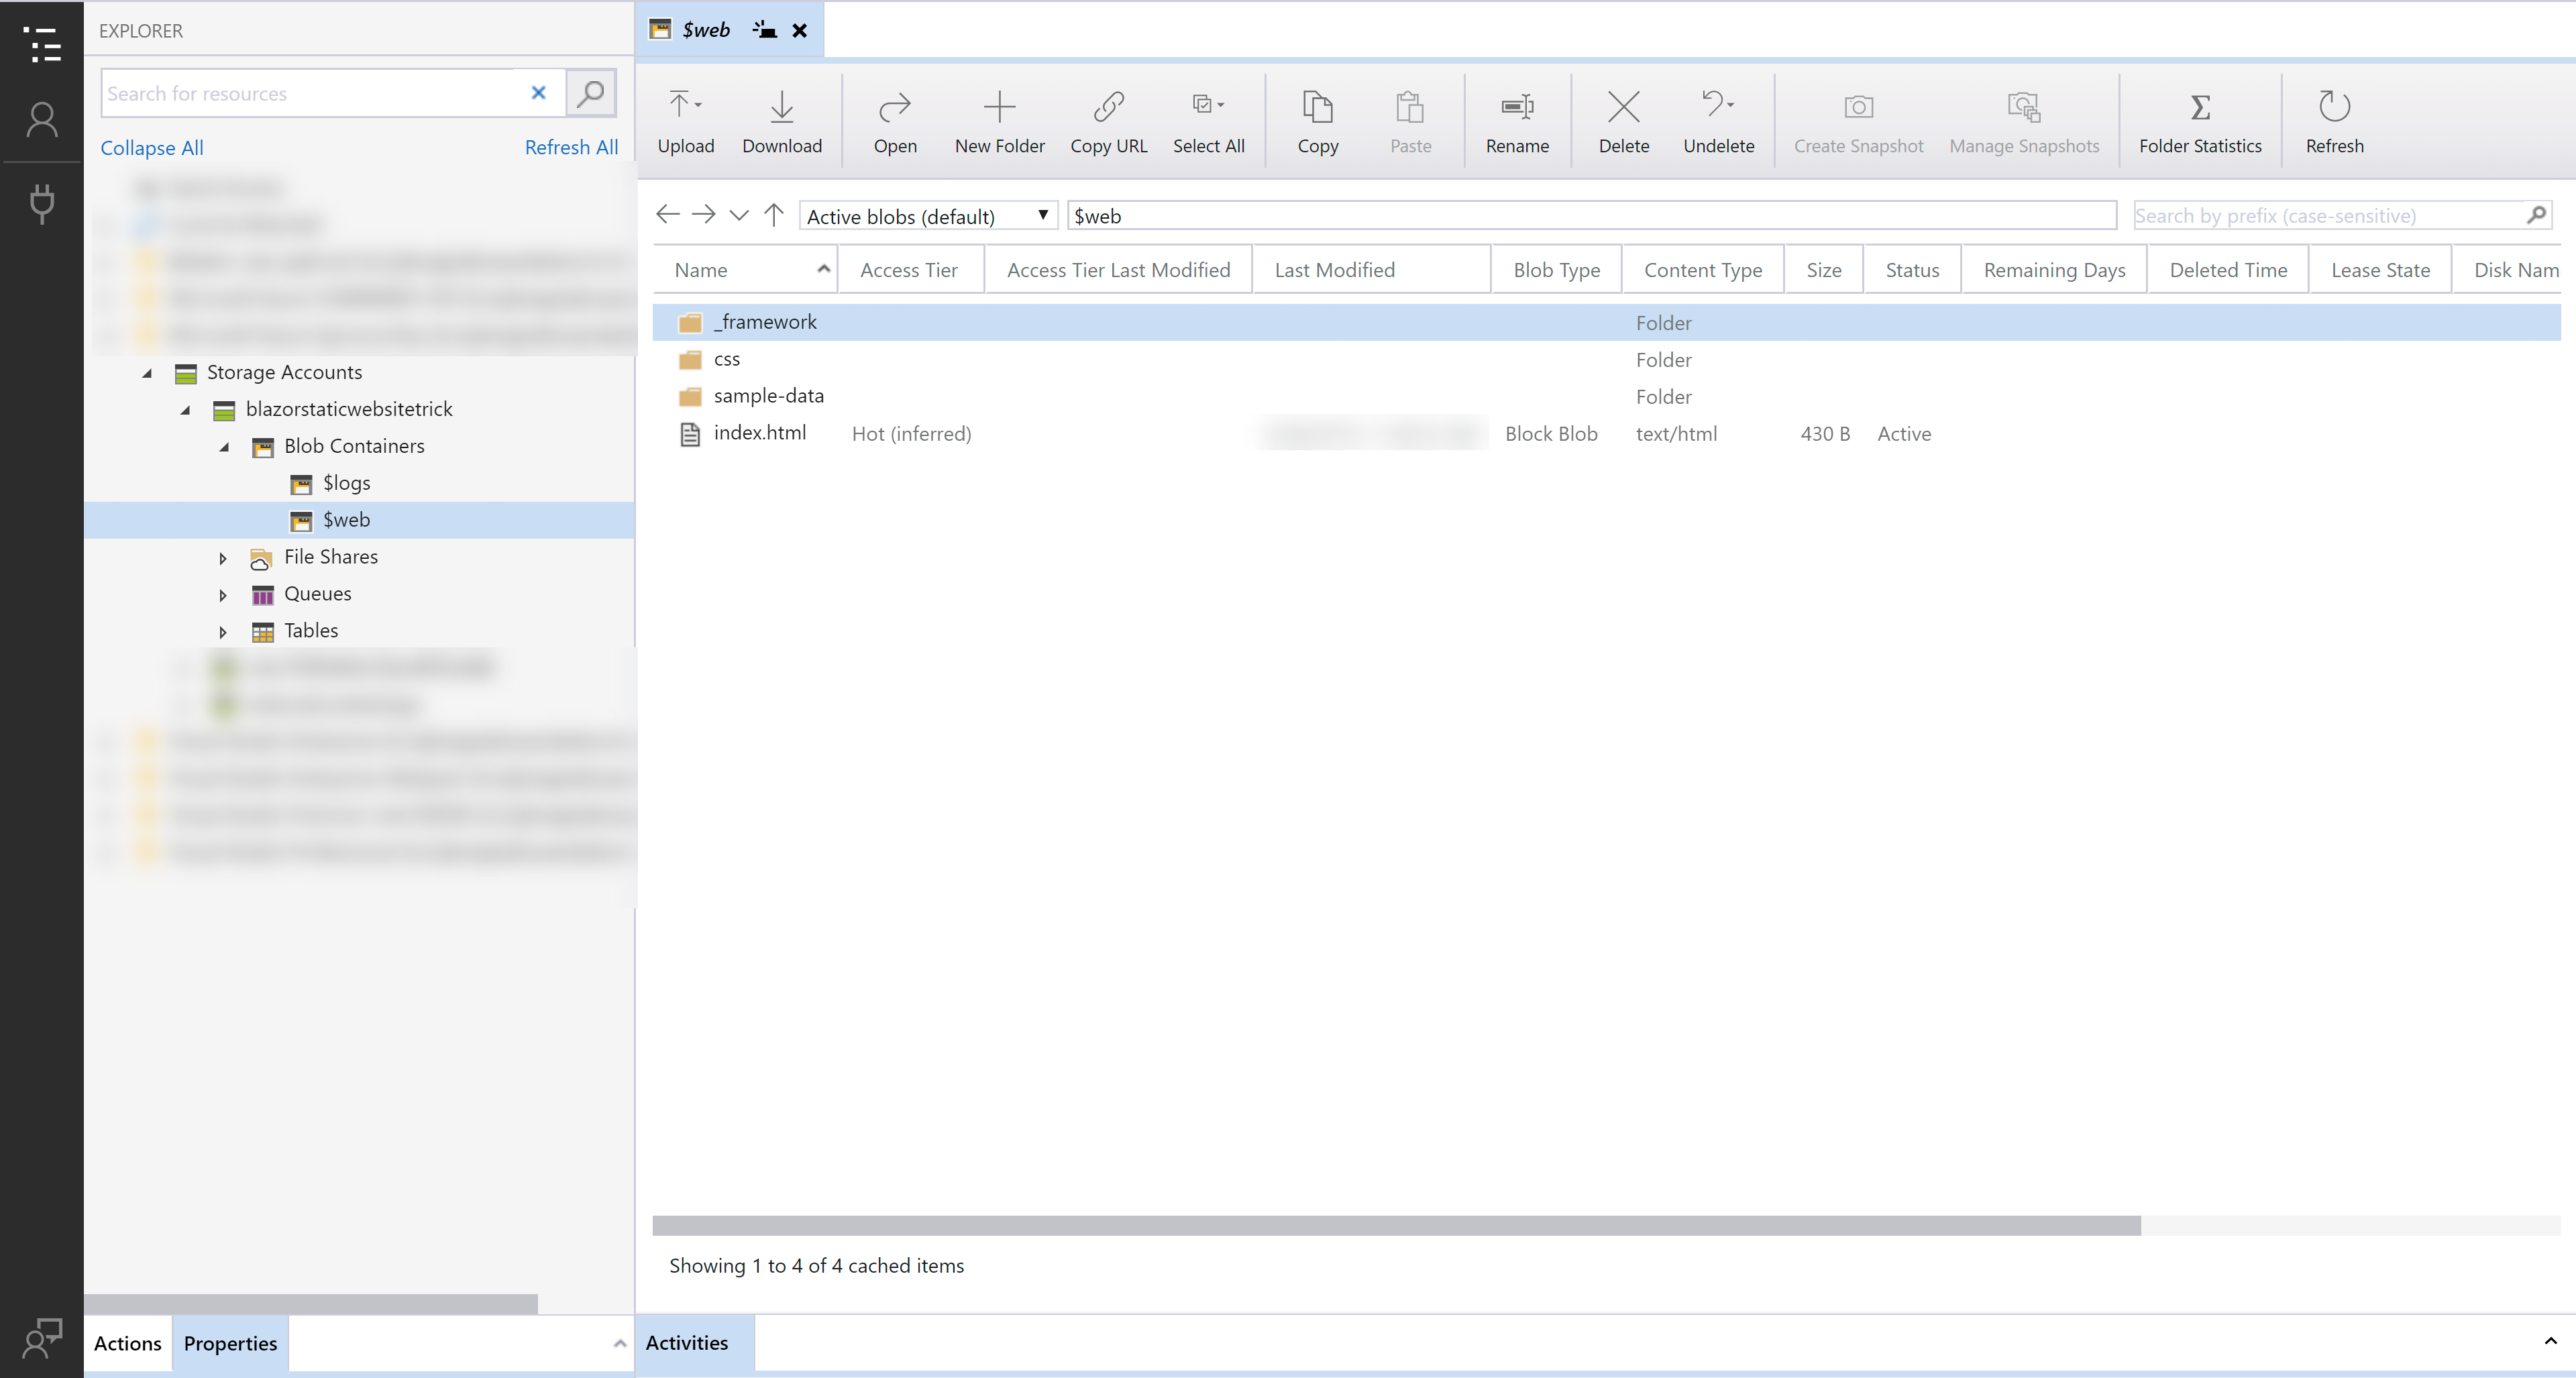
(Azure Storage Explorer)
That's it!
Now go to a browser and paste in the Primary endpoint URL of the Azure Storage static website. Here we go. A static Blazor website running in Azure!

(Blazor app running in Azure Storage as a static website)
We've just deployed the app manually, but you can also automate this process by using Azure DevOps Pipelines (opens new window). This is easy to setup and eliminates errors that we might introduce by copying things manually. You can learn how to get started with Azure DevOps Pipelines here (opens new window).
# Conclusion
Blazor is a very cool feature of ASP.NET Core that allows you to use C# instead of JavaScript, to create web UIs. Many .NET developers have dreamed about that for a long time, and now it is finally here.
And when you've created a website with Blazor, there is nothing simpler than running it as a static website in Azure Storage. It is extremely simple to use and it is inexpensive. It is also very reliable, as Azure Storage is highly available by default and makes sure that you never lose data. On top of that, your website will be very fast, because Azure Storage is very fast and Blazor is very fast. You can learn more about Blazor here (opens new window). Go and check it out!