
TIP
🔥 Make sure you star the repo (opens new window) to keep up to date with new tips and tricks.
💡 Learn more : Azure Spring Cloud (opens new window).
📺 Watch the video : Working with Azure Spring Cloud (opens new window).
# Working with Azure Spring Cloud
# Develop Microservice-based apps with Azure Spring Cloud
Azure Spring Cloud (opens new window) makes it easy for you to deploy and run Spring Boot-based microservice applications to Azure. By running your microservices on Azure you get the advantages of the Azure cloud, like high availability, great performance, unmatched security and more. You also get the power to easily connect your services to other Azure services, like Azure Cosmos DB (opens new window) and Azure Storage (opens new window).
In this article, we'll get started with Azure Spring Cloud by creating a new Spring Cloud server in Azure and deploying a sample application to it.
# Prerequisites
If you want to follow along, you'll need the following:
- An Azure subscription (If you don't have an Azure subscription, create a free account (opens new window) before you begin)
- Install Git (opens new window)
- Install the Java Development Kit (JDK) 8 (opens new window)
- Install Maven 3.0 or above (opens new window)
- The Azure CLI (opens new window). You can download it for Windows, Linux or Mac (opens new window). Or you can use the Azure Cloud Shell (opens new window)
# Getting started with Azure Spring Cloud
Let's get started. We'll use a sample application, that you can find here (opens new window), and deploy that to a new Azure Spring Cloud service.
First, we'll create a new Azure Spring Cloud server:
Go to the Azure portal (opens new window)
Click the Create a resource button (the plus-sign in the top left corner)
Search for Azure Spring Cloud and click on the result to start creating a new Azure Spring Cloud
a. This brings you to the create Azure Spring Cloud blade
b. Select a Resource group
c. Fill in a Name for the Spring Cloud
d. Select a Region
e. Click Review and create and Create after that to create the Azure Spring Cloud server
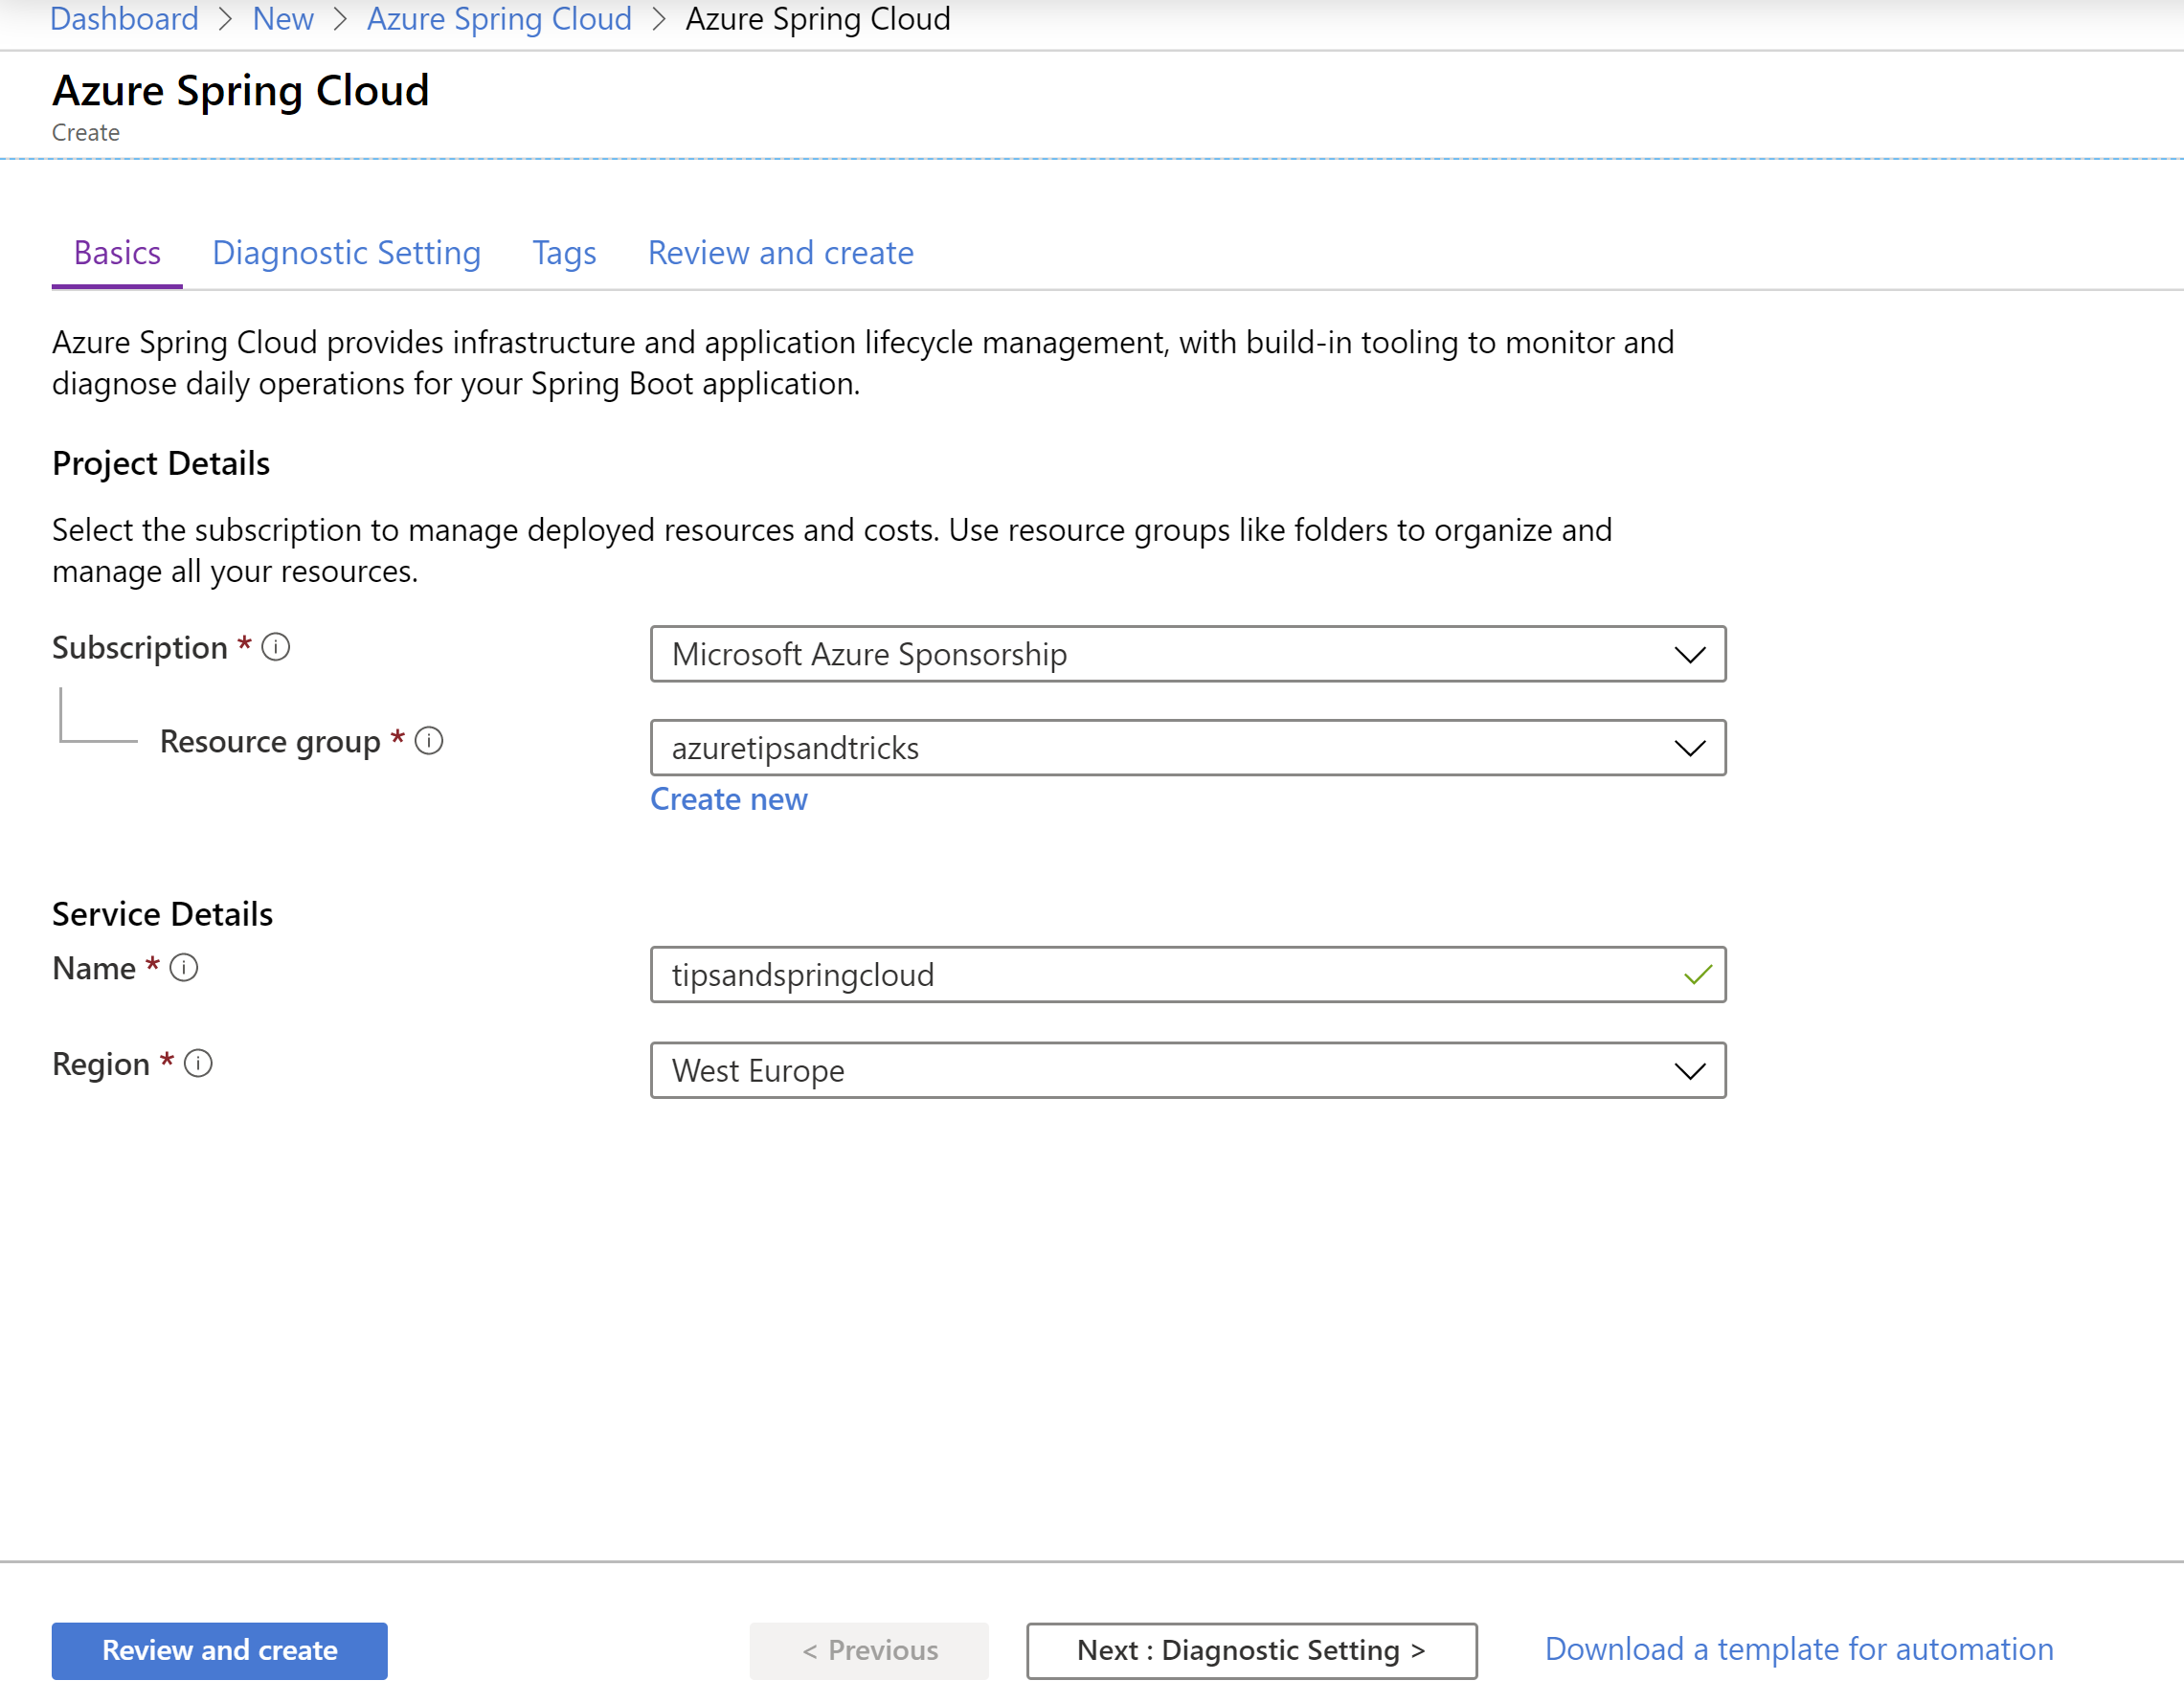
(Create new Azure Spring Cloud in the Azure portal)
Once the deployment is complete, we need to configure the Spring Cloud server, before we can start deploying applications to it.
- In the Azure portal, open the newly created Azure Spring Cloud server
- Go to the Config Server menu
- Under Default repository, set the URI value to https://github.com/Azure-Samples/piggymetrics and the Label value to config
- Click Apply
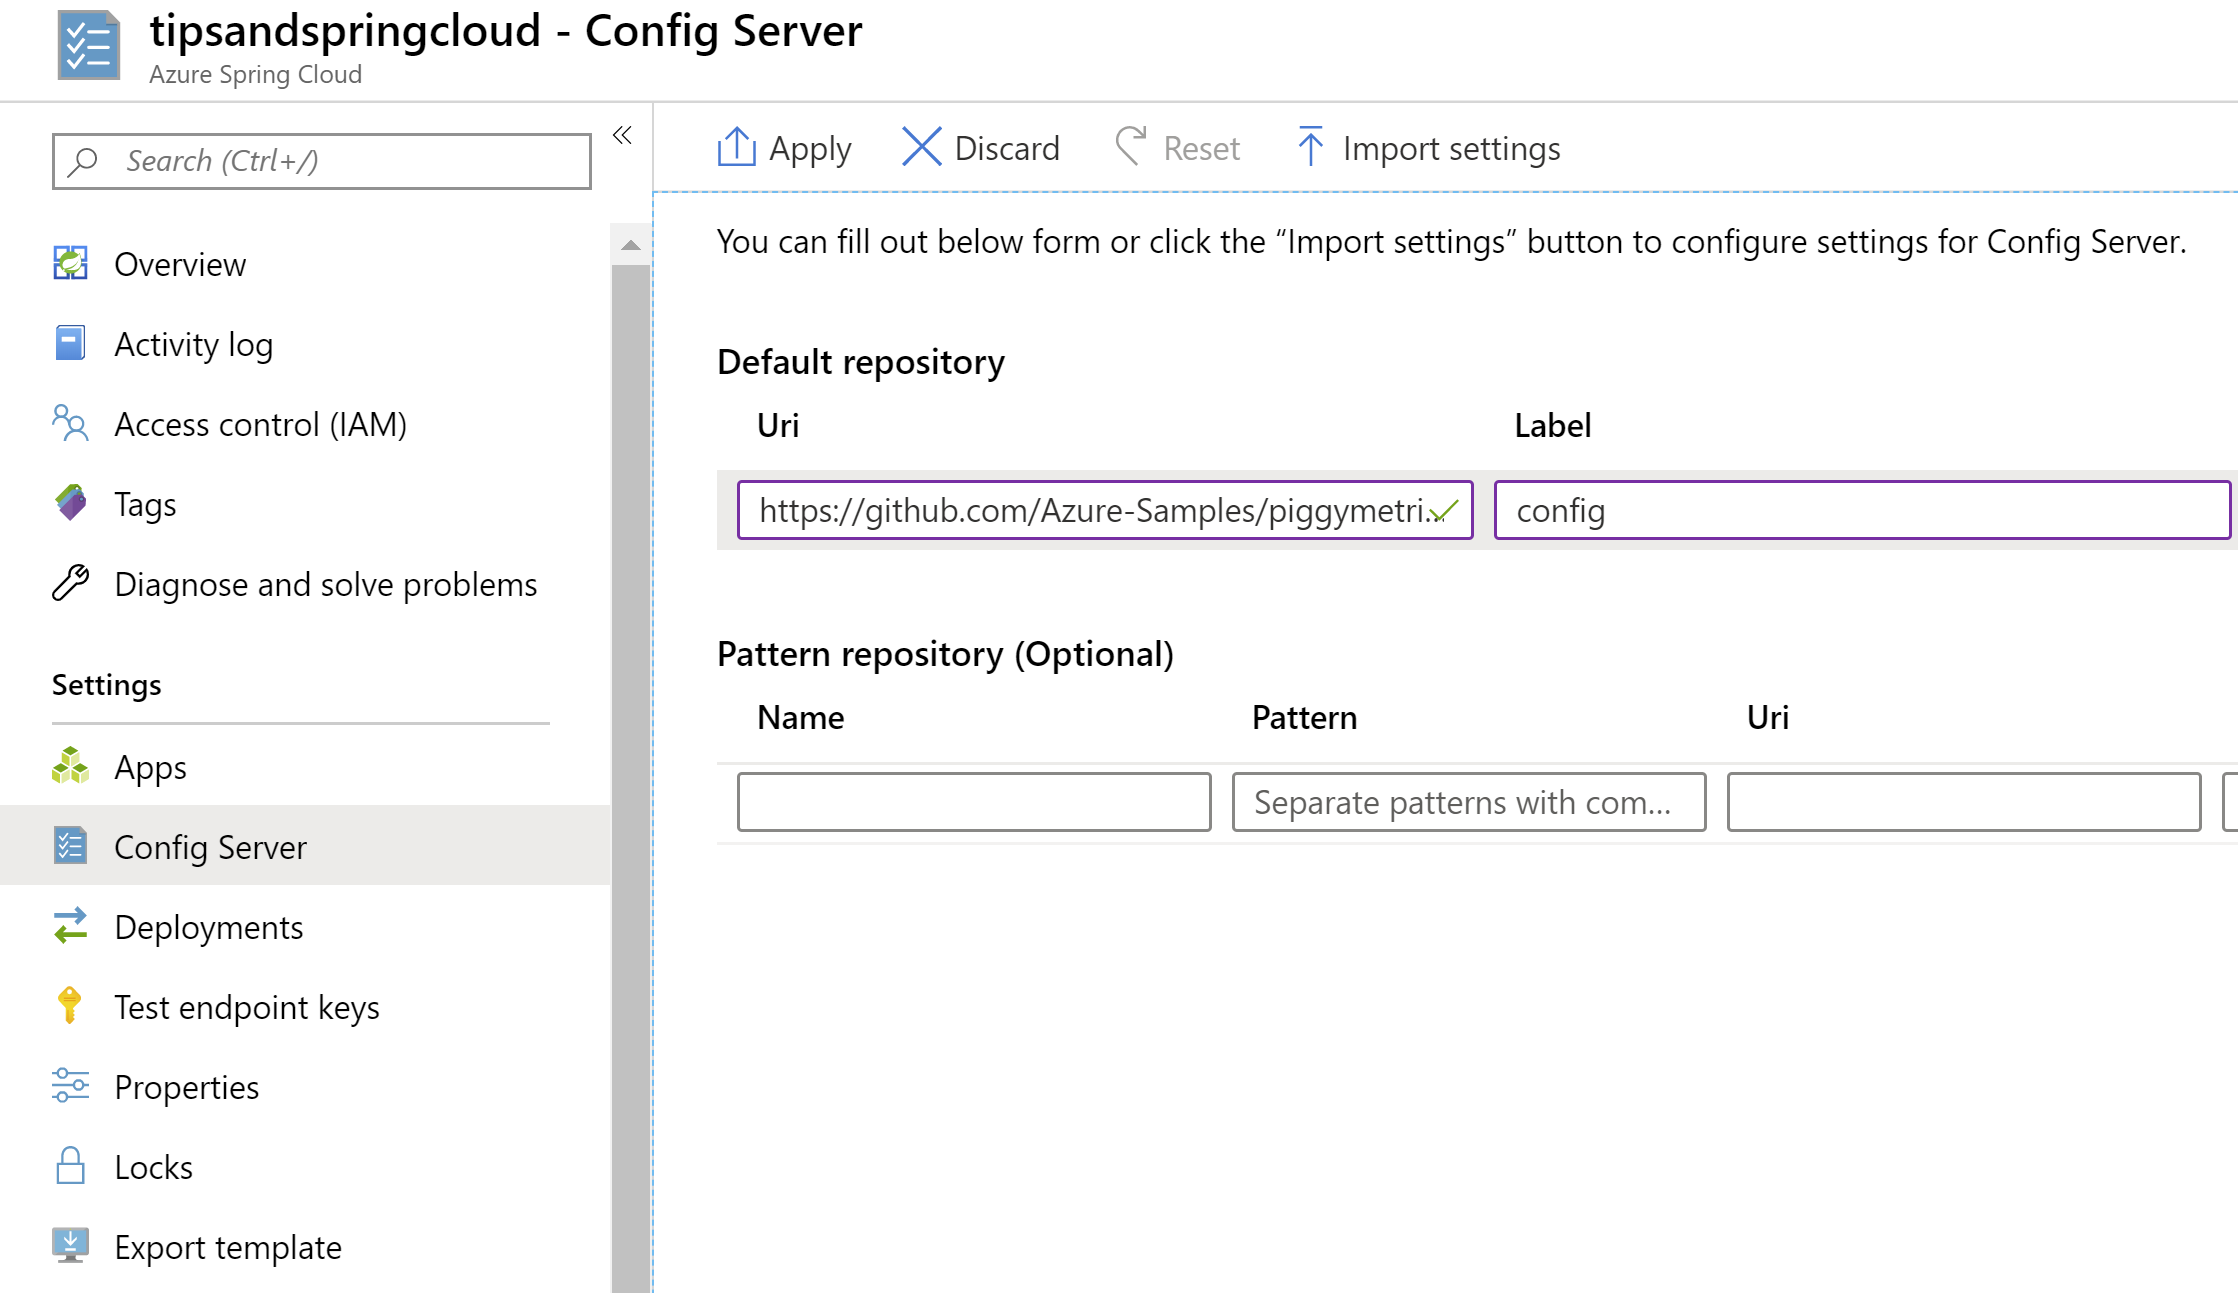
(Setup the Azure Spring Cloud configuration server in the Azure portal)
Let's switch to the command prompt to download and compile the application and deploy it to the Azure Spring Cloud server. Make sure that you have installed everything from the prerequisites section.
First, we need to install the Azure Spring Cloud extension for the Azure CLI by running the following command:
az extension add --name spring-cloud
Next, run the following commands to download the code for the sample application:
mkdir source-code
cd source-code
git clone https://github.com/Azure-Samples/piggymetrics
2
3
And now compile the code using Maven:
cd piggymetrics
mvn clean package -DskipTests
2
The code is compiled into .JAR files that we can deploy. Sign into Azure using the Azure CLI, so that we can start creating applications:
# Login to Azure CLI
az login

# List all subscriptions
az account list -o table

# Set active subscription
az account set --subscription <target subscription ID>
2
3
4
5
6
7
8
Before we start using to the Azure Spring Cloud server we should assign names to the resource group and Spring Cloud server. The Azure CLI Spring CLoud extension uses these values. Make sure to put your values into the placeholders:
az configure --defaults group=<resource group name>
az configure --defaults spring-cloud=<service instance name>
2
Now, we can create the applications in Azure Spring Cloud. With the following code, we create apps in Azure Spring Cloud and deploy JAR files to them. This will take several minutes to complete.
az spring-cloud app create -n gateway
az spring-cloud app deploy -n gateway --jar-path ./gateway/target/gateway.jar
az spring-cloud app create -n account-service
az spring-cloud app deploy -n account-service --jar-path ./account-service/target/account-service.jar
az spring-cloud app create -n auth-service
az spring-cloud app deploy -n auth-service --jar-path ./auth-service/target/auth-service.jar
2
3
4
5
6
Let's go back to the Azure portal.
- Go to the Azure Spring Cloud server
- Click on the Apps menu. This should show three applications. These are three microservice applications that make up the solution
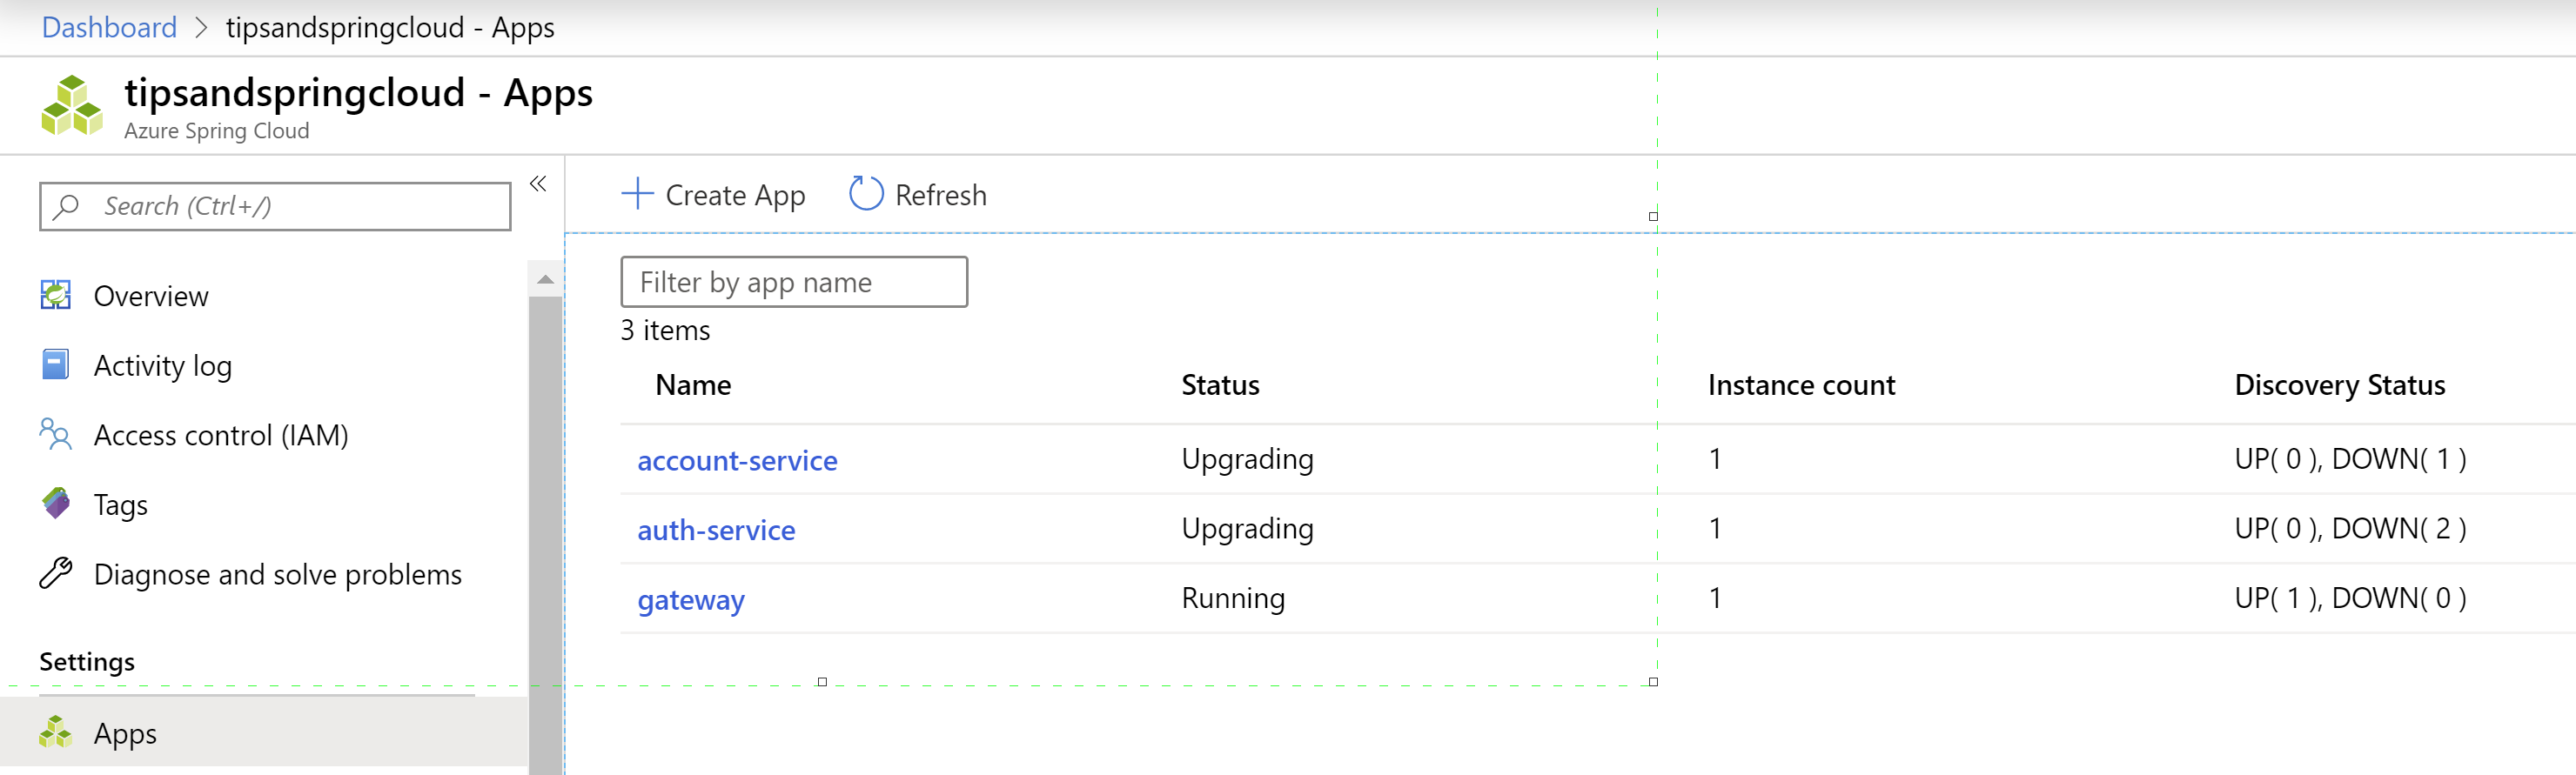
(Azure Spring Cloud apps in the Azure portal)
- Click on the gateway app. We need to assign a domain to this, so that we can access it from the internet
- In the next screen, click on the Assign domain button. This will take a few minutes to complete
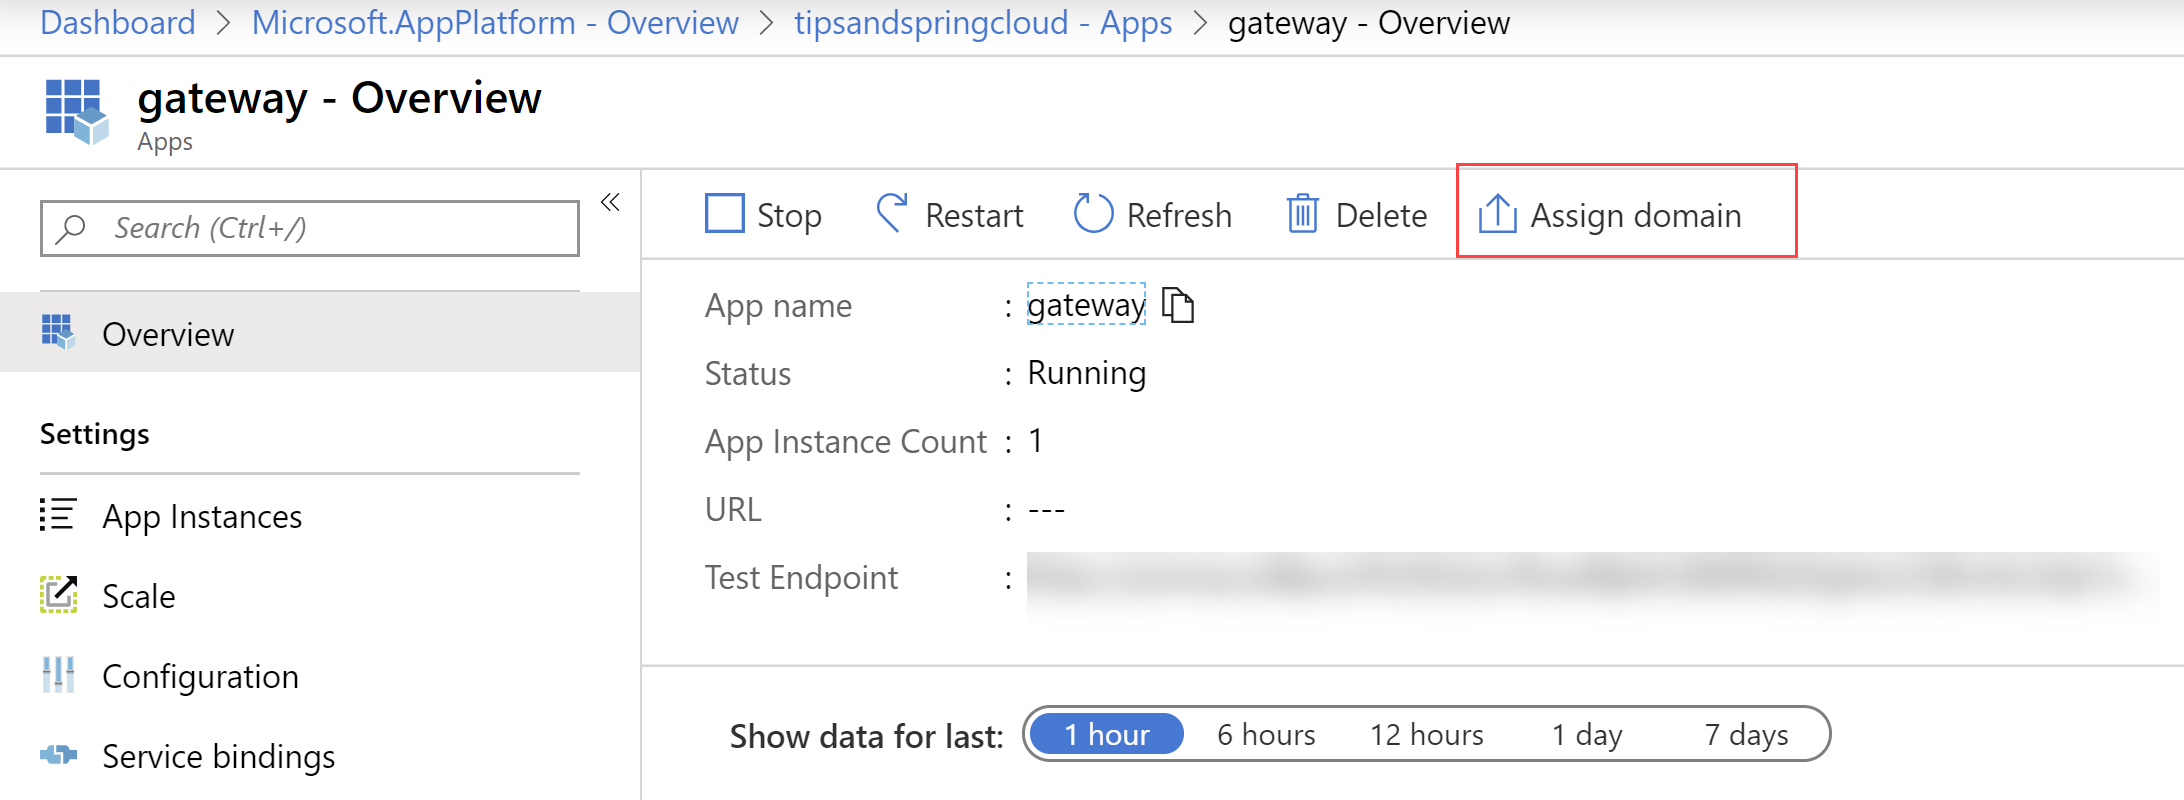
(Assign domain to Azure Spring Cloud app in the Azure portal)
Take the URL of the public endpoint and try it out in a browser. This should show the working application.
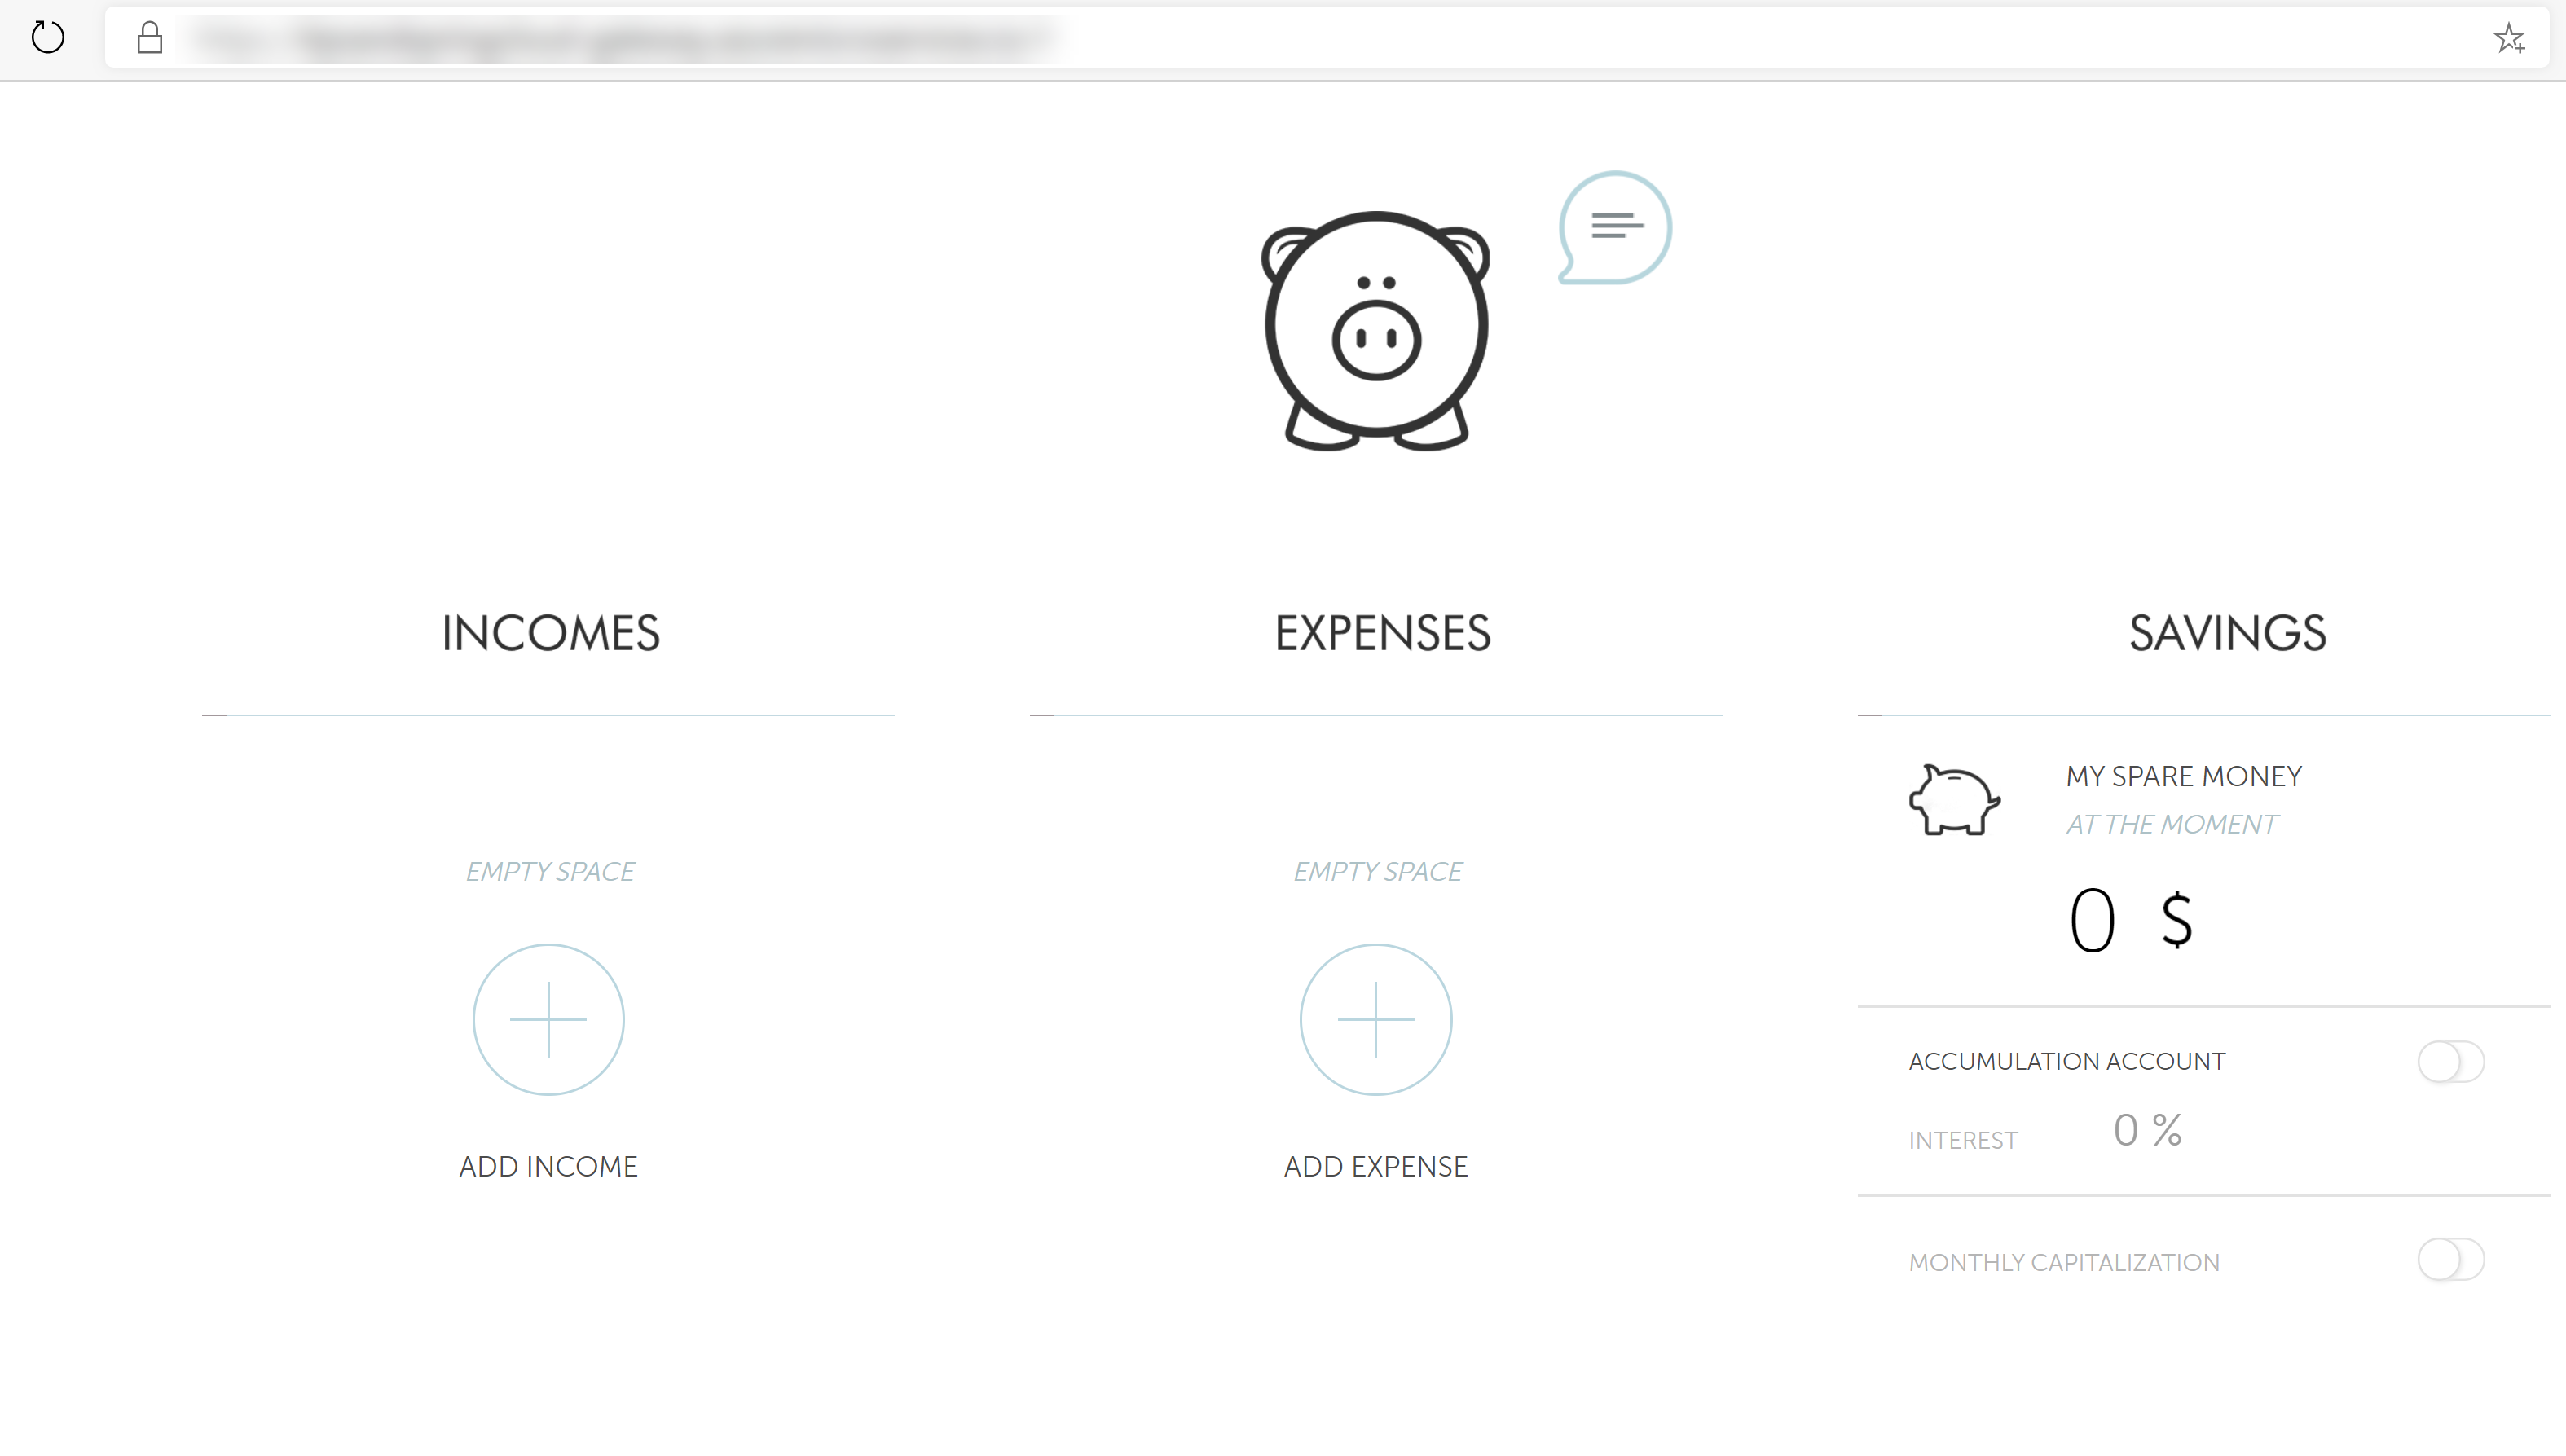
(The working application in a browser)
# Conclusion
If you are developing Spring Boot-based-services and applications, you can run them in Azure Spring Cloud (opens new window). Azure Spring Cloud is easy to setup, is managed by Azure, is highly available, performant and secure and enables you to connect your apps to Azure services like Azure Cosmos DB (opens new window) and Azure Storage (opens new window). Go and check it out!