
TIP
🔥 Checkout our new Azure Developer page at azure.com/developer (opens new window).
📺 Watch the video : How to work with Azure Cosmos DB and the JavaScript SDK (opens new window).
💡 Learn more : Azure Cosmos DB (opens new window)
# Working with Azure CosmosDB and the JavaScript SDK
Azure Cosmos DB (opens new window) is a cloud native, no-sql database that enables you to work with data without having to worry about infrastructure. It also enables you to create geographically performant applications by providing geo-replication features with multiple writable nodes.
You can choose how you talk to Cosmos DB by choosing the API that fits your needs. You can use the SQL, Gremlin, Cassandra, MongoDB and Table APIs. And you can use a variety of SDKs to talk to all of these APIs. There are SDKs for .NET (Core), Xamarin, Java, Python an now also a new SDK for JavaScript.
Let's take a look at how you can use the JavaScript SDK for Cosmos DB.
# 1. Create a new Cosmos DB account and documents to work with
To get started, we'll first create a new Azure Cosmos DB account and create some documents in it. We will do this using the Azure portal.
- In the Azure portal, click on the "Create a new resource" button (the green plus sign in the top-left corner)
- Search for "cosmos db"
- The search results will now show Azure Cosmos DB. Click on it and click on Create
- The Create Azure Cosmos DB account blade shows up.
- Pick or create a Resource group
- Fill in an Account Name
- Choose the SQL API as that is what we will use. This API uses a SQL-like language to query documents in the database and it very simple to use
- Pick a Location
- Disable Geo-redundancy. This feature provides high-availability by making sure that your data stays available, even if the current geographic region would fail
- Leave Multi-region writes disabled. This is used to sync data to different regions to achieve faster geographic performance. We don't need it for this example
- Click review + create and Create after that to deploy the Cosmos DB account. This can take a few minutes
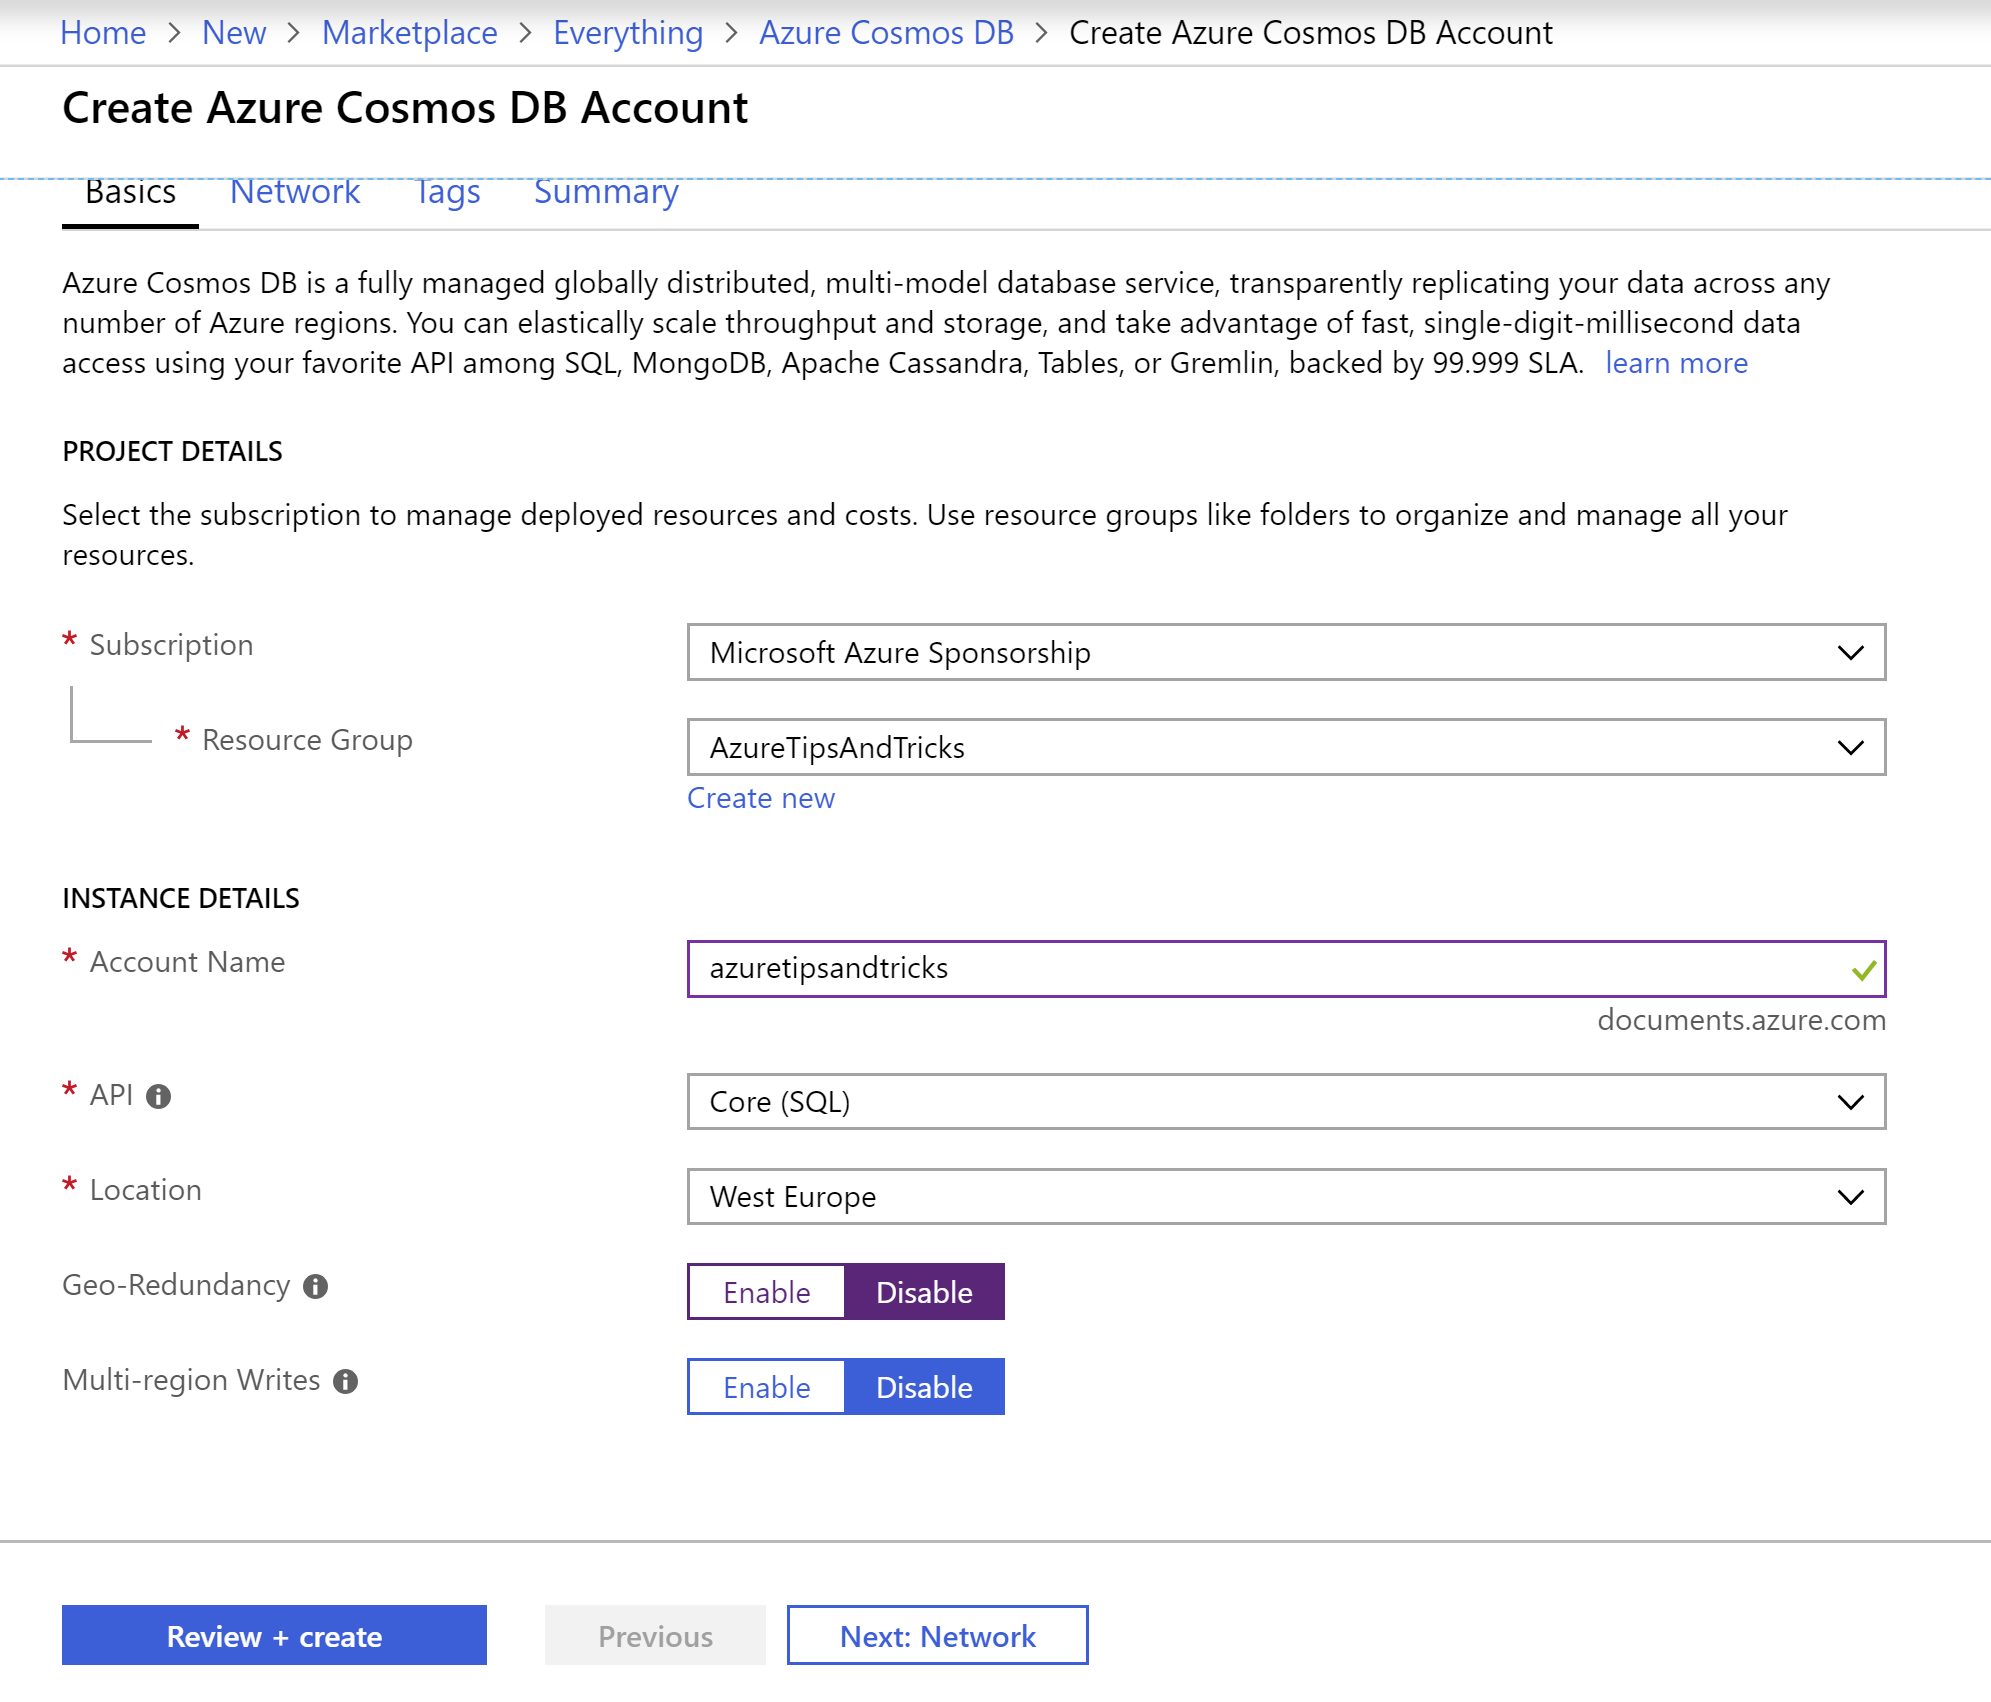
(Create a new Azure Cosmos DB Account)
- When the Cosmos DB account is created, navigate to it in the Azure portal. We'll now create a database, a collection and some documents. For your reference: Cosmos DB accounts contain databases. Databases contain collections and collections contain documents, which are the things that contain the actual data
- Click on the Data Explorer menu
- Now click on the New collection button. This will open the Add collection blade
- Fill in a Database Id. Because we haven't created a database, we can add this directly when creating a new collection
- Fill in a Collection Id
- Fill in a Partition key. We'll use "name" as that is one of the key properties that we'll use in our data. The Partition key is used to group similar objects together. So in our case, the database can easily search through documents based on the name key. This increases query performance dramatically
- We'll leave the throughput as is. This is the number of Request Units (RUs) that expresses how many database operations per hour you can use within this collection. You can read more about how RUs are defined here (opens new window) 5.Click OK to create the collection
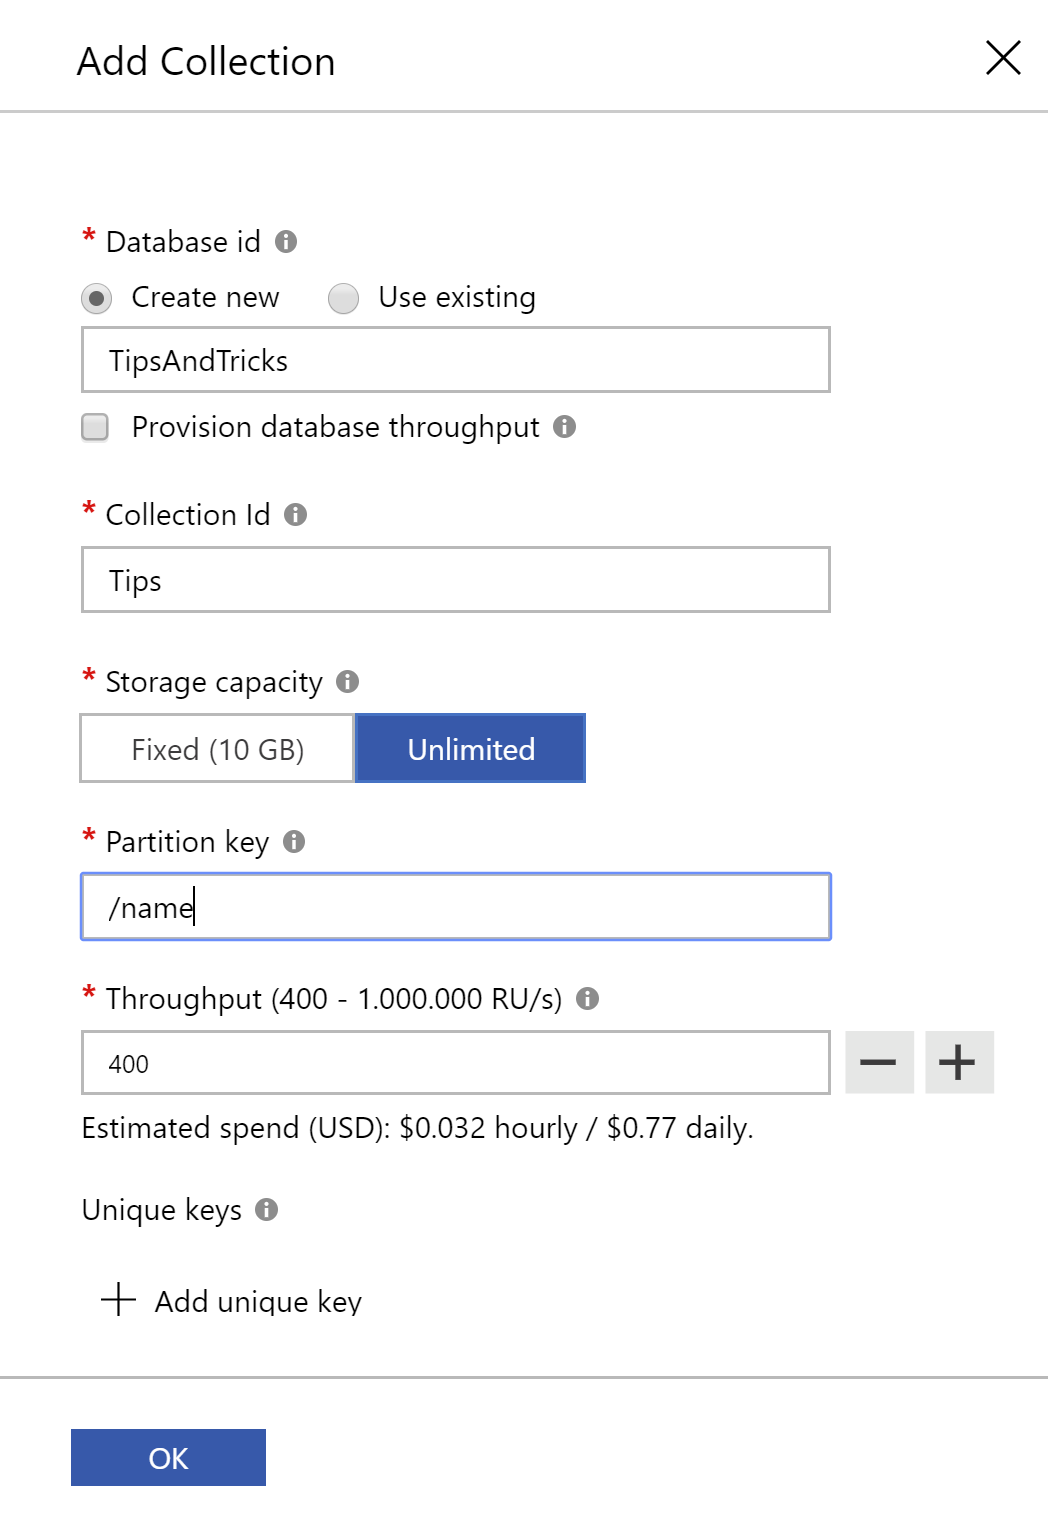
(Add a new collection to Cosmos DB in the Azure portal)
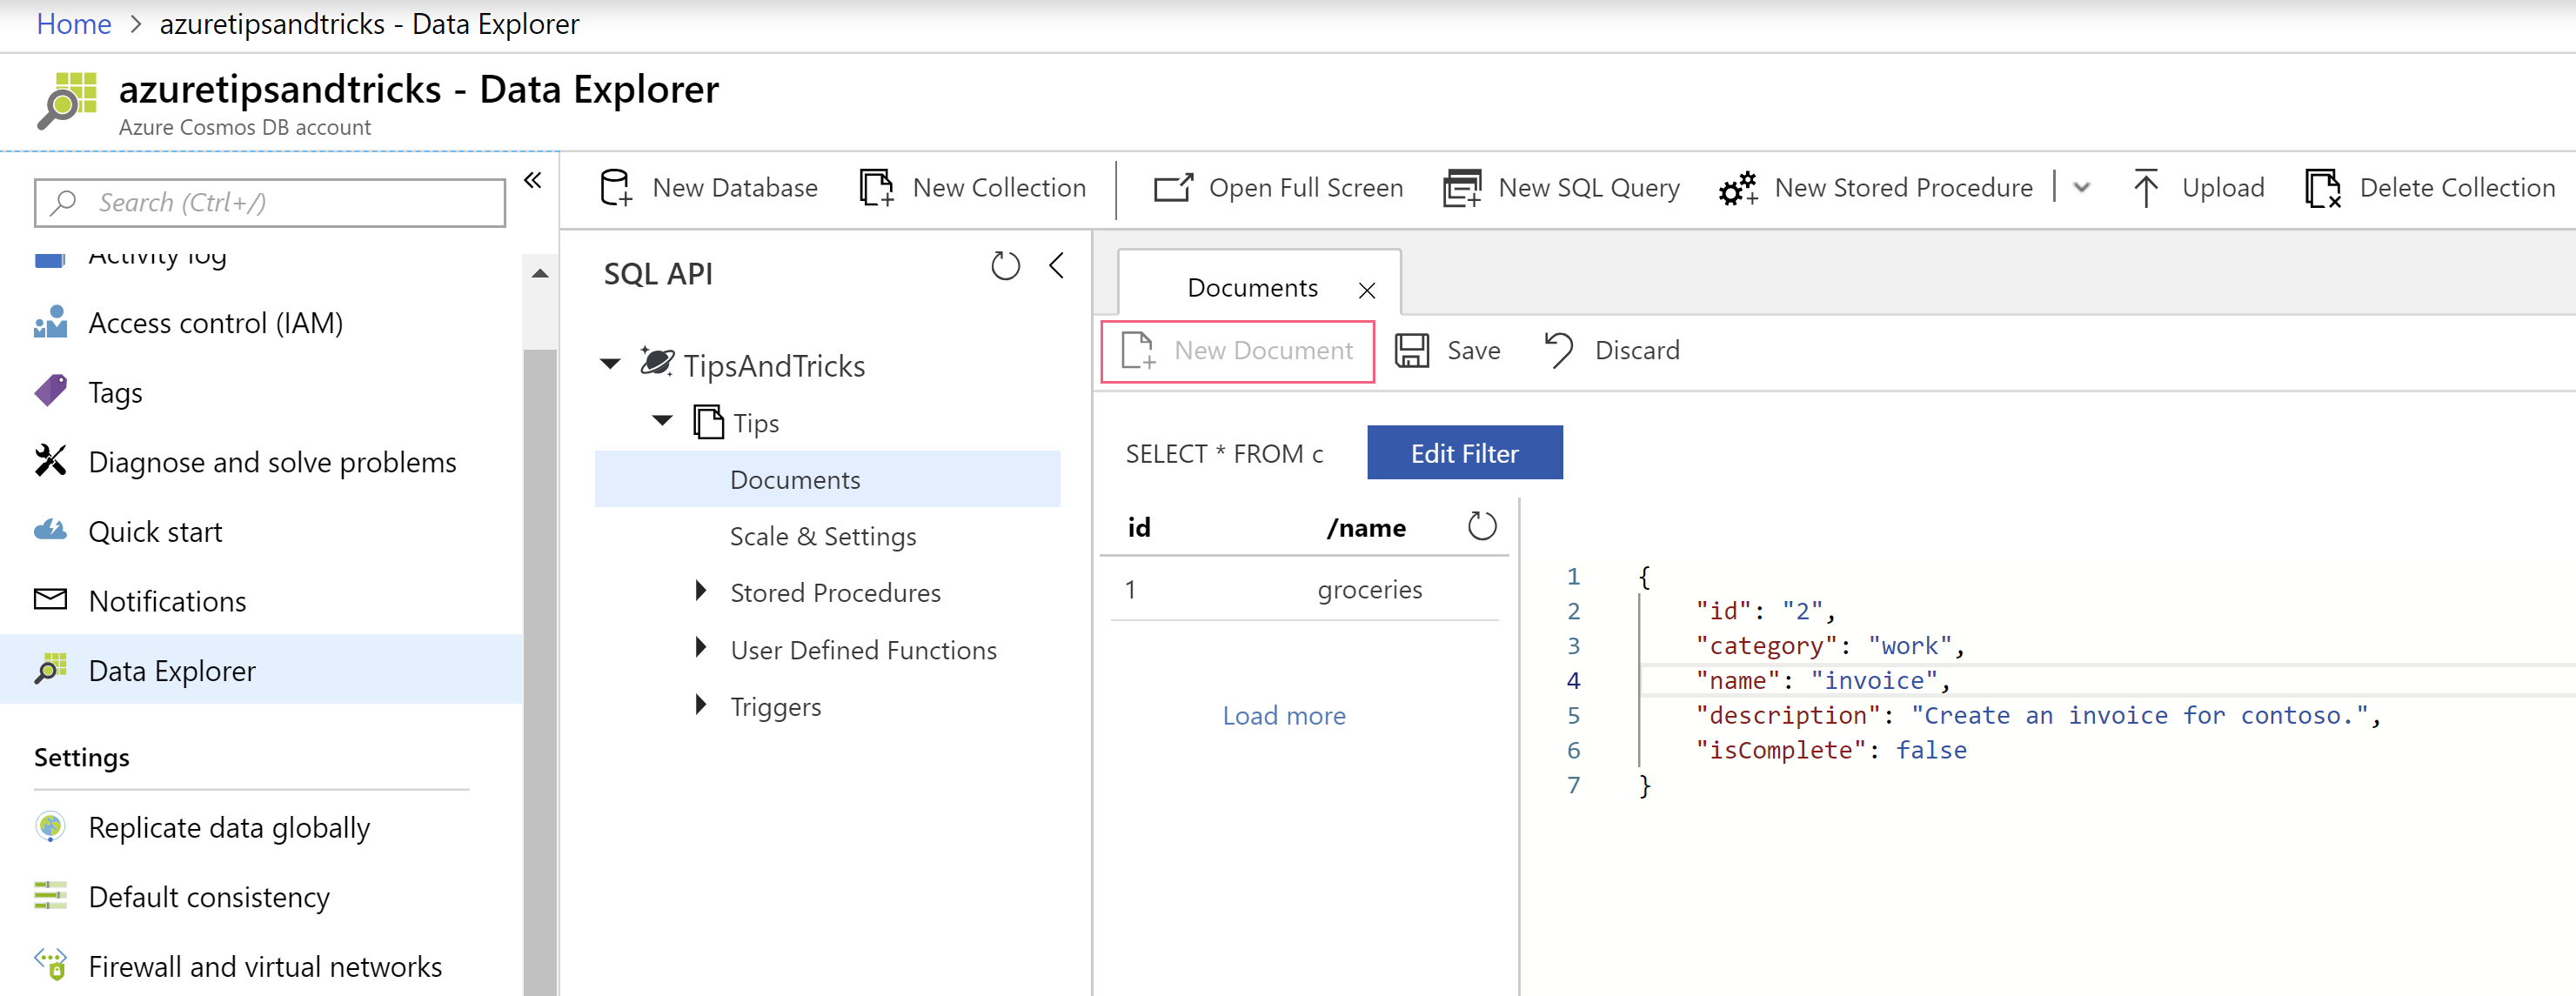
- Now that we have a collection, we can add some documents to it that we can query later. In the Data Explorer, navigate to the Documents node under the collection. From here, click on the New Document button
(Add documents to Cosmos DB in the Azure portal)
- Now add a document with the following values:
{
    "id": "1",
    "category": "personal",
    "name": "groceries",
    "description": "Pick up apples and strawberries.",
    "isComplete": false
}
2
3
4
5
6
7
- Add another document with these values:
{
    "id": "2",
    "category": "work",
    "name": "invoice",
    "description": "Create an invoice for contoso.",
    "isComplete": false
}
2
3
4
5
6
7
That's it! Now we can start using the JavaScript SDK to work with Cosmos DB.
# 2. Create a Node.js app that uses the Cosmos DB JavaScript SDK
The Cosmos DB JavaScript SDK is primarily meant for use in Node.js applications, although you can also use it in client-side, JavaScript applications. Let's create a simple Node.js app and use the Cosmos DB JavaScript SDK in it.
- First, you need to install Node.js on your machine. You can do that by installing Node.js with a installer from here (opens new window)
- Open Visual Studio Code
- Open the explorer and open a folder that you will use to create the Node.js app in
- Create a New File and call it App.js
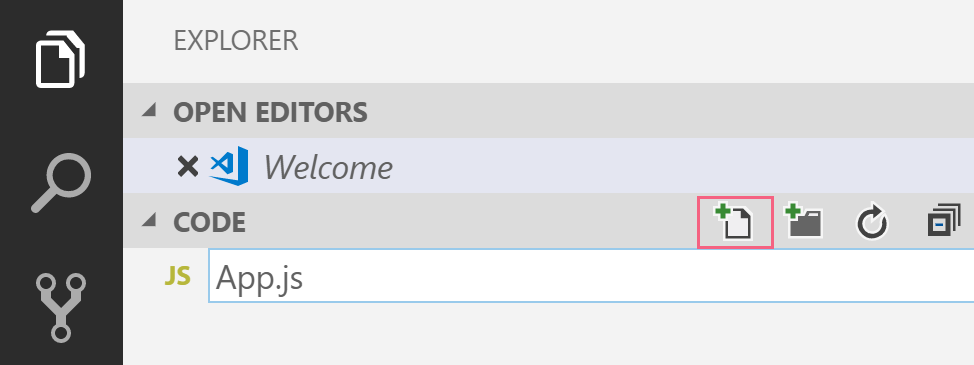
(Create a new file in Visual Studio Code)
- Install the Cosmos DB JavaScript SDK by opening a terminal and running the command "npm i @azure/cosmos". You can ignore the warnings. These aren't important for our scenario
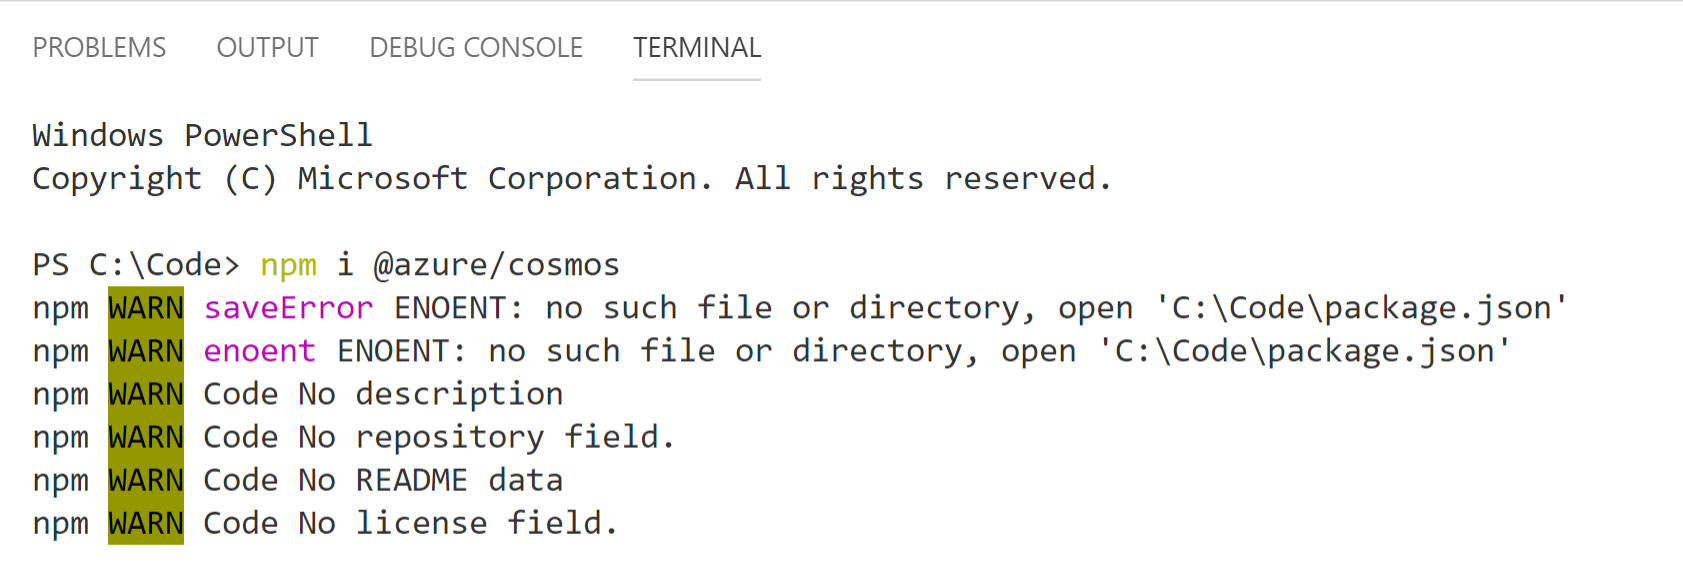
(Install the Cosmos DB JavaScript SDK)
- In the App.js file, paste the following code and fill in the Cosmos DB endpoint, masterKey, databaseId and containerId
const cosmos = require("@azure/cosmos");
const CosmosClient = cosmos.CosmosClient;

const endpoint = "[hostendpoint]"; // Add your endpoint
const masterKey = "[database account masterkey]"; // Add the masterkey of the endpoint
const client = new CosmosClient({ endpoint, auth: { masterKey } });
const databaseId  = "[databaseId]"; // Add the Database ID
const containerId  = "[containerId]"; // Add the Container ID

const querySpec = {
    query: "SELECT * FROM c"
};

async function run() {

    const { result: results } = await client.database(databaseId).container(containerId).items.query(querySpec, { enableCrossPartitionQuery: true }).toArray();

    for (var queryResult of results) {
        let resultString = JSON.stringify(queryResult);
        console.log(`\tQuery returned ${resultString}\n`);
    }
}

async function handleError(error) {
    console.log("\nAn error with code '" + error.code + "' has occurred:");
    console.log("\t" + error.body || error);
}

run().catch(handleError);
2
3
4
5
6
7
8
9
10
11
12
13
14
15
16
17
18
19
20
21
22
23
24
25
26
27
28
29
This code instantiates a new Cosmos DB Client that it uses to execute a simple query against ("SELECT * FROM c"). And it outputs the results of the query in the console window.
- Our Node.js application is complete, so we can run it. In a terminal window in Visual Studio Code, run the command "node App.js". This will run the application and output the results, which should be the contents of the two documents that we've added earlier

(Run the Node.js app in Visual Studio code)
- As a bonus, I've published the application to an Azure App Service Web App to see if it would work there. You can easily do this by following this tutorial (opens new window) on Microsoft docs. It works and shows the screen that you see in the image below
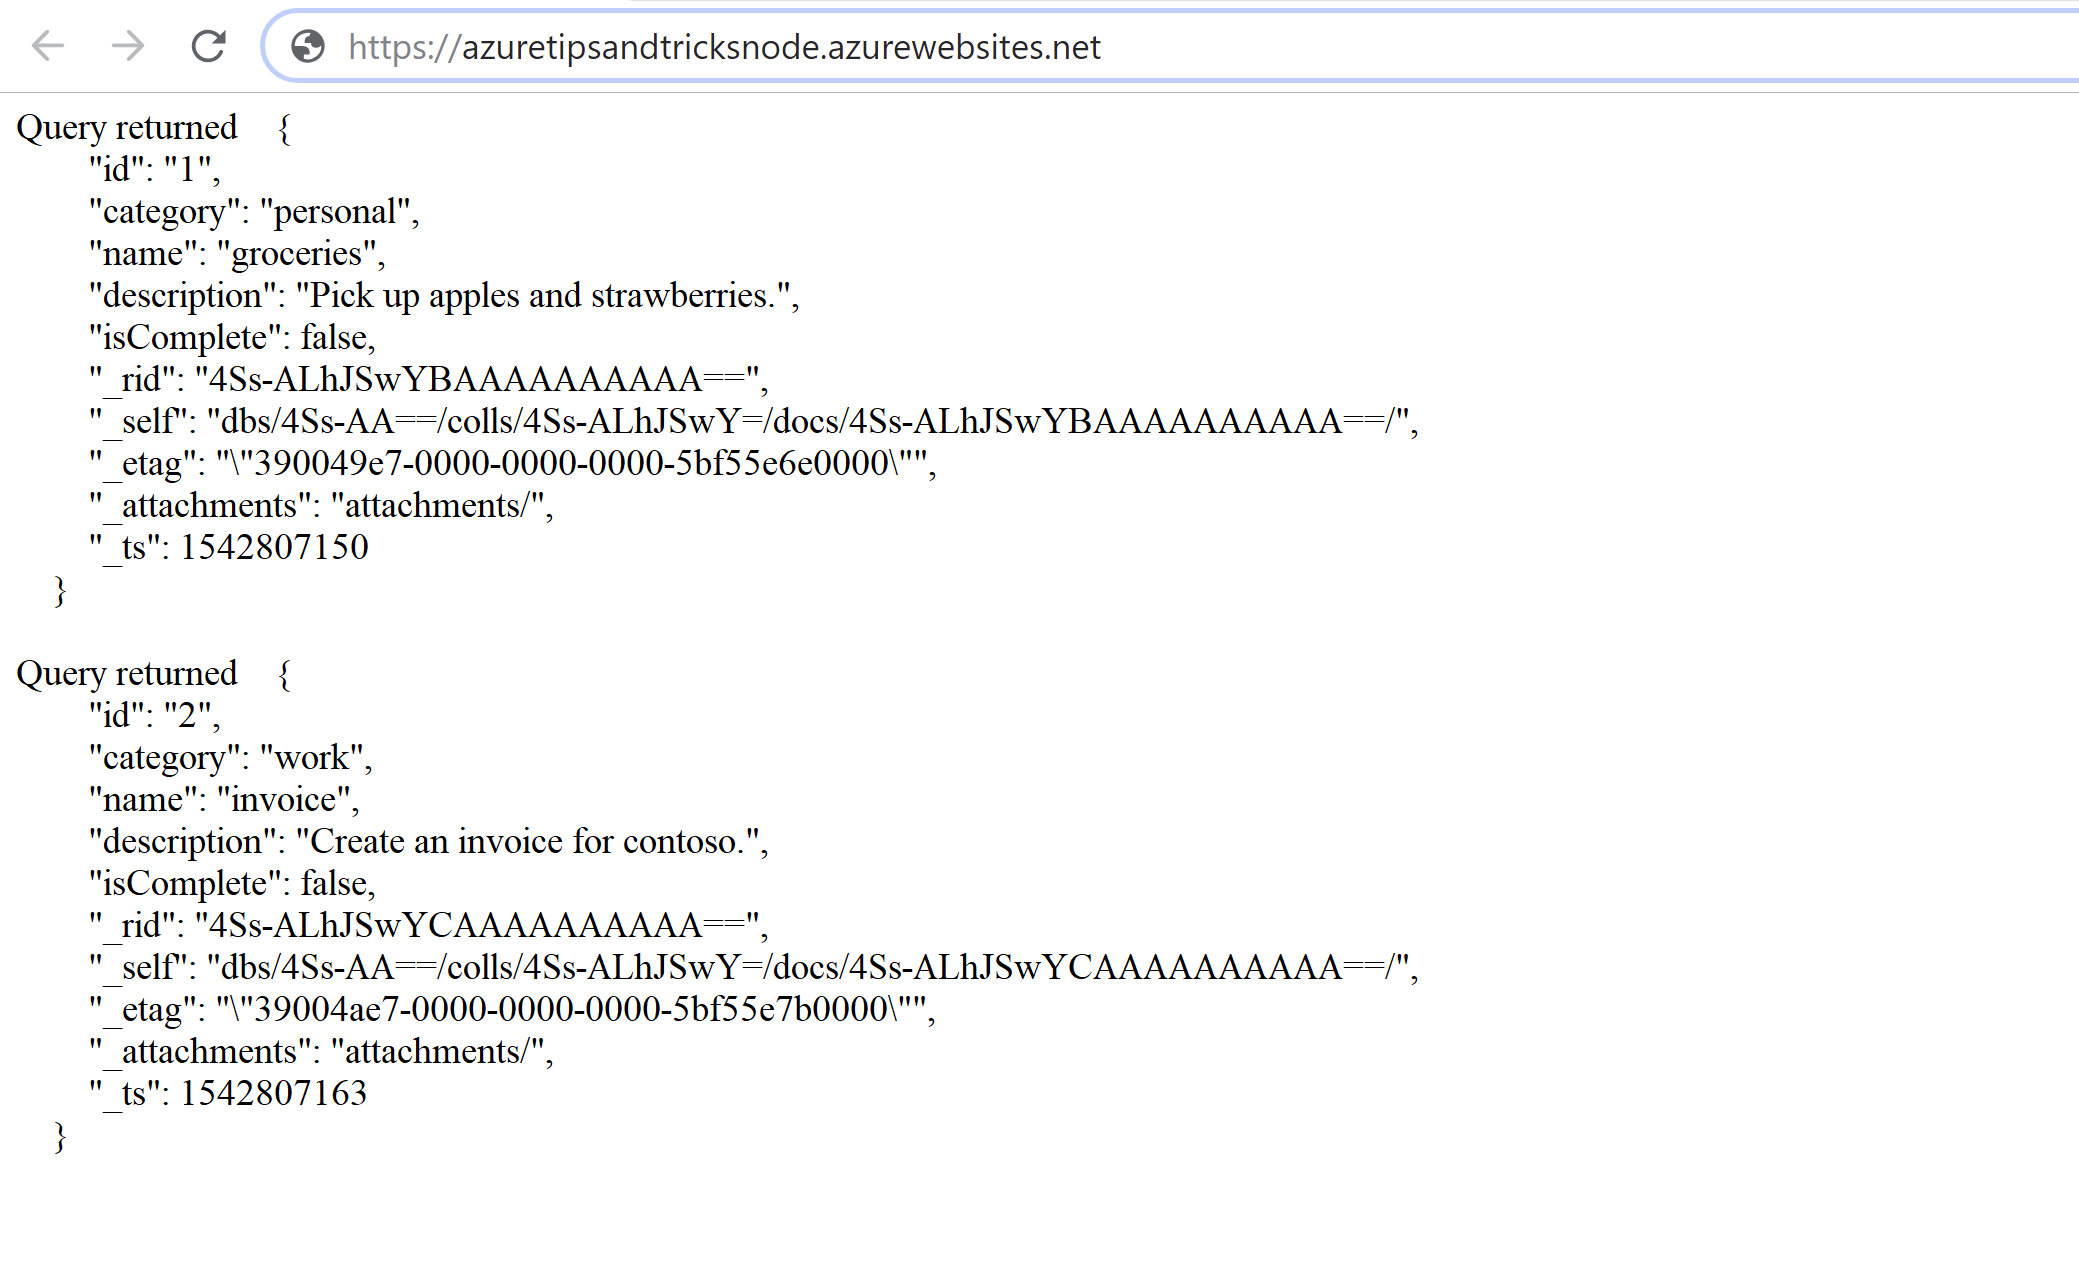
(Run the Node.js app in an Azure App Service Web App)
# Conclusion
Azure Cosmos DB is a great database for no-sql data. Microsoft has made it so that you can easily create and use it and that you can use it however you like. You can choose the API that you use to talk to it and you can use it with almost any programming language. The new Azure Cosmos DB JavaScript SDK proves that you can easily use Cosmos DB from Node.js applications. You can find out more about the specific functionality of the JavaScript SDK here (opens new window). Go and check it out!