TIP
💡 Learn more : Azure Cosmos DB (opens new window).
# Using the Data Migration Tool with Cosmos DB
One tasks that seems to come up over and over is migrating data from one format into another. I was recently building out an API and needed to dump some data into Cosmos DB. The tool that made short work of this was the Azure DocumentDB Data Migration Tool (opens new window). In my case, I needed to dump a large JSON file into Cosmos DB. Here is how I did it.
# The Tools + Sample Data
Download and install the Azure DocumentDB Data Migration Tool (opens new window)
Grab whatever sample file that you'd like to experiment with. I'm using the en_kjv.json JSON file from here (opens new window)
Now we're ready to begin work!
# Get to Work
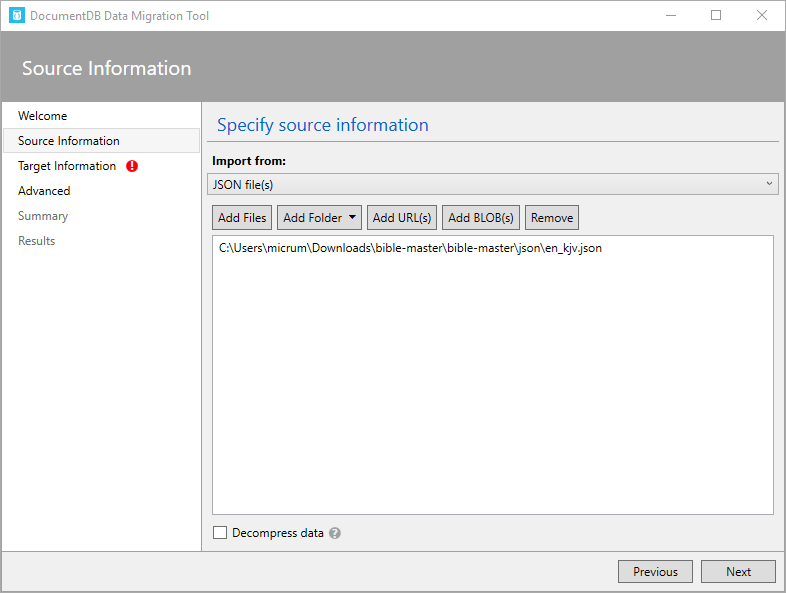
Open the Data Migration Tool and under Source Information, point to the local JSON file as shown below.
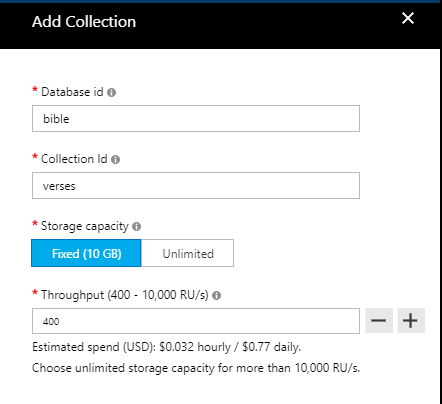
Ensure you have a Cosmos DB database id and collection. I'm using the following:
Go to Keys (inside your Cosmos DB blade in the portal) to copy the Primary Connection String
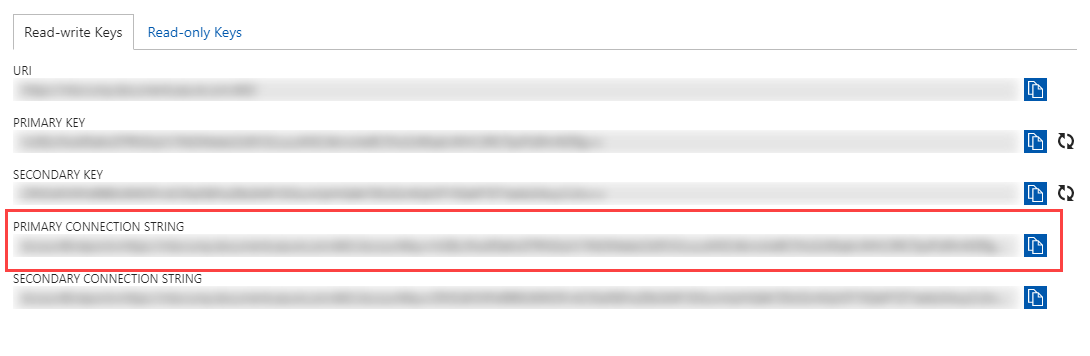
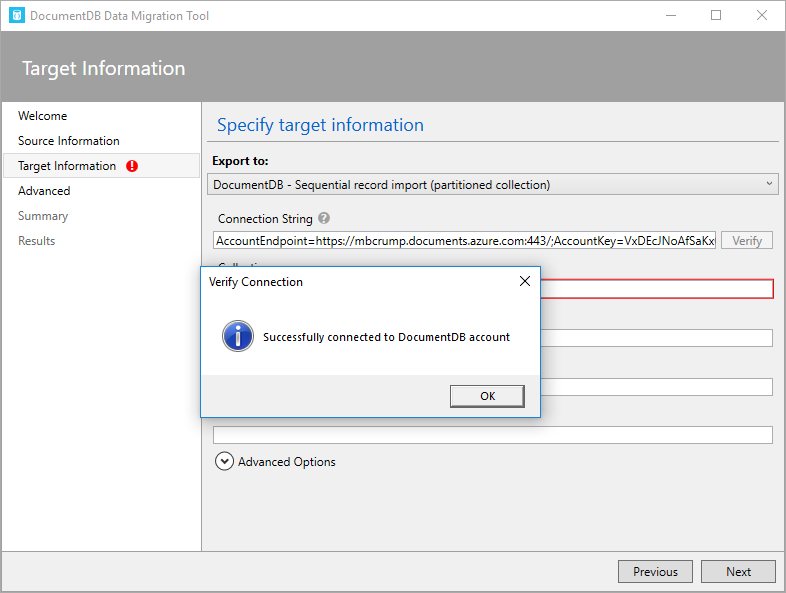
You'll need to append the Database name to the end of the string. For example Database=bible will be appended to the string AccountEndpoint=https://mbcrump.documents.azure.com:443/;AccountKey=VxDEcJblah==;Database=bible that I copied out of the portal. Now press Verify Connection.
You'll need to add the Collection and in my case it is verses. We'll take the defaults on the next two screens and you'll finally see a Confirm inport settings page.
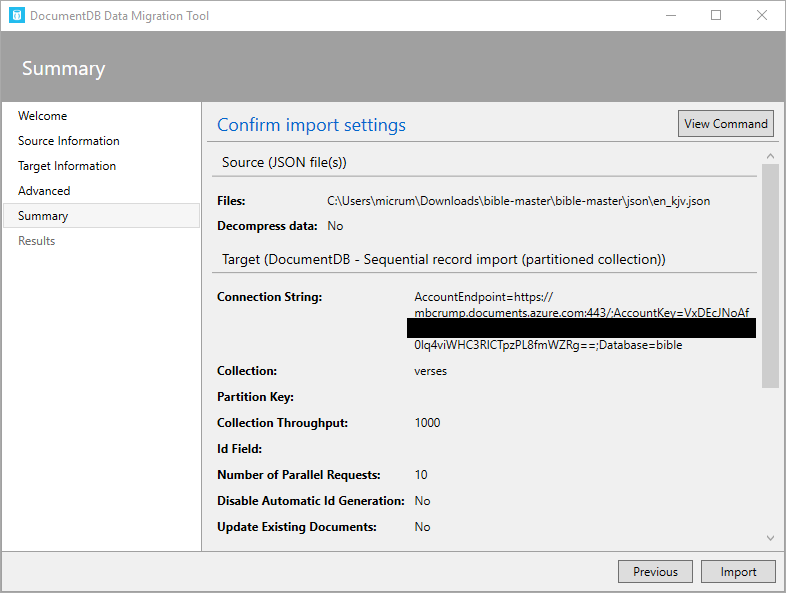
You can even click on View Command to see the command that will be used to migrate your data. This is helpful to just learn the syntax.
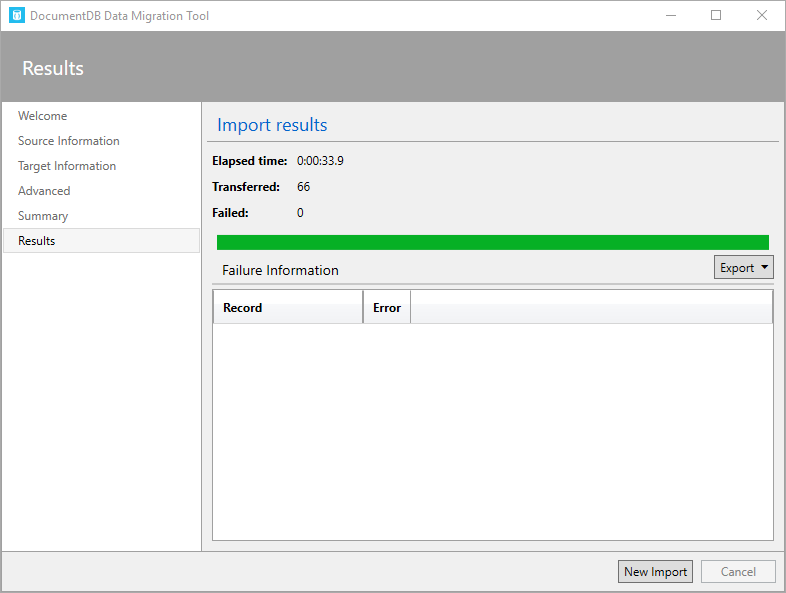
You'll finally see the Import has completed with 66 transferred. (This is the total number of books in the Bible.)
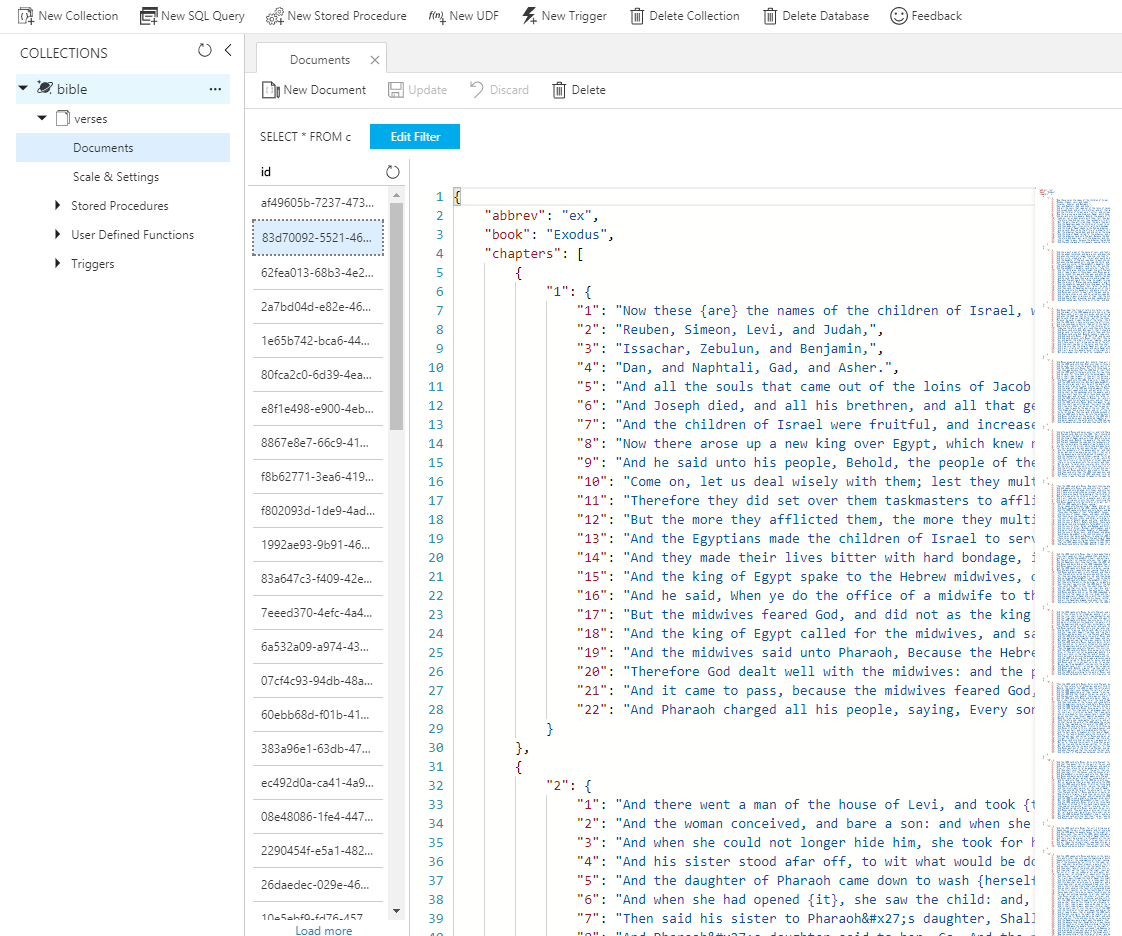
If you go back to the Azure Portal and open Cosmos DB and look under Data Explorer, you'll see the data has been imported successfully into our collection.