
TIP
🔥 Make sure you star the repo (opens new window) to keep up to date with new tips and tricks.
💡 Learn more : Azure Purview Overview (opens new window).
📺 Watch the video : How to get started with Azure Purview (opens new window).
# How to get started with Azure Purview
# Keep track of your data landscape
It is hard to keep track of all your data. You want to know where data is, and if it contains sensitive information. And you want to know where you data is coming from and how it is being transformed and by whom. Azure Purview (opens new window) enables you to manage your data, wherever it is stored, including on-premises and in other clouds. Purview can automatically discover data and classify it, so that you know what is in it.
In this post, we'll get started with Azure Purview (opens new window) by creating a new Azure Purview account, and coupling and scanning a data source.
# Prerequisites
If you want to follow along, you'll need the following:
- An Azure subscription (If you don't have an Azure subscription, create a free account (opens new window) before you begin)
- An Azure SQL Database (opens new window) in Azure. You can follow this quickstart (opens new window) to create one
# Create and use an Azure Purview account
Let's start by creating an Azure Purview account in the Azure portal.
Go to the Azure portal (opens new window)
Click the Create a resource button (the plus-sign in the top left corner)
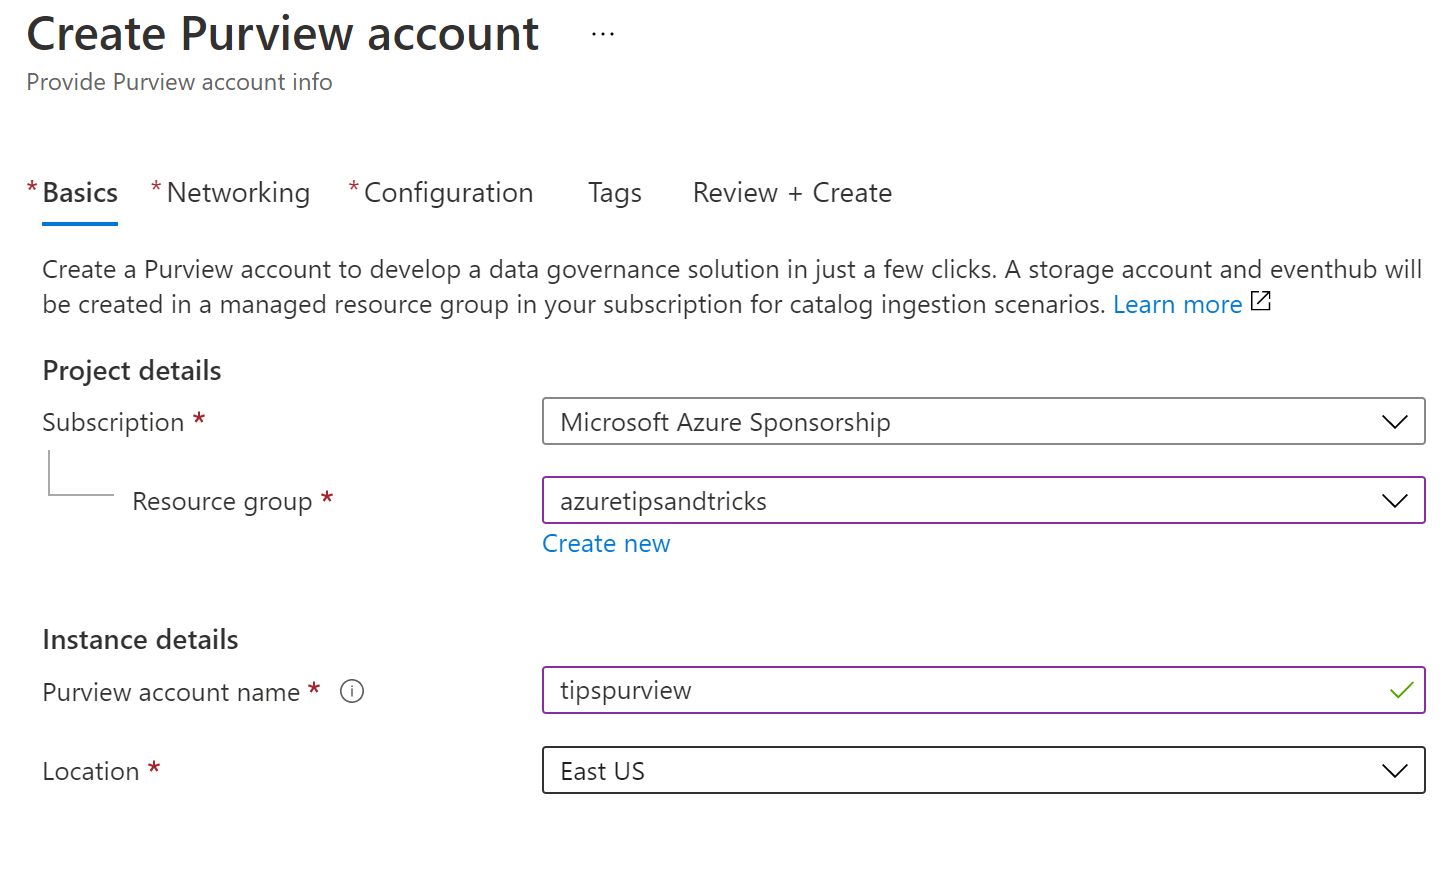
Search for purview, select the "Azure Purview" result and click Create. This shows the Create Purview Account blade
- Select a Resource Group
- Give the Purview account a Name
- Pick a location
- Select Next: Networking
(Create an Azure Purview account in the Azure portal)
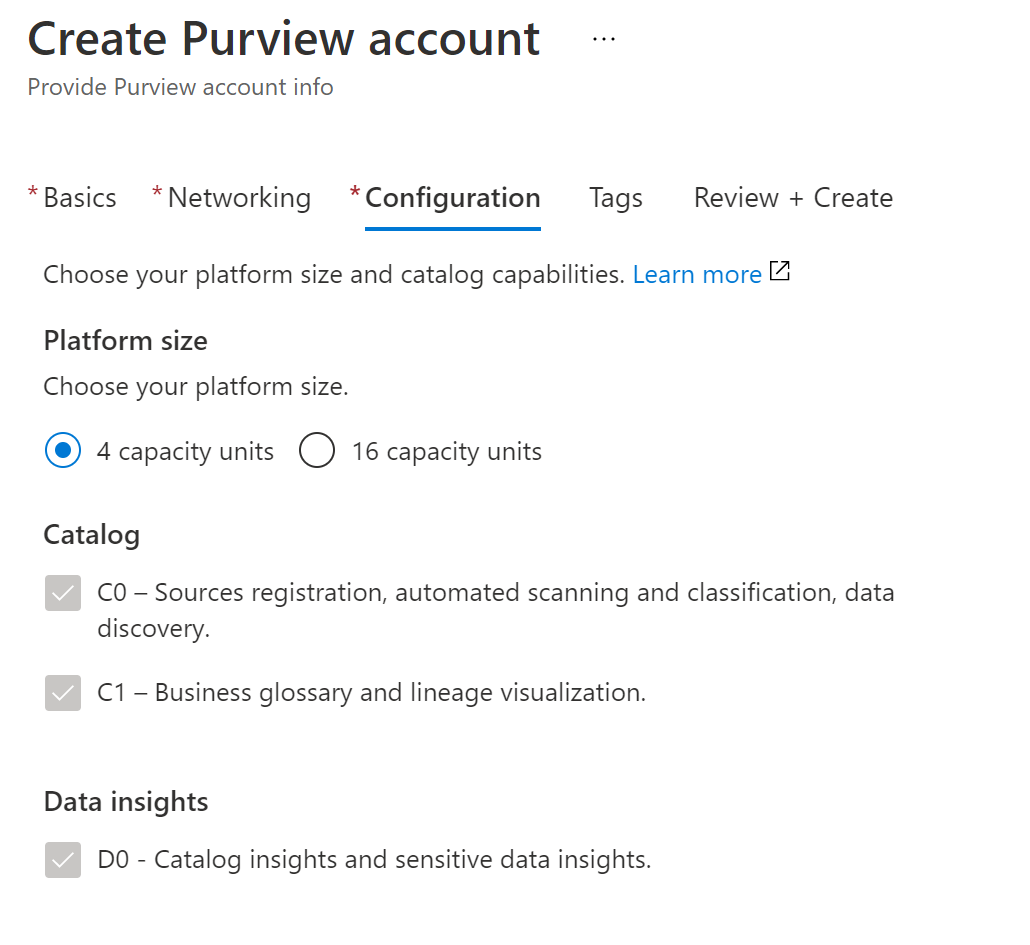
- You can connect to Azure Purview with a Private endpoint (opens new window) to make it more secure. Leave it set to All networks and select Next: Configuration
- In the configuration blade, you can manage the platform size and catalog capabilities of the Purview account. Leave the Platform size to 4 capacity units and select Review + Create and then Create
(Configure Platform size of the Purview account)
When the Purview account is created, navigate to it in the Azure portal. From there, you can configure access to the account and networking settings. And to use Purview, you need to open Purview Studio. You can open that from the Overview blade of the Purview account.
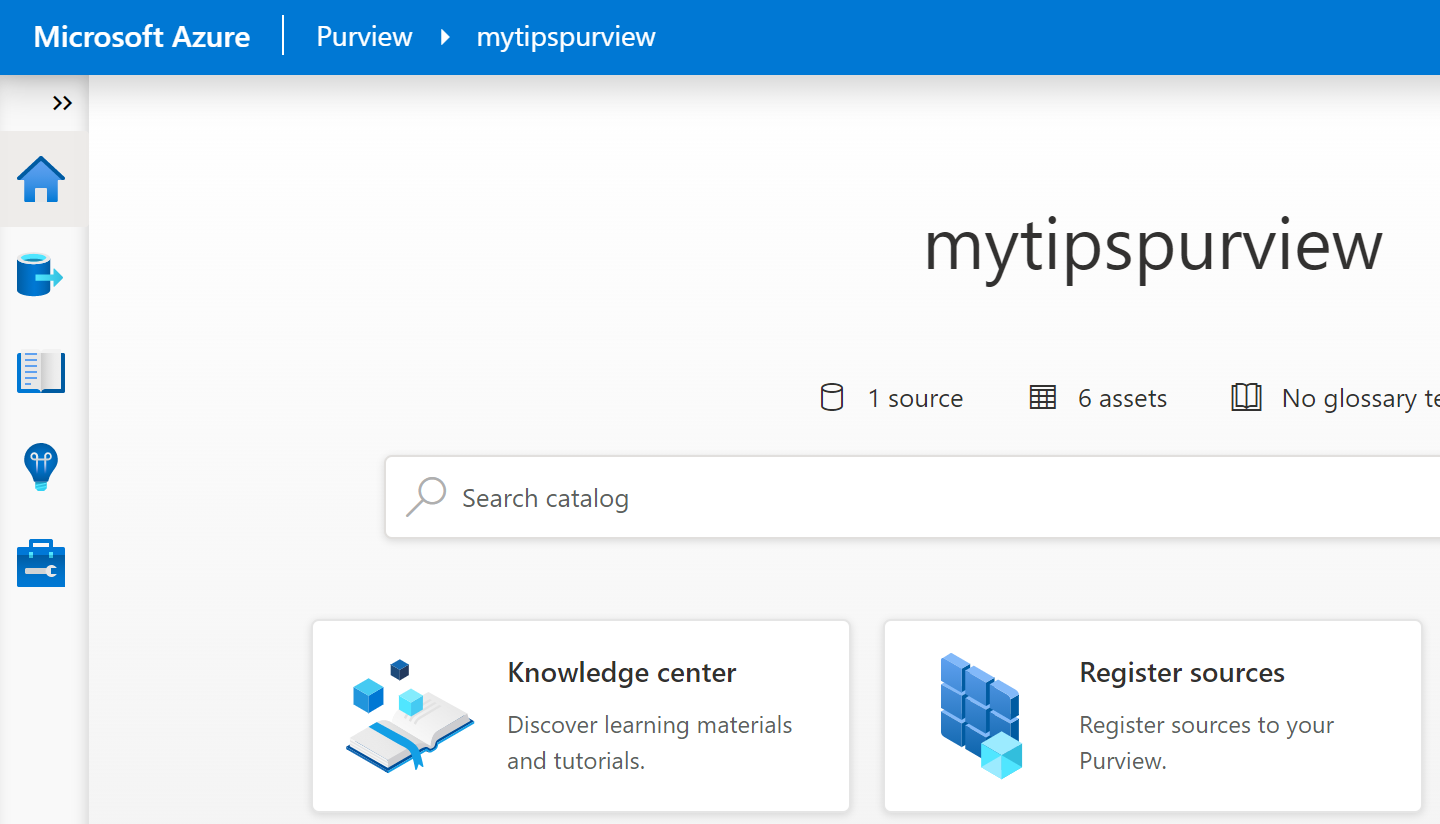
(Azure Purview Studio)
You can use the Purview account to track and manage your data, even when it is on-premises or in other clouds. To get started, you need to register a data source.
- In Purview Studio, select the Sources menu from the left menu. This shows the data sources that are registered with Purview
- Let's register the first data source. Click Register to get started
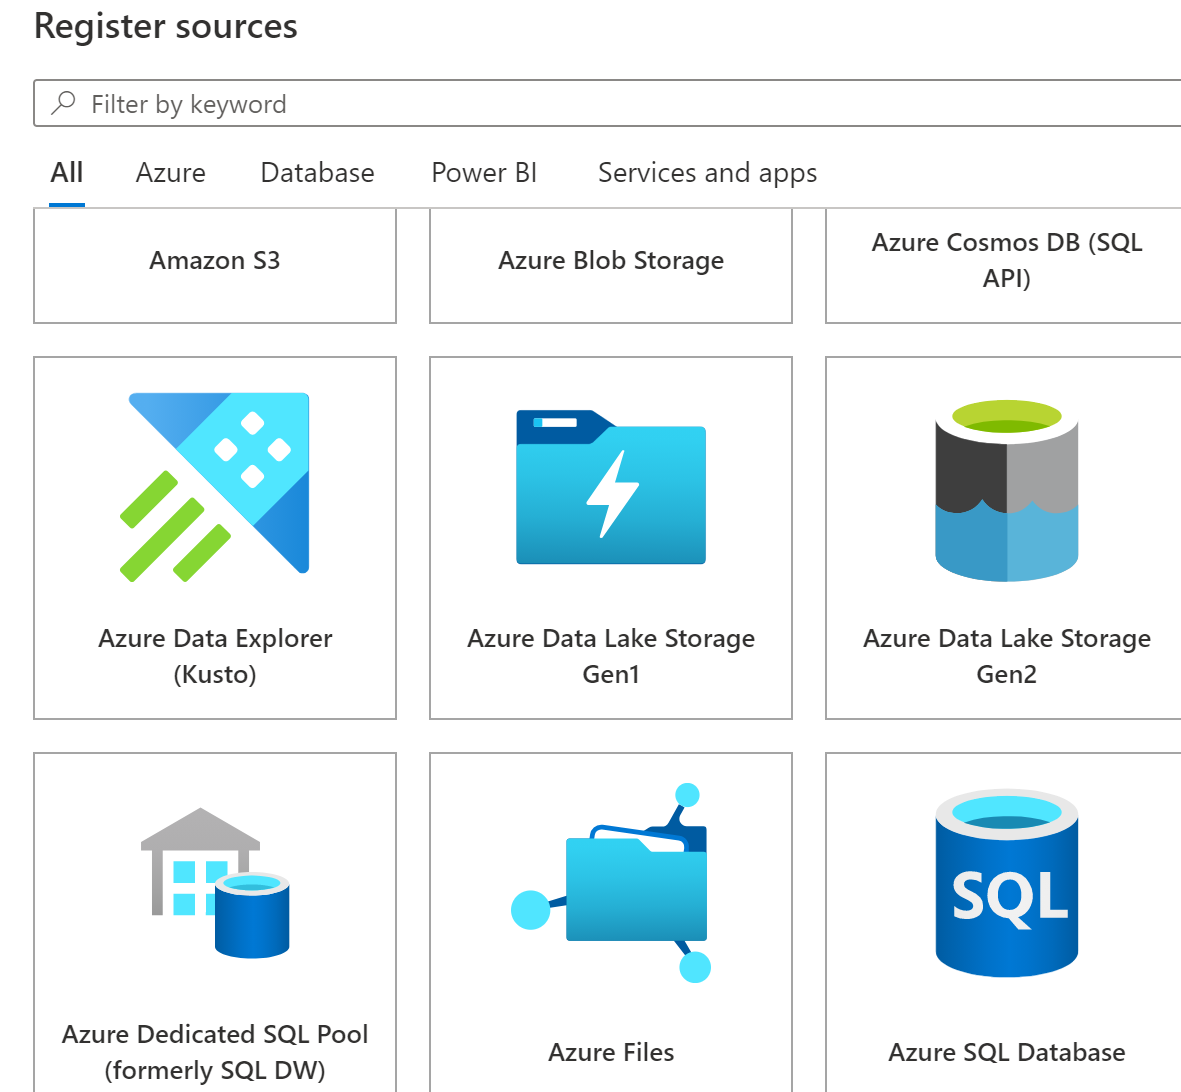
(Register a data source in Purview)
- You can register all sorts of data sources in Purview. Select Azure SQL Database and click Continue
- Select your Azure subscription
- Pick the Azure SQL Database server that contains the database you want to register
- Click Register
- Now that the data source is registered, you can start scanning its data. In the menu of the data source, click New scan
(Create a new data scan in Purview Studio)
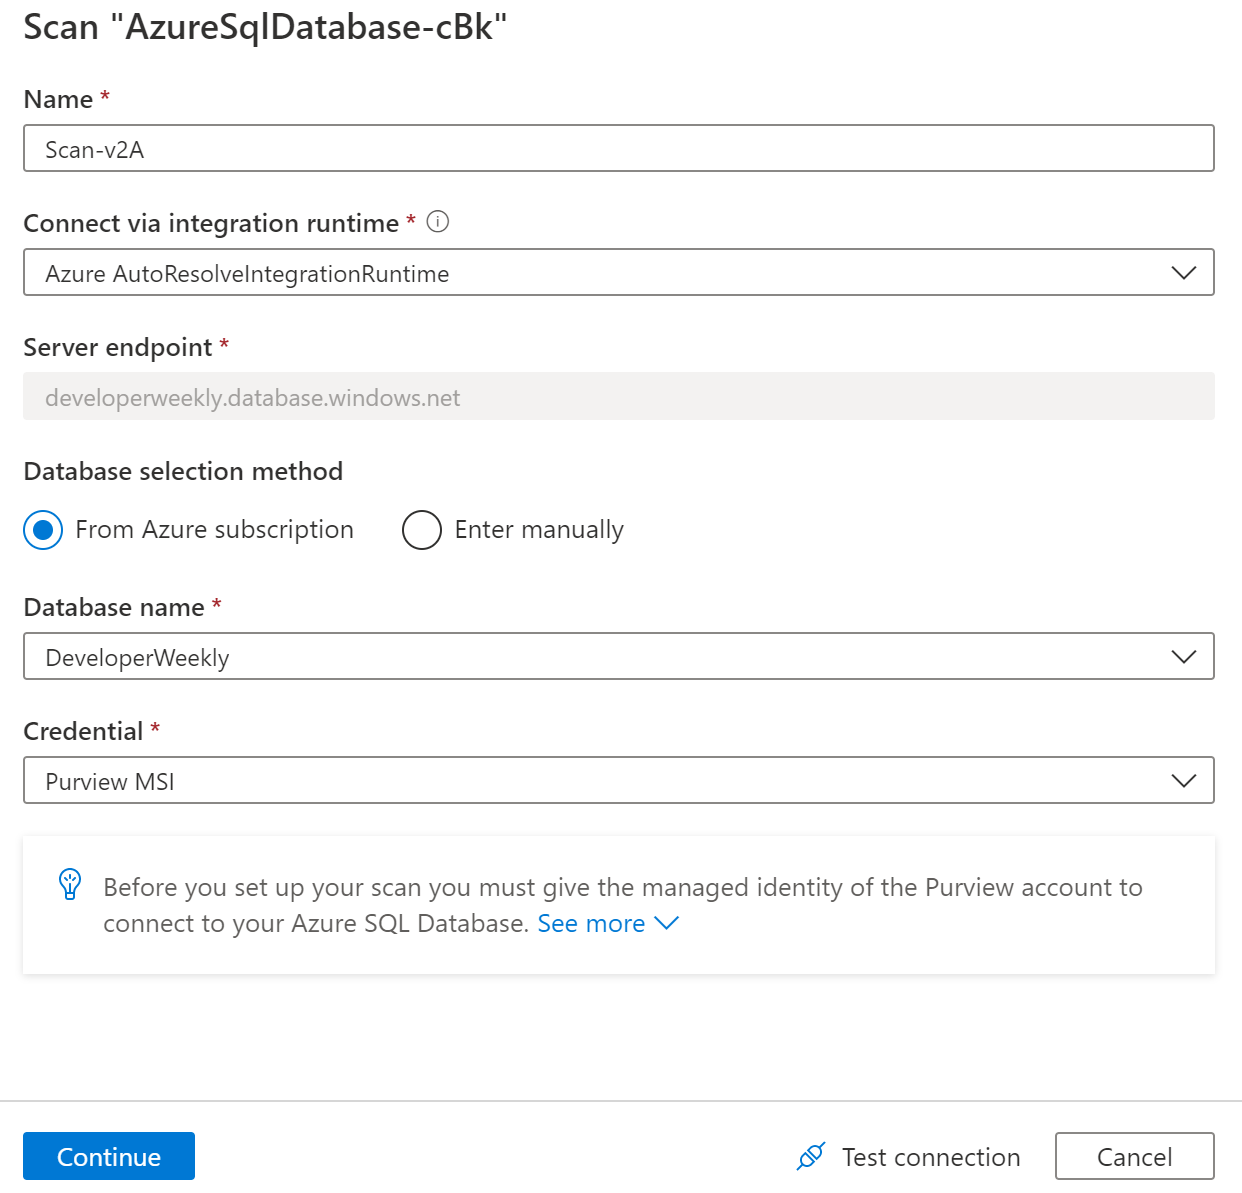
- Fill in a name for the scan
- Select the database that you want to scan
- Leave the Credential setting as it is. And click See more to see the name of the Purview identity that needs to access the database
- We need to grant Purview access to the database. Copy the Managed Identity Name of the Purview credential
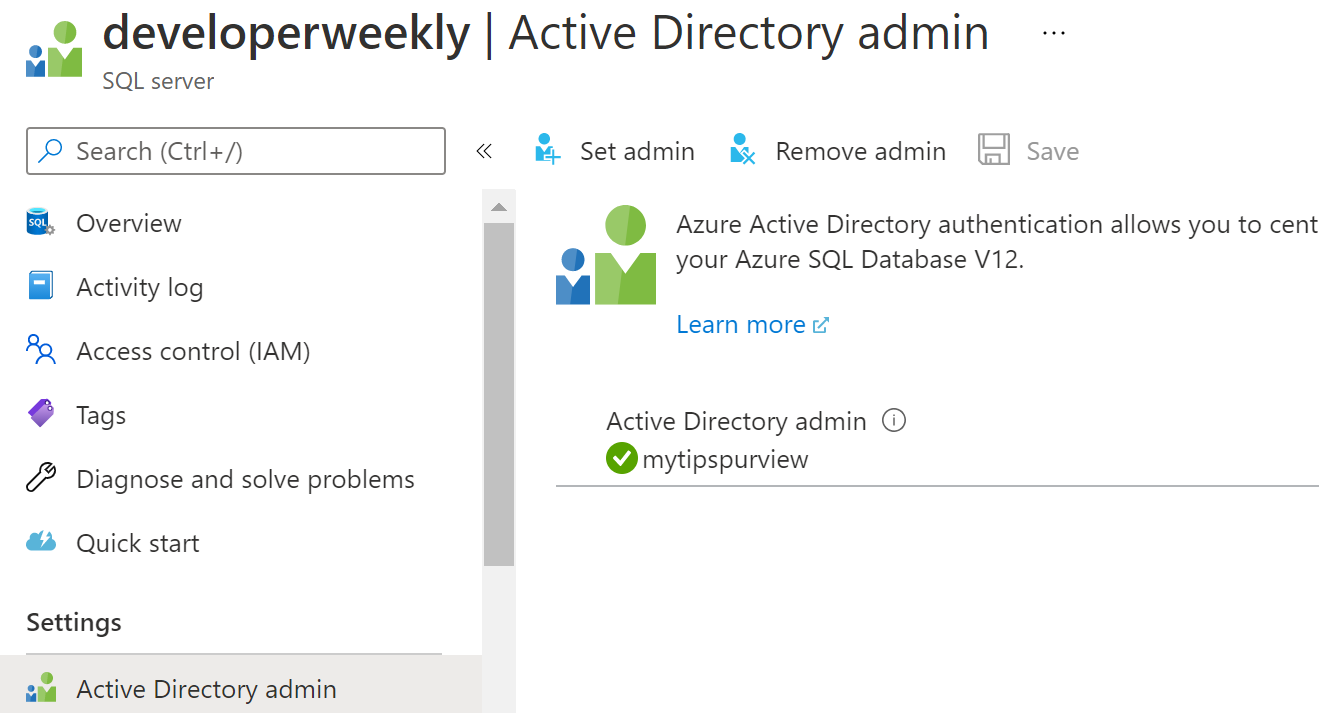
- Go to the Azure portal and navigate to the Azure SQL Database Server
- In there, navigate to the Active Directory admin setting
- Click Set admin
- Paste the Managed Identity Name in the search bar
- Click Select
- And click Save to grant the Purview identity access to the database server
(grant access to Purview)
- Go back to Purview Studio and click Test connection in the Create Scan blade. This should result in a "Connection successful" message
- Click Continue
- Select the table(s) of the database to scan and click Continue
- Leave the rule set as it is. You can take a look at its details to see what this rule set will scan for. The default AzureSqlDatabase rule set scans for many things, including credit card numbers and dates of birth. Click Continue
- You can scan this data source on a schedule. For instance, every week. We'll do it once. Select Once and click Continue
- Click Save and Run to start the scan
When you click on the View details link of the data source, you can see if the scan is complete. When it is, you'll also see the results of the scan. It could be that it classified some data, like credit card numbers. Now, you can analyze this information further in an analytics engine like Microsoft Power BI (opens new window) and see insights in Purview Studio.

(Scan results in Purview Studio)
# Conclusion
Azure Purview (opens new window) is your main entry point for managing and analyzing all of your data, regardless of where it is stored. Go and check it out!