
TIP
🔥 Download the FREE Azure Developer Guide eBook here (opens new window).
💡 Learn more : Azure Cosmos DB Overview (opens new window).
📺 Watch the video : How to copy data from one Azure Cosmos DB container to another container (opens new window).
# How to copy data from one Azure Cosmos DB container to another container
# Azure Cosmos DB data migration
Sometimes, you need to migrate data from one Azure Cosmos DB (opens new window) to another. You can, for instance, do this if you need to change the partition key of a container, or to consolidate Azure Cosmos DB instances.
The Azure Cosmos DB live data migrator tool (opens new window) enables you to migrate data from one container to another. In this post, we'll configure the tool to try it out.
# Prerequisites
If you want to follow along, you'll need the following:
- An Azure subscription (If you don't have an Azure subscription, create a free account (opens new window) before you begin)
- Two Azure Cosmos DB (opens new window) instances with databases and containers. One of the containers should contain data that can be migrated.
# Use the Azure Cosmos DB live data migrator tool
Let's try it out. To use the migration tool, we first need to create an application registration.
Go to the Azure portal (opens new window)
Search for "app registrations", and click on the App registration result
Click New registration to start registering the migration tool app
- Type in a Name for the application. For instance "tips01".
- Put in a *Redirect URI. This should contain the name, so something like "https://tips01-ui.azurewebsites.net/signin-oidc"
- Click Register
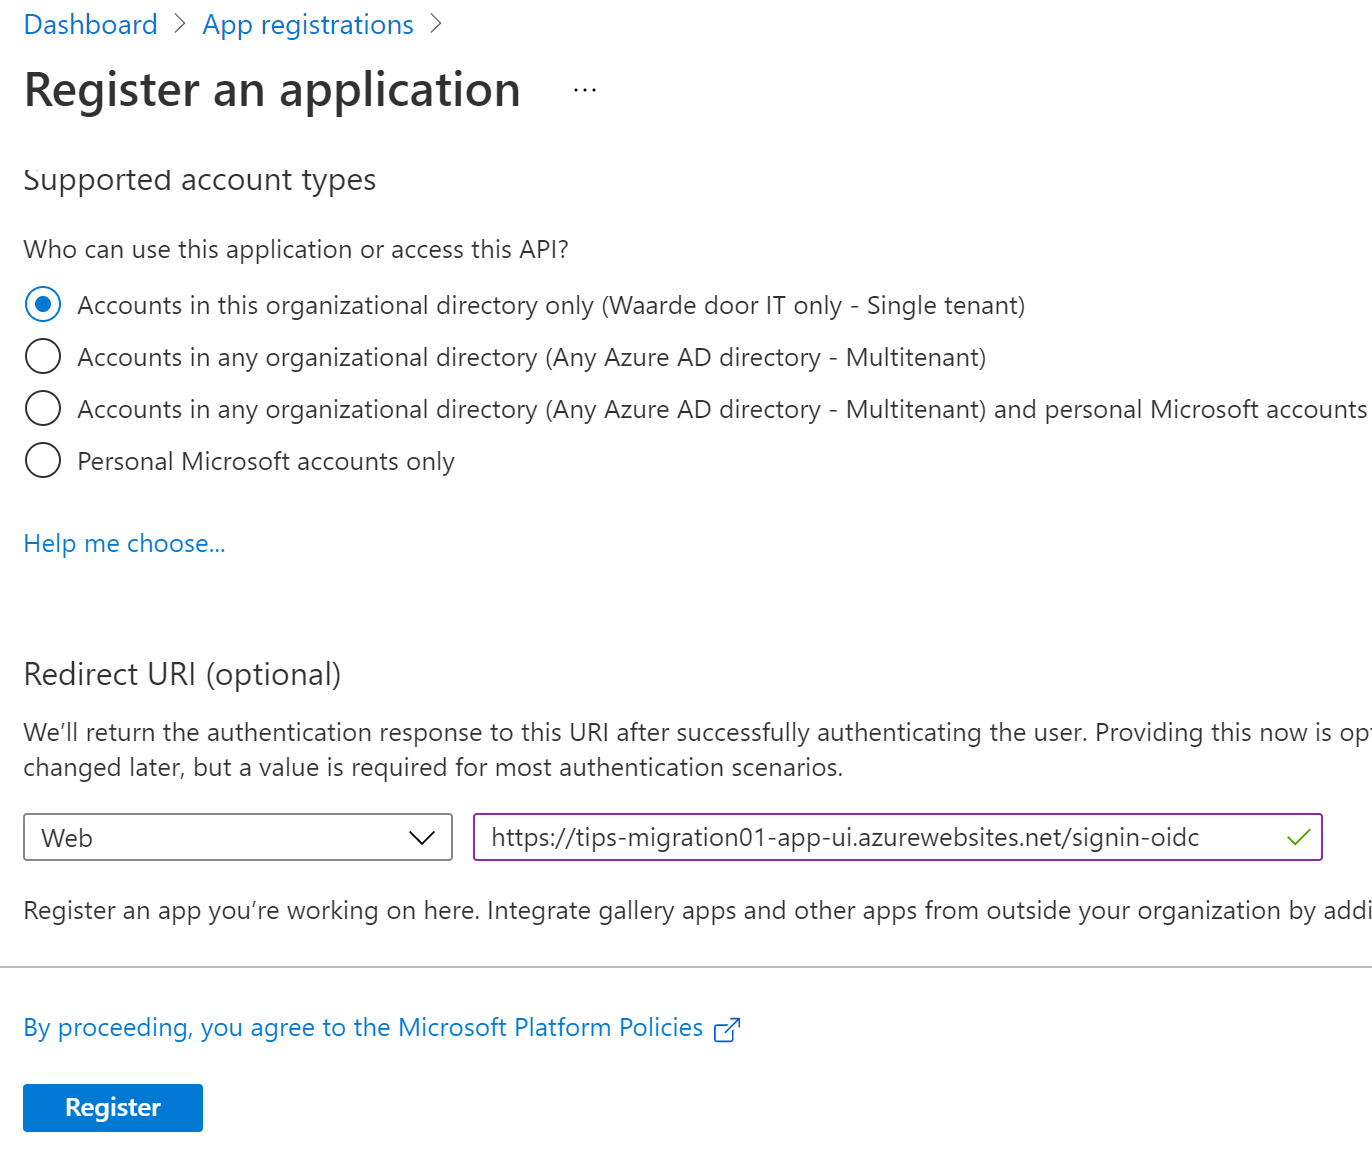
(Create an App Registration in the Azure portal)
- Next, note the Application (client) ID in the overview blade of the App registration. Copy it to use it later
- Navigate to the Authentication menu
- Fill in a Front-channel logout URL. Again, this should contain the name, like "https://tips01-ui.azurewebsites.net/signout-callback-oidc"
- Check ID tokens (used for implicit and hybrid flows)
- Click Save
- Next, go to the Manifest menu
- Add to the requiredResourceAccess node, so that it looks like this:
	"requiredResourceAccess": [
		{
			"resourceAppId": "00000003-0000-0000-c000-000000000000",
			"resourceAccess": [
				{
					"id": "e1fe6dd8-ba31-4d61-89e7-88639da4683d",
					"type": "Scope"
				},
				{
					"id": "b340eb25-3456-403f-be2f-af7a0d370277",
					"type": "Scope"
				}
			]
		}
	],
2
3
4
5
6
7
8
9
10
11
12
13
14
15
- Click Save
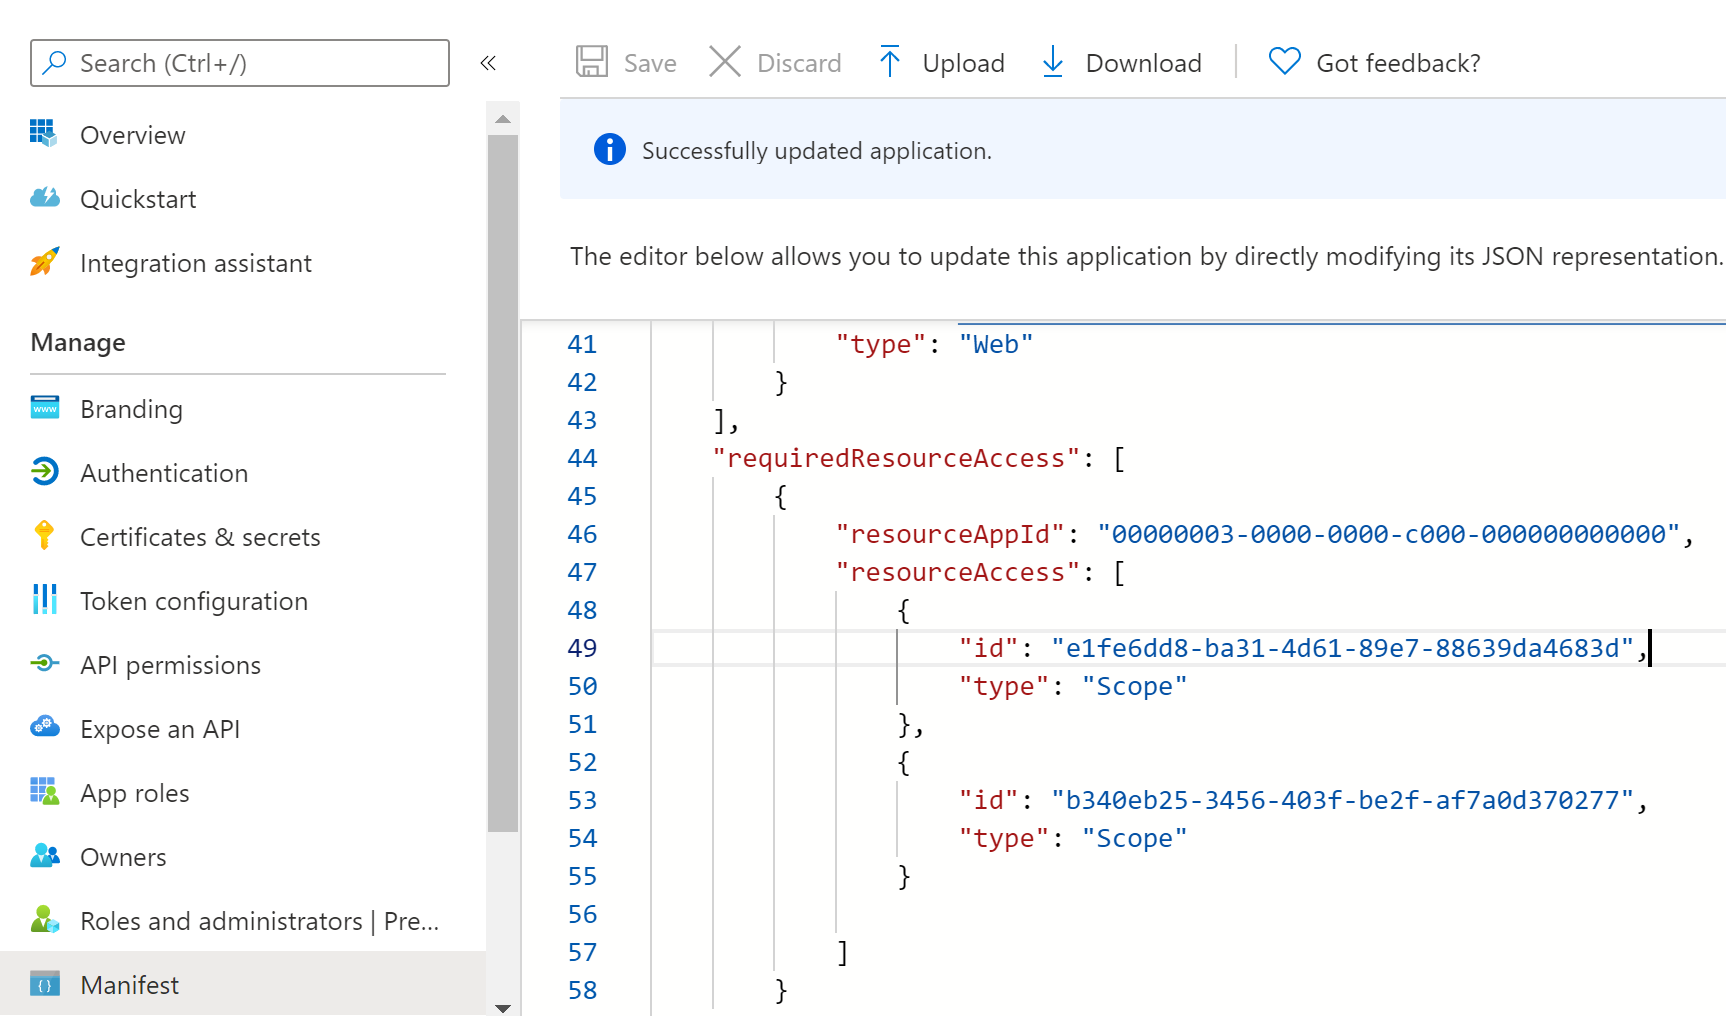
(Change the manifest of the App registration)
- In the manifest, copy the publisherDomain for later
Now that we have an application registration, we can deploy the migration app.
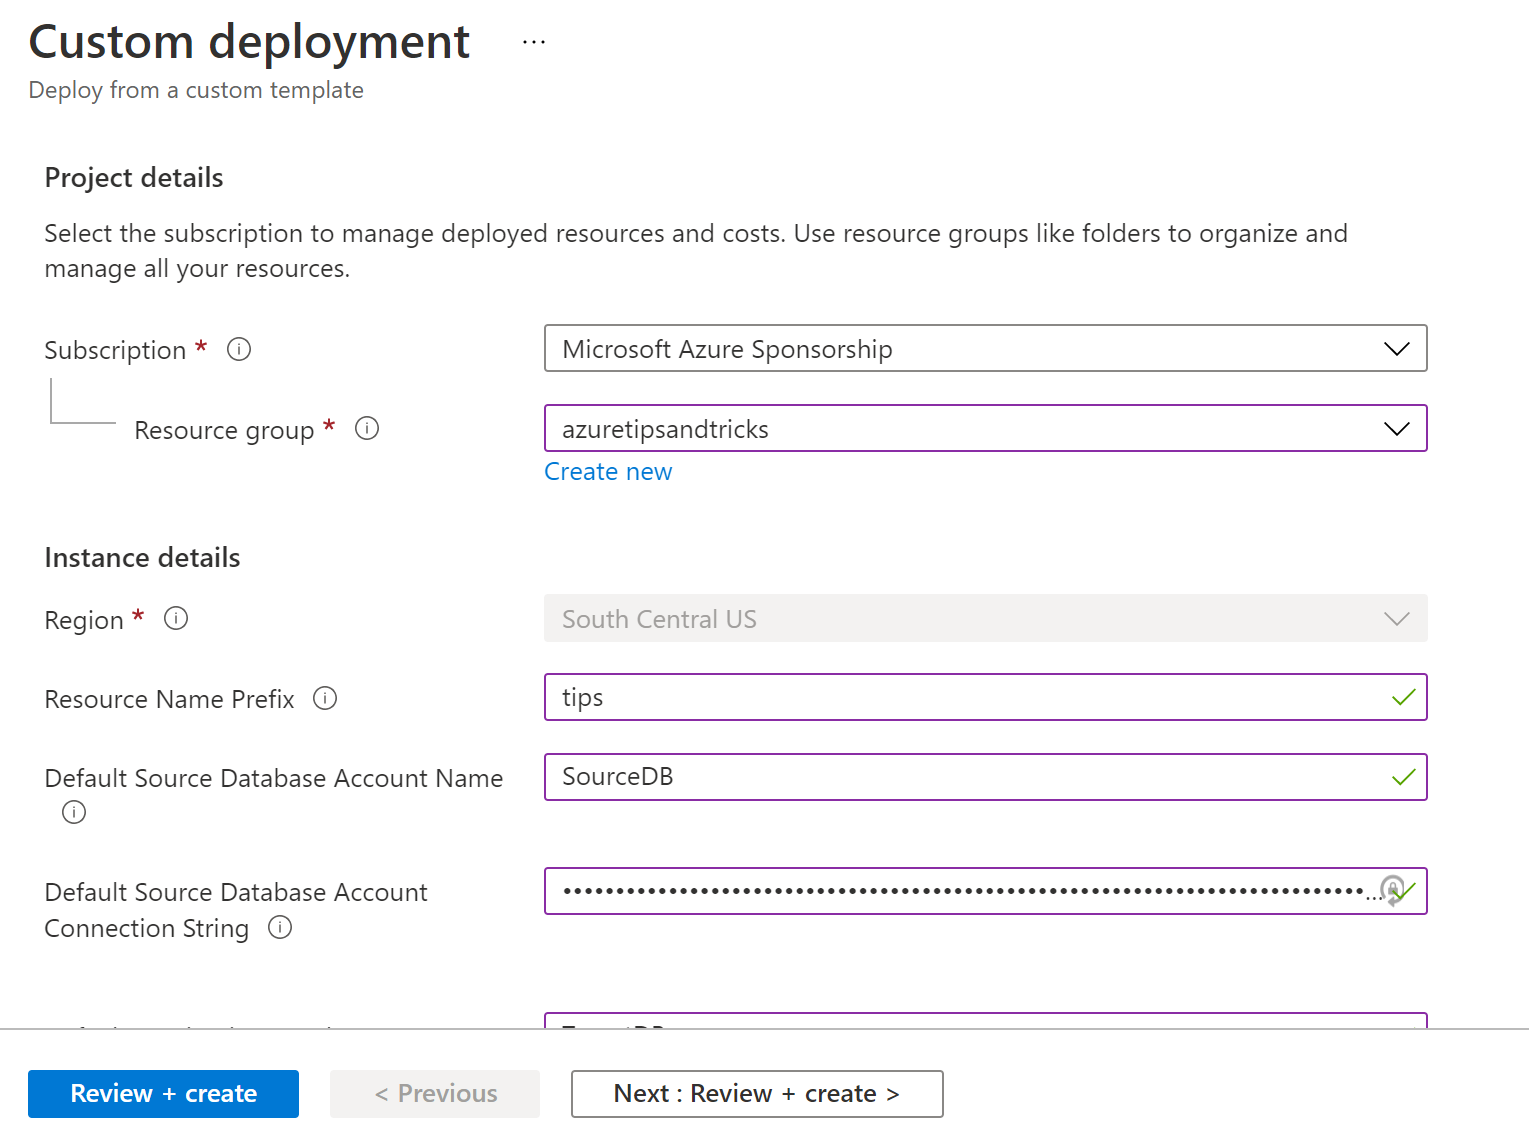
Go to this link (opens new window) to start creating the migration app
- First, select a Resource Group
- Next, type in a Resource Name Prefix. This should be the name that you used earlier. So, in my case, it is "tips01"
- In Default Source Database Account Name, put in a name for the Azure Cosmos DB connection that will serve as the migration source. This can be anything, and you can change it later
- For Default Source Database Account Connection String, type in the connection string for the source Azure Cosmos DB. You can find this in the Azure portal
- Type a name for the Default Destination Database Account Name
- Provide the connection string for the destination Azure Cosmos DB account in Default Destination Database Account Connection String
- In the Allowed Users field, provide a user that will use the migration tool. This can be an objectId or email address of a user that is in the same tenant where the application will be deployed. You can provide multiple users by separating them with the "|" character
- Next, provide the publisher domain from the App Registration Manifest in the Aad App Registration Publisher Domain field
- Finally, in the Aad App Registration Client ID field, put in the Application (client) ID from the App registration
- Click Review + create and then Create to deploy the migration tool
(Deploy the migration tool)
The migration tool will deploy several resources. This includes an Azure App Service Web App (opens new window) that runs the UI for the tool. Find the Web App in the Azure portal and open the UI in a browser. The URL will use the name that you provided earlier. So, in my case, it is https://tips01-ui.azurewebsites.net
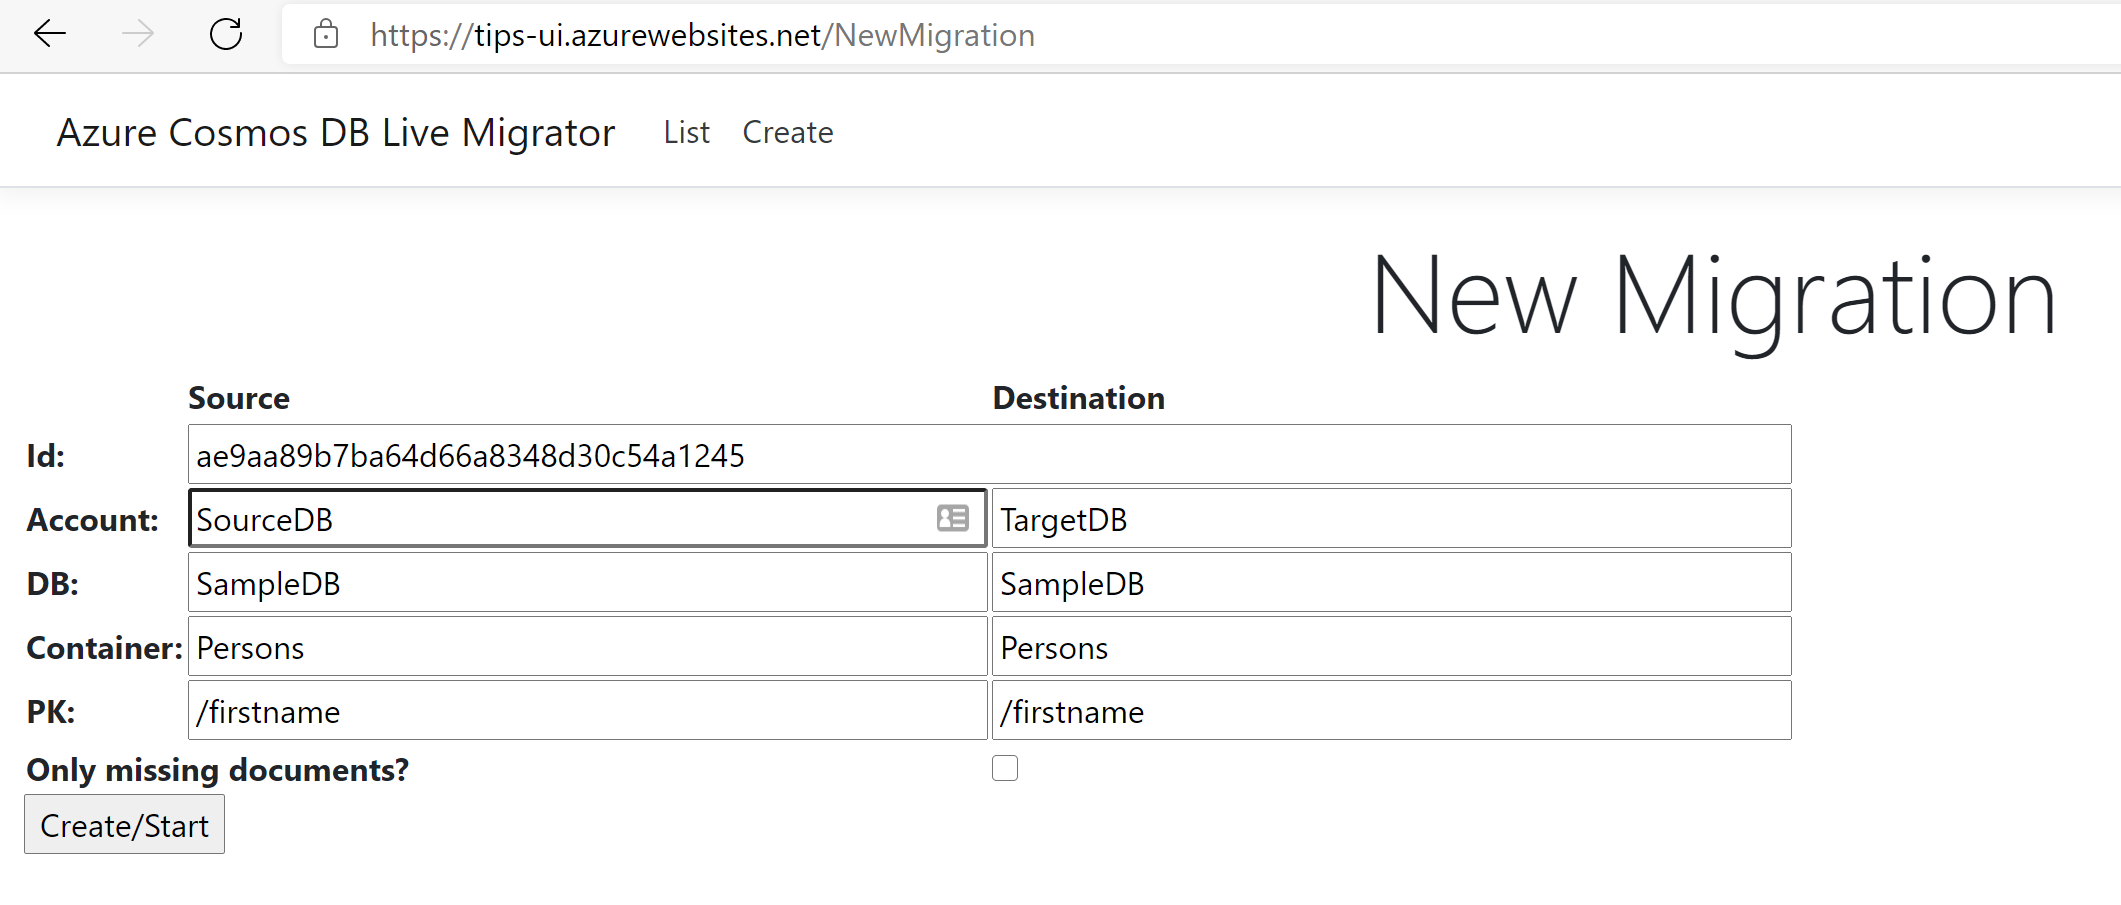
To start creating a migration, click Create
Now fill in the source and destination details
- For source and destination, provide the Azure Cosmos DB database name in the DB field
- Fill in the database Container name
- Provide the Partition key for the source and destination
- Click Create / Start
(Create a new migration)
You can watch the progress of any open migrations by clicking on the List menu and refreshing your browser
When all documents are migrated, click Complete to mark the migration as finished

(Complete the migration)
# Conclusion
Migrating data between Azure Cosmos DB (opens new window) containers can be difficult. The Azure Cosmos DB live data migrator tool (opens new window) helps to create and manage migrations. Go and check it out!