TIP
💡 Learn more : SQL Server on Azure Virtual Machines (opens new window).
# Part 1 - Implementing Azure Search with SQL Server and ASP.NET MVC
Welcome to a new series, in this series I'll cover Azure Search, SQL Server and putting it all together in a ASP.NET MVC web app. I'll be adding the post to this series below as I go:
# What is it?
Azure Search is a search-as-a-service cloud solution that allows you to access APIs (REST and an SDK) to search over your content using web, desktop or mobile apps. There is variety of services that you can attach Azure Search to, including SQL Server - which we'll cover in this tutorial.
# First Step - Creating the SQL Server Database that we'll place the indexer
Go into the Azure Portal and search for SQL Server and click the Add button.
Give it a database name, resource group and fill out the new server information. For the source, select AdventureWorksLT and pricing tier select Basic.
Your screen should look like the following:
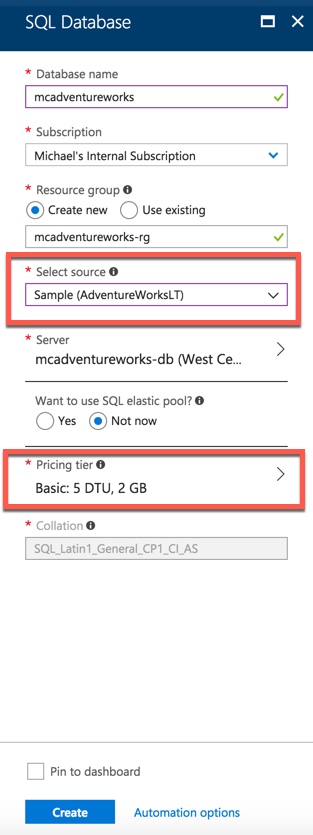
Remember this! Double check you selected the select AdventureWorksLT database if you want to follow along with this tutorial.
# Take a look at the data
Now that we have a sample database and it has deployed, let's use Query Editor which is inside the SQL Server blade to take a look at the table structure. Note: You can also use SQL Server Management Studio (opens new window) if you prefer it better.
If you click on Query Editor and login as instructed, then you'll see the following:
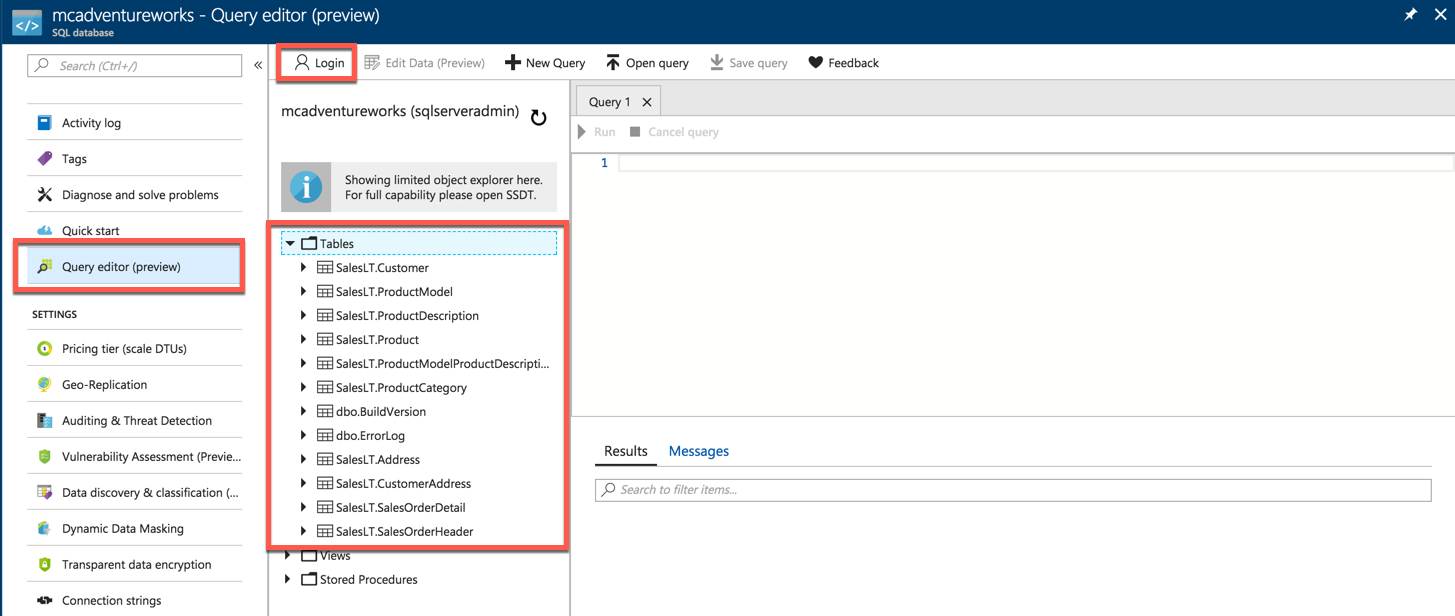
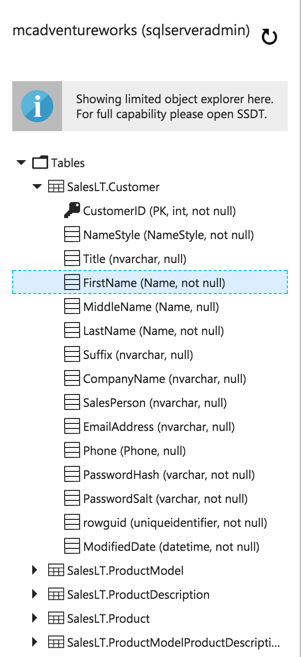
As you can see, I expanded the Table dropdown and I can drill down again to the column names.
It looks like Customer would be a great table to implement search and we could pass in the FirstName or LastName field.
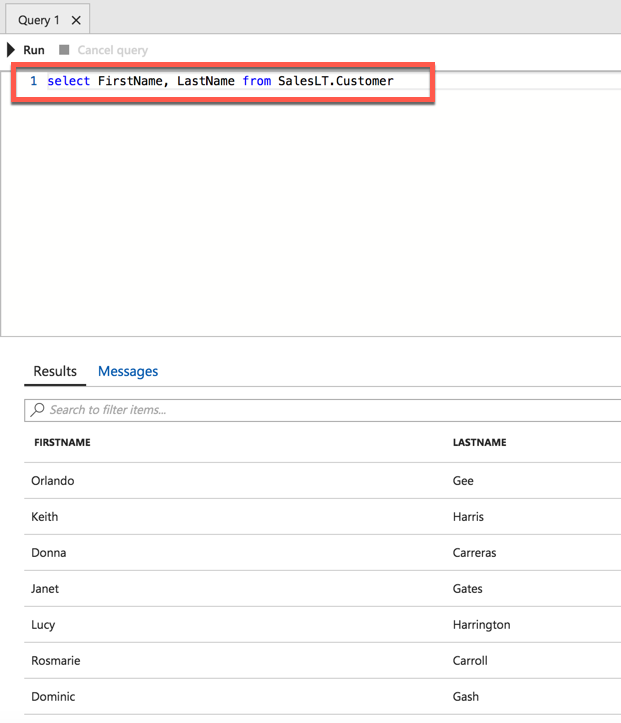
We could write a simple query such as select FirstName, LastName from SalesLT.Customer and click Run to take a look at the data.