
TIP
🔥 Checkout the Azure Developer page at azure.com/developer (opens new window).
💡 Learn more : What is Azure Database for MySQL? (opens new window)
📺 Watch the video : How to migrate your MySQL database to the cloud (opens new window).
# How to migrate your MySQL database to the cloud
# Enhance your MySQL security, availability and scalability by running it in Azure
MySQL (opens new window) is a very powerful database. When you run it on-premises, you are responsible for keeping it up and running and for securing it and making it as performant as possible. When you run your MySQL database in Azure Database for MySQL (opens new window), Azure manages it and ensures that it is highly available, performant and secure, so that you can focus on using the database and building valuable applications with it. To get your existing MySQL database into Azure, you need to migrate it. You can use several tools and techniques to do that (opens new window), depending on your MySQL version and where you are running it.
In this post, we'll migrate a MySQL database that is running in a Virtual Machine (opens new window), to a managed MySQL database that runs in an Azure Database for MySQL (opens new window) server.
# Prerequisites
If you want to follow along, you'll need the following:
- An Azure subscription (If you don't have an Azure subscription, create a free account (opens new window) before you begin)
- An existing MySQL database that is connected to Azure (with a hybrid connection, like Azure ExpressRoute (opens new window), or running in Azure in a Virtual Machine). If you don't have an existing MySQL database, you can create one by installing a MySQL server (opens new window) and running the SQL script in this GitHub repository (opens new window) in a schema on the server
- MySQL Workbench (opens new window) that can access the existing MySQL database
# Migrate to Azure Database for MySQL
I have a MySQL database that is running in a Virtual Machine in Azure. You might have one that is running on-premises or in another cloud. When that's the case, you need to create a connection between the environment where your MySQL is running and Azure, which is beyond the scope of this article.
Let's migrate the MySQL database from my VM to Azure Database for MySQL. I'll start by creating an Azure Database for MySQL with the Azure portal.
- Go to the Azure portal (opens new window)
- Click the Create a resource button (the plus-sign in the top left corner)
- Search for mysql, select the "Azure Database for MySQL" result and click Create
- This brings you to the create MySQL server blade
- Select a Resource Group
- Fill in a Name for the server
- Select a Location
- Pick a Version. For this example, we'll use MySQL version 5.7. You need to make sure that the target server (in Azure), is the same version as the existing MySQL server
- Select the Compute + Storage tier
- Fill in an Admin username for the server
- Tye a Password and Confirm the password
- Click Review + create and Create after that. This creates the Azure Database for MySQL server
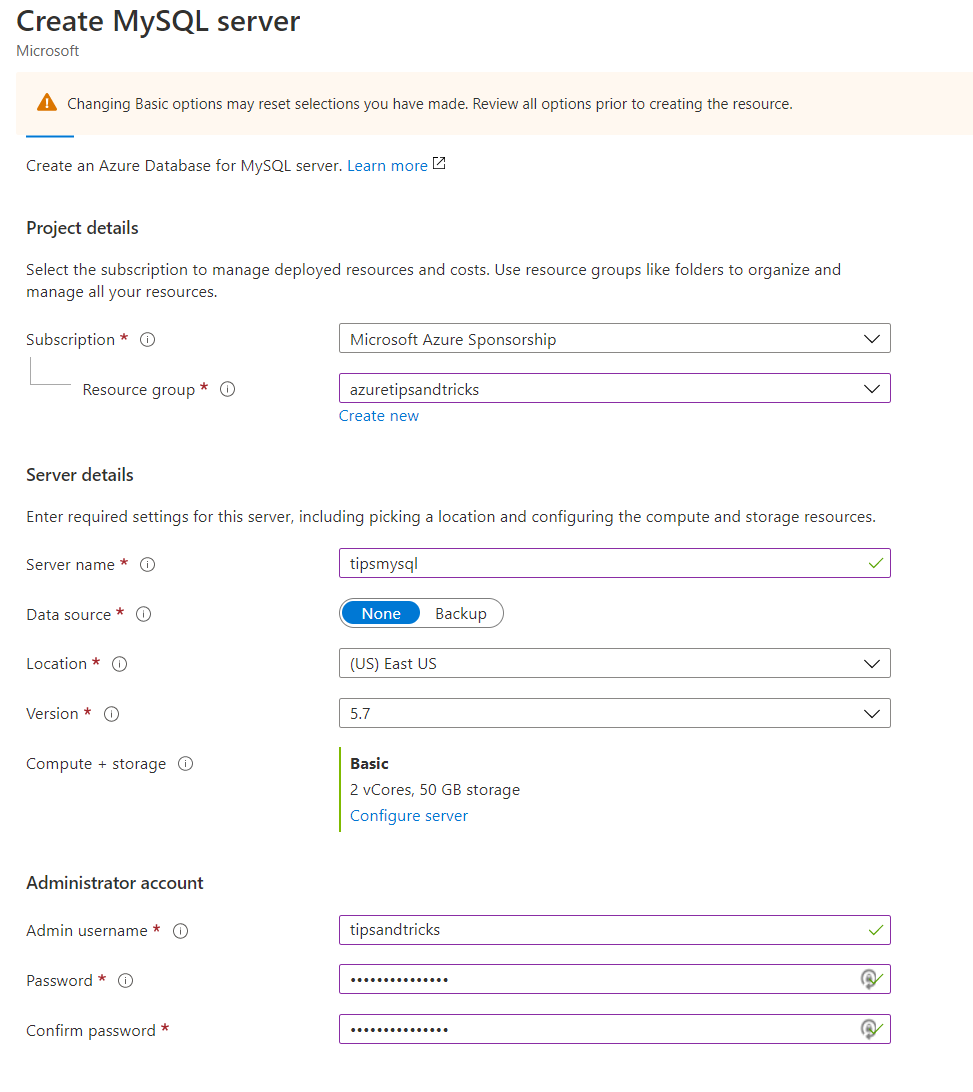
(Create Azure Database for MySQL in the Azure portal)
We'll use MySQL Workbench to migrate my existing database to the newly created Azure Database for MySQL server. Before you can start to migrate, you need to make sure that you can access the Azure Database for MySQL from MySQL Workbench. In my case, MySQL Workbench is installed on the VM that runs my existing database. So to make sure that I can access the Azure Database for MySQL, I need to go to the Connection Security blade of the Azure Database for MySQL in the portal. In there, I can add the IP address of my VM to the server firewall and enable the Allow access to Azure services setting.
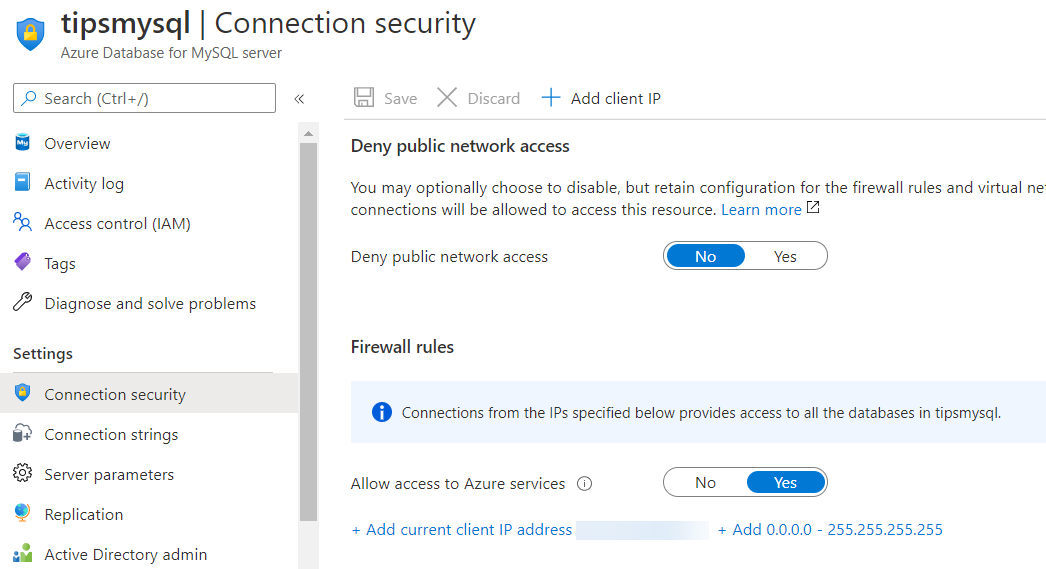
(Configure Security of the Azure Database for MySQL in the Azure portal)
Let's migrate my existing database to the Azure MySQL database.
- Open MySQL Workbench
- Navigate to the Database menu and select Migration Wizard. This opens the Migration Wizard
- Let's go through the steps in the migration wizard. We'll start by selecting the source MySQL server. This is the existing database. When you've selected it, click Next
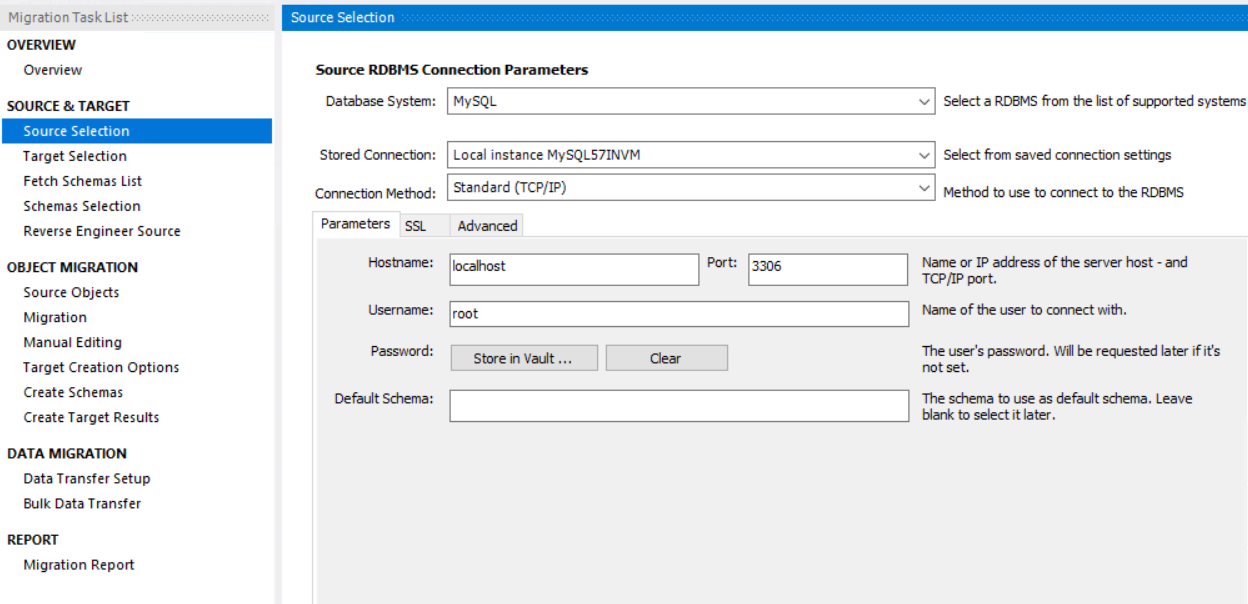
(Select the existing database in the migration wizard)
- Now you need to connect to the Azure Database for MySQL in the Target Selection. You can find the details that you need in the Connection strings blade of the Azure Database for MySQL
- It is useful to save this connection, so that you can use it later. In the Stored Connection drop down listbox, click on Manage Stored Connections
- In the Manage DB Connections window, click on New to start creating the connection
- Fill in a Name for the connection
- Provide the Hostname (which will be something like myservername.mysql.database.azure.com)
- Type in the Username for the server (something like tipsandtricks@tipsmysql)
- Fill in the Password by clicking on Store in Vault
- Click Test Connection to see if it works. If you can't connect, check you that you correctly typed in your credentials and check the security settings of the Azure Database for MySQL
- When the connection works, click on Close to save the connection
- Click Next to go to the next step in the wizard
- This next step fetches the available schemas to migrate and shows them to you. Select the schema of the database that you want to migrate and click Next
- The wizard now determines the structure of the selected schema. If it passes, click Next
- In this step, you'll see the artifacts that you can migrate, like Tables and Views. Select what you want to migrate and click Next
- The objects that will be migrated are now converted into MySQL objects (if they came from a different database type). When it is done, click Next
- Now you'll see any migration issues that need to be solved. If there are no issues, click Next
- You can now choose to create and overwrite the schema (if it exists), in the target database. Keep the setting "Create schema in target RDBMS" selected and click Next
- The schema will now be created in the target database. Once this is done, click Next
- If the results of the schema creation are okay, click Next
- In this step, you get to choose how you'll perform the migration. You can do it online, which migrates the data directly, or do it offline, which results in a batch file or script that you can use to migrate the data at a later time. Choose "Online copy of table data to target RDBMS" and click Next. This starts the migration process
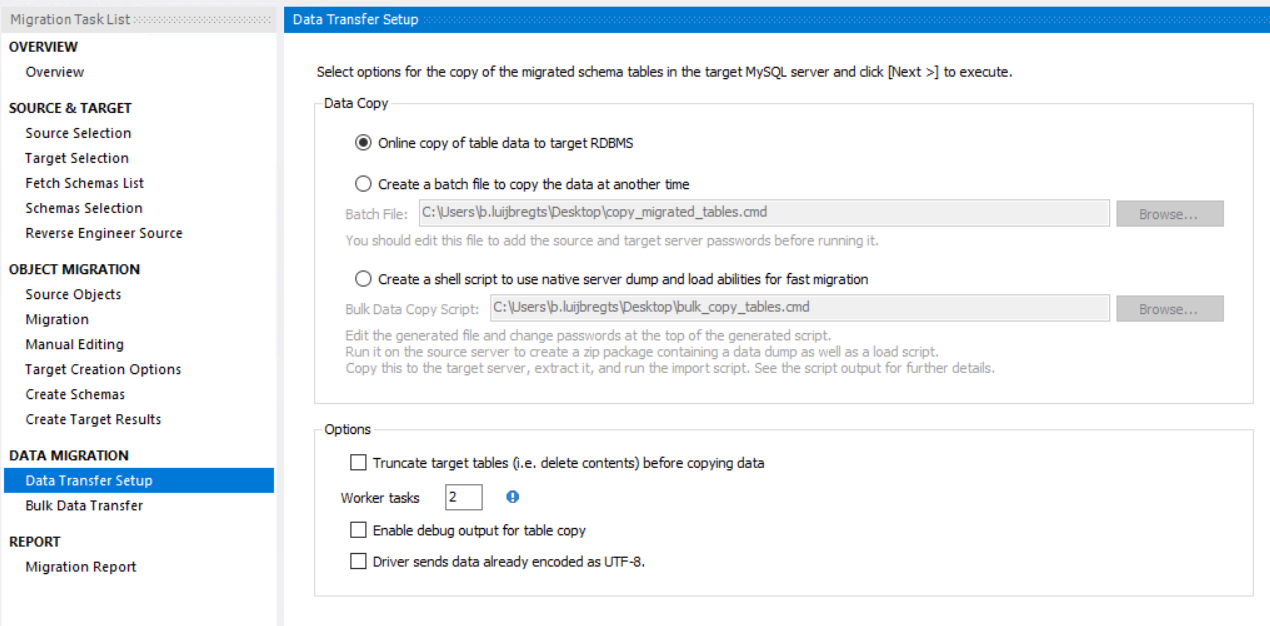
(Choose the type of data migration in the migration wizard)
- Once the migration is done, click Next
- Finally, you see the results of the migration in the Migration Report. This shows how many objects were created and if it was successful. Click Finish to close the wizard
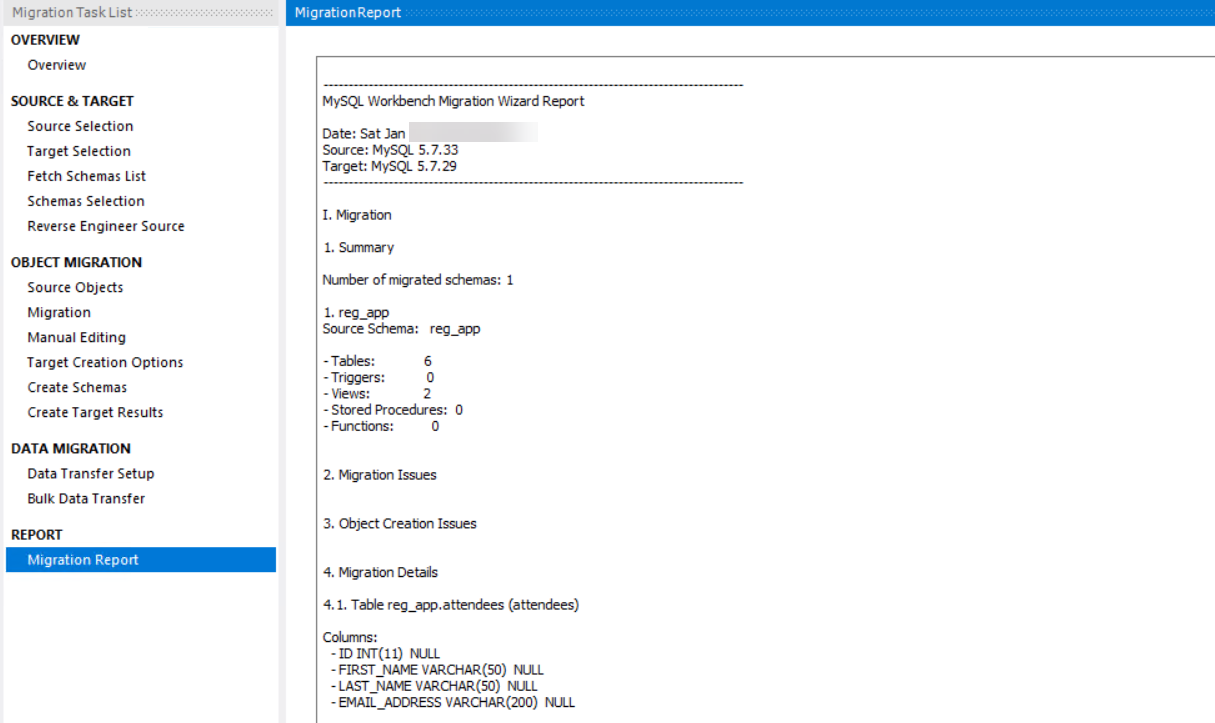
(The Migration report in the migration wizard)
The schema and data is now copied to the Azure Database for MySQL. You can test if it actually succeeded, by opening a connection to the Azure Database for MySQL in MySQL Workbench (with the stored connection that you created in the migration process). Once you are connected, browse through the schema of the database, right-click on a table and click Select Rows - Limit 1000. If this shows the rows of data that you expect, the migration succeeded. In a production scenario, you should create more formal pre- and post-migration tests to validate that the migration was successful. This migration guide (opens new window) can help you to plan your migration scenario.

(Query a table in the target database using MySQL Workbench)
# Conclusion
When you migrate your MySQL database to Azure, you let Azure take care of running your database and making it highly available, secure, scalable and performant, so that you can focus on building applications that add value. There are several options to migrate a MySQL database to Azure, and in this post, we saw one of them. You can use Azure Database Migration Guide (opens new window) to choose the right option for you. Go and check it out!