
TIP
🔥 The FREE Azure Developer Guide eBook is available here (opens new window).
💡 Learn more : Use built-in notebook commands and features in Azure Cosmos DB C# notebooks (opens new window).
📺 Watch the video : How to run C# notebooks with Azure Cosmos DB (opens new window).
# How to run C# notebooks with Azure Cosmos DB
# Run code in notebooks
In Azure, you can use Juniper notebooks (opens new window) in lots of services to run code and experiments in Python. This is very useful to query and manipulate data, especially because notebooks enable you to combine code with text and interactive results, like charts and graphs.
And now, you can use C# notebooks with Azure Cosmos DB (opens new window). In this post, we'll explore how these work.
# Prerequisites
If you want to follow along, you'll need the following:
- An Azure subscription (If you don't have an Azure subscription, create a free account (opens new window) before you begin)
- An existing Azure Cosmos DB account with the Sample Dataset enabled in it
# C# notebooks in Azure Cosmos DB
When you are creating an application that uses Azure Cosmos DB, it is useful to experiment with code that uses that Cosmos DB. Especially when you want to try code for data querying and manipulation. In Azure Cosmos DB, you can use C# notebooks that enable you to write C# code that interacts with Cosmos DB. Let's try it out.
In order to work with notebooks in Cosmos DB, you need to enable them:
- Go to the Azure portal (opens new window) and navigate to the Azure Cosmos DB
- Select the Data Explorer menu
- From here, you can enable notebooks by selecting the Enable Notebooks button. You can also enable notebooks when you create a new Azure Cosmos DB (opens new window)
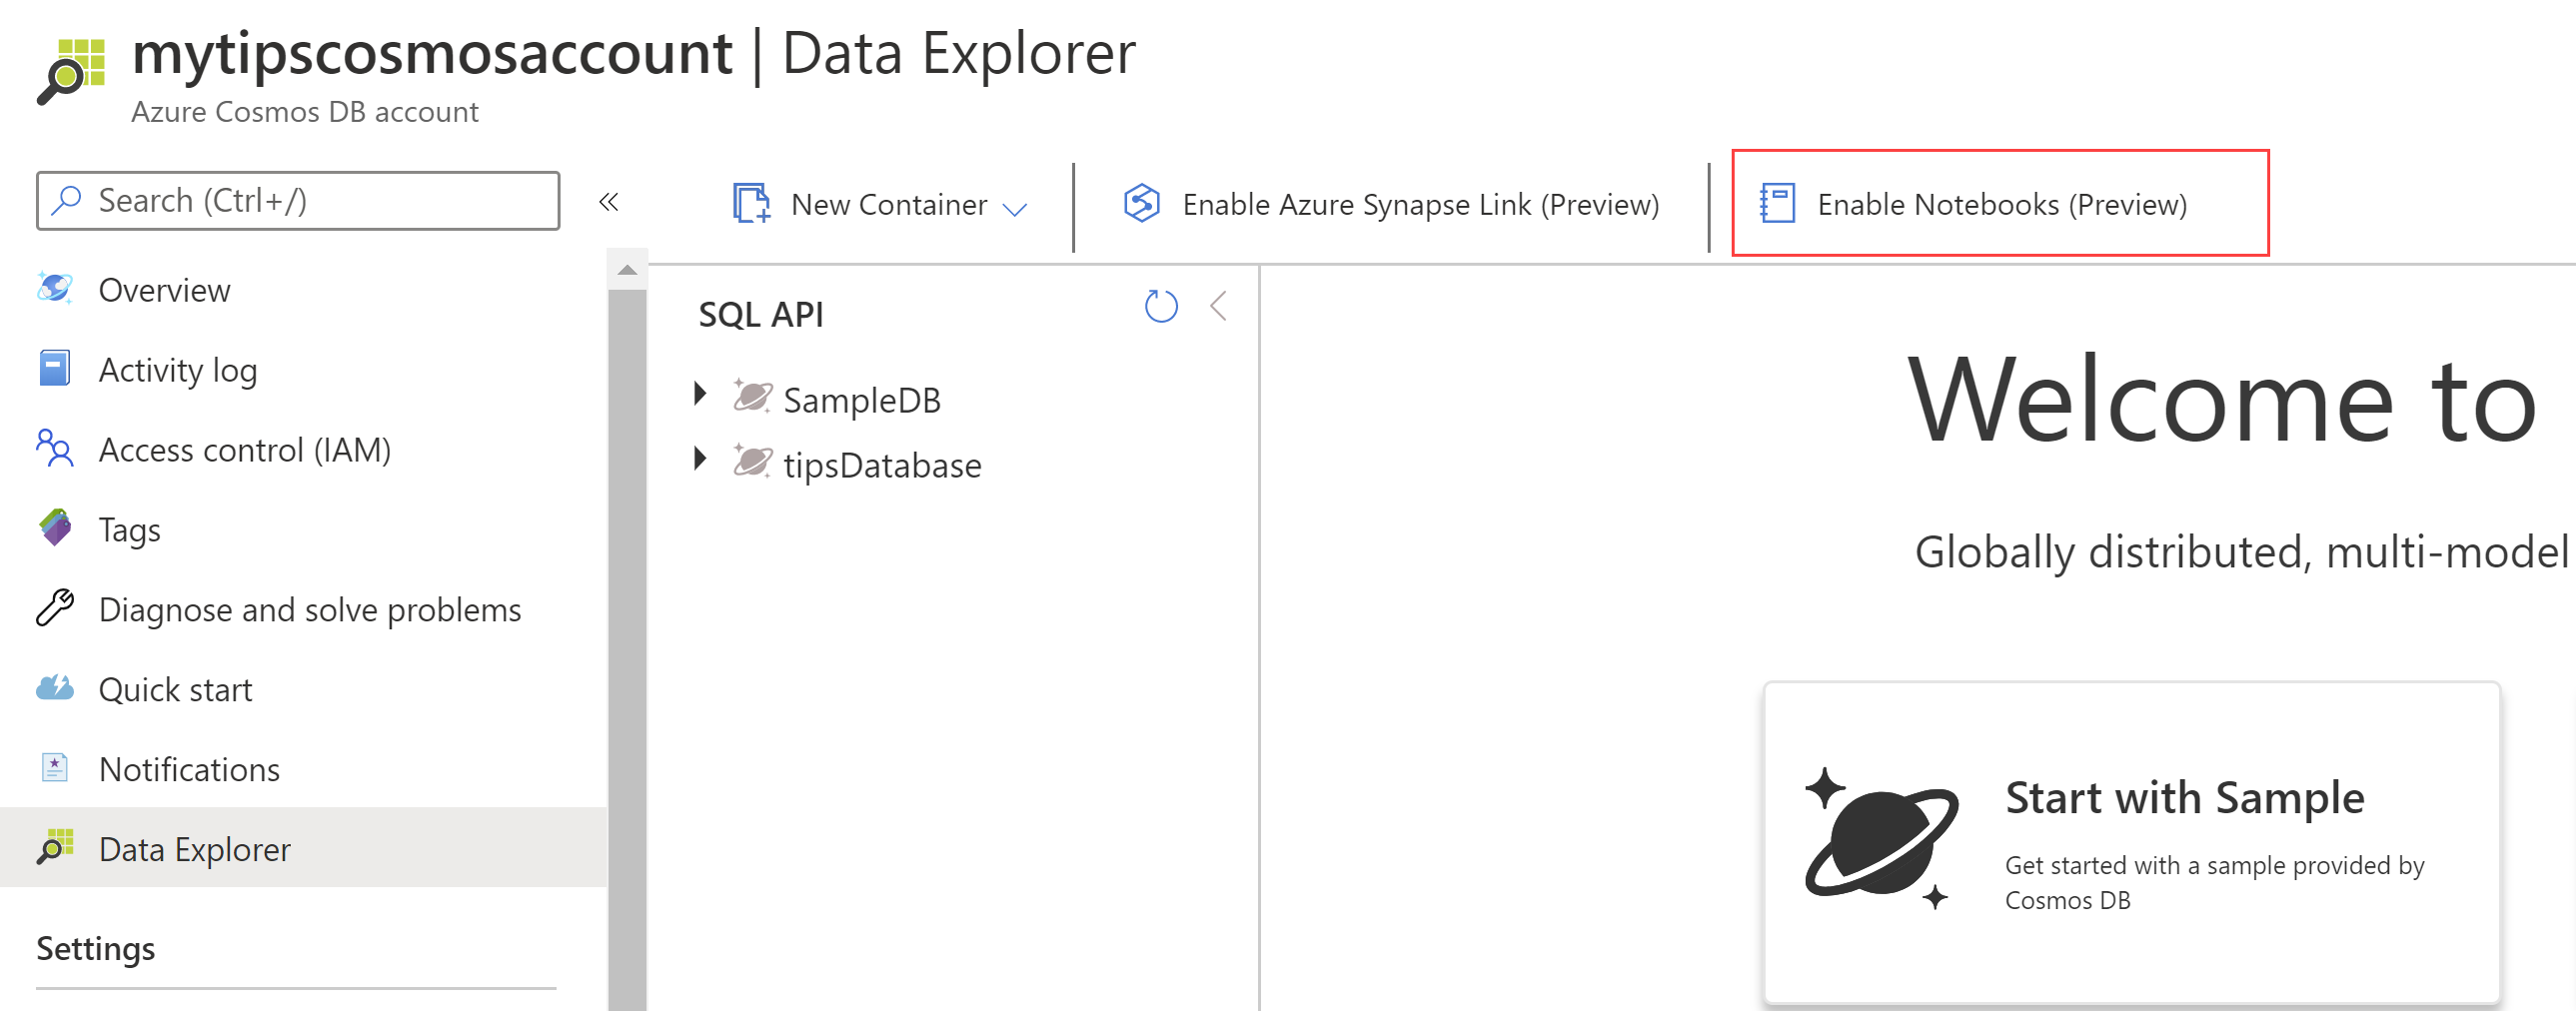
(Enable notebooks in Azure Cosmos DB)
Once the notebooks feature is enabled, you'll see a notebooks workspace in the data explorer. In there, you can find the notebook gallery (opens new window). This contains sample notebooks to show you how they work.
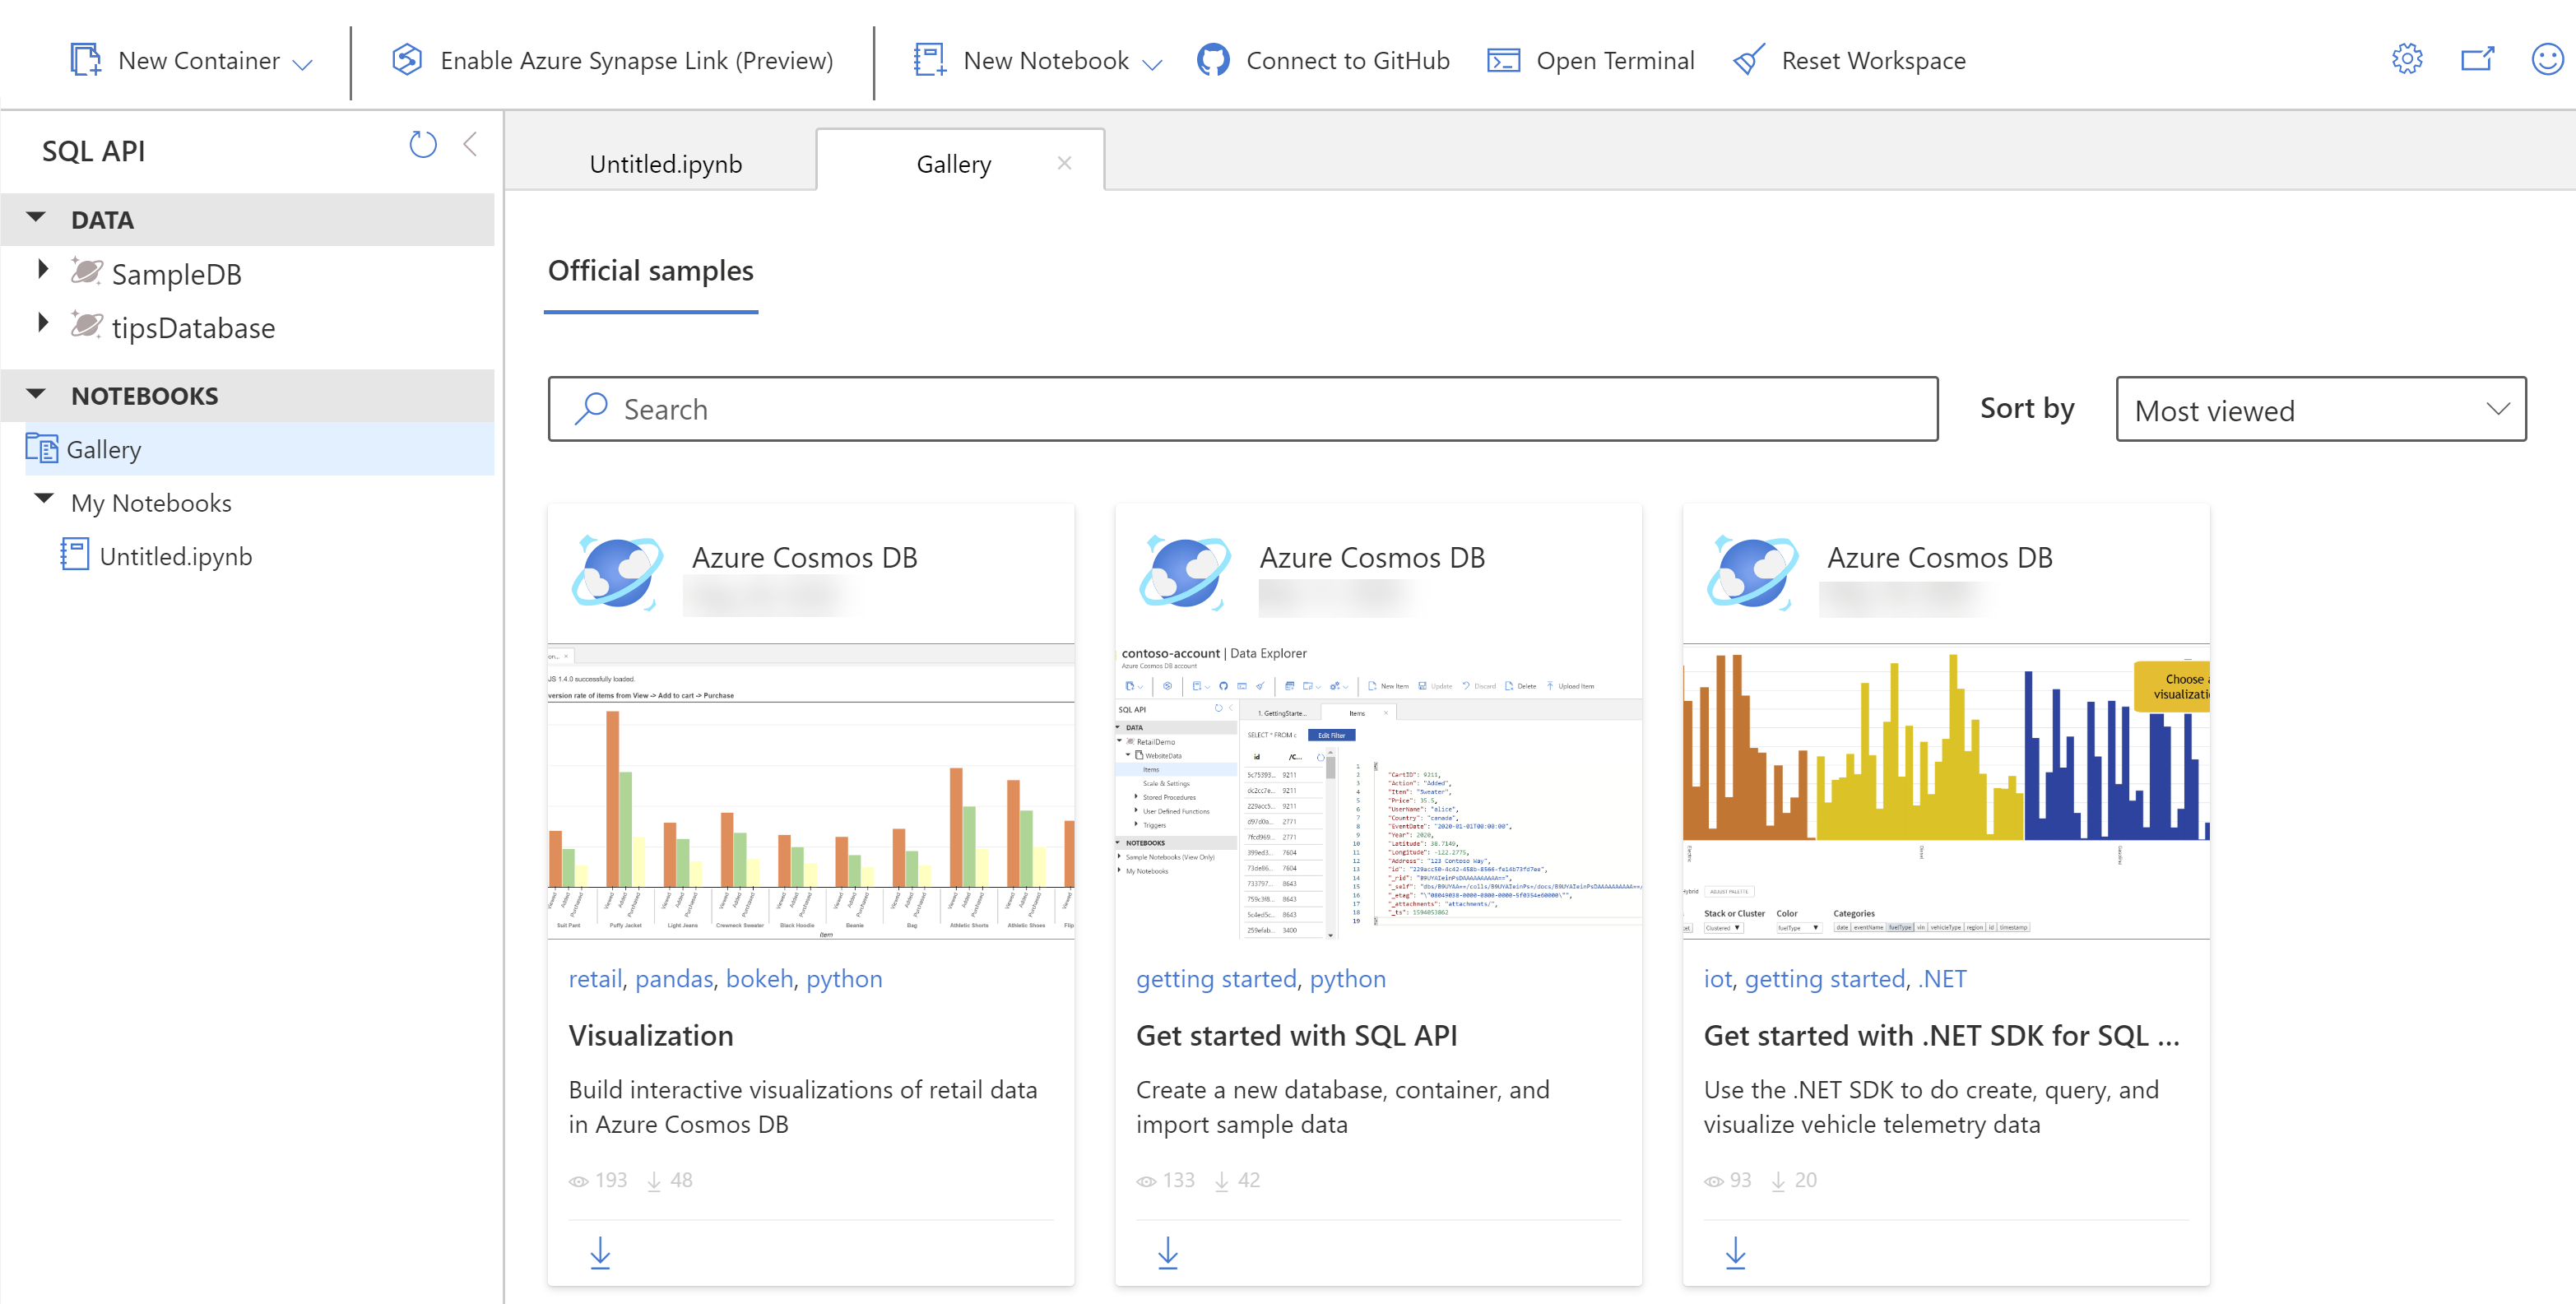
(Azure Cosmos DB notebook gallery)
Let's create a new notebook and query some data.
- In the Data Explorer, in the menu on the top, select New Notebook. Alternatively, you can also upload an existing notebook
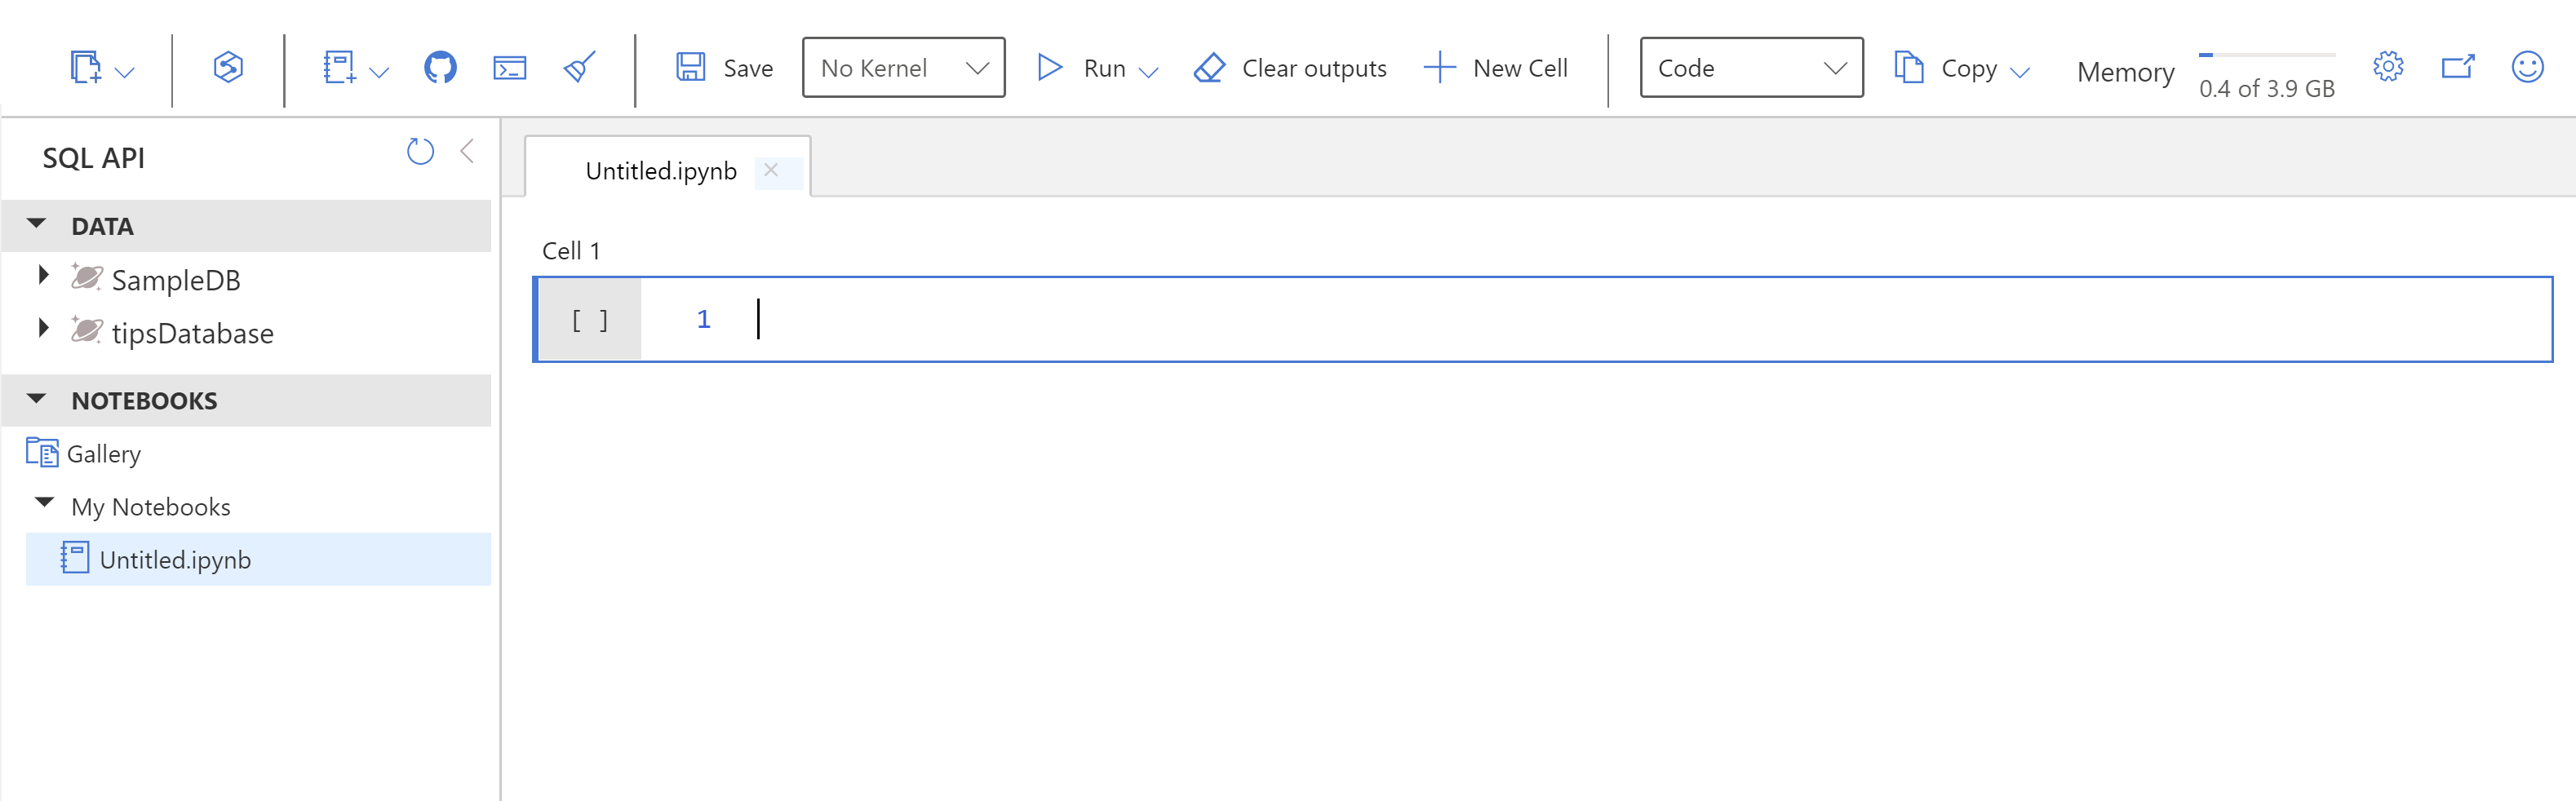
(New notebooks in Azure Cosmos DB in the Azure portal)
- The new notebook contains one new cell, in which you can type code. You can add more cells that contain code or text. In the first cell, we'll insert the following code:
using System;

class Person
{
    public string firstname { get; set; }

    public int age { get; set; }
}
2
3
4
5
6
7
8
This is C# code that can run in the notebook. This code represents a person object that we'll query out of the database. Try it out by selecting the Run button on the left to the cell. Make sure that the language setting (in the top menu) is set to CSharp. You should see no errors.
- Create a new code cell and insert the code below. This code connects to the Cosmos DB and executes a query against it using the Cosmos DB .NET SDK (opens new window). It than puts the query results in a List of Person objects and outputs that by simply adding it to the last line of code. This triggers the notebook to start the data visualization feature. Note that I don’t have to insert the actual endpoint and key here. These are already known by the system.
// Include usings
using System;
using System.Linq;
using System.Collections.Generic;
using System.Linq.Expressions;
using Microsoft.Azure.Cosmos; //namespace for Azure Cosmos DB .NET V3 SDK
using System.Collections;

// Initialize a new instance of CosmosClient using the built-in account endpoint and key parameters
CosmosClient cosmosClient = new CosmosClient(Cosmos.Endpoint, Cosmos.Key);
Microsoft.Azure.Cosmos.Database database = await cosmosClient.CreateDatabaseIfNotExistsAsync("SampleDB");
Container container = await database.CreateContainerIfNotExistsAsync("Persons", "/firstname", 400);

QueryDefinition queryDefinition = new QueryDefinition("SELECT * FROM c");

FeedIterator<Person> queryResultSetIterator = container.GetItemQueryIterator<Person>(queryDefinition);

List<Person> personObjects = new List<Person>();

while (queryResultSetIterator.HasMoreResults)
{
    FeedResponse<Person> currentResultSet = await queryResultSetIterator.ReadNextAsync();
    foreach (Person person in currentResultSet)
    {
        personObjects.Add(person);
    }
}

personObjects
2
3
4
5
6
7
8
9
10
11
12
13
14
15
16
17
18
19
20
21
22
23
24
25
26
27
28
29
- Execute the code by selecting the run button to the left of the code. This should result in the data being visible in a table. From there, you can select various chart- and table formats to display the data in different ways
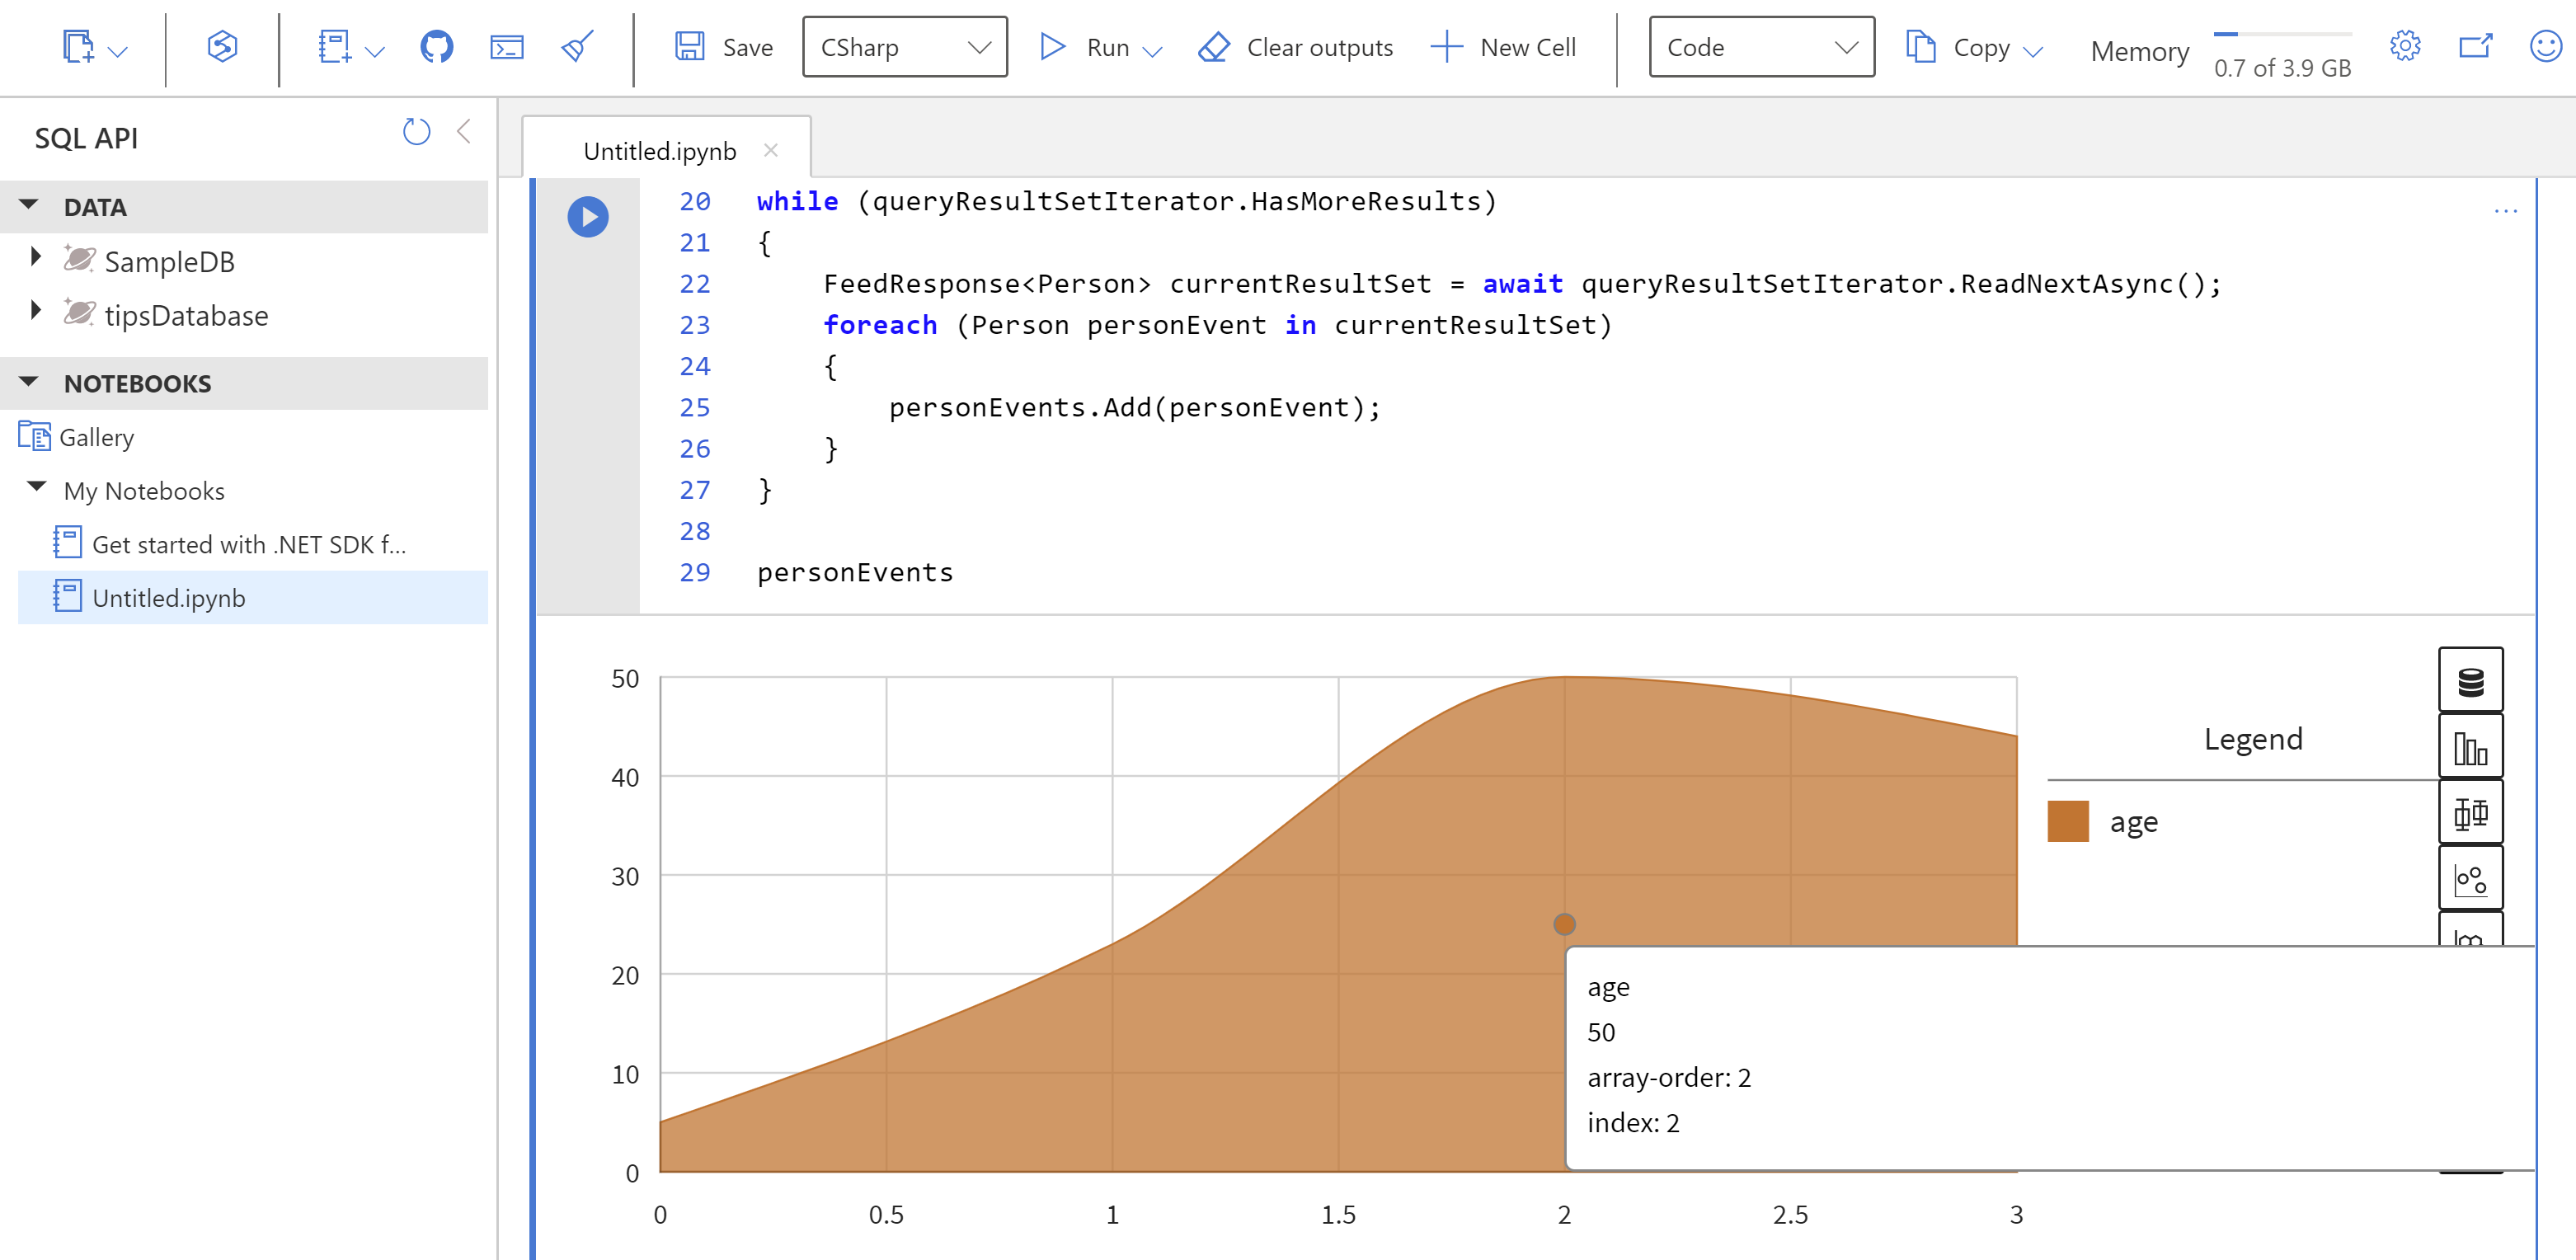
(Visualized data in a notebook in Azure Cosmos DB)
# Conclusion
The Azure Cosmos DB .NET SDK (opens new window) enables you to manage your Azure Cosmos DB (opens new window) and interact with its data. Now, you can use the SDK in intelligent notebooks within Azure Cosmos DB (opens new window), that enable you to run code, add descriptive text and visualize data. Go and check it out!