Adding Authentication configuration for Authenticated skills.
Follow these instructions to configure Authentication for skills where needed.
Manual authentication steps
If you wish to make use of the Calendar, Email and Task Skills you need to configure an Authentication Connection enabling these Skills to authenticate against services such as Office 365 and securely store a token which can be retrieved by the Skill when a user asks a question such as “What does my day look like today” to then use against an API like Microsoft Graph.
The Add Authentication to your bot section in the Azure Bot Service documentation covers more detail on how to configure Authentication. However in this scenario, the automated deployment step for the Skill has already created the Azure AD v2 Application for your Bot and you instead only need to follow these instructions:
- Navigate to the Azure Portal, Click Azure Active Directory and then App Registrations
- Find the Application that’s been created for your Bot as part of the deployment. You can search for the application by name or ApplicationID as part of the experience but note that search only works across applications currently shown and the one you need may be on a separate page.
- Click API permissions on the left-hand navigation
- Select Add Permission to show the permissions pane
- Select Microsoft Graph
- Select Delegated Permissions and then add each of the following permissions required for the Productivity Skills you are adding (see the specific documentation page for the specific scopes required.)
- Click Add Permissions at the bottom to apply the changes.
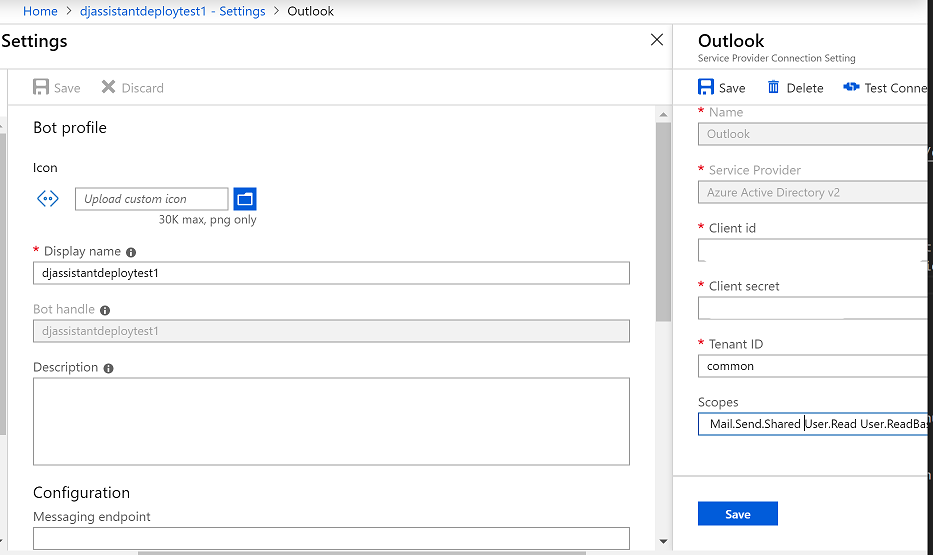
Next you need to create the Authentication Connection for your Bot. Within the Azure Portal, find the Web App Bot resource created when your deployed your Bot and choose Settings.
- Scroll down to the oAuth Connection settings section.
- Click Add Setting
- Type in the name of your Connection Setting - e.g. Outlook
- This name will be displayed to the user in an OAuth card, ensure that it is clear what this maps to
- Choose Azure Active Directory v2 from the Service Provider drop-down
- Open the appSettings.config file for your Skill
- Copy/Paste the value of microsoftAppId into the ClientId setting
- Copy/Paste the value of microsoftAppPassword into the Client Secret setting
- Set Tenant Id to common
- Set scopes to match the ones provided in the earlier step.
Finally, open the appSettings.config file for your Skill and update the connection name to match the one provided in the previous step.
"oauthConnections": [
    {
      "name": "Outlook",
      "provider": "Azure Active Directory v2"
    }
  ]