Task 4.1: Manage eDiscovery (Standard) or (Premium) in Microsoft Purview
Electronic discovery, or eDiscovery, is the process of identifying and delivering electronic information that can be used as evidence in legal cases.
You can use eDiscovery tools in Microsoft Purview to search for content in Exchange Online, OneDrive for Business, SharePoint Online, Microsoft Teams, Microsoft 365 Groups, and Viva Engage teams.
You can search mailboxes and sites in the same eDiscovery search, and then export the search results. You can use Microsoft Purview eDiscovery (Standard) cases to identify, hold, and export content found in mailboxes and sites.
If your organization has an Office 365 E5 or Microsoft 365 E5 subscription (or related E5 add-on subscriptions), you can further manage custodians and analyze content by using the feature-rich Microsoft Purview eDiscovery (Premium) solution in Microsoft 365.

Microsoft Purview provides three eDiscovery solutions: Content search, eDiscovery (Standard), and eDiscovery (Premium).
| Content Search | eDiscovery (Standard) | eDiscovery (Premium) |
|---|---|---|
| Search for content | Search and export | Custodian management |
| Keyword queries and search conditions | Case management | Legal hold notifications |
| Export search results | Legal hold | Advanced indexing |
| Role-based permissions | Review set filtering | |
| Tagging | ||
| Analytics | ||
| Predictive coding models | ||
| And more… |
Review Microsoft Purview eDiscovery solutions for more information and to review prerequisites.
-
Go to the Microsoft 365 admin center at https://admin.microsoft.com.
-
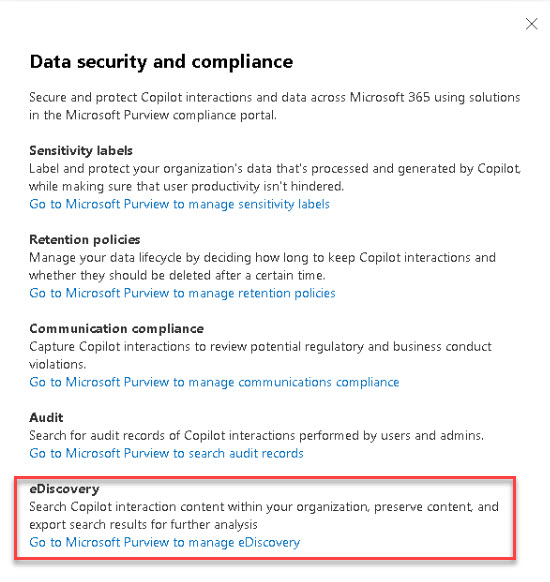
On the left menu, select Copilot.
-
Select the Settings tab and then select Data security and compliance.
-
Under eDiscovery, select Go to Microsoft Purview to manage eDiscovery.

If you were redirected to the new Microsoft Purview portal at https://purview.microsoft.com/ediscovery, you will see some differences from the remaining task steps.
-
In Microsoft Purview, on the left menu under Solutions, expand eDiscovery and then select Premium.
-
Review the Overview page and then select the Cases tab.
-
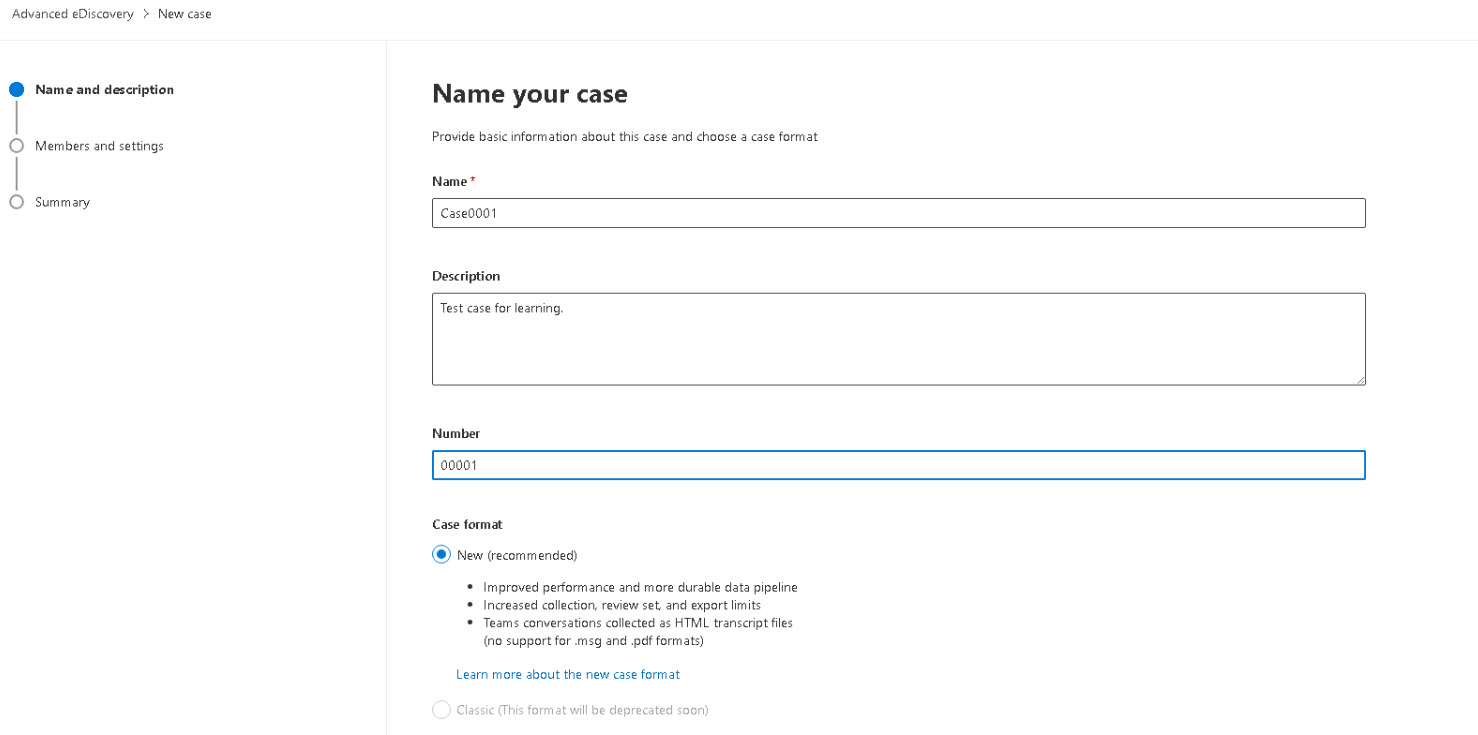
Select + Create a case.
The user who creates the case is automatically added as a member. Members of the case can access the case in the Microsoft Purview compliance portal and perform eDiscovery (Premium) tasks.
-
Enter a name, description, and number.
Example:

-
Select Next.
-
Under Users, add a user from your organization.
Users and groups that should be assigned to the case must be assigned the appropriate eDiscovery permissions.
-
Review the following settings:
- Search and analytics: Select the options to configure the case. You can skip this section and configure these settings after the case is created if needed.
- Text to ignore: Add text or regex expressions to define text to ignore in the case. You can apply this to Near-duplicates, Email threads, or Themes modules.
- Optical character recognition (OCR): Configure the option and settings for finding text contained in images during advanced indexing.
-
Select Next.
-
Review the configuration for the case and then select Submit.
-
Select Done.
If necessary, refresh the browser page to see the new case.
-
In the new case, review the Overview information.
-
Select the Collections tab and then select New collection.
The creation of an eDiscovery case is only the beginning. To learn more about collections and other related eDiscovery settings, go to Overview of collections in eDiscovery (Premium).
And Microsoft Purview eDiscovery solutions. -
On your own, complete the creation of the collection using the Microsoft Learn article to help you with the different options that can be configured.
eDiscovery is a powerful tool available to organizations using Microsoft 365. The intent of this task is to help you identify where this Microsoft Purview feature is and perform some basic configurations. To learn more, go to Microsoft Purview eDiscovery solutions.